cut and stretch CJ-7

madssjeep

Active Member
Joined
Nov 27, 2005
Location
Huntersville NC
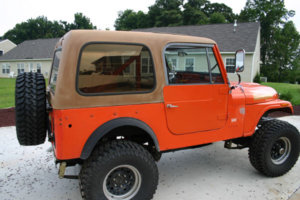
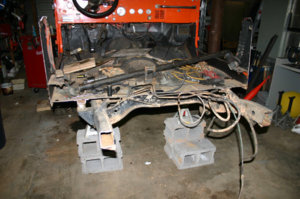
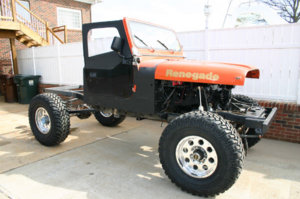
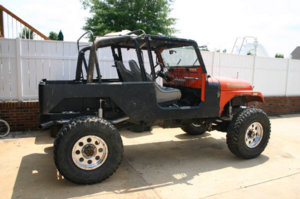
last fall I decided to start the cj over. pull the tired 304, cut the body in half, cut the frame, wanted 37" heavy duty rear, 5 speed. You know, the works. well It is getting close to beening finished so I thought i would share some pics.

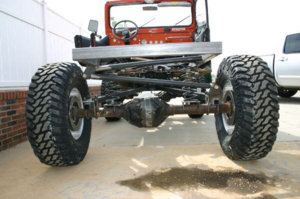
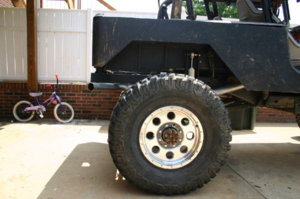
It now has a 360-.040 over, nv3550, 14 bolt rear( cut the snot out of it), 44 front(broke a joint already on a test run), 110" wheel base, about a 79" track width, spring over front, mid mounted gas tank, one link rear( work great if you set it up right, just right with the antisquat, using a LeeBoy ball socket fror a grader turrent), Discover SST 37x 12.5x 17 on some new blingy Aluminum wheels.
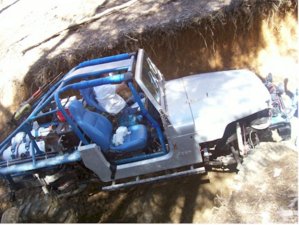
took it out last weekend to Uwarrie and had a blast. It needs some longer shocks and springs in the rear, front needs some cromo shafts(busted the factory steel shaft backing up slab pile rock, got up there though). anyway I am happy with it so far, cage, fuel injection, rear mid gate(so i can us a wrangler soft top) and paint.
 

Attachments

  • IMG_0416web.jpg
    IMG_0416web.jpg
    50.9 KB · Views: 959
  • cut jeep 3.jpg
    cut jeep 3.jpg
    57.3 KB · Views: 991
  • IMG_3220.jpg
    IMG_3220.jpg
    51.8 KB · Views: 926
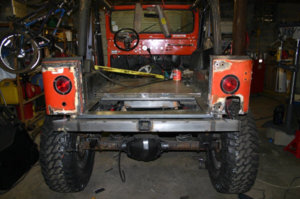
I have some more pics now and will up load them today of the rear tub, these are last months construction pics.
 

Attachments

  • IMG_3292.jpg
    IMG_3292.jpg
    53 KB · Views: 968
  • IMG_3223.jpg
    IMG_3223.jpg
    53.4 KB · Views: 964
  • IMG_3296.jpg
    IMG_3296.jpg
    56.8 KB · Views: 985
Cool project...got any finished pics?
 
Nice:D
 
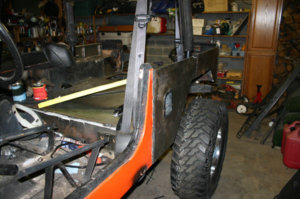
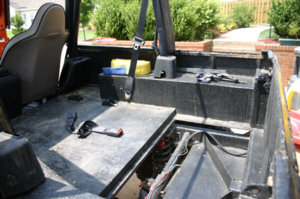
OK took some pics today of my progress. I took it out 2 week ago to Uwarrie for a test run of everything. Rear suspension work great but need a few thing. The sides are made with 18 gage, floor is 10gage. control arms are 2x2x.25 square. with a piece of .25x2" welded to the inside off the arms for added support in the joints. cross member is 2x4"x.25" stacked and welded with 2x2 runing the frame rails for skid plate mount. skid is made of some really hard plastic cutting board.
I did everything except the ehaust work which was done by a great guy at muffler master named Roger. top notch work, ++++A rating from me.

1. The rears coils are Cherokee factory fronts. I need springs that is about 6" longer the factory versions but with only 1 to 2" of lift.
2. longer shocks for rear. mx6 or more 9000x. I like the 9000x's, have work flawless but always up to new Ideas.
3. fronts are factory wrangler rears. sagging well I knew they would. I need a set that is only 1.5" higher then factory rears.
4. I need a new friend that knows how to cut a %#^#^ tube for cage work.:D
I stink!!!
5. i am working on the top edge of the tub and the midgate so I can run a factory top. Imagine a CJ-7 with a little truck bed. thats what she will look like.
6. need to finish the rear floor. It will lift up like a trunk lid to hid thing below. (i ran out of .125 sheet) going steel shopping this week.
7. odd ball stuff like flares, lights, misc, etc.. you know the stuff that makes it road worthy.

Cave Dave i hope you don't mind if I post more pics on here. :beer:


pics taken today of several things.
 

Attachments

  • IMG_3627.jpg
    IMG_3627.jpg
    59.3 KB · Views: 904
  • IMG_3624.jpg
    IMG_3624.jpg
    48 KB · Views: 915
  • IMG_3628.jpg
    IMG_3628.jpg
    62 KB · Views: 912
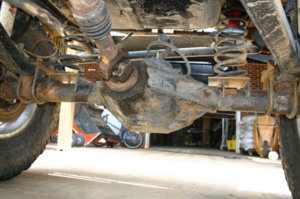
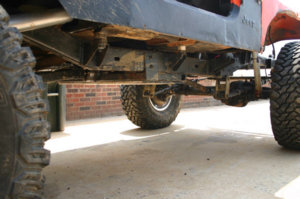
Here is a few on the Ground clearance, rear axle, rear overhang.
The Disco tire worked well on the test run. I kept them at 15 psi so i would not bust a bead.(don't have a spare and on board air not complete yet). 10 or less would produce some great results. great all around tire.
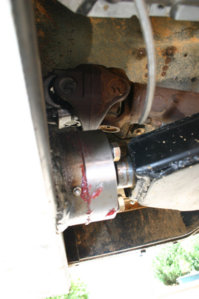
the poor d-44 spit out a joint. (don't try slab pile in reverse with 37" 360, spool. joints won't hold.) broke it on a 700 rpm idle up. hopfully cromo will be better. I know 60,60,60 but I like my width and my little bit of money I have left. powerball is running now, so hopfully I can get a 60 custom someday.
I need some tbi parts, mainly a complete harness if anyone has one. 2100 just does not do it for me. need the- turn key, start, drive of fuely! I am getting old.:driver:
 

Attachments

  • IMG_3634.jpg
    IMG_3634.jpg
    59.6 KB · Views: 973
  • IMG_3626.jpg
    IMG_3626.jpg
    45.3 KB · Views: 871
  • IMG_3625.jpg
    IMG_3625.jpg
    46.6 KB · Views: 852
Scott, AFAIK posting pics here is fine! Didn't mean to come across confusing earlier, just meant to say that if you had pics posted/hosted elsewhere, just post a link (so we could see them all! :D )
Tell me more about that "LeeBoy" joint... I like the simplicity of your rear setup! :beer:
 
Caver Dave said:
Scott, AFAIK posting pics here is fine! Didn't mean to come across confusing earlier, just meant to say that if you had pics posted/hosted elsewhere, just post a link (so we could see them all! :D )
Tell me more about that "LeeBoy" joint... I like the simplicity of your rear setup! :beer:

I would say its about a 15 to 20k ball compared to my 10K 2 5/16" trailer hitch on my truck. allthough not a trailer ball, its completly round on the top. It uses removable shimms that will keep it tight for many years.
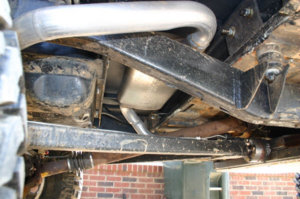
It is a very simple design. one side is welded to the crossmembed and the the ball which is treaded, screws into a 1 1/4" or 1 1/2" (can't remember) fine tread nut welded into the arms. in between the two is the sandwhich clamp which is held in place with 4- 9/16" G-8. It came with G-5 but I changed them to G8.
The control arm union is a piece of 2x2x.25 welded between the arms and completly incased in .25 plate. The nut is inside so there is no chance for it to come out.

I like this setup, although it gets a lot of bad mouth from others. You have to have long arms, mine are 53" and they need to be close to level. I calculated it on paper to be around 90% but can change easily with the addition of a spare, weight distribution, etc.
My real world test was tring slab pile forward. No rock humping was present and it just spin the tire on hard accleration. My buddy in the Tj with a 4" kit was mad because my homemade stuff made his look bad!!! I went places in two wheel where he had trouble in 4. now all you TJ guys don't get mad I am just stating what he said and this is not dirrected toward any of you. :)


Here are a few pics for ya!
 

Attachments

  • IMG_3301.jpg
    IMG_3301.jpg
    40.4 KB · Views: 879
  • IMG_3635.jpg
    IMG_3635.jpg
    74.1 KB · Views: 921
Hey man that Hardtop looks familar

Scott, nice pics man

cant wait to see the finished pics with the Kubota Orange you picked out at the Tractor Supply

I am goona post some pics on this site soon when I get closer to being done with mine

Hey If you dont mind could you send me that steering box mount you have

I am going to use the stock setup and order a brace for now

call me
 
Caver, your best friend and mine (Tomcat) use to sing the praises of this rear setup. He used a 1 1/4 " grade 8 bolt as the pivot though.

Jeep looks good.
A Kubota orange stretched CJ 7 huh?
I could have just sold you mine.

akoanwood.com_gallery_jeepin_image_595_img_0038_s.JPG


Slap on the 37s and you'd be done.:D
 
yeah you are my neighbor, maddsjeep is a buddy of mine, from Huntersville

I told him about your Kubota Orange Commando, he came up to Tractor Supply and bought a gallon
 
Ugly nice Commando!! That would have been a lot easier for me to pick up yours. nice color:D
Josh I will get that mount out to in the next few days.
i am starting my fenders. they are going to be pretty butch. square tubing with 1/8" plate.
 
madssjeep said:
nice Commando!!

You *MUST* be talking about mine (behind that blasphemous orange chunk of Lemming dung)! :D

BTW, tell me some more about the LeeBoy joint! Where'd you get it, availablity, what does the assembly cost, etc? Also, what's the construction of the crossmember you have the socket welded to?
 
Yeah, i guess mine is not a "real" Commando any more. People actually think it is a Jeep now.:flipoff2:
Josh, that is funny. I sent you the PM about being in Hickory, then read your profile and figured out who you were.:lol:
When you spray the TSC enamel, it will take a lot of thinner to get a shine. Mine has kind of a pebble finish. i didn't thin it enough.
Even as thick as I sprayed it, and after 3 coats, I still have 2/3 of a gallon left.
 
Caver Dave said:
You *MUST* be talking about mine (behind that blasphemous orange chunk of Lemming dung)! :D
BTW, tell me some more about the LeeBoy joint! Where'd you get it, availablity, what does the assembly cost, etc? Also, what's the construction of the crossmember you have the socket welded to?
OH I thought that one was broke! see ugly in great pumpkin assuming the "thinking man pose" mumbling how the heck we gonna fix this one. :D
OK to the leeboy joint, Got a good buddy that runs a build line a Leeboy equipment. I will check the name of it but we just referance it as the the grader ball. They had 2 sizes- small one like mine(1 1/4") and a big beasty approx 2"ish shaft version. way to big for our application. I am guessing the cost to be around 180.00 to 200(can't remember how much I paid) for the ball and socket. I will ask him about availbilty. don't know if he can get them easy or not.
It is a ball with a theaded shaft(like a trailer ball but not flat on top like trailer ball) socket is two parts(one is welded and the other side is bolted to the welded one with the ball captured inbetween. Very heavy duty, I would rate it around 15000 lbs if you compared it to a trailer ball.
The cross member is a 2x4x.25" bolted to bottom and sides of frame with another 2x4 welded to it. the socketed is welded to this in the middle.
hope this helps.
 
madssjeep said:
OH I thought that one was broke! see ugly in great pumpkin assuming the "thinking man pose" mumbling how the heck we gonna fix this one. :D
It had minor issues (2 broken motor mounts and ducktaped together front leafs), but I didn't use that as an excuse to avoid everything requiring 4wd!
"thinking man pose"? BWHAHAHAHA! He was calculating the amount of crap the rest of us were gonna dole out around the campfire... for not wanting to get off gravel roads & acting all "Nancy" on us!
Thanks for the additional info on the LeeBoy joint... would be great to find out availability too! :beer:
 
Caver= trailered to the trail
Ugly= driven to the trail
Caver=crawling under jeep to change gears
Ugly= no issues, other than having to leave early to get home and missing the rest of the Welder run
Thinking man? i think, at the time, I was watching this
akoanwood.com_gallery_jeepin_image_595_img_0035_s.JPG

and trying to figure out how we were going to get it back on its wheels if he rolled and back together for the drive back to Pennsylvania.:flipoff2:
 
i like that 1 link rear setup. heard mixed things about it but it seems so easy!
how bout some pics of the rear flexing and the track bar.

tyler
 
also what springs are those from?

and some more info on the grader ball setup and avalability. also i don't understand what you are talking about the two sockets on the ball setup.

tyler
 
jeepeater2003 said:
also i don't understand what you are talking about the two sockets on the ball setup.
tyler

As I understand it, there is a full "cup" on the front side and a beveled "collar" on the back... basically, a 2 pc. ball socket w/ shims allow it to be tightened to adjust for wear...

Still waiting to hear on availability & pricing also! :beer:
 
Back
Top