Tig welding with ESAB Rebel EMP215ic

jeepcj3a

Well-Known Member
Joined
Jul 13, 2006
Location
winston salem
**Tig and plasma table update in last post**


Thought I would post in case it helped others and hopefully get some feedback as I learn how to weld. (Let me know if wrong section).

I last tried welding about a decade ago with a Hobart 140 mig but had to sell it not long after. Fast forward to now and I got a EMP215ic ESAB and am using .030 ESAB OK Aristorod, 75/25 gas, and their factory accessories. Finally hooked it up tonight to try it out. Helmet is the Sentinel and using a Miller respirator with P100 filters (snug fit under the hood).

Set up all per their guide, purged the lines, set at 20 cfm (18 when trigger pulled) and did a quick grind on the 1/8” wall tubing with my belt grinder.

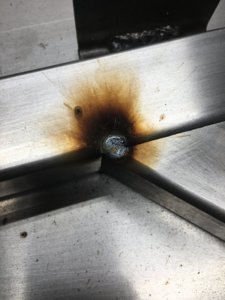
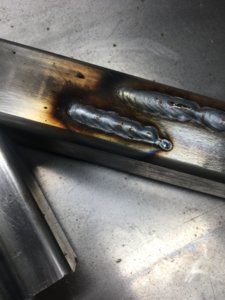
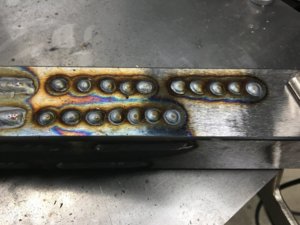
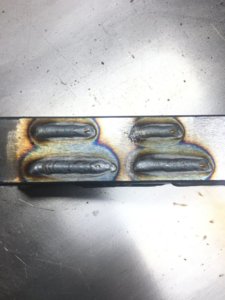
Machine set on sMig which displays the voltage and amps as it adjusts it for you as you weld and displays the final setting(?) for a few seconds after you’re done. Results: (109A/21.2V read out for first and 107/24 for second):
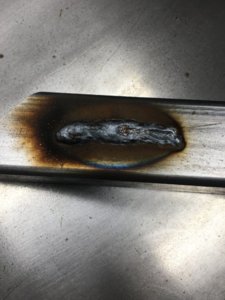
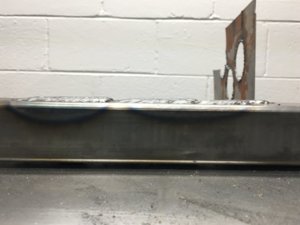
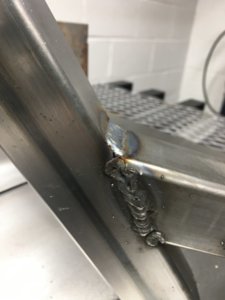
9CBBE247-5A2D-4EB6-A665-4F3081FB4E7A.jpeg1291EF42-1496-4C26-B6F5-B0512C8870D9.jpeg

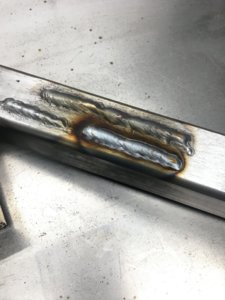
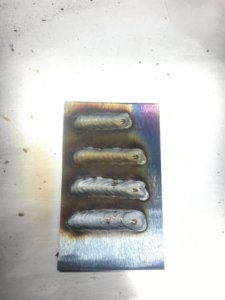
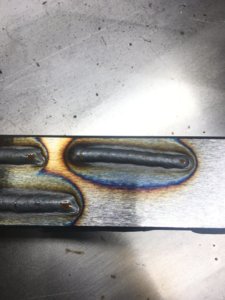
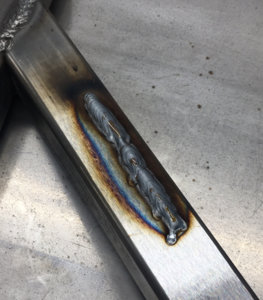
Then tried some clean 16ga, big mess with lots of porosity. Put everything up, bled the line and started watching YT videos to see what I was missing. Then remembered one video mentioning to make sure you fully seat your torch connector in the machine (and many of the comments on that video echoed that). Well I checked and mine was a little more than 1/4” out from being fully seated. Fully seated it, set machine back up and got the following on another piece of 1/8 wall. Gas back at 20cfm with 18 when trigger pulled. Some welds were brushed with steel brush in between. All welds had new wire snip.

(1st: 121A/19.5V; 2nd: 113/18; 3rd: 104/18.2; 4th: 117/18.5)
5CA1C51C-C0D5-47A9-BE95-551F7590D548.jpeg
D76A9DC1-7425-4F0E-97D1-4A0A43B9DB40.jpeg 83BE207B-5B54-44F1-BFF5-2534DA13B71C.jpeg 326E69A9-7FFE-4CE5-8D6C-0DA5648539A5.jpeg

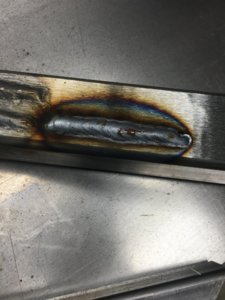
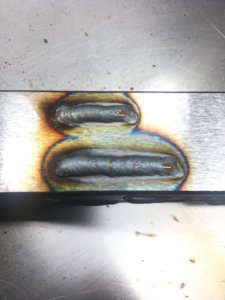
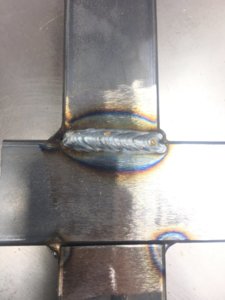
Profiles:
5F792563-A188-4978-9D3F-BDCCA17134E9.jpeg

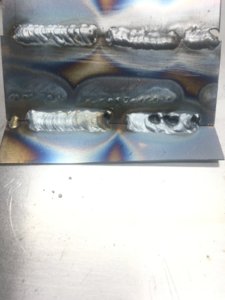
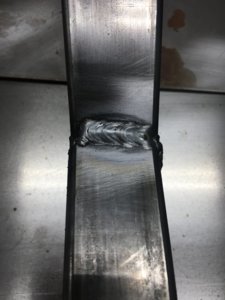
Last one I did, also shows a weld from when connector was leaking gas. (106A/18V)
82B54E6B-58B7-4F75-945B-6F98C4434A42.jpeg
716BA9BB-9162-42D7-8E13-AF02498F5982.jpeg


Ill be cutting up some 3/32 wall tube sections this week to practice and small squares of 16ga to try that again. Definitely need to work on distance that I am keeping the nozzle from work piece as I move my hands. Any suggestions on ways to improve would be greatly appreciated.

Edit: I was misreading the gauge. The figures above actually were L/min. It ends up I was at 42 CFH which was still in the gauages “Mig” zone but from what I have read that’s over double what it should be.
 
Last edited:
Fine tune your gas flow, position and joint design can necessitate a flow change. If you see soot around the weld, you need more gas flow.

Porosity is always a contamination issue. Could be too little or too much gas flow, or something on/in base metal and filler.

Focus on the front edge of the puddle. Keep the arc tracing that front edge.
 
Got some time this evening to try more. Realized I was incorrect yesterday and not only is it CFH (not CFM) but I was reading it wrong and had been using 40 CFH (which still shows in green section for “Mig” on the included Victor regulator). Also triple checked the Mig connector and sure enough I still had not fully seated it, even though it doesn’t appear to weld any different after this second fix.

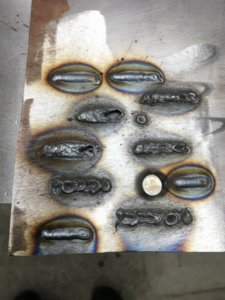
Worked on trying lots of gas flow settings to see if I could mitigate soot. Settings and results detailed below. All CFH are what the regulator showed when the trigger was pressed. All are also still using sMig setting.

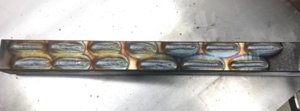
Top Row (L to R) - 18 CFH, 18, 38, didn't mark, 23, 29, 18; Second Row - 23, 29, 15, 23, 23, 38
A6ED3521-37D8-4339-99D5-ED8D0D26E739.jpeg

L to R - 18 CFH, 23, 29, 15, 15
5A195A75-DC84-427C-B9C1-28BA9CA23948.jpeg

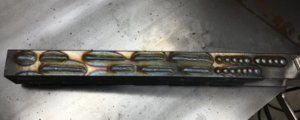
Top Row (L to R) - 23 CFH, 18, 23, 38, 18; Second Row - 23, 18, 18
012AD3D8-5ED6-42EA-AB4E-F6D37654E63B.jpeg

Top Left five spot welds - 18 CFH; Top Right - 23; Bottom - 38
5252ECC9-0E14-4496-A623-DAED9592495D.jpeg

This is good example of no gas vs gas on 16ga. I think this was 18 CFH.
78326856-BE74-4AE0-BF6F-C345A3C043DC.jpeg

I tried different stick out lengths from 1/4 to just over 1/2", varies the tilt of the gun, and tried a few pushing vs pulling and was expecting a much more evident difference between at least some of the setting. The soot now (except for the spot welds) appears to mostly be at the start of the weld for most. One two or three welds I got a sputter start and let off trigger before trying again. Is there supposed to be zero soot? All of the metal was sanded before starting.
 
Last edited:
Got some time this evening to try more. Realized I was incorrect yesterday and not only is it CFH (not CFM) but I was reading it wrong and had been using 40 CFH (which still shows in green section for “Mig” on the included Victor regulator). Also triple checked the Mig connector and sure enough I still had not fully seated it, even though it doesn’t appear to weld any different after this second fix.

Worked on trying lots of gas flow settings to see if I could mitigate soot. Settings and results detailed below. All CFH are what the regulator showed when the trigger was pressed. All are also still using sMig setting.

Top Row (L to R) - 18 CFH, 18, 38, didn't mark, 23, 29, 18; Second Row - 23, 29, 15, 23, 23, 38
View attachment 282765

L to R - 18 CFH, 23, 29, 15, 15
View attachment 282766

Top Row (L to R) - 23 CFH, 18, 23, 38, 18; Second Row - 23, 18, 18
View attachment 282763

Top Left five spot welds - 18 CFH; Top Right - 23; Bottom - 38
View attachment 282764

This is good example of no gas vs gas on 16ga. I think this was 18 CFH.
View attachment 282762

I tried different stick out lengths from 1/4 to just over 1/2", varies the tilt of the gun, and tried a few pushing vs pulling and was expecting a much more evident difference between at least some of the setting. The soot now (except for the spot welds) appears to mostly be at the start of the weld for most. One two or three welds I got a sputter start and let off trigger before trying again. Is there supposed to be zero soot? All of the metal was sanded before starting.


There should be a setting for preflow of the gas. The machine should open the gas solenoid just before pushing wire and energizing it.

When I welded with an esab with smig, you can tell very little difference in the weld behavior with changes in gun angle and sticking length. That’s the trick to the machine reading arc voltage and varying output to keep the weld consistent.

Try fine tuning the wire speed down slightly or up slightly from smig preset to get rid of the pop start.

You may end up with slightly different parameters for tacking well and for finish welding well.

My guess is to turn the wire speed down slightly to get rid of the pop start. That’s if it is pushing though the arc causing the pop.

If it’s popping, then burning back some wire then popping again, the amperage is too high initially for that wire diameter. Increase wire speed or reduce amperage, or stick out is too long.

It may take a moment for the smig to read arc voltage and adjust at the very beginning of the weld. Try “tuning” the settings to note any changes.
 
Tried different pre flow settings today and tried different joints on 22ga. Also before I started any of this welding I purged the line for five seconds (saw recommended elsewhere). Also tried leaving in sMig but adjusting wire speed up and down and could not tell a difference. Kept stick out just under 1/2 inch. Will be cutting up more square pieces tomorrow to try more joints. Garage door half way open, fan 10 ft behind me on low setting blowing out garage door, 57 degrees.

sMig, preflow at 0.1 seconds (25 CFM for top three, 42 CFM for bottom)
924A73B4-3064-453B-ADAC-3B7DC034983D.jpeg

O preflow top, 0.1 preflow bottom
5625542B-D2F9-43ED-B62D-6A3C8CBB9870.jpeg

0.1 preflow top left (15 CFH), 0.1 preflow bottom left (20 CFH)
F3EF514C-FD7D-4EB2-93FF-F3C885785196.jpeg

0.5 pre flow
22254FF3-3625-4D75-962E-37E01D295745.jpeg

0.1
5CD97627-DCC0-4875-B56D-AD8BCA20598F.jpeg

22 ga, cleaned with denatured alcohol first. regular mig mode (sMig goes down to 18ga only). lap and t joints (first t joint I thought was good, then proceeded to just burn through the second)
947C4835-E030-4E67-80D0-F67DD989DC7E.jpeg

0.1 preflow for all (15 CFH top right, 20 bottom left, 40 CFH for bottom middle and right)
4B9E3AF5-774E-4C65-A4CB-ECE9FED271BE.jpeg

I plan to cut/etch some 10ga pieces by end of this weekend. Will use loctite naval jelly.
 
Last edited:
On that 22ga, or any thin stuff,

You can also try a forward and back stepping motion. With the gun. Think 2 steps forward one back, two forward, one back.

It achieves good penetration and fusion on thin stuff without burning through, and a good bead profile while stepping back onto the weld briefly.

There is practically no side to side moton with that technique.
 
After about two months of no welding due to other projects taking priority I decided today I would start building a plasma cutting table to use with my new Hypertherm. I had been watching build videos on YT and looking through photos and decided on a 2x3’ cutting area with the top (including casters) coming in at 36” to match another table in garage so I can use it to support larger sheets I may cut.

The frame is all 1.75” square tubing, slats are 1”x1/8” thick and the support under the slats, and the 1” spacers, are 3/4” square tubing. Locking casters from HF and the caster mounting plates are 1/8” plate. I will make a chute underneath out of 20ga to funnel all the sparks into a bucket. I still have more cutting and welding to go with bottom shelf supports, caster plates and the rest of the spacers for the slats, but thought I would share the progress. In hindsight I should’ve made some practice welds before jumping back in.

Used Fireball Tool and Genuine Metal Works squares to keep everything at 90 degrees.

8A13B1DB-51E2-4051-B45C-CCEDD274846D.jpeg
018F2502-8A6D-419B-B471-95BEF763367D.jpeg
255F21CB-08D4-4A07-A78C-272A22D72B62.jpeg
D3E18F1B-E057-4DD1-9E42-85DB5945A2DD.jpeg
 
super interested to see how this goes!
whats the future specs of this? Stepper motors I assume? Control type?

I built a simple little cnc plotter in an intro to engineering course using an Arduino running GRBL, and have always pondered building my own table. I have been eyeing the Langmuir CNC plasma system as it's not too far off the price of me building my own and could cut most everything I'd need with the 2x2' table.

Following closely!
 
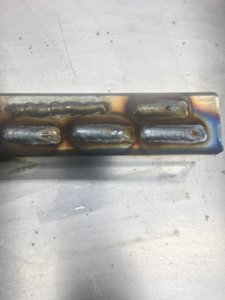
After almost a year of just Mig welding I hooked up the tig function. 20cfh. 75 amps. 3/32 electrode with 3/32 ER70S3 filler. Tubing is 14ga cold rolled. First one is bottom right (forgot to turn gas knob on torch). Then they go counter clockwise to one I just did (bottom left). Lots of tungsten grinding so far. Need to get a cup of pre cut and sharpened ones.

DA6E2400-78F9-4F16-9012-5E9233DF0173.jpeg
 
Last edited:
Back
Top