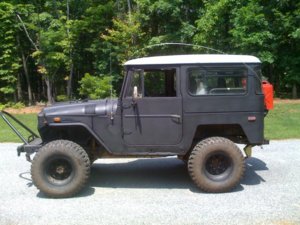
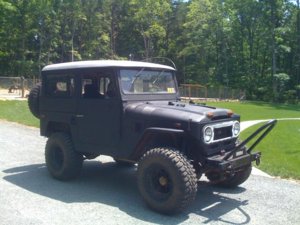
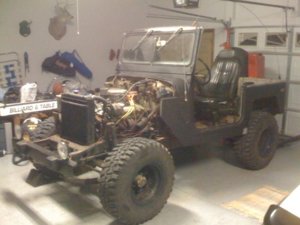
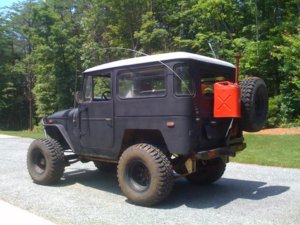
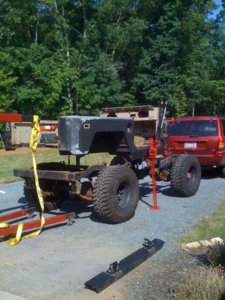
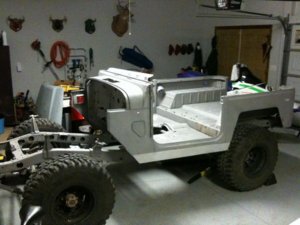
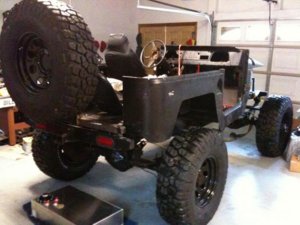
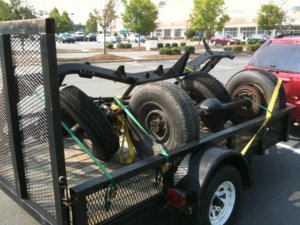
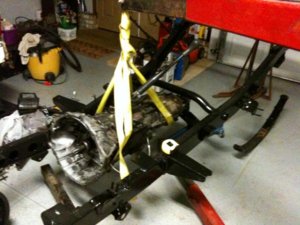
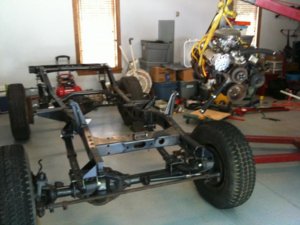
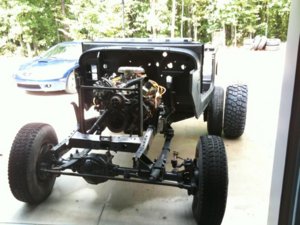
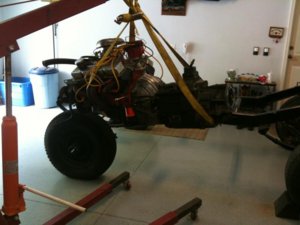
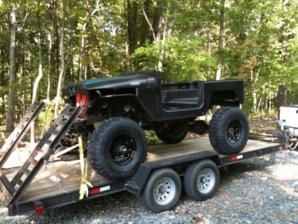
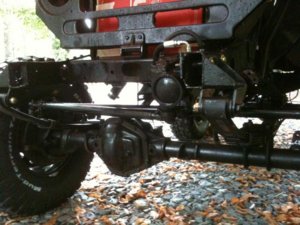
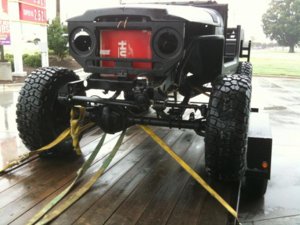
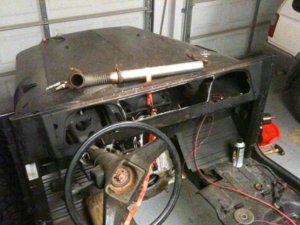
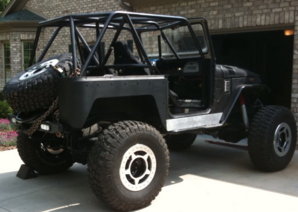
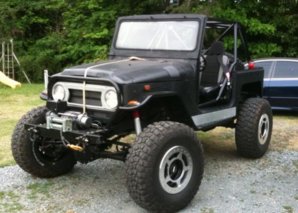
Well I am a new member here, but I have been working on my 1970 FJ40 off and on (mostly off) for over 6 years now. This past year has been the most productive, so I thought it was time to post a thread about the build. These pics are probably going to be out of order, but here some of them are. Started out with a Chevy 350 paired to all stock FJ running gear (3spd, dash op'ed 4 wheel) with 4 inch springs and anti-inversion shackles. Rattle-can Bat Man black. I'm not even sure how all this started, but I started buying up parts, saving, buying more, stocking up over the years, and doing what I could when I could. I am close to getting on the trail. Now here we go with the pics. Let me first off say that the out of place stinger on the front in the earlier stages pics was fab'ed up back when I first saw one and started with the project. Like back when I dreamt of running "Avalanche Engineering" beadlocks and gear.
You are using an out of date browser. It may not display this or other websites correctly.
You should upgrade or use an alternative browser.
You should upgrade or use an alternative browser.
1970 FJ40 build over 6 years...
- Thread starter BShore
- Start date
Reid
Hasnt Seen Dirt in Years
- Joined
- Dec 30, 2005
- Location
- Winston Salem
cool looking cruiser
Jeff B
Thanos was right
- Joined
- Dec 23, 2006
- Location
- Lincolnton N.C.
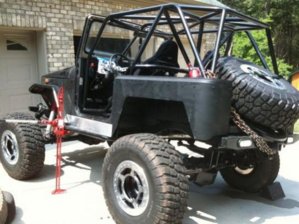
The bottom was after I got the frame back from the powder coating, mocked up with the NV4500 and at the time NP208. I changed my mind later and went with an Atlas 4.3:1 behind the 5 speed. A few years ago I had a TH400 I was going to put in it, but it was stolen and I found the NV from a 98 GM that had the bell housing to match my 350 that I built 5 years ago. The middle was the first trip to MandM Offroad, to get the ton axles mounted to the frame. Dana 60F 14B, 4.56's from a SRW military GM. The top was how I made the rear tire carrier 5 years ago, when it was only going to hold a 33" tire, but ditched the idea when the 37's went on. The pic is with a 37" BFG KM2 on it.
mo
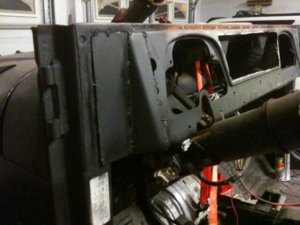
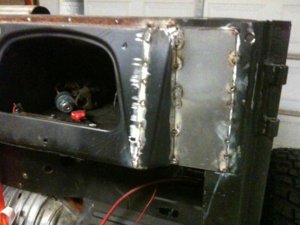
mo pics... When I was planning on the cage, one thing that always erked me about FJ40 Cages was all of them seem to avoid the hump in the lower dash that sticks far out by either going around it or coming straight down in front of it, being far back from the windshield. I wanted to have smoother lines than what I have seen so here is what I did. Got out the good ol' grinder and threw some sparks. Carefully, and with a purpose in mind, took out the end sections. Then I bobbed them in towards the center of the dash and filled in the gaps. It gave about 2 inches or so of clearance to work with for the A pillar cage bars. With some bondo, I think it might look like it could have been factory.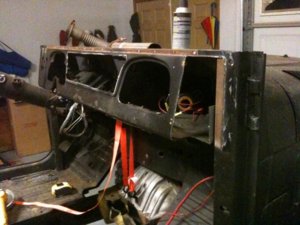
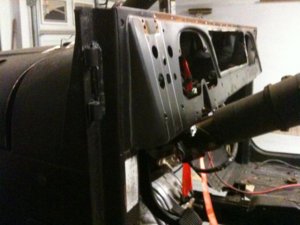
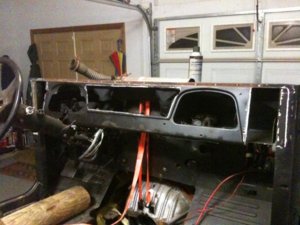
mo pics... When I was planning on the cage, one thing that always erked me about FJ40 Cages was all of them seem to avoid the hump in the lower dash that sticks far out by either going around it or coming straight down in front of it, being far back from the windshield. I wanted to have smoother lines than what I have seen so here is what I did. Got out the good ol' grinder and threw some sparks. Carefully, and with a purpose in mind, took out the end sections. Then I bobbed them in towards the center of the dash and filled in the gaps. It gave about 2 inches or so of clearance to work with for the A pillar cage bars. With some bondo, I think it might look like it could have been factory.


more
and... Here's where you can see how much forward the cage comes. I'm working on laying out the dash... I'm going with aluminum panels that I tried to make cool machined looking circles on, but after over an hour of practicing decided it was not going to work. The bottom is a 3D Illustration that my friend who is a graphics designer and I came up with to give PJ an idea of what I was thinking of for my cage. After getting the Cruiser back, it looks better than what I came up with.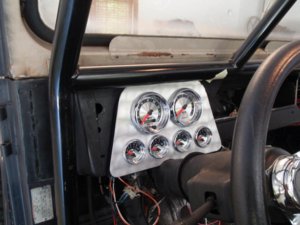
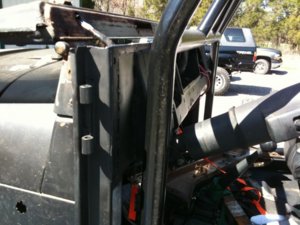
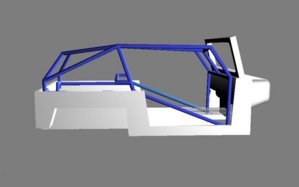
and... Here's where you can see how much forward the cage comes. I'm working on laying out the dash... I'm going with aluminum panels that I tried to make cool machined looking circles on, but after over an hour of practicing decided it was not going to work. The bottom is a 3D Illustration that my friend who is a graphics designer and I came up with to give PJ an idea of what I was thinking of for my cage. After getting the Cruiser back, it looks better than what I came up with.


yup.
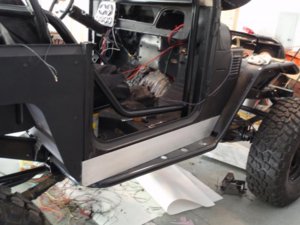
and... here is a good shot of the new front tube fenders tied into the sliders and the axillary battery mounted under the passenger seat. You can't tell how low the seats are in this pic, but I wanted them mounted as low as possible to allow the cage height to stay low also. You can see the rear corner protection from Bud Built, which are 3/16" bent steel. I'm happy with how they turned out too. Here is also a shot of my electric spaghetti I have been living off of for a while. The hardest thing about it for me has been deciding where to mount the fuse box and how to run the wires as neatly as possible. I know nothing about wiring, but it has been pretty straight forward, and I am almost done.
and... here is a good shot of the new front tube fenders tied into the sliders and the axillary battery mounted under the passenger seat. You can't tell how low the seats are in this pic, but I wanted them mounted as low as possible to allow the cage height to stay low also. You can see the rear corner protection from Bud Built, which are 3/16" bent steel. I'm happy with how they turned out too. Here is also a shot of my electric spaghetti I have been living off of for a while. The hardest thing about it for me has been deciding where to mount the fuse box and how to run the wires as neatly as possible. I know nothing about wiring, but it has been pretty straight forward, and I am almost done.
Attachments
Your Hot Dog Guy!
Well-Known Member
- Joined
- Mar 15, 2008
- Location
- winston-salem,nc
 Won't be too much longer! It'll be worth the wait. Good luck Brandon. Tip when testing your new harness, put a fuse holder between the + positive cable and the + positive post on battery! Put the appropiate fuse in inline that that circuit is calling for incase their is a short so it won't fry the new harness, this is for test purposes only. I've installed seven or eight Painless Wiring harnesses and it's better to blow a fuse than to release the SMOKE that's in all wires! LOL
Won't be too much longer! It'll be worth the wait. Good luck Brandon. Tip when testing your new harness, put a fuse holder between the + positive cable and the + positive post on battery! Put the appropiate fuse in inline that that circuit is calling for incase their is a short so it won't fry the new harness, this is for test purposes only. I've installed seven or eight Painless Wiring harnesses and it's better to blow a fuse than to release the SMOKE that's in all wires! LOL
Awesome tip, thanks Terry... Yeah, I've been extremely nervous about letting that smoke out of the wires. Hey where is the Scottie's Muffler we talked about again? I can't remember. I'm going to get the exhaust run this week if I can. These straight pipes sound cool, but my ears are still ringing from taking a test drive yesterday. Thanks again, brother for your work on this project.
M&M Offroad
Well-Known Member
- Joined
- Mar 16, 2006
- Location
- mocksville
awesome
Brandon, very nice work.. Glad to see it mobile.. Through the years i have built alot of different rides for me and customers. It is always still a joy to have them move under their own power again after you tear them down. Their is usually a point that you look at the pile of parts and wonder if they ever will move again.. Congrats... If you ever need anything just give me a shout..It was an absolute pleasure dealing with a stand up guy like yourself.. thanks PJ
Brandon, very nice work.. Glad to see it mobile.. Through the years i have built alot of different rides for me and customers. It is always still a joy to have them move under their own power again after you tear them down. Their is usually a point that you look at the pile of parts and wonder if they ever will move again.. Congrats... If you ever need anything just give me a shout..It was an absolute pleasure dealing with a stand up guy like yourself.. thanks PJ
M&M Offroad
Well-Known Member
- Joined
- Mar 16, 2006
- Location
- mocksville
Sick!
I love it... I think i want to build another one day for me and the kid.. It will look very similar to this one. nice job..
I love it... I think i want to build another one day for me and the kid.. It will look very similar to this one. nice job..
BigFish
I came here to leave...
- Joined
- Nov 19, 2007
- Location
- Oakboro, NC
just plain nasty

Your Hot Dog Guy!
Well-Known Member
- Joined
- Mar 15, 2008
- Location
- winston-salem,nc
Looks good Brandon, stay in touch and we want to see a finished pic.
Update. I pulled the motor and transmission this week because the 3-4 syncro has gone out on the NV4500. so, as it sits with the engine out, a friend tells me about a 5.3LS motor that he knows of for pretty cheap, and I somehow justified getting it to put in when the trans goes back in. So, pics to come about my 5.3 swap.


