2015 Grand Cherokee Radiator Replacement Walkthrough

YJJPWrangler

Well-Known Member
Joined
Jul 19, 2005
Location
Charlotte
Well, looks like I'm going to be replacing the radiator on the wife's daily. Radiator started seeping around the driver side where the plastic is crimped onto the metal part of the radiator. Giant air bubble in the system now so you can hear the coolant running around the motor and every so often that air bubble sits right on the coolant sensor which causes the car to "overheat". Obviously its not overheating and the gauge reads normal once the air bubble is passed. I've been limping it along by just filling the overflow every 2-3 weeks or so but the puddle is starting to get bigger. Apparently its a common issue on these models. Kinda pissed about this because you would think a radiator would last longer than 88k.:mad:

I was able to access Alldata and book time is around 4hours. Alldata says to pull the AC condensor but I don't have the equipment to purge/refill etc. I have seen other guys be able to remove the radiator without pulling the condensor but you have to pull the entire front fascia off. So looks like I'm pulling the entire front end off starting Friday morning.

Anyone messed with this model for radiator replacement? Any tips or tricks? Average cost to replace is 1k by a shop and the radiator is only $150 or so.

Wife is terrified I'm gonna screw up her baby:shaking:

:lol:
 
What engine does it have? I’ve done 3.6 without cracking the ac or pulling the clip.
 
Why not just take it to have the system evacuated and then charge and refilled after your done? Should be less than $200 total if I were to through a guess out there.
 
Why not just take it to have the system evacuated and then charge and refilled after your done? Should be less than $200 total if I were to through a guess out there.

For a car as new as 2015 I would expect 3x that much for an AC related job. Did you forget about the cost of labor :D


Sent from my iPhone using Tapatalk
 
@Chris_Keziah thats always a possibility and one that I have thought of. However I would still have to remove the condenser from radiator to pull it. From other threads I've read, you can disconnect the condenser from the radiator and push it forward and pull the radiator out from the top(while still leaving the AC charged). With the front fasica off, there should be enough room to accomplish that.
 
For a car as new as 2015 I would expect 3x that much for an AC related job. Did you forget about the cost of labor :D


Sent from my iPhone using Tapatalk

The evac should be fairly cheap, I've even heard of it being free? Hell a vacuum and recharge shouldn't take more than an hr of labor plus the cost of freon and any oil that was pull out of the system. I'm just guessing though. I'd much rather have the system drawn down than having to fuck with all the plastic hardware holding the front fascia on.
 
The evac should be fairly cheap, I've even heard of it being free? Hell a vacuum and recharge shouldn't take more than an hr of labor plus the cost of freon and any oil that was pull out of the system. I'm just guessing though. I'd much rather have the system drawn down than having to fuck with all the plastic hardware holding the front fascia on.
this plus the small benefit of getting a fresh dry charge after.

Much cheaper than the scratch you are going to put in the front fascia and the then cost of a new car because your wife cant not see it
 
I don't have experience with one of these yet to offer personal experience, but either way would be good. It'll be probably a couple hundred to evac your ac then vacuum and recharge when you're done. The front facia is also usually easier to pull and replace than most people think. There are tons of cars and trucks these days where the plastic bumper facia and grill get pulled just to replace a headlight bulb. Most vehicles have a row of screws or dammit pins along the top, a few along the bottom, some more in each fenderwell, along with a hidden vertical screw right where the bumper, fender and wheel well all meet, then it pops out of clips under the headlights and along the sides usually by pulling sharply. Unplug fog light or side marker wiring from underneath first. I haven't seen one yet that isn't sitting on the ground in 15 minutes.
 
@Tim C thats what I've found. There is 1 bolt in each fenderwell that then reveals 2 clips. Remove both sides, remove top and bottom 1/4 turn pins, unplug all electrical connections and then pull everything off from the front. Ill do a writeup with pictures on this since I can't find any that deal specifically with the Summit model(fender flares are different than other trim models).
 
Tackled this last night. Started at 8pm and finished at 1:45am. Alldata book time is 3.8 hrs. I budgeted 8 :lol:. Ill rate it a 5 out of 10 on the hardness scale. Take your time and follow the steps and you shouldn't have an issue. Tools used were screwdriver, 10mm, 8mm, 13mm wrenches and ratchets, body panel tools, various sizes of pliers. No special tools are needed. For reference, parts cost was around $330 for new radiator, lower/upper hose, belt and 2 gals of antifreeze.

These are the steps below that I followed but your mileage may vary. For reference, vehicle is a 2015 JGC Summit with 88k. The Summit has upgraded trim, specifically fender flares that make everything a bit easier. Here's the walkthrough:

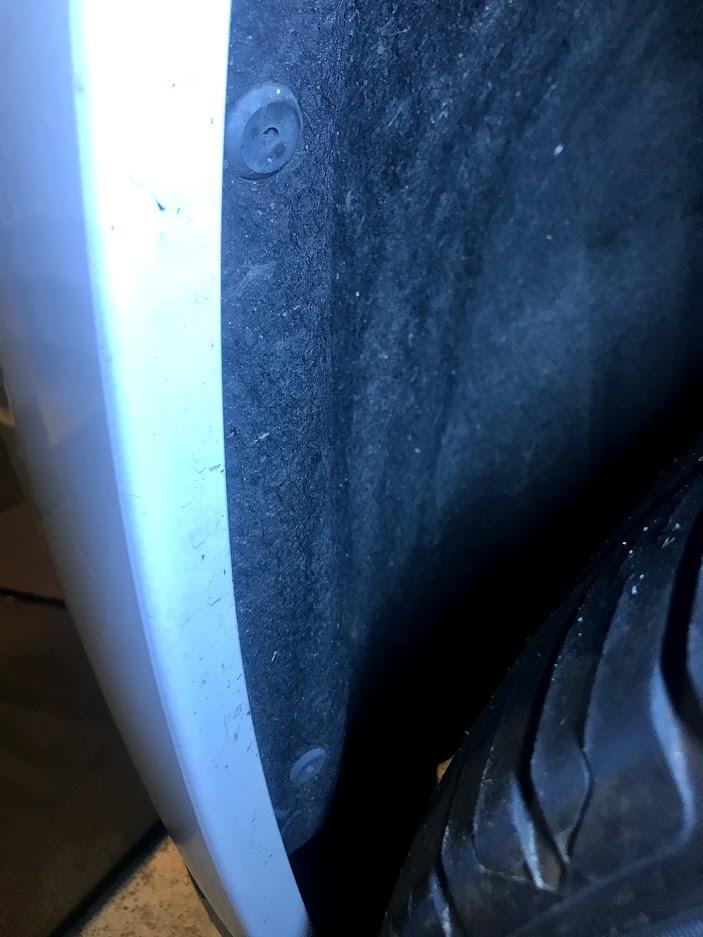
Remove the 2 plastic rivets and 1 10mm bolt from each wheel well. I drilled out the plastic rivets with a 1/8" drill bit for ease of of removal. It helps to turn the wheels to gain access.

lXtEtj0cAi0uoTBa-7P1y0erbXIxB2hczNtJY9iZEYjHspt8c26D5_V6e3i3JJR7TSbw8HoE-9H7lBufI0JfrEIUX_N1xnkj_DezBqKMPf0vUm4Cz9iQGGMQjaSsy6bXN9B4D7z1UcXWgX5CcxPFnvizX1dyG1PjTuK0dDLoJzCZiGHW01q4nTubKtOQ1JsNqb9A9IjCULLkDKzpj99amjgkm3URbQRcMu8GEUpivAw-xtole6_HbSz6Lld2Lv3zZjApw9YUsto4PLRNV6fSzvYzy1Gb23ACAT_40_2pEPS87igRZG4pmYkTQkkC2UjMpgw8j-de0OGy0gqd9E9hyeXHu6HtfsVN3eUabcMkAytnidyJSzAoc92nwD3OtwYxj6sMqamGLT9QjPMec9s_StkVONu5wSKaQHTnz0MJCKztGSzC108ktBFft-VjmiJyvjA78RsLs5BjclLBwBO2dPpj2RijWwD3rVXDkXu1nD13VDaCVgsPx0lC4su1iNHj2yK4GCxn3dvtPR0eqWHDH9XhrTCzyfmAHfn-yq4XiX3MNF5l2tNDYkBiO-P-Qq703YKLnYABKfRKQCQs7JgaVPB3OBOiH46T5PxN2i6qjJZf-OYoNmpTe42SQNyDnfIpzODmoabkmDXGOCakHrCf_zdZwhKPfFDhaBDXHvAoBK8ti7Qkiu87szYveTz0gLo=w703-h937-no


After these rivets and bolts are removed, its time to start disconnecting body tabs. There are 5 1/4" tabs on the bottom of the air valance. Turn 1/4 turn and remove tab completely. Move to one side of the wheelwell where the front fascia meets the fender and pull sharply forward(not out). Don't be scared to give it a good tug. A cheap set of body panels tools will be helpful here, I picked up a set for $10 at harbor freight. The fascia should be loose to the area under the black plastic underneath the headlights. Repeat for the opposite side.

Make sure to disconnect the fog lights and parking sensors. Parking sensor plug is located in the passenger side wheel wheel and disconnects the entire front sensor system. Fog lights are 1 plug on each side. Plugs were pretty easy to remove. Once all electrical plugs are disconnected, move to the top of the grill on the upper radiator support. There are two plastic body panel tabs that need to be pulled up and removed completely. Once these tabs are removed, pull the plastic covering on either side of the hood latch upward to release the hidden tabs.

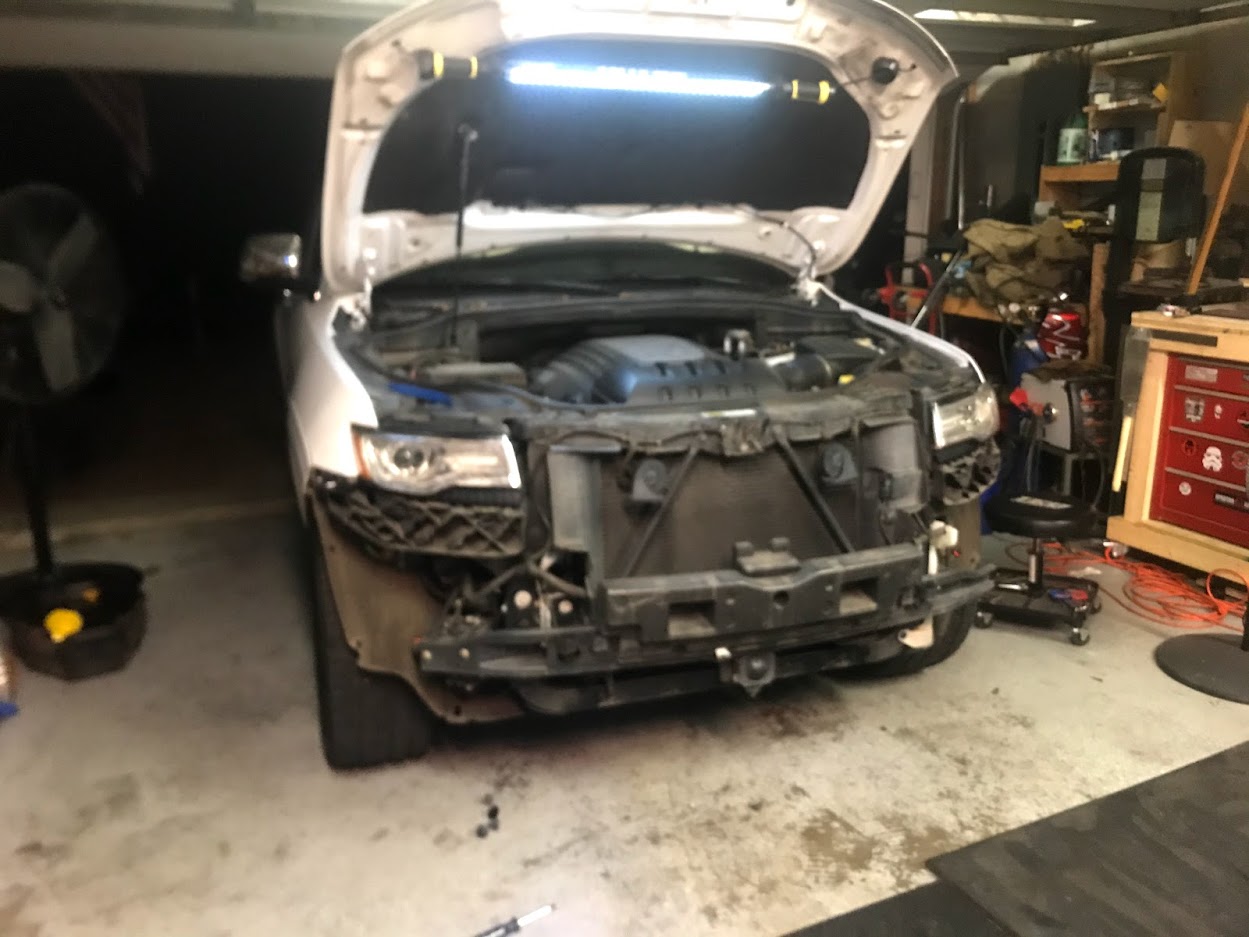
At this point, remove the entire front fascia and carefully set aside. Here is what you are left with.

5m47QnEWIAgcbJle8F7mfW18TCU-duWQAcbALRYD_Cs55eCrVGW8SE_zPMw5FLswNEVD7jHhr30lyebf7wcBz4ZOSvPPpXZXSgTpGcEQ4VDY_CMXlmdRW0JctB5DBJ49OyQh9pwvo636Jd92ZEq6ZK80R1Wosa5FUTPDkA2ATTvgyk_1muR5NpVXEv8YMVvHSm9G-bG1ZHI4n6vTsxvhsd2FY4Yu8xpYDbQtaYVSzPBAYdxxJhaoqQbQlcNNo2lMsm_Iqu9r2Ba_wDlM76j5OUWWX1NdM-eliZw0gwqL7gzbpVPC7C57tEKJh3PodaUh-szdx6AQpQLmBsL85JV6TPZ_8Wx5zeGxUkSXJKNx3eYrgo-Tmi5O7pPgYAyyj4euVim91onQMAJO2XLTcbRMczh-cK3ZUXiGDvwGY5o4-4K_-2MWBZAuEcK_DG56fcH7IMmvUhAzxLp-MJUOii6L32BOVxW34WYThQ1USkrXZduCaVgn8yAgpliaswpl3W7os7eXW2wbCacj51158-HgMcVJ4Qt2XxgS8xkF7xzfQQYNpgp1K9XL3GVNBrL9WUVTrE0S-DTTzwhZAA0X2ATQoOdftqzrszr3SG6JJ5sUTPTY0YyZ6bc8HqJfTkD3QetXyjwTucd_w-AFB9LsHsu9ij9ZL-Z4m9KFDZ9BL4eQPjF8j0lxgrmqUw0ZB1zZgSY=w1250-h937-no


At this point, its time to start removing just about everything. Pick your starting point and go. In no particular order, you will have to remove/pop out: hood molding seal, windshield washer line, horn power(label your wires as mine were the same), plastic wings on either side of the radiator, upper radiator support rods, air intake, and hood latch. Make sure you mark your hood latch so the hood will close. It will also help to remove the belly pan at this point. 5 10mm bolts, 2 13mm bolts, and 1 body panel hold it in place.

Once all these are loose, its time to take the upper radiator support out. There are 6 10mm bolts on the top of the radiator support and front that need to be removed. You will also have to unscrew the overflow bottle as well as the windshield washer bottle and a small strap for AC condenser line. Remove some more body tabs on either side and the entire upper support should lift straight up.

5yKaJ4dMsVDUY8hla8MTo6m_X1iJES9Kmy2CVPkgfQou_V2cVXzvwwZy8ylefrUNrzrKfuqcGxxMag-QZrFMei6FP_iG4zTQrsK6cLUsOgB7Xn-EDIZuCYtamYUwZhjFoUWk_4v18TstJM_h43I4M0nkFslHOWGX9zKWo1fo2GRHIDHuyPW62BURnvo3ZOo6fT0NFPnYTdM9T-dtoIHrrLSKeuK_DpuaTM8GIMeuWs99zzF9JFGoFBbBgyUNEF6cf4hccFxtOPjB1vVZoQXYYB7STKiDLzDnB9zy6-ozKAM2QTlaJuVX0GEUFt5OOqvZB8QERUlWe8o0AqYzYDAsy-g3ZFPPLOschhbPzHoItlgDqzMe_b1Tqj-ulz7OCA13bXcdHoWwA0Zx8D6mHRzh1xnjJ8tob4MgPyqWKVHG7njgf_LDPo-7yWe7S7w7Wgnaq7SjA6mIsxY2AeEA7KquHnDjJfemaevbMWyuJPqfeHd4E6z1bP5odXob0VuZLT3CTQAim0qRESqirjPPtaO2WUHJuVOykniaMIwd4s3yDCFNSLWGmKQsYMHmQcFE5X3U1NPJ8BeXaW5DAg1oTUmP4lJNC74nnFpBl3e2vriPrmnXrFgynSPOkPtRDm14gNO_EH_vYxOItj11J4SG4Z21gECAf7BFHUlp3fS-_3Ik9Zk_TmpLnSkUtlJjFYTbX9E=w1250-h937-no


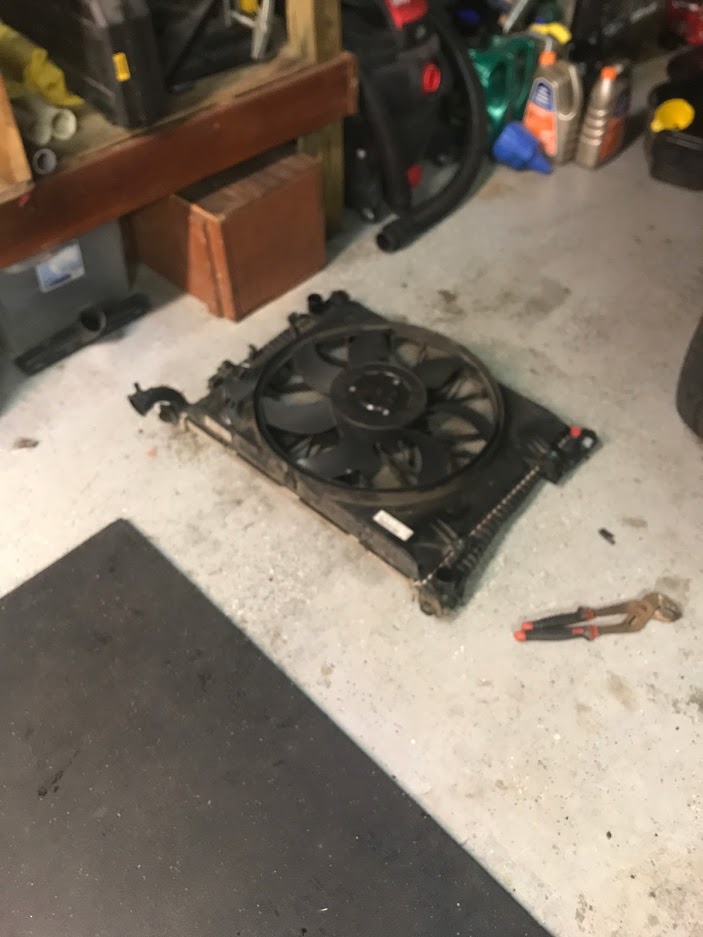
From here, drain the coolant. Remove upper and lower radiator hoses. Start gently pulling the AC condenser up and away from the radiator. It helps to break the clips off the bottom of the bad radiator for removal. Take your time and go slow removing the radiator. I pulled it straight up and out but have heard others pulling it from the bottom. I did NOT have to remove the transmission cooler lines or the AC lines for removal. Remove the radiator and fan as one unit(don't forget to disconnect the fan plug)

ofsEnrCmq6Fe_3vngBIkgQpeex5O44dRYy3oIOvgTWIVCXxVgIOoojxjWIZxnW0F28gGOdi-NZE3nnDEbfUoDtOgufd3CeJSJ1iL_qQLKcMC65UW2kaR98zup7QwYQ8YZ86yeiDurxoGUQn7SnnHV567Sn3FSRfFJ9o4gAlwPzig0pnjhqD8H6IbAONa4LR4n76s-SxHZIAmfax97vkElrSiLGq6RwGbtzq0EPFo3oPYbi5t0TdMu36rH1TKz1qf-IfIF-8lHpKKBt85HyKM8JZ_1_DCf_73CTfFID1iZzvKAwOoeD2HHVY7gxf5VpwKom1b6tiyZy4xC9VIjVplVxC-9CnfIrUZ312DobneErkGe0lp7L6aUb279jAAaDfKXSwbpY7zBTN-2n3W9PaeHyeUZelgzGXquWpck1bQ8Ed-bdUTxg7aHozPndkSira7JaK6nHhi3SuJFRztOOk5lbgGhj_9G2Jzz5tymBILqm8XZa_ffrhx0GbnTG8jKaOleOBajQtWKP5j3CEQVsKPMfT445YFcJqlBQMTHkL5twcZx9P94uQTAUYqCW5JqNZVjgnnnJeoHEdOcdxUFptiwUS_gcpVFnT9YzJsI85g_2d3x72HUdbDB025Lf-c36AXxjmcUI6Rvb4IHJxLsSiEhwNvgwYKVeiEbHjZasXovvbD0a80PXueq4VJgaG4UPE=w703-h937-no


Transfer fan onto new radiator. Its held in with four plastic clips.

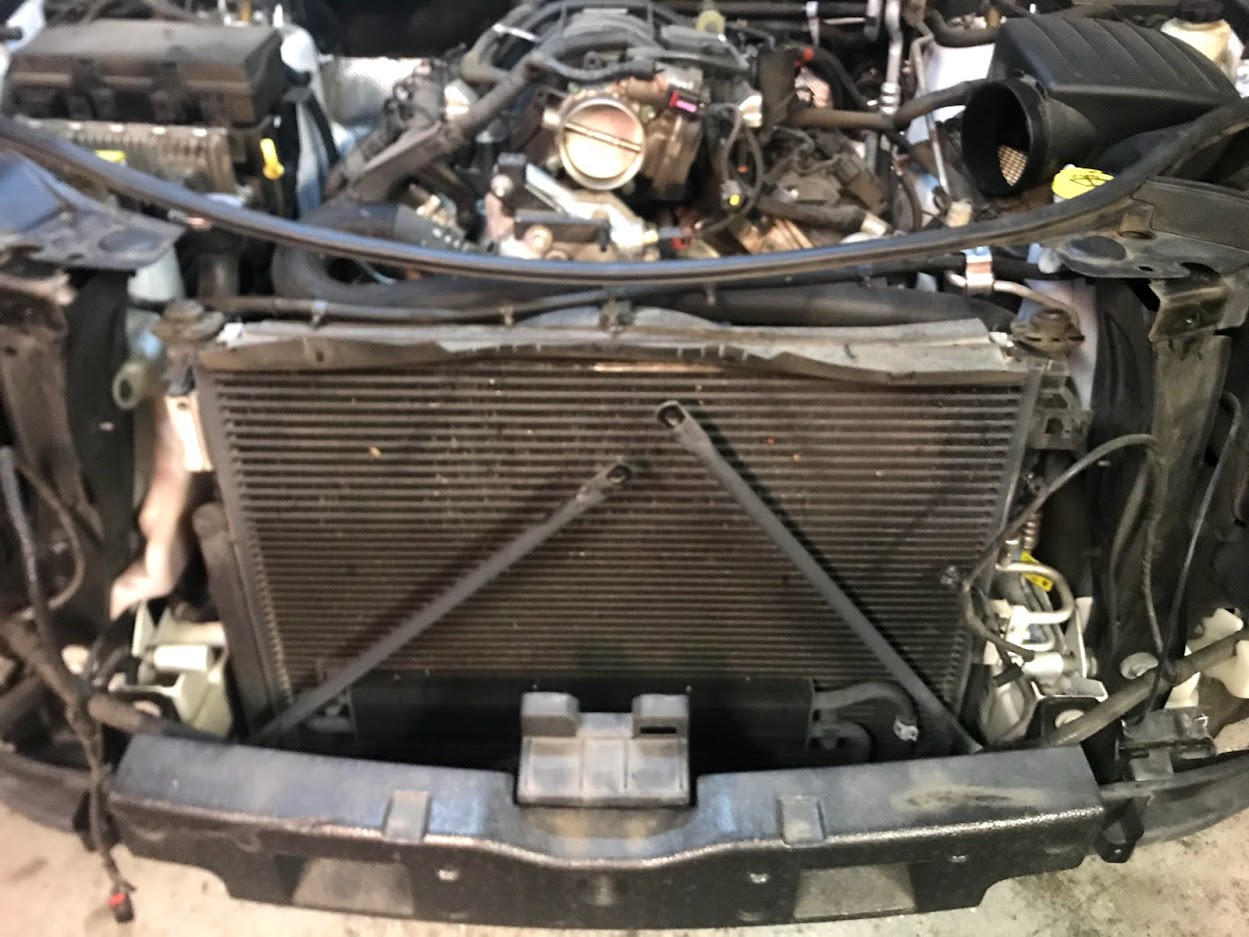
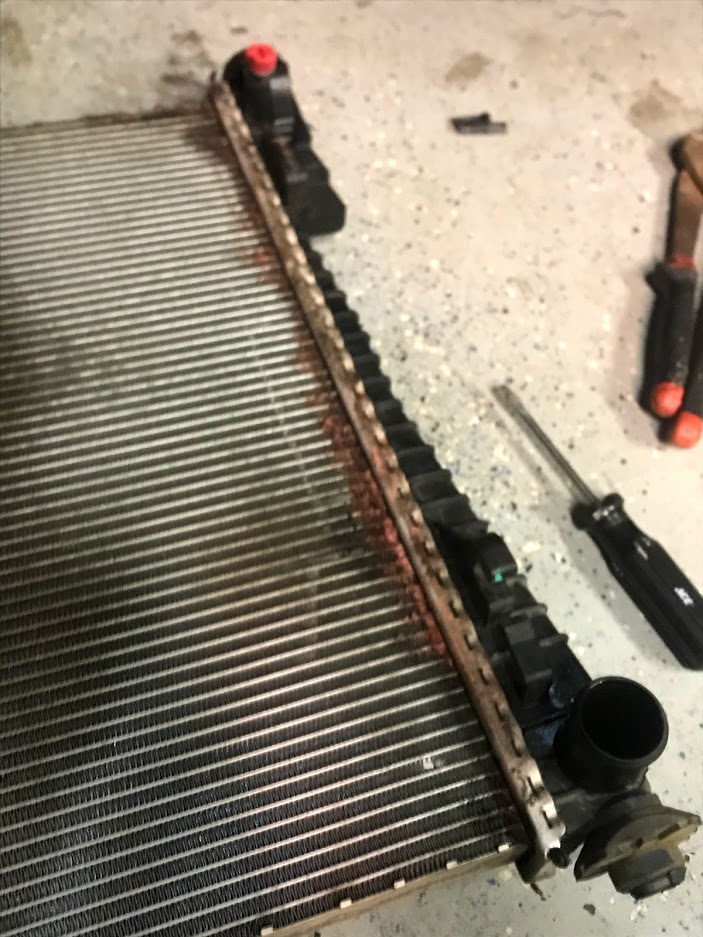
You can see where my old radiator is bad. Apparently its a common issue on these

mjP4QBaWJifuJNwvtT0bZTy8I8yKdxohDVWyAH4hj6NvohbSjMPKfkAF-6O3jLAHoIyoRe7XfOEbx8NaCWIp_RuihwApE9DD92zXPDlPVE28lR3jIl0erAWF1bvSAlTqmk2NHQajtlydk8GwhCPjmzw-phgR7uhaR_ABc8pJf647uTobAW_UHB_jBMlgMO-9I_C80z4ceTpivfhzmBh9sX__V78WgiEORId1NhgZx5I4-G8vtlpjtoo7nWDVwCn4rbUt7s6ud0OPTXP5v3SSd2uXa8GG9s5KkTr9TBDZH0Aj1fbINolL0b3D2S5AVn4lWPPpSyA1Yj7IHAdI4znw5i_aWdyTzg3QmIk_OYxXe4q_gxJ-6haFfMsf1_vjjKuMHkNBYvgDStqxSu6VPkYSnb3KOyywRs7LQhVIWu7K0jSthTILbJEQCDop57NDSpkIbEVh21XLVWSAOIs875p6UO5O_agyUdgHNa-Q_-kXXg3uuKgpnW5nsRyKcA5cGl4sG2OcRRLWPkW7asyH1kKokVTpJYRdpk-EErLfgjamUwW0lzGZ-MDvxZ6IEzhtaKHHoxN5c3XyWF0nkTJBLt5-fgzNL0mFqFjZuXMxSOOMM3UUoZqwTFzx_tZTaj7viVAlZREluHSMYSR8Z8UUXGGYtk4_uNX5SDrKcwZuRc5Md5_iuz6yqOGMzF_xA1xB1mg=w703-h937-no


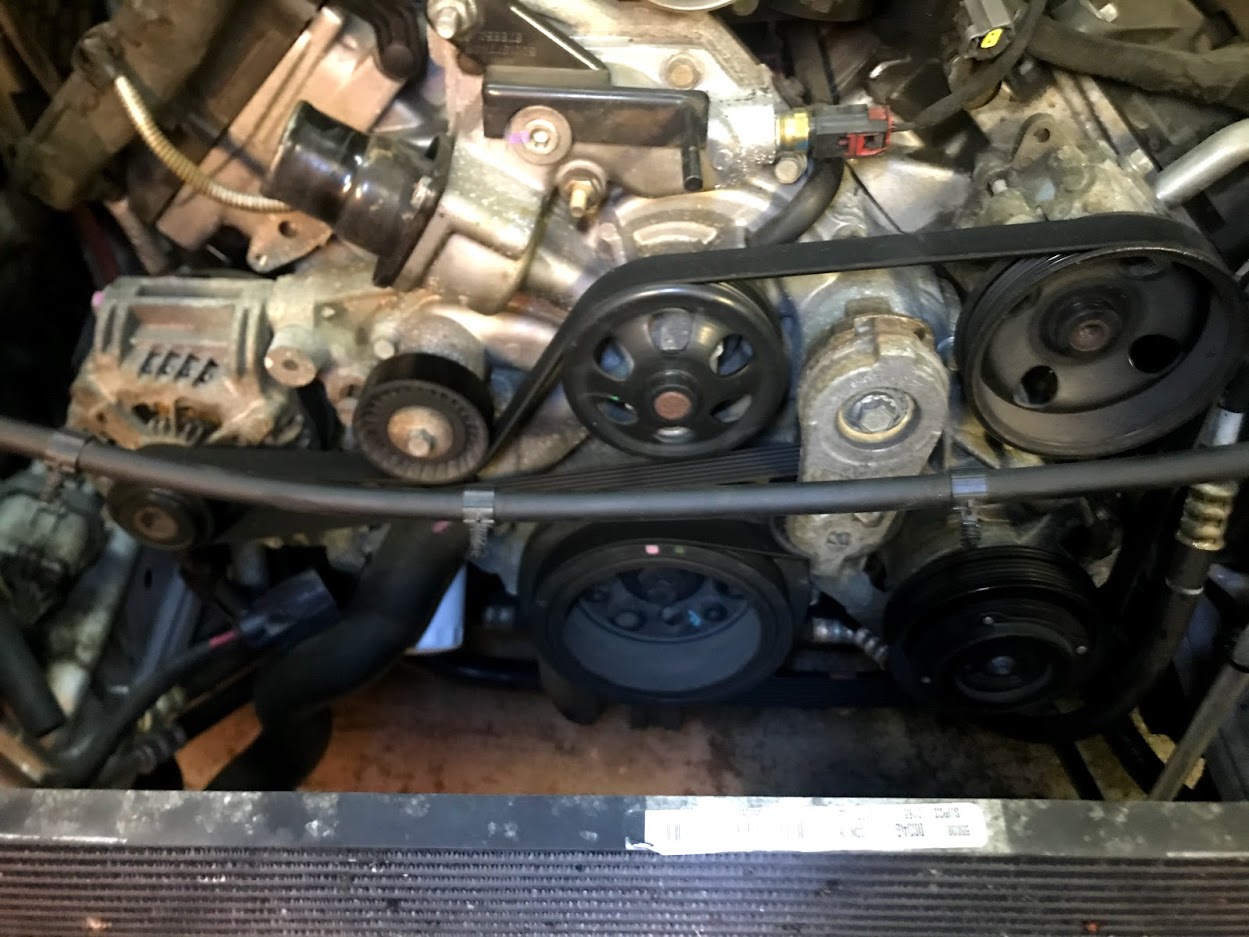
While the radiator was out, I went ahead and installed a new belt as there is now plenty of room to work with.

5s1zSNF5IVoegGEVvyX8ie1d7EtWlrcqhkYJbX41QYDYAlkPNt_Qik5rJGZjxtfhfpYoYD7OF3tE0Sxo45iSZMat4SqxZY_nzwkqJoQGyJMpzcFk7x-5cGrxQEw5udKX2ryGZqHh9DRjijzkAOShM3FfmKImxkXvy56M8bhRo8lajMkhN7fWeW8sP2hsxmp6PqizgY0wd0DzJO2MD6L5dFP192rYDoV0CxXpJ7mTKxUnbVB3KTA9V7gr4Kg8f_RnUzZspN98chv4A5rL6pwt7mRYsoXmPAnZNcS5cT-vZJZjW7VwLPr2-GVsIOvyfyr4uNj1zJp8tpdrbpLHWuj2ILYGMHOZMVt9ZyHteyeaA4GskDFaeJ6P2IGn8wrbNAb_rwTkAbUhBBgKUKln1Y1D6LyTB8_Ldp0fzdIS-3aIR12LkPNpT767q0xx0cZg1XnMlsWzjnCLPtKyt6OXY6ySkyAGhadNzxI72MXFz5PTx3gFEvxuNapuxk0L_d-UFkI1ju-uHq7OrrTCwwfHoncwh9DzMUucU4P6QEckDxk5Ih5LRRTXENnGxB9RtPmRQTJLaWQJVy4aE9Oe30DGHUwc-2Bxq9tSC3yRpWBTxnlz2aK9vLPEB8elyZlJ8Hw4813zOOyTrT1OqhKZ47usymQwUEHiO1-7c27qkQH9x6wy39JeTDN392In5JaQrUgJuyo=w1250-h937-no


Now comes the worst part. Reinstalling the new radiator/fan combo. This easily took me 45 mins or so. I tried it from the top, from the bottom etc with no luck. Take your time, walk away if you get frustrated(I know I did). It would help if you had two people to do this. One to guide the radiator down, one to move the condenser around. After much wiggling and crossing of the fingers, she slid into place. It helps if you angle the radiator back and get the driver side to clear the AC lines first. Reclip the condenser onto the new radiator clips and make sure that the radiator rubber feet are in the frame slots.

Congrats now you are halfway there. Reinstall upper radiator support, all lines, support rods, hood latch, and molding. I verified that my hood latch would operate properly at this point as its very difficult to get to once the fascia is back on. I decided to put new upper and lower radiator hoses on because why not? I had them and I'd rather replace now then 10k miles from now. Note, that the upper radiator hose should be trimmed to fit. If you don't it will ride on the power steering pulley. Once you have everything reinstalled, except for the fascia, go ahead and fill the cooling system. There is a bleeder plug that is conveniently located on the thermostat housing. It's an Allen wrench, remove completely and fill system. Check for leaks as you fill. Once antifreeze starts weeping out of the bleeder plug, close the bleeder plug and resume filling. It took about 10 mins to fill from this point, waiting for the air bubbles to escape etc. Reinstall airbox, hook up battery and test fire. I let the motor get up to operating temperature and everything was good.

From here, the last step is reinstalling the front fascia. The trick I found was to get the fascia underneath the lights first and then work the top on and temporarily secure it with body pins. Then work on getting the lower valance/air dam up and under and into the right spot. From there, work on each fender. You will need to give each fender some hard hits with your hand to get the body clips to engage. Take your time here and make sure the fenders are lined up etc. After both sides are done, reinstall 1 10mm bolt in each wheelwell and install new plastic rivets.

Test drive.
 
YJJP, Thanks for this write-up. Sorry to comment on an old thread. I just did this swap two days ago. Talk about a painstaking process! I have this identical vehicle- for anyone else reading this for advice:
You need to remove the whole front facia with the V8 as shown above. The U-shaped aluminum AC lines on the drivers side are a nightmare. How I wish the engineers left a 45 degree angle on there instead of the full 90. I had to lift the AC condenser as high as possible on the drivers side, and angle the radiator as low as possible on the drivers side and they baaaarelly can slip past each other. (Also need to remove the coolant reservoir.) I tried from the bottom twice with no luck at all.
Getting the facia clipped back together at wheel wells is tricky too. I took off the crescent inside bracket and put it in after the facia clipped in. Requires a tricky angle and twist to get the peg and slot together.
Last thought is, if you do a flush with cleaner, add the cleaner with distilled water, open the bleed port at the thermostat (8mm hex key) until fluid is at that level, close bleed port, run vehicle for 20+ minutes, drain, flush again with distilled water, this time leave the bleed port open and let a gallon or so run out from there, that will be the fluid that is in the block. close, run again for 15 minutes, drain and add coolant, again letting that bleed port open as you add coolant and it pushes all of the water out from the bock. once you get coolant coming out there then you know you got most of it.
Bottom line, I'd do it again if needed, but dang those engineers didn't do us any favors with those freaking AC line placements
 
Back
Top