indulf
Member
- Joined
- Aug 10, 2015
- Location
- Rutherfordton, NC
Some of y'all may remember Toby Till. He rode with the Ga Bounty Runners years ago, moved away to Colorado, wheeled out there a bit, and ended up getting into some other stuff.
By a stroke of luck I learned that he was taking bids on his old 69 bronco. Sure it's a little beat, sure it's a little old, sure it's seen better days, but the bones were still good.
I put in a bid and ended up winning.
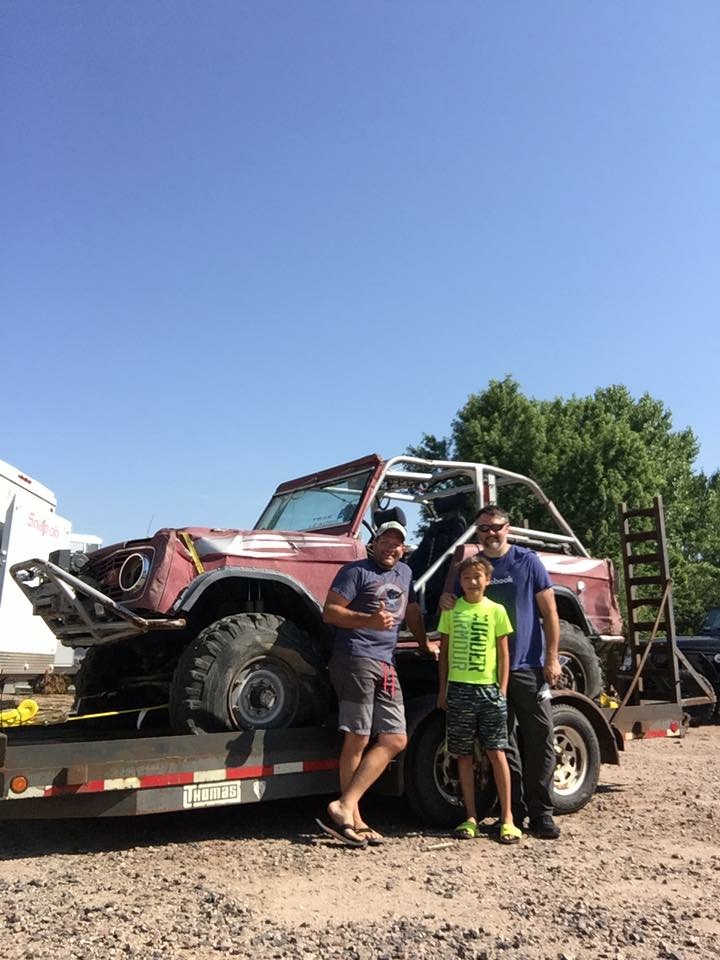
My 11yo son and I made an epic road trip from Western NC to Colorado over the 4th of July weekend to pick it up. We drove to Columbia, MO, spent the night, then on to CO, spent the night, picked it up the next morning, drove back to Columbia, spent the night, and headed home the next day.
A few asides..
- We had an amazing trip. It was much needed "guy time". Lots of bonding, discussion, and we listened to some audiobooks to pass the time.
- Out and back we hit 9 states. My son is well traveled, but not by car. He now has a better understanding of just how big this country really is.
- A truly good friend let me borrow his 2016 f350 King Ranch dually AND a trailer for the journey. I still don't know what I did to get so far onto this guy's good side, but what a friend!
Specs on the Bronco:
- 1969 model. It's well used (in other words, the body is BEAT!)
- 351w, fuel injected
- np435 with custom hydraulic clutch
- T-shift Dana 20, cryo'd input shaft
- hydroboost brakes
- f150 steering conversion
- dana 60 front, ARB, 35 spline stubs, full time hubs, 1 ton brakes
- dana 60ff rear, moser 35 spline shafts, 1 ton brakes
- custom long radius arm rear suspension on airbags with forced articulation
- long radius arm front suspension
- full cage
- premier power welder
- Set up for 38s on stock H1 rims - came with a set of recentered H1s which I'll use in order to step up to 42s.
- 8274 with custom 15" drum
- an entire truck bed full of all sorts of spare parts. Example - a complete second fuel injection system.. A 750 demon carb with all AN connections to hook it up.. All sorts of great stuff.
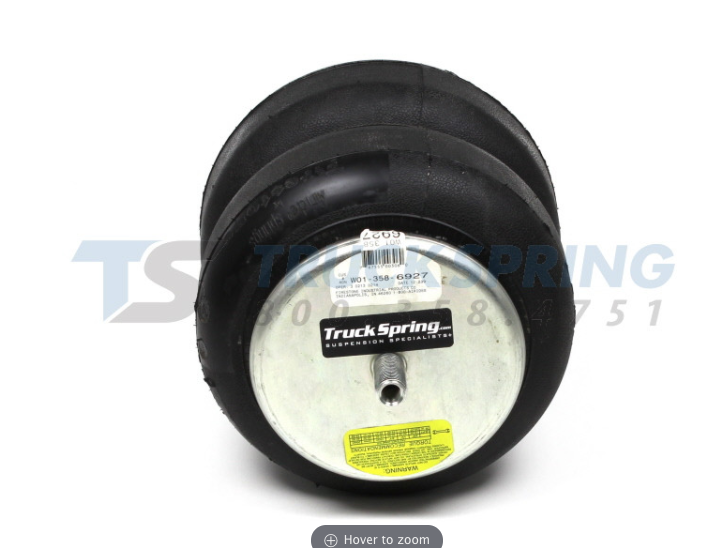
The air source was an old CNG tank which Toby would pressurize to 3000psi. I'm dumping that and going with something else - likely a CO2 setup, but maybe a viair and small storage tank. Looking for simplicity.
Plans:
- Fix the front end.. Needs a new core support, inner fenders, fenders, grille, and hood (if you have any parts laying around please message me!!)
- Fix the minor wiring issues with the injection setup. I can make it run, but something's up with one of the fuel pump relays.
- Discover and chase down any other electrical demons
- Install a new air source - CO2 or compressor / tank
- Replumb the air system - it's leaky after all these years. Will likely use solenoids instead of manual valves.
- Add gussets and rock rings to the recentered H1 wheels, blast, paint
- Cut and trim to fit 42s
- New harnesses, maybe reupholster the seats, clean up the interior
- Lighting
- Radios
- Wheel the heck out of it")
Here are some pics
From left to right - Toby, my son, Me
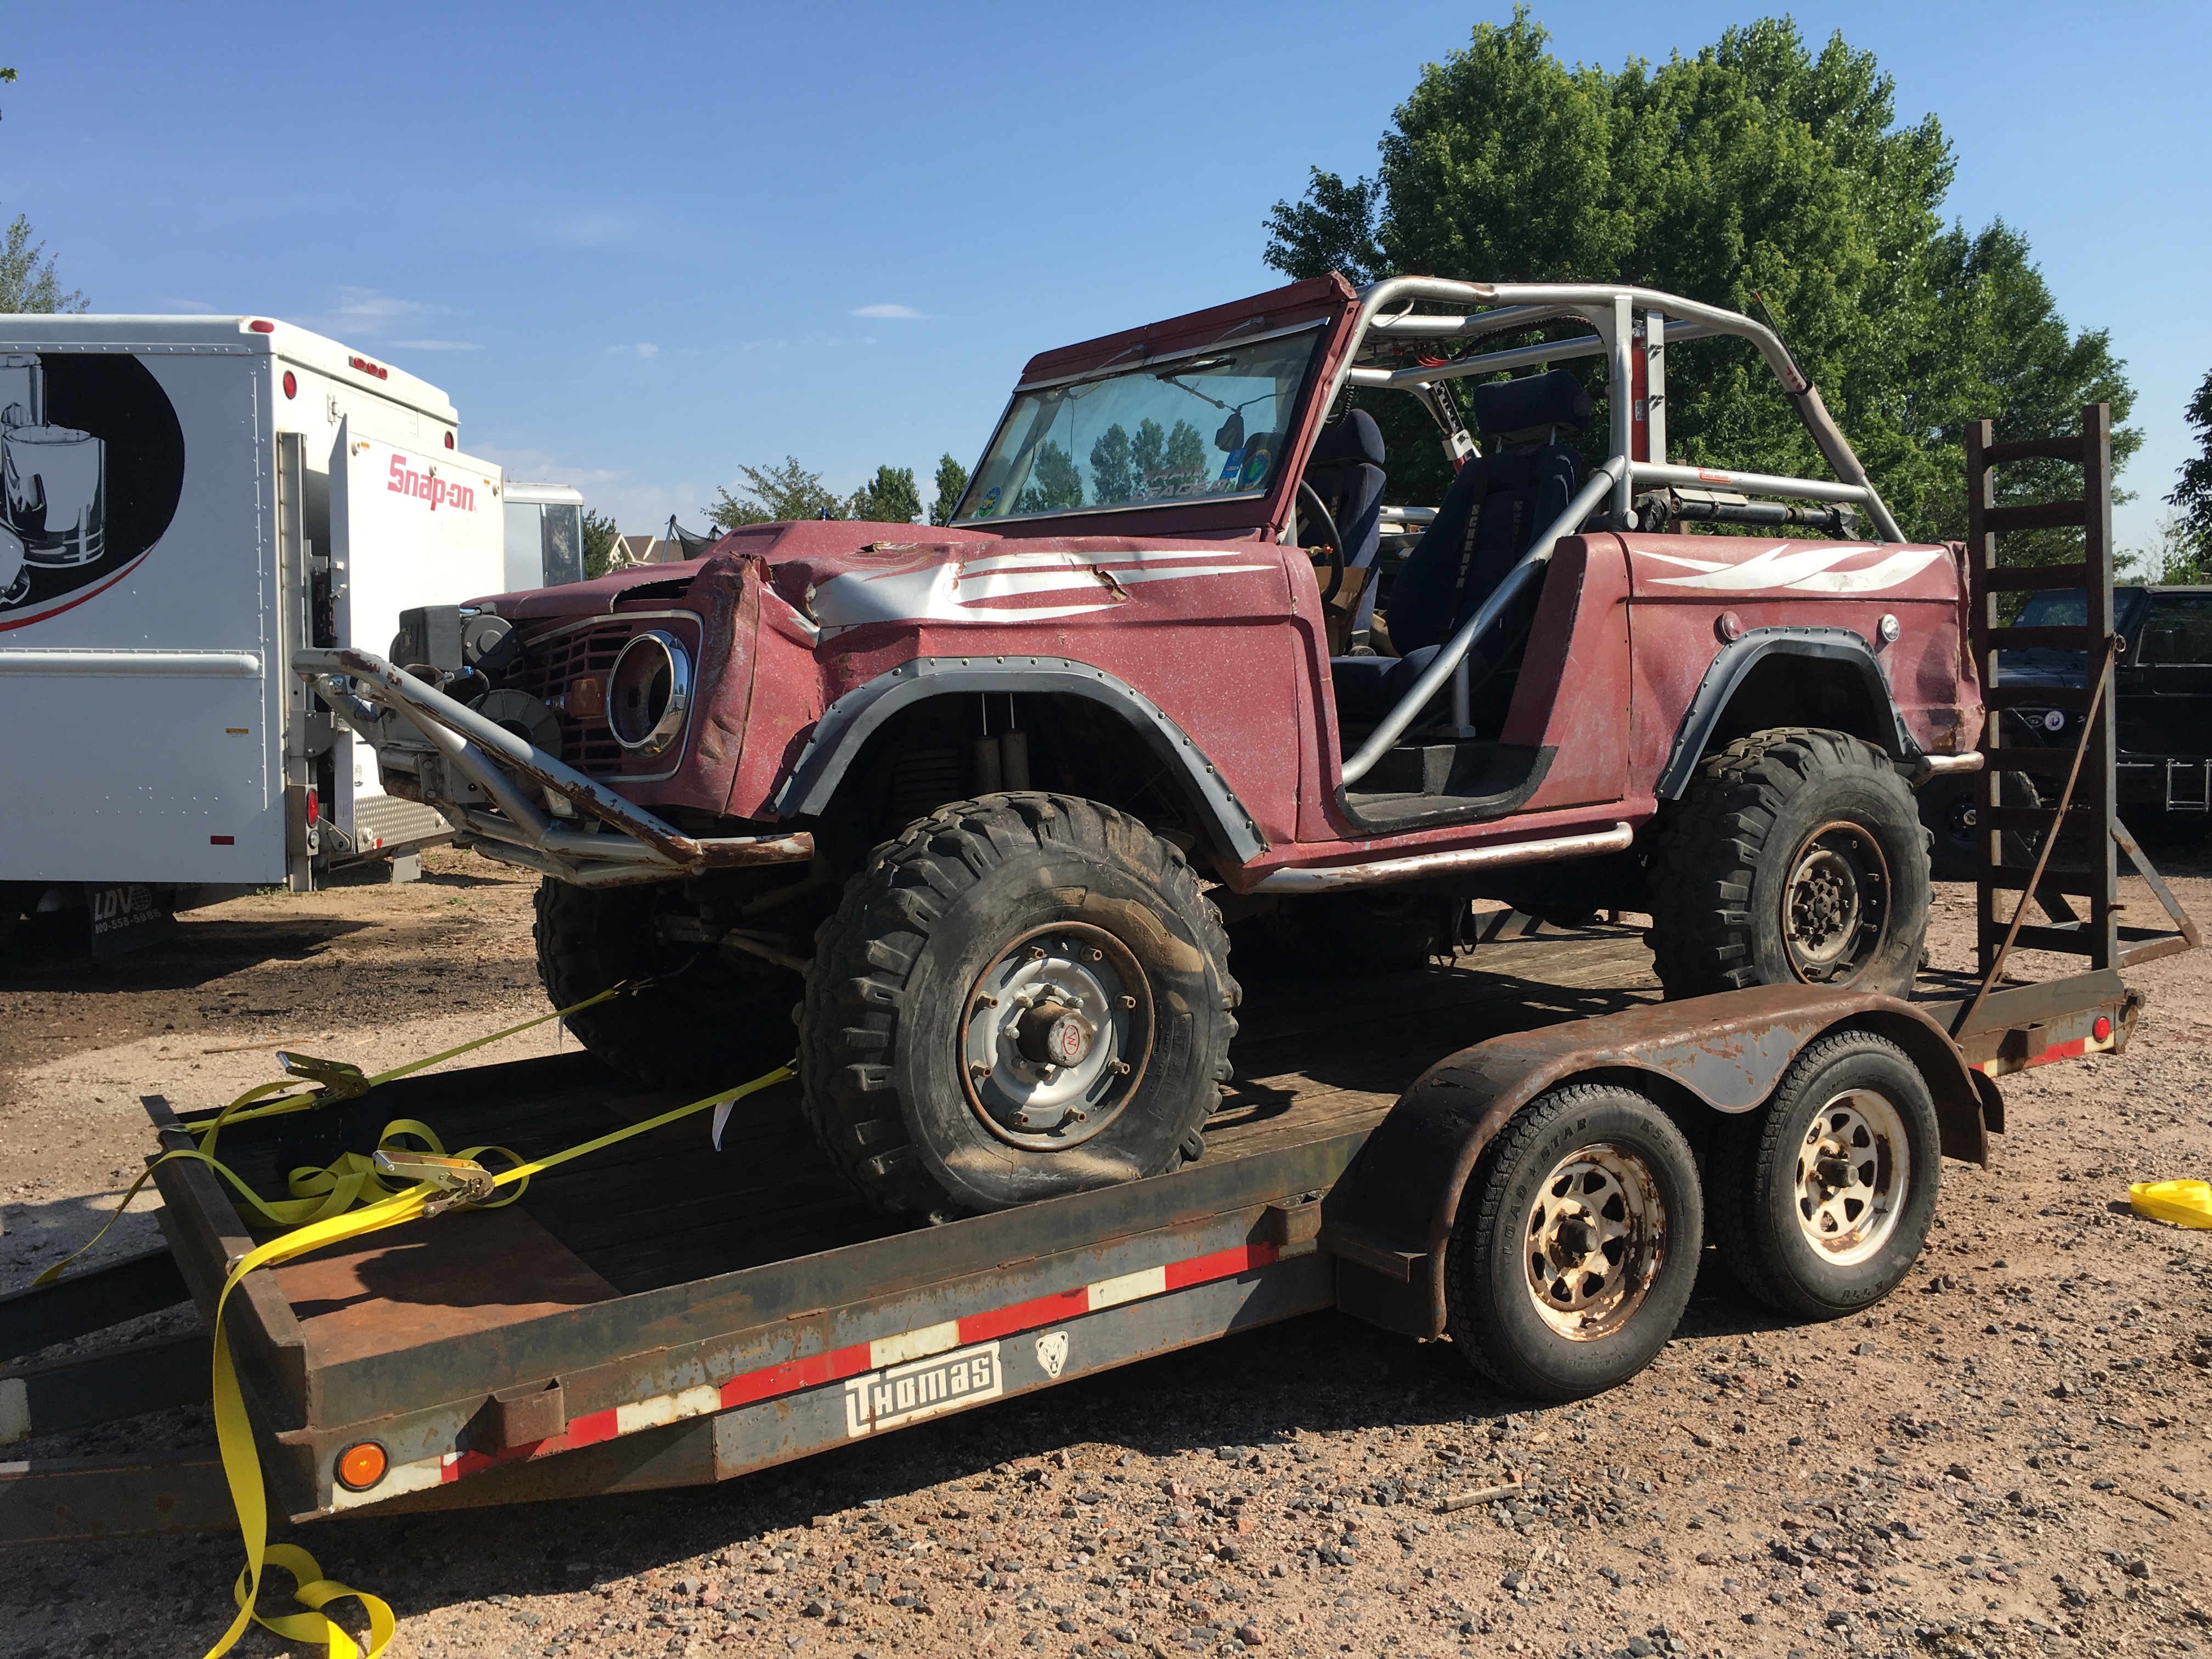
How it was when we picked it up.
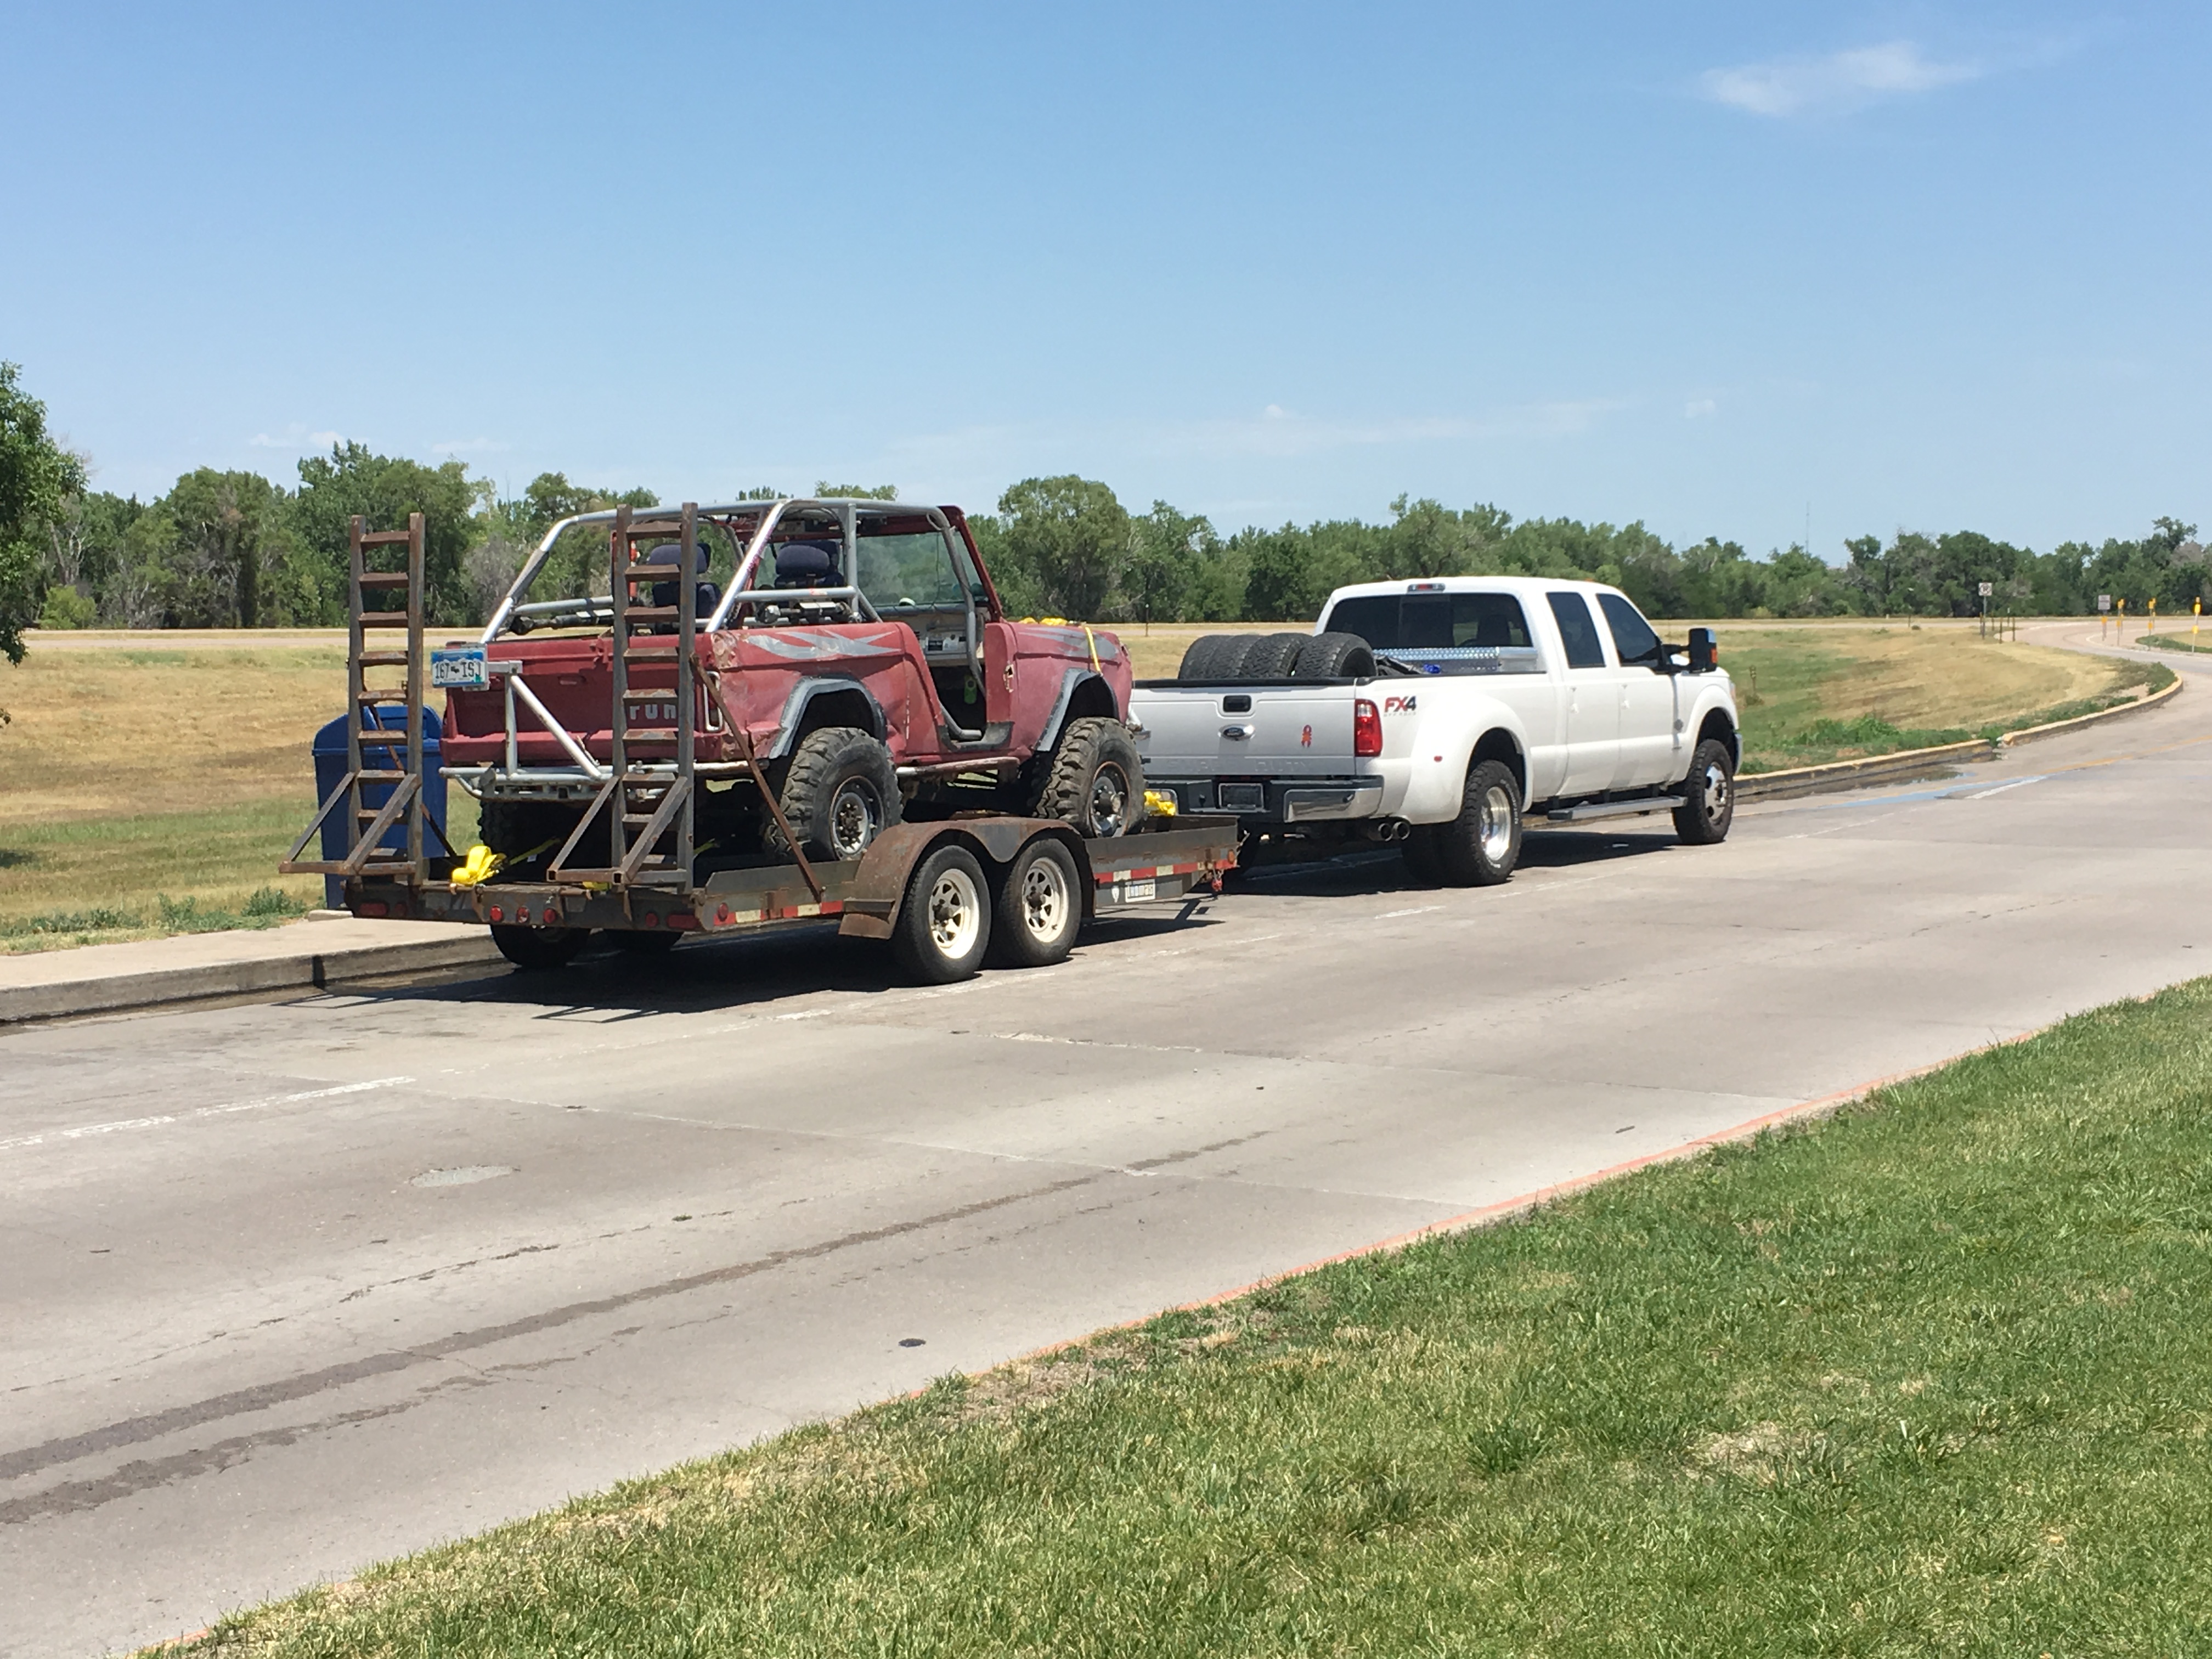
On the way home.. Nice setup, even better friend who let me borrow it Somewhere in Nebraska.
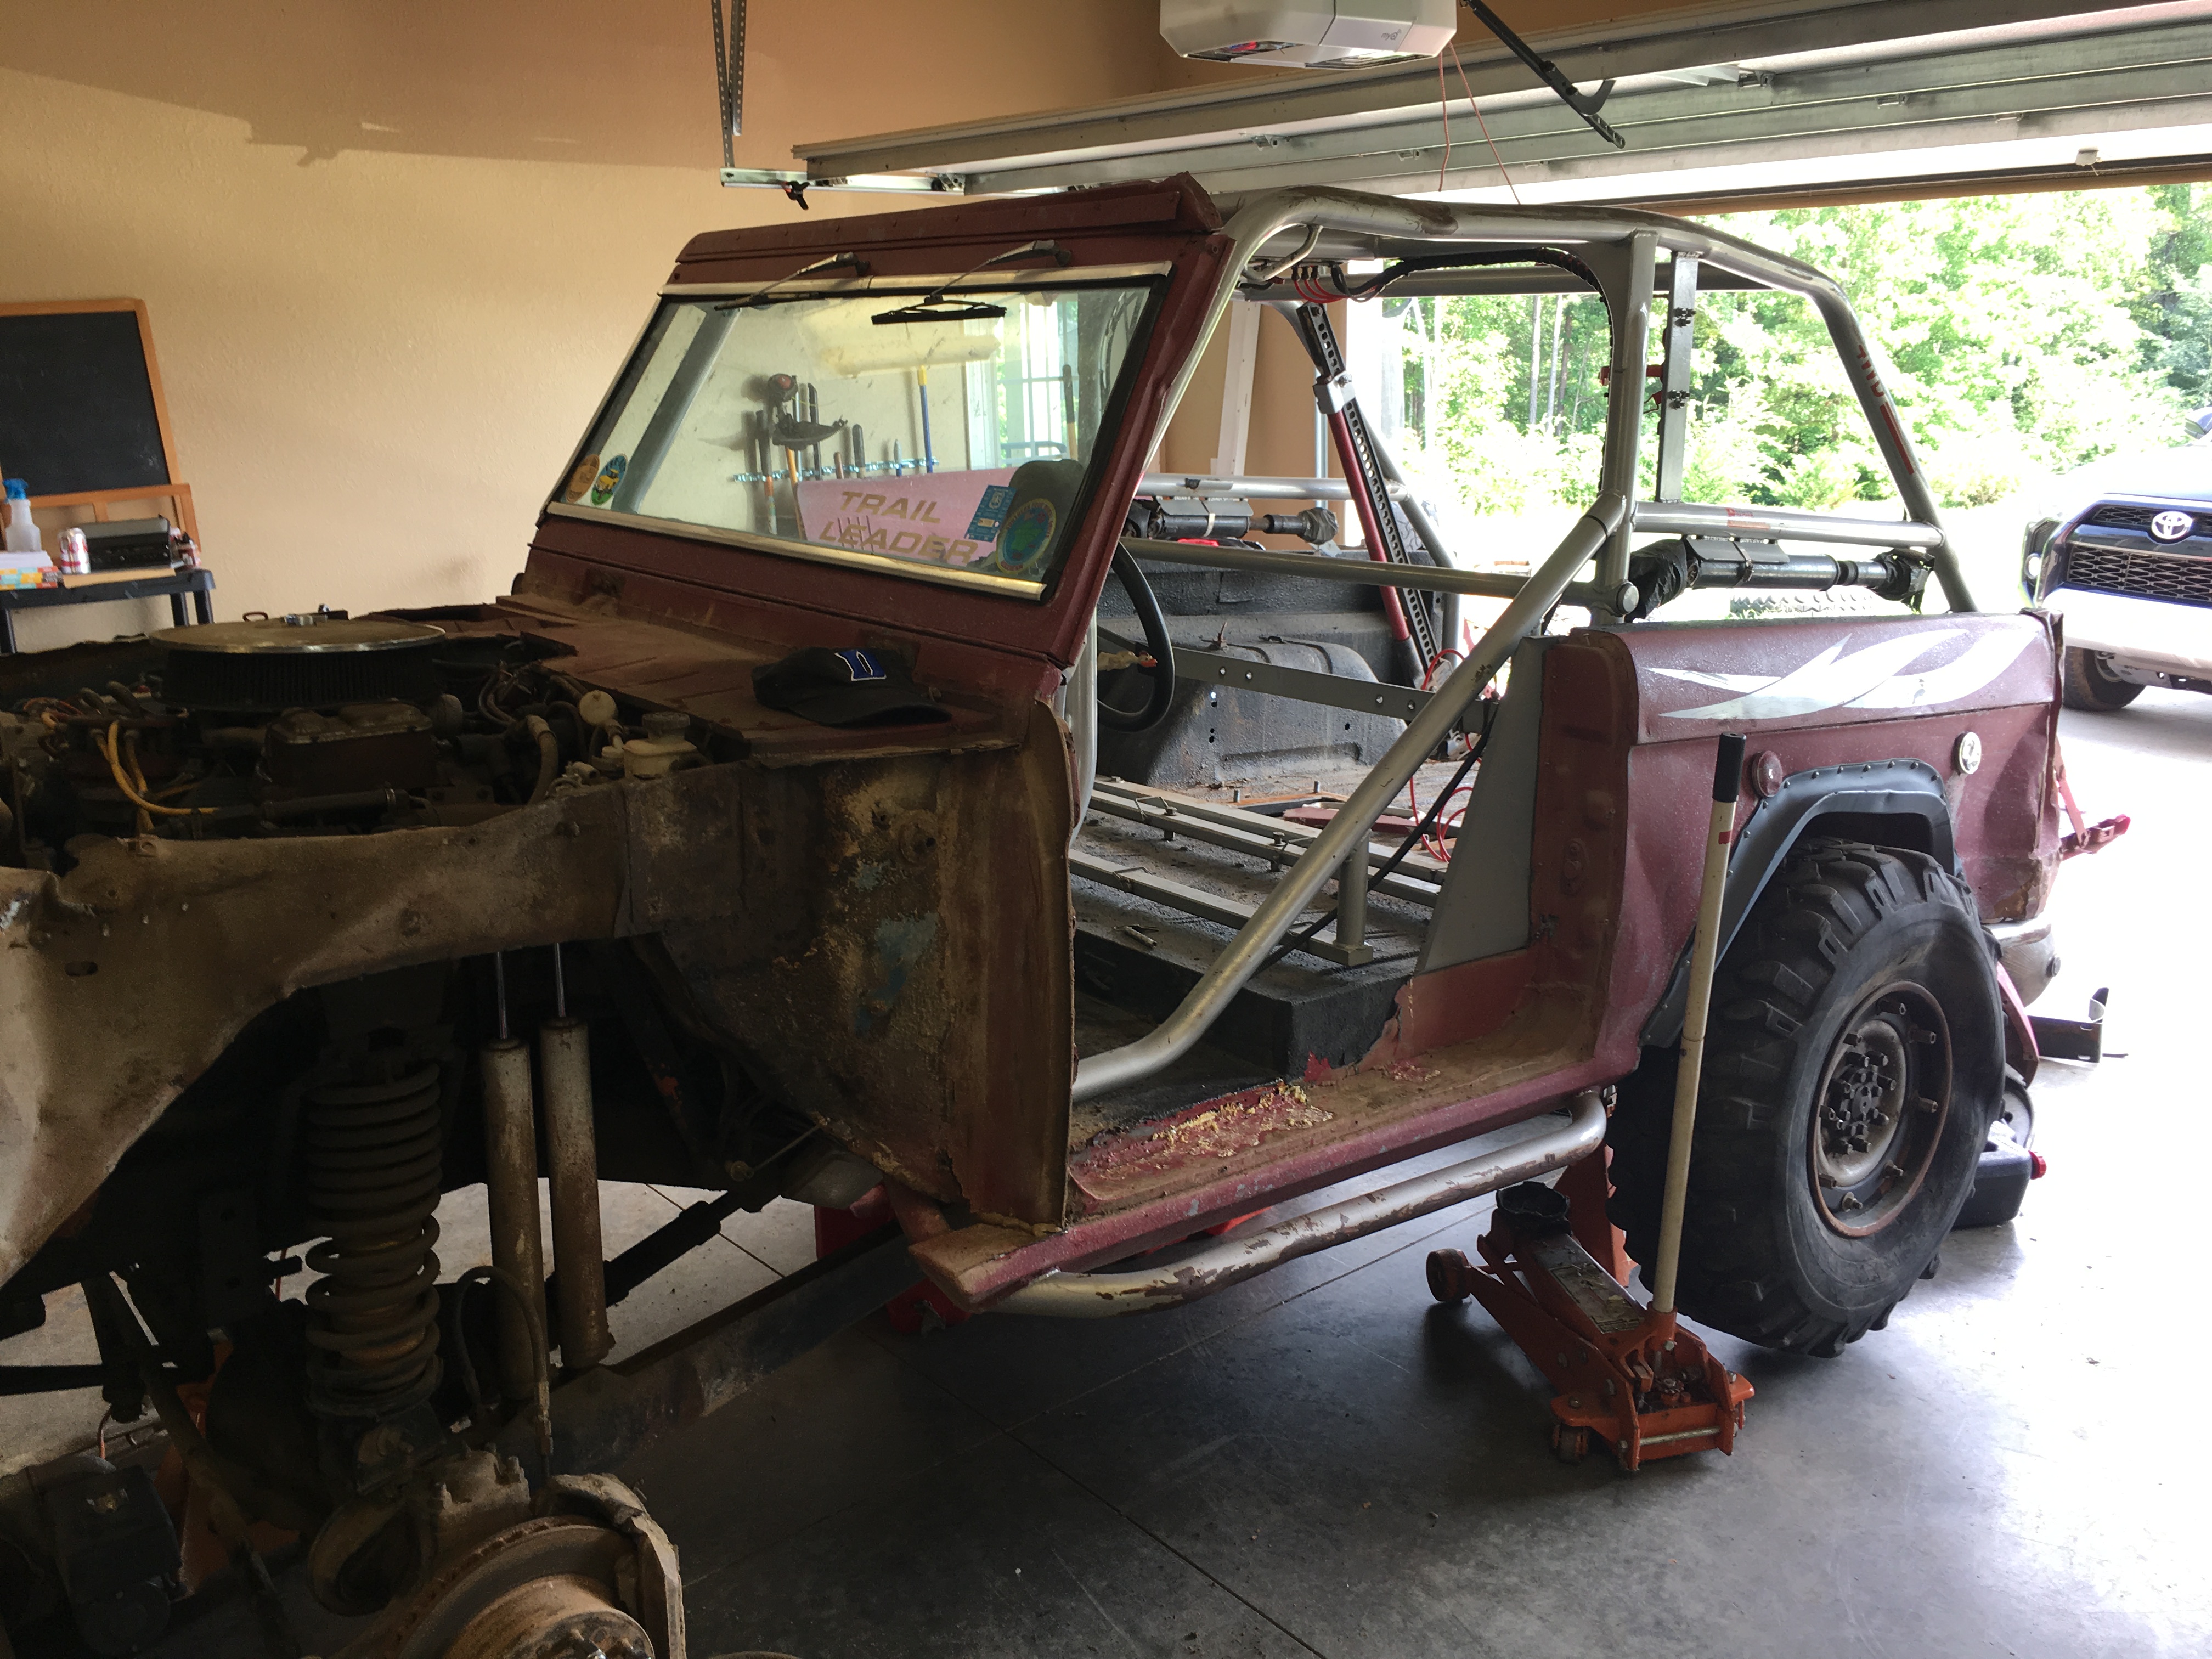
How it's sitting right now.
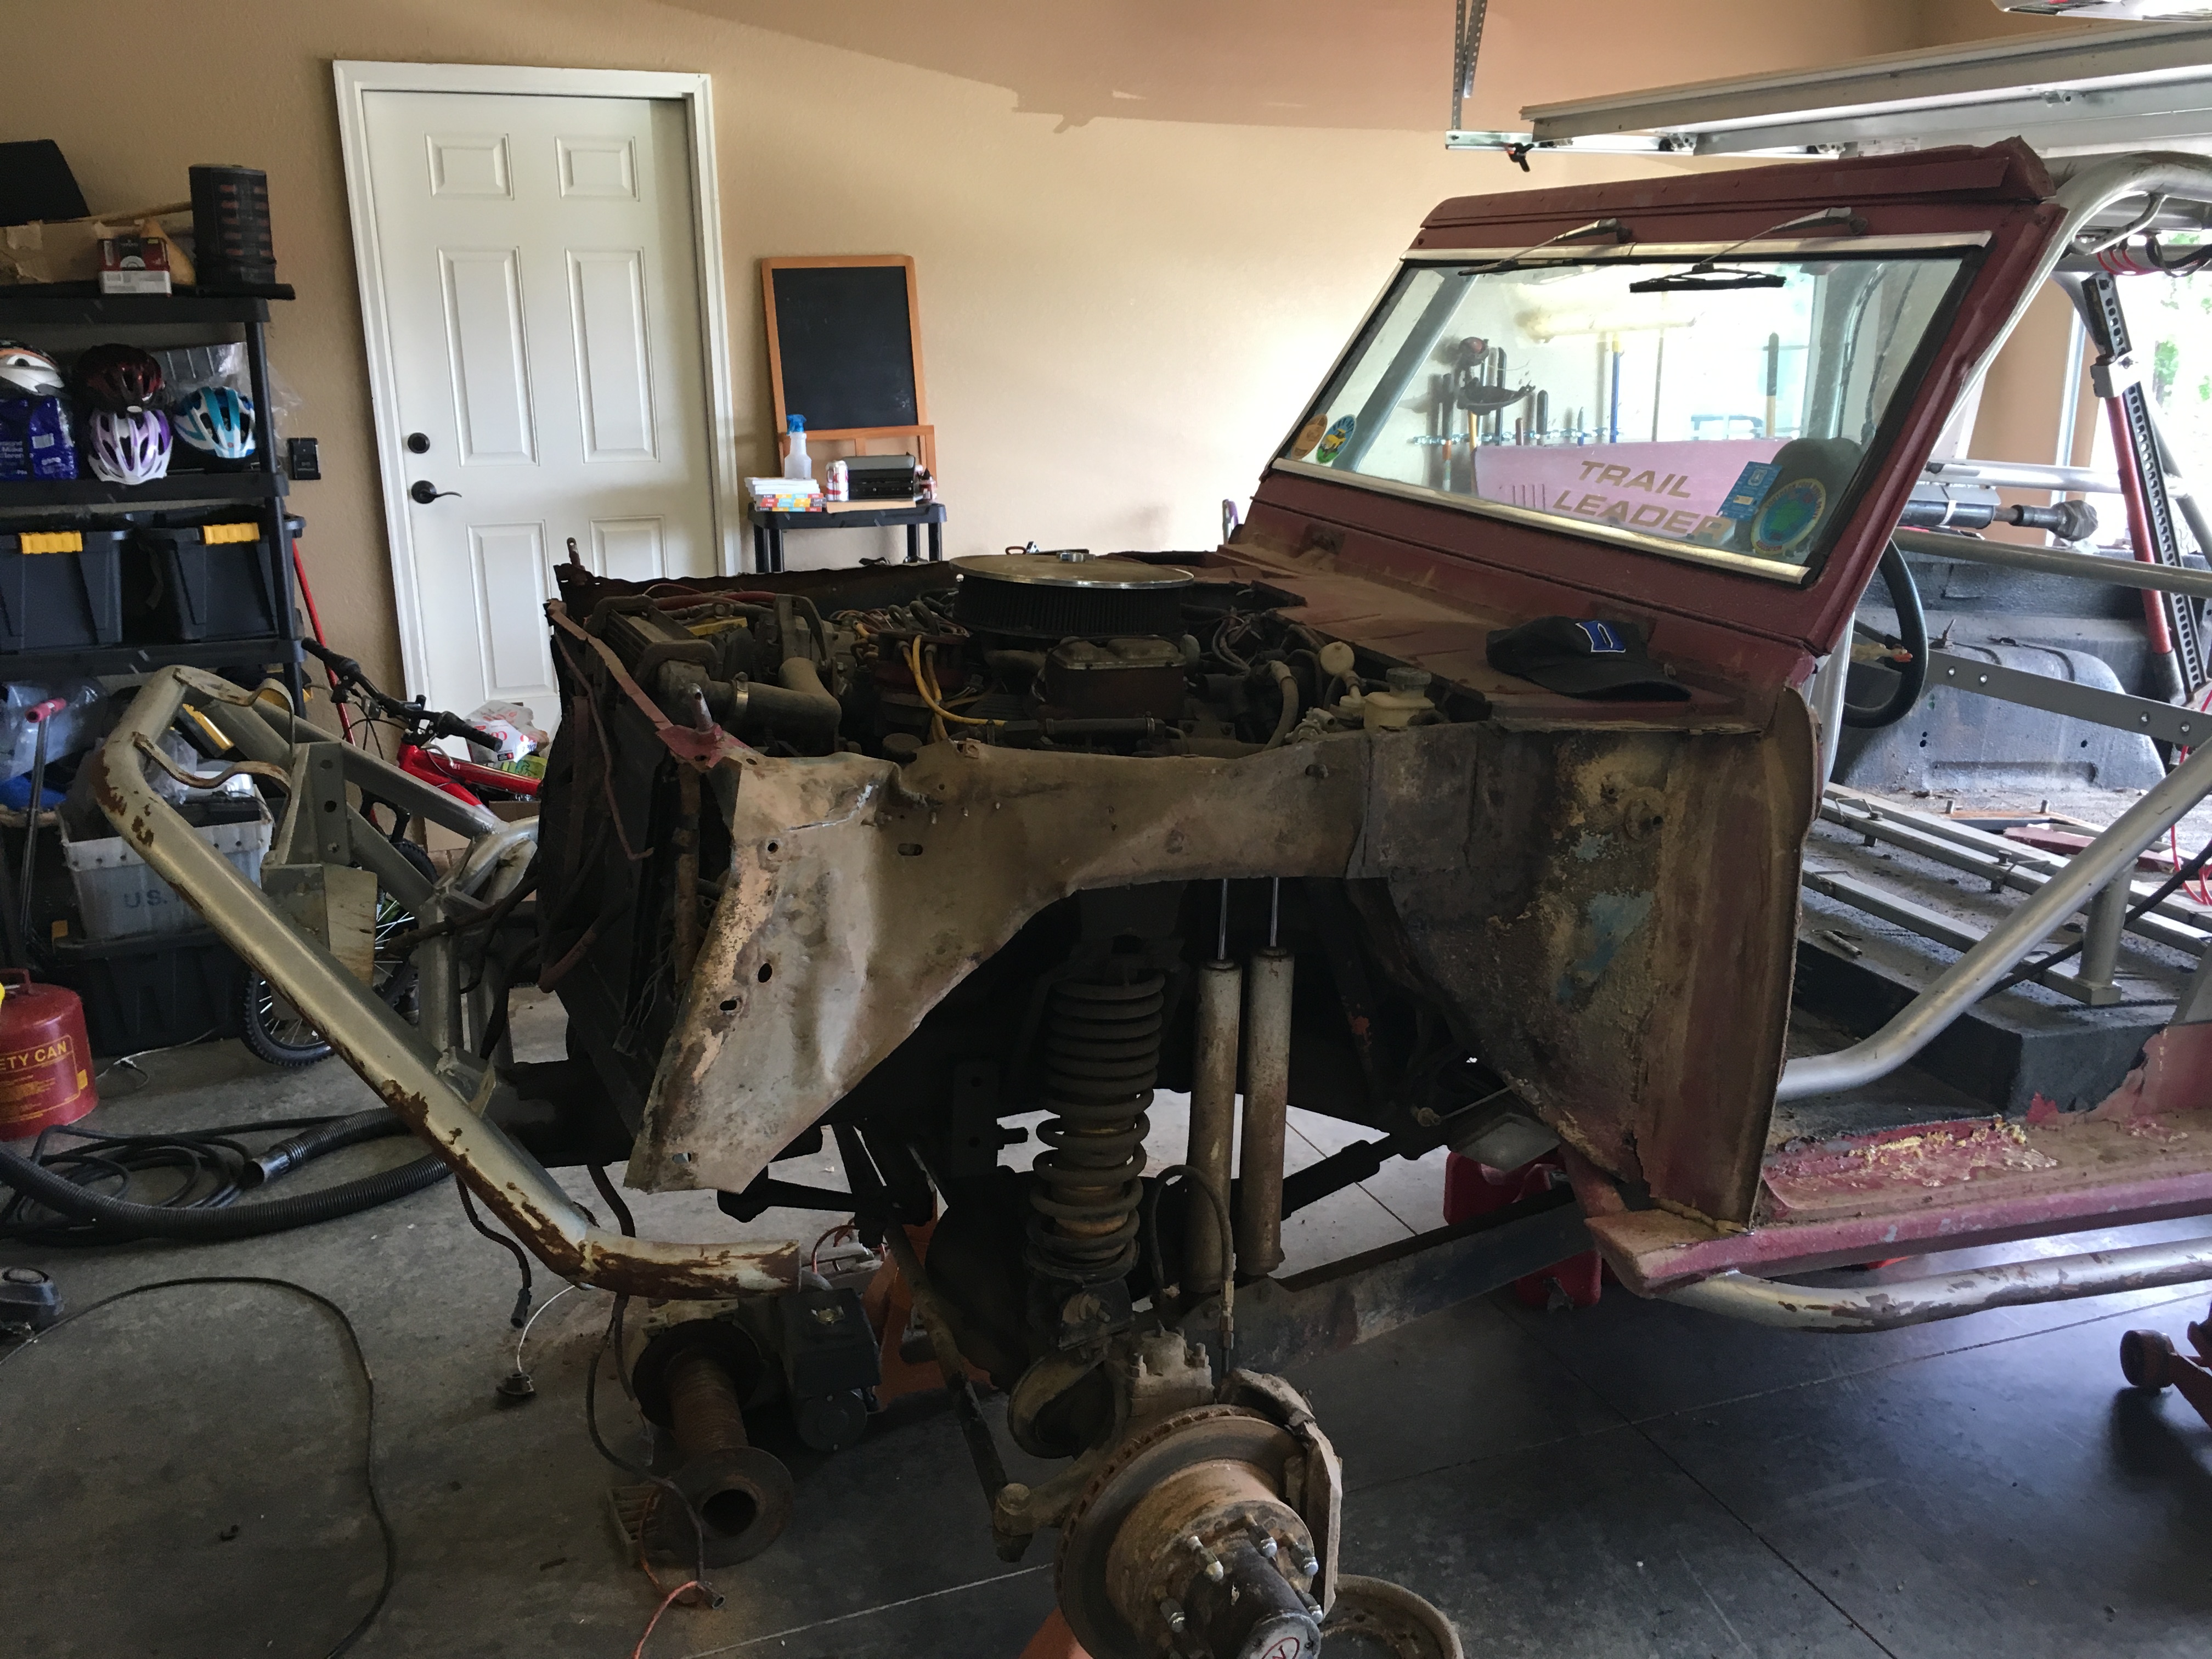
Seats and tank removed for access to clean everything up.

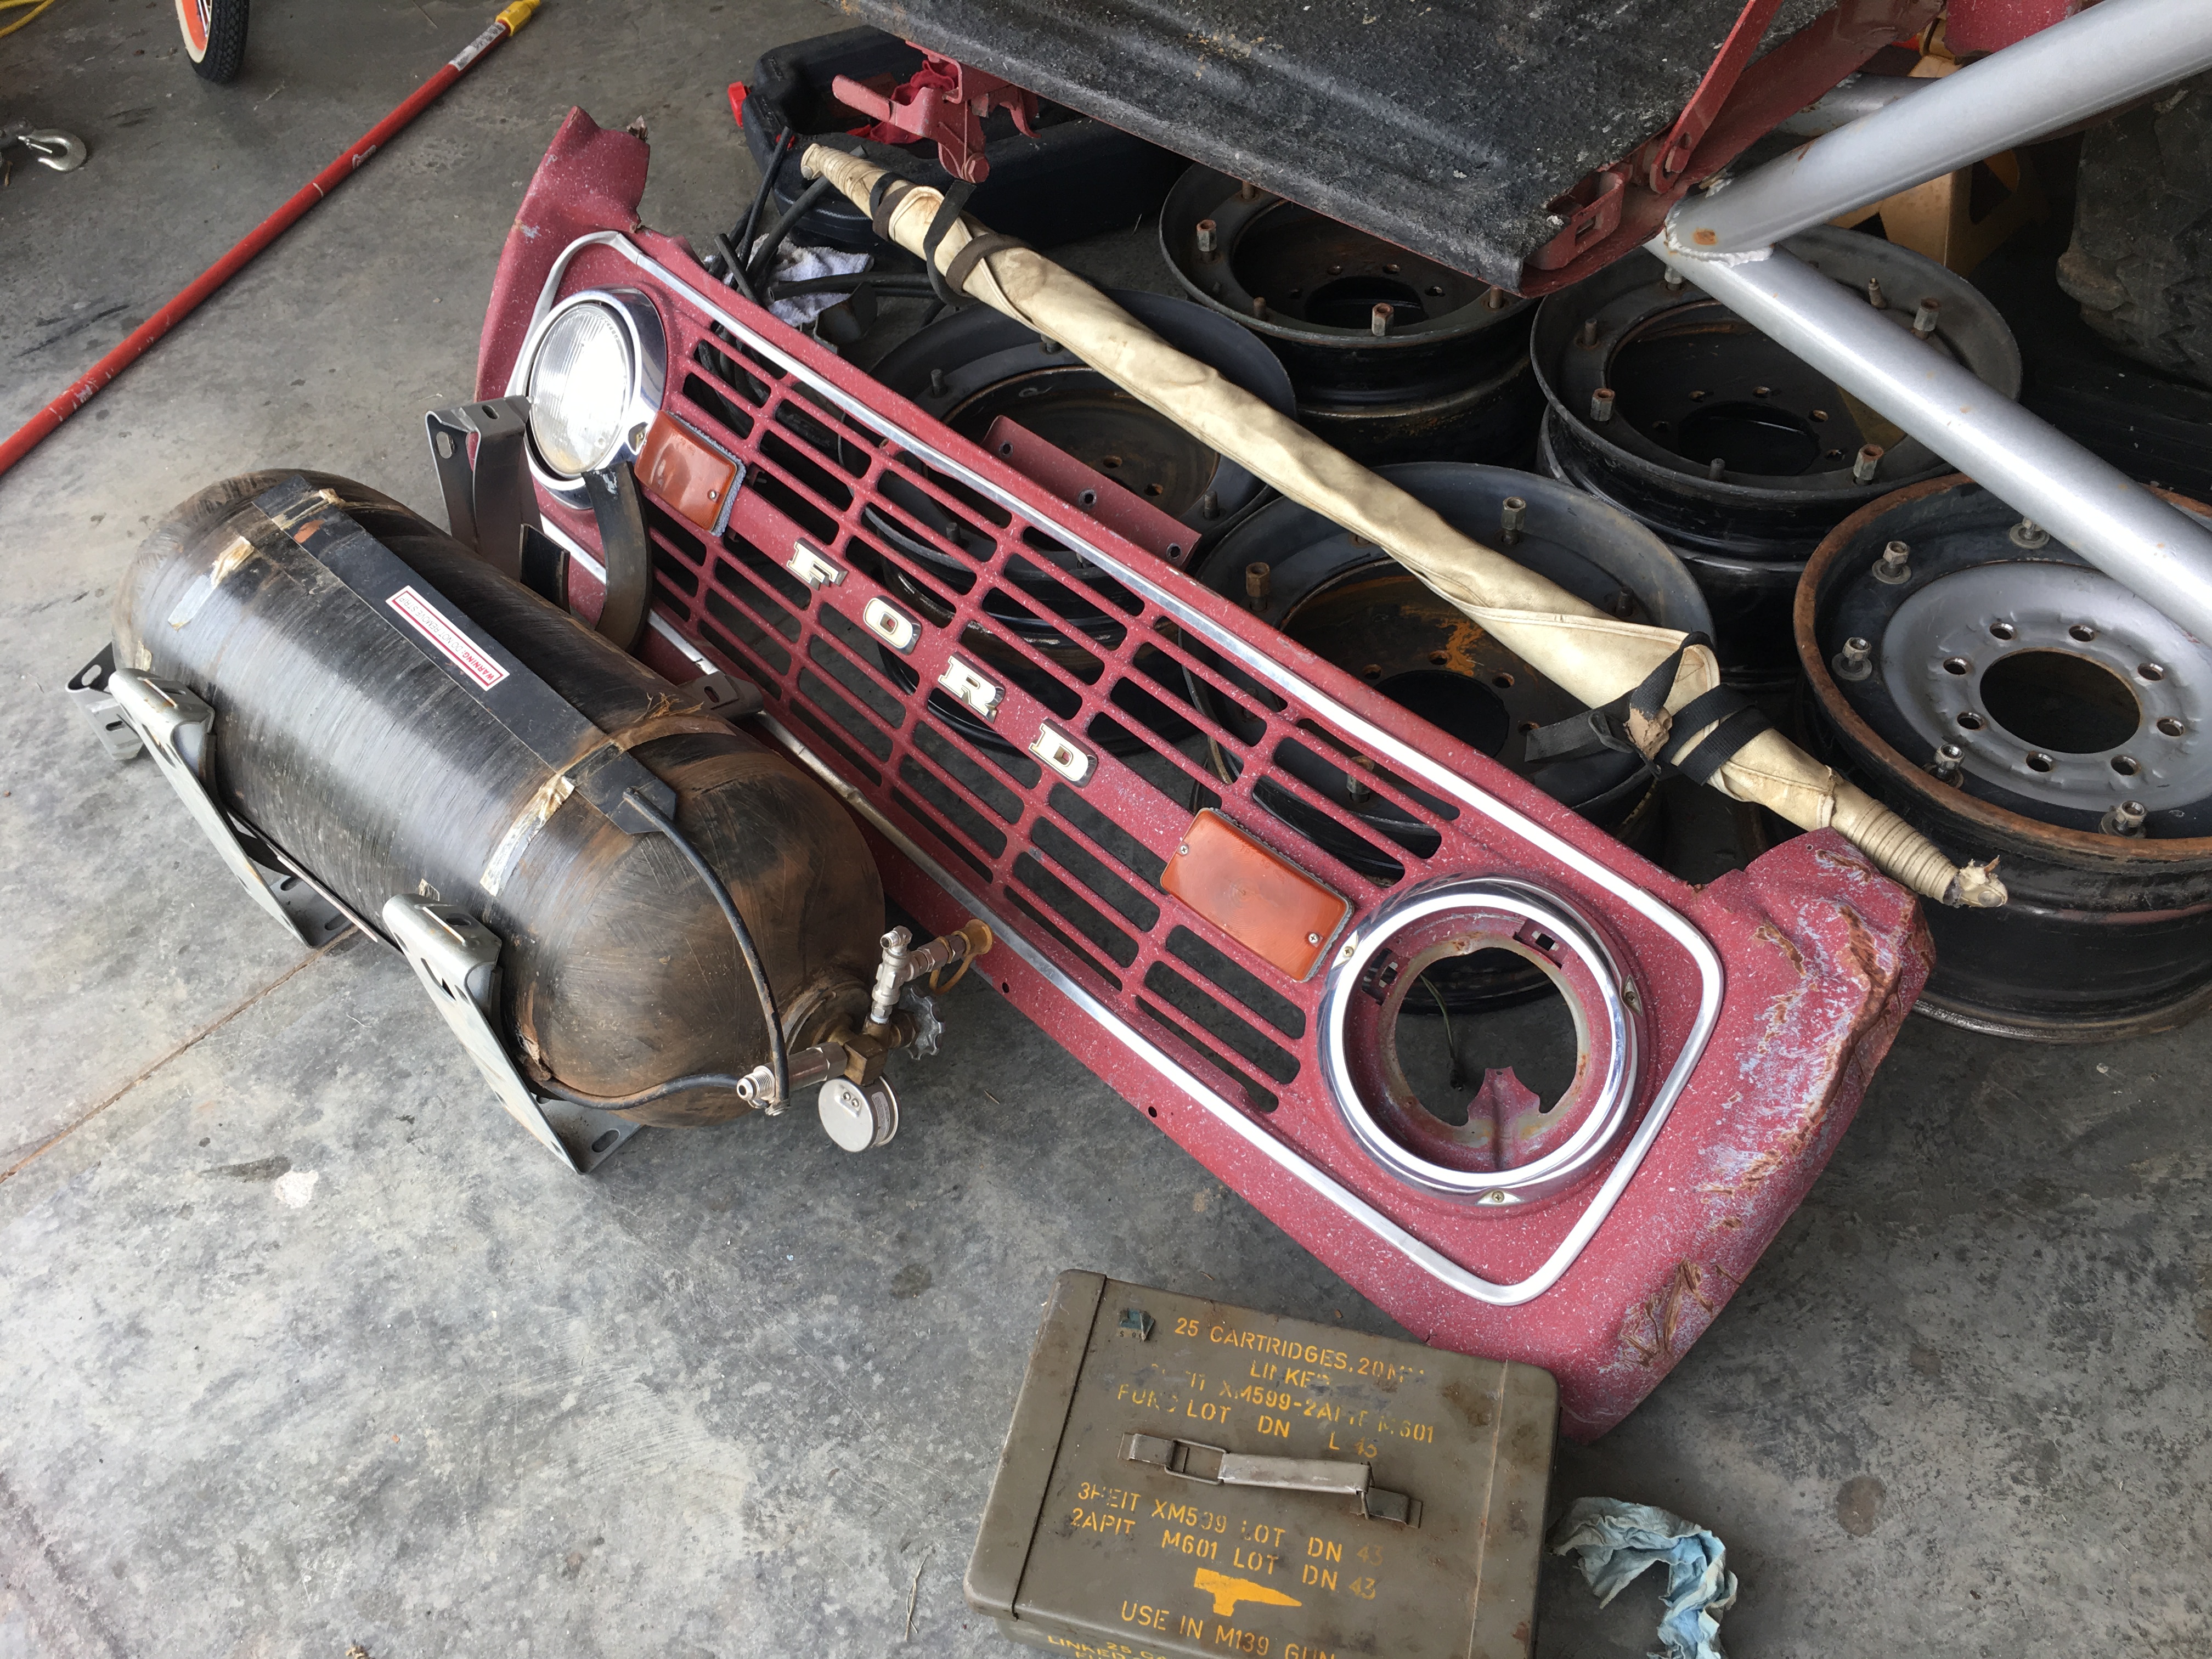
Some of the parts we've yanked. Believe me, the grille is way, way worse than it looks in this photo
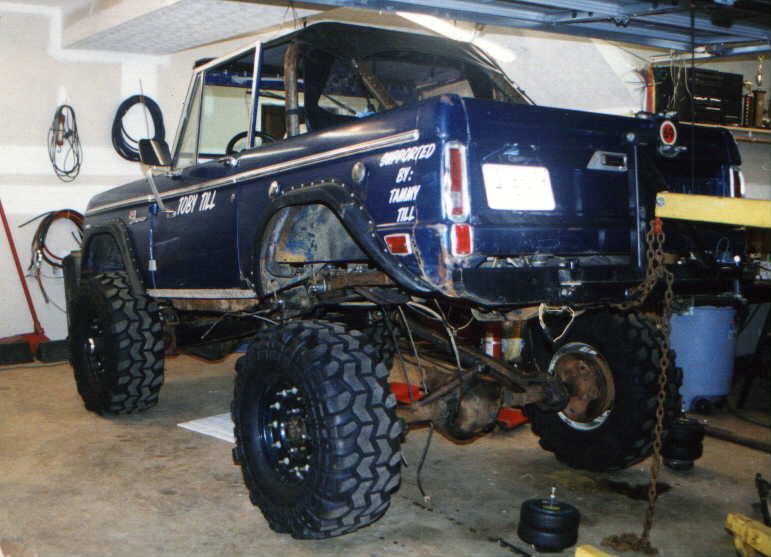
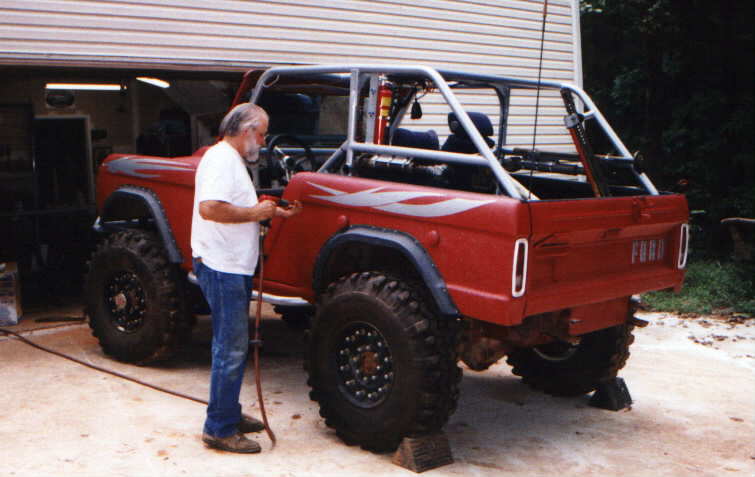
Here's how it looked when Toby finished the second build years ago.. Found these on his old website along with a TON of details on the custom work. Priceless info about the hydroboost, hydraulic clutch, and suspension setup. I'm glad the internet never forgets
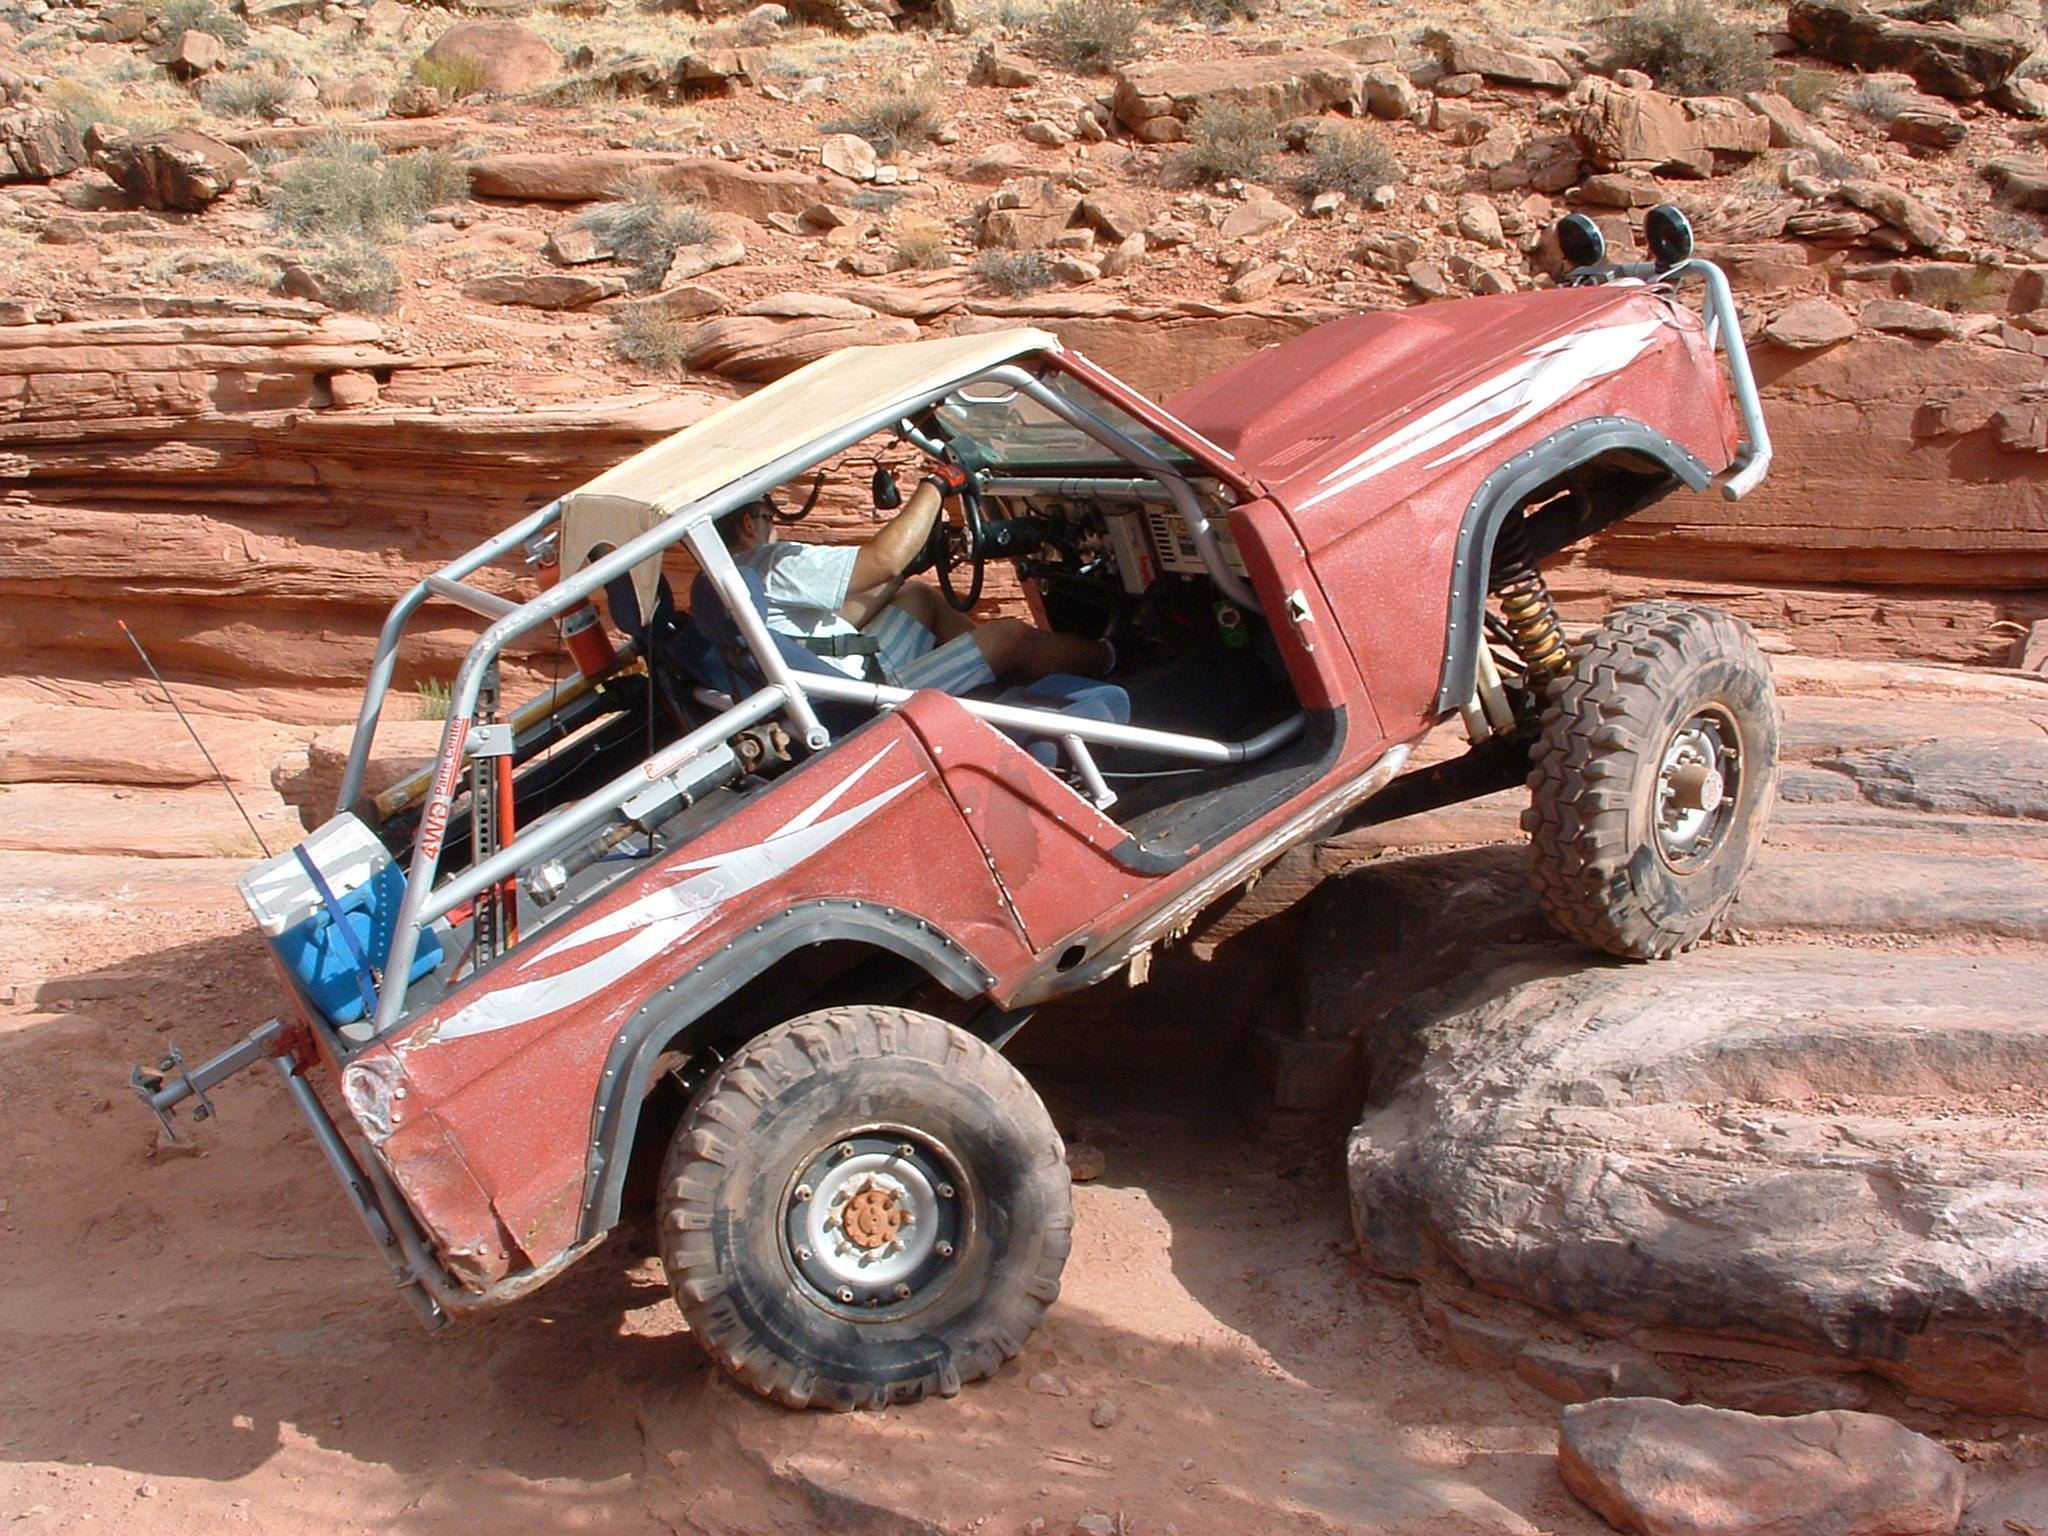
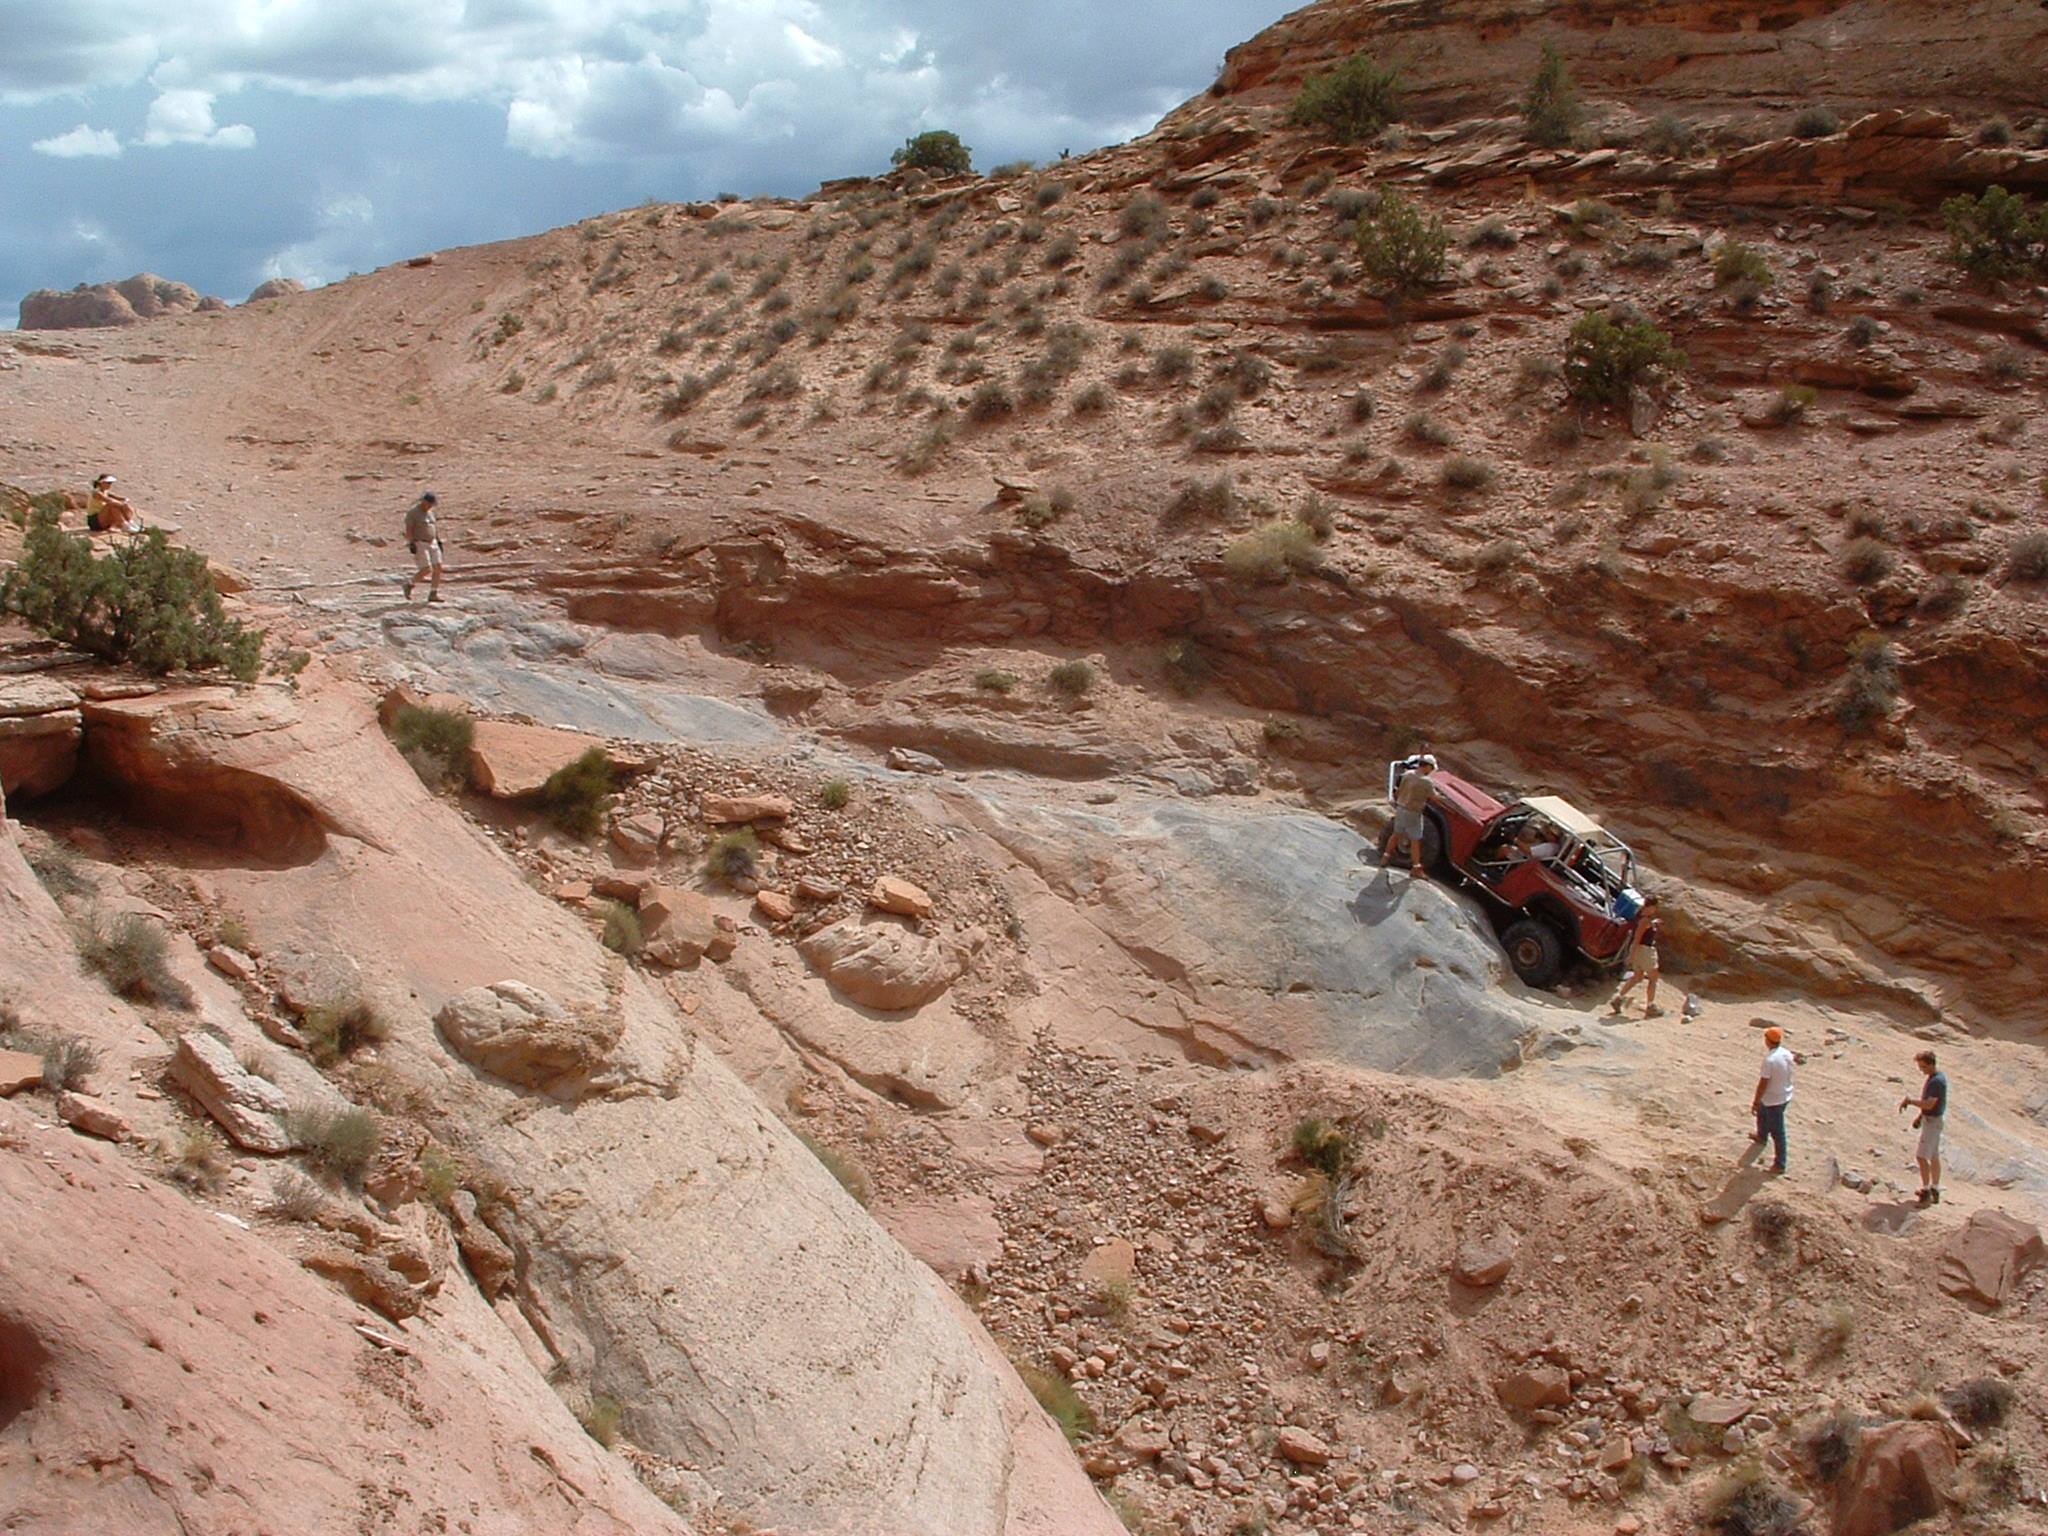
And here are a few from the last ride it ever took before he parked it.. Moab with the GBR.
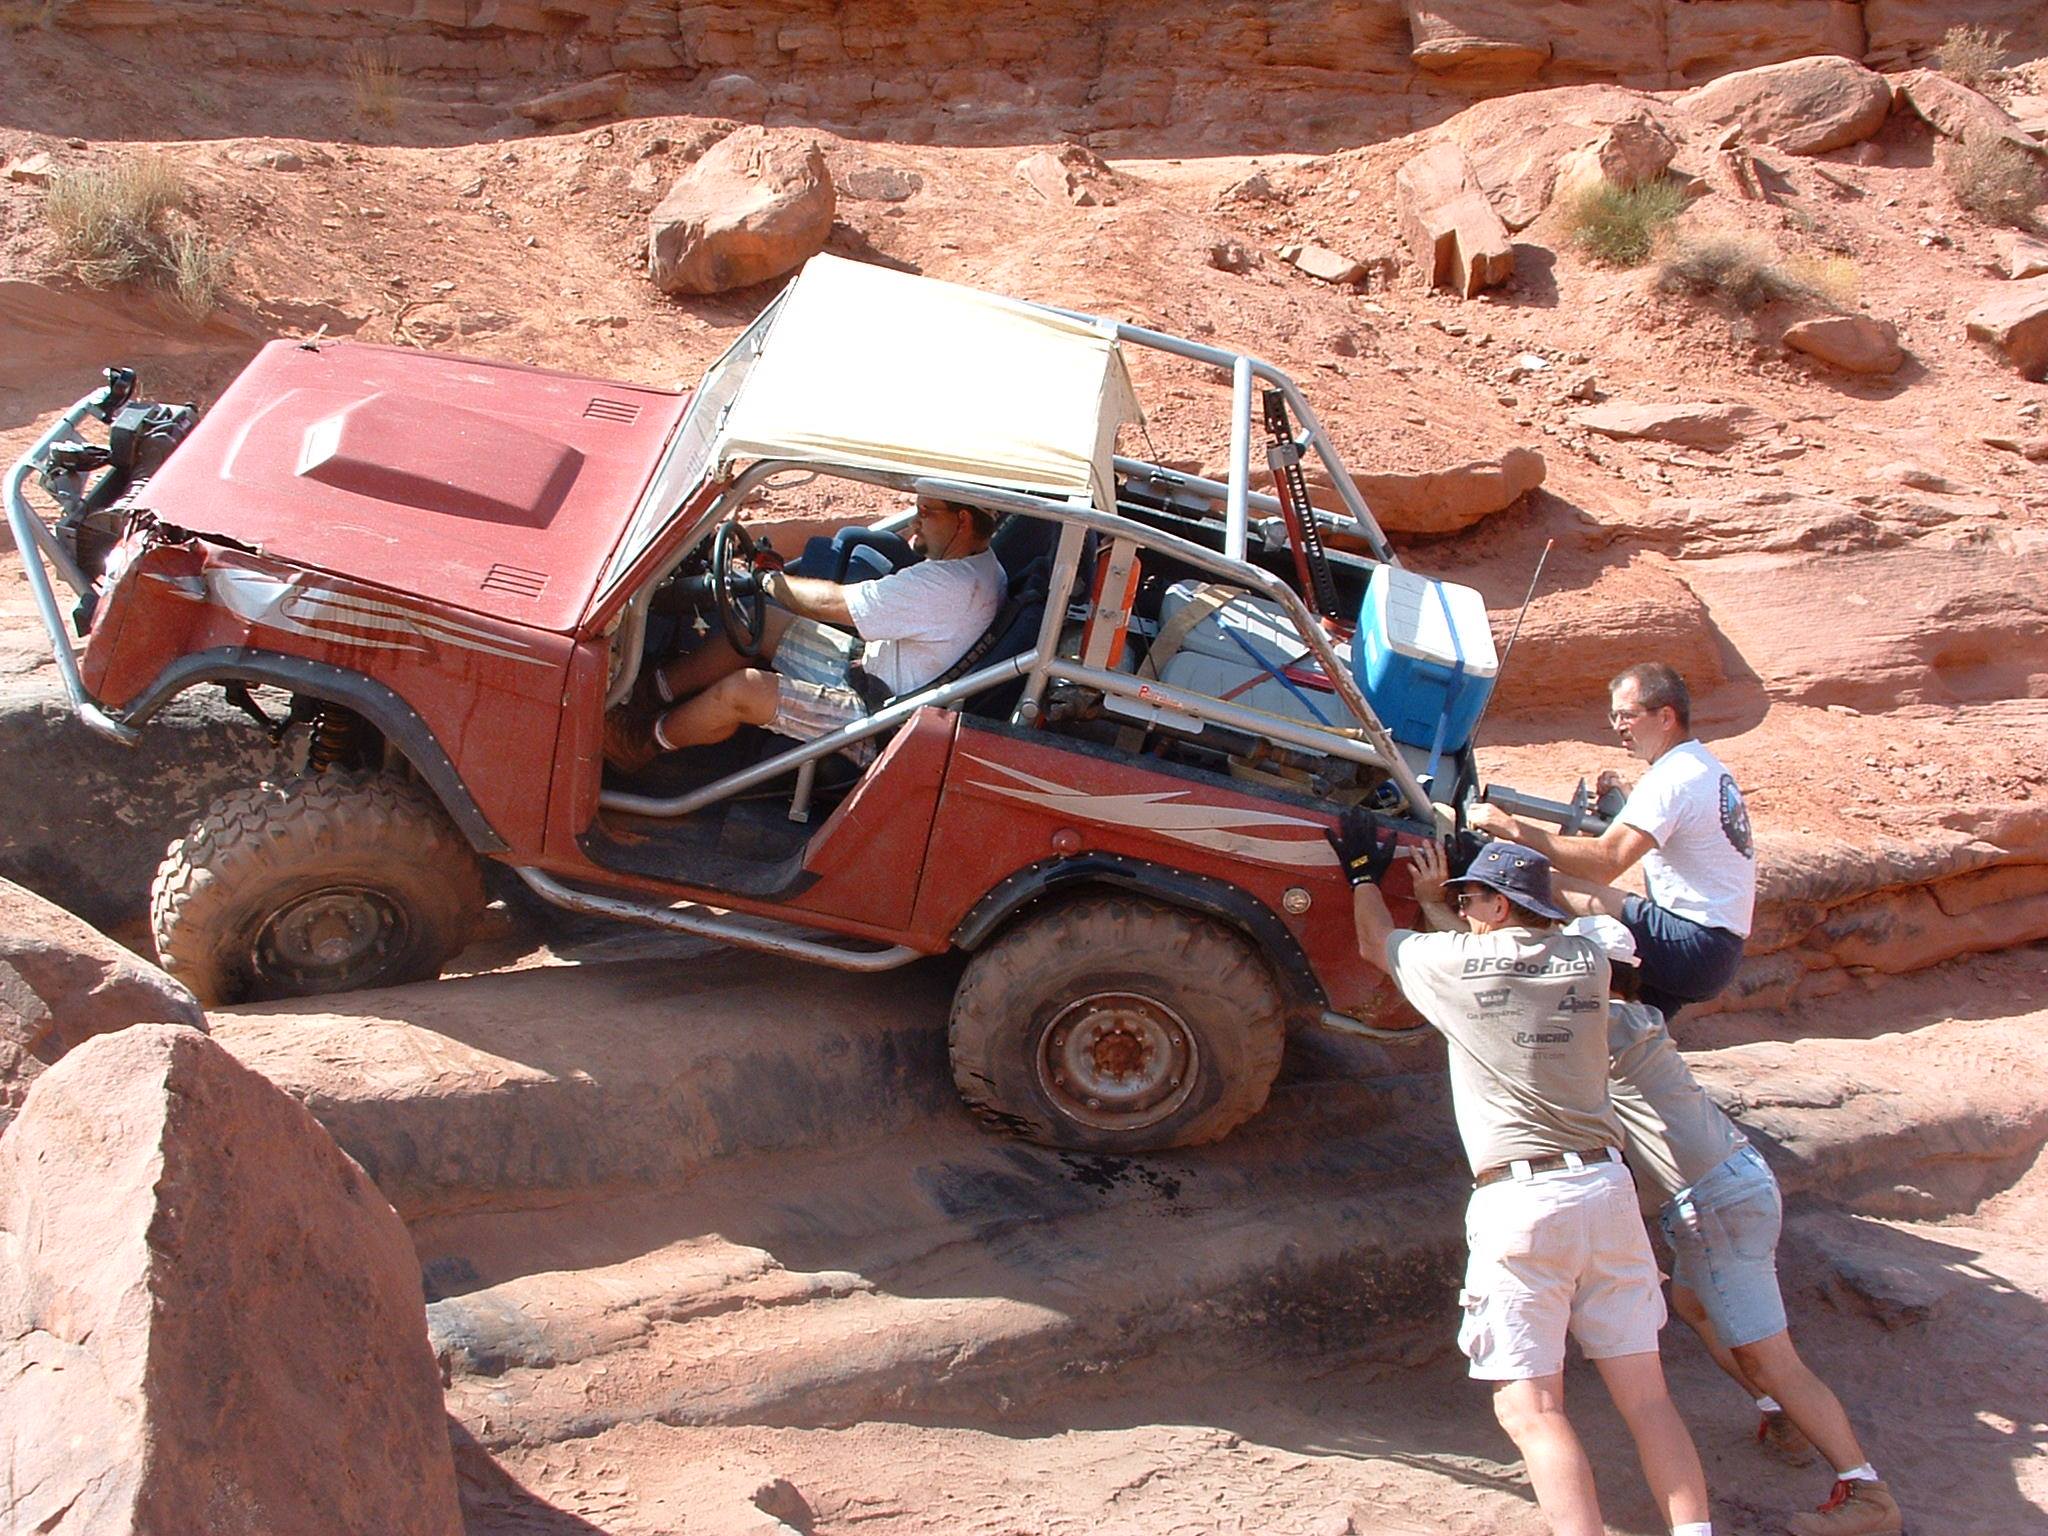
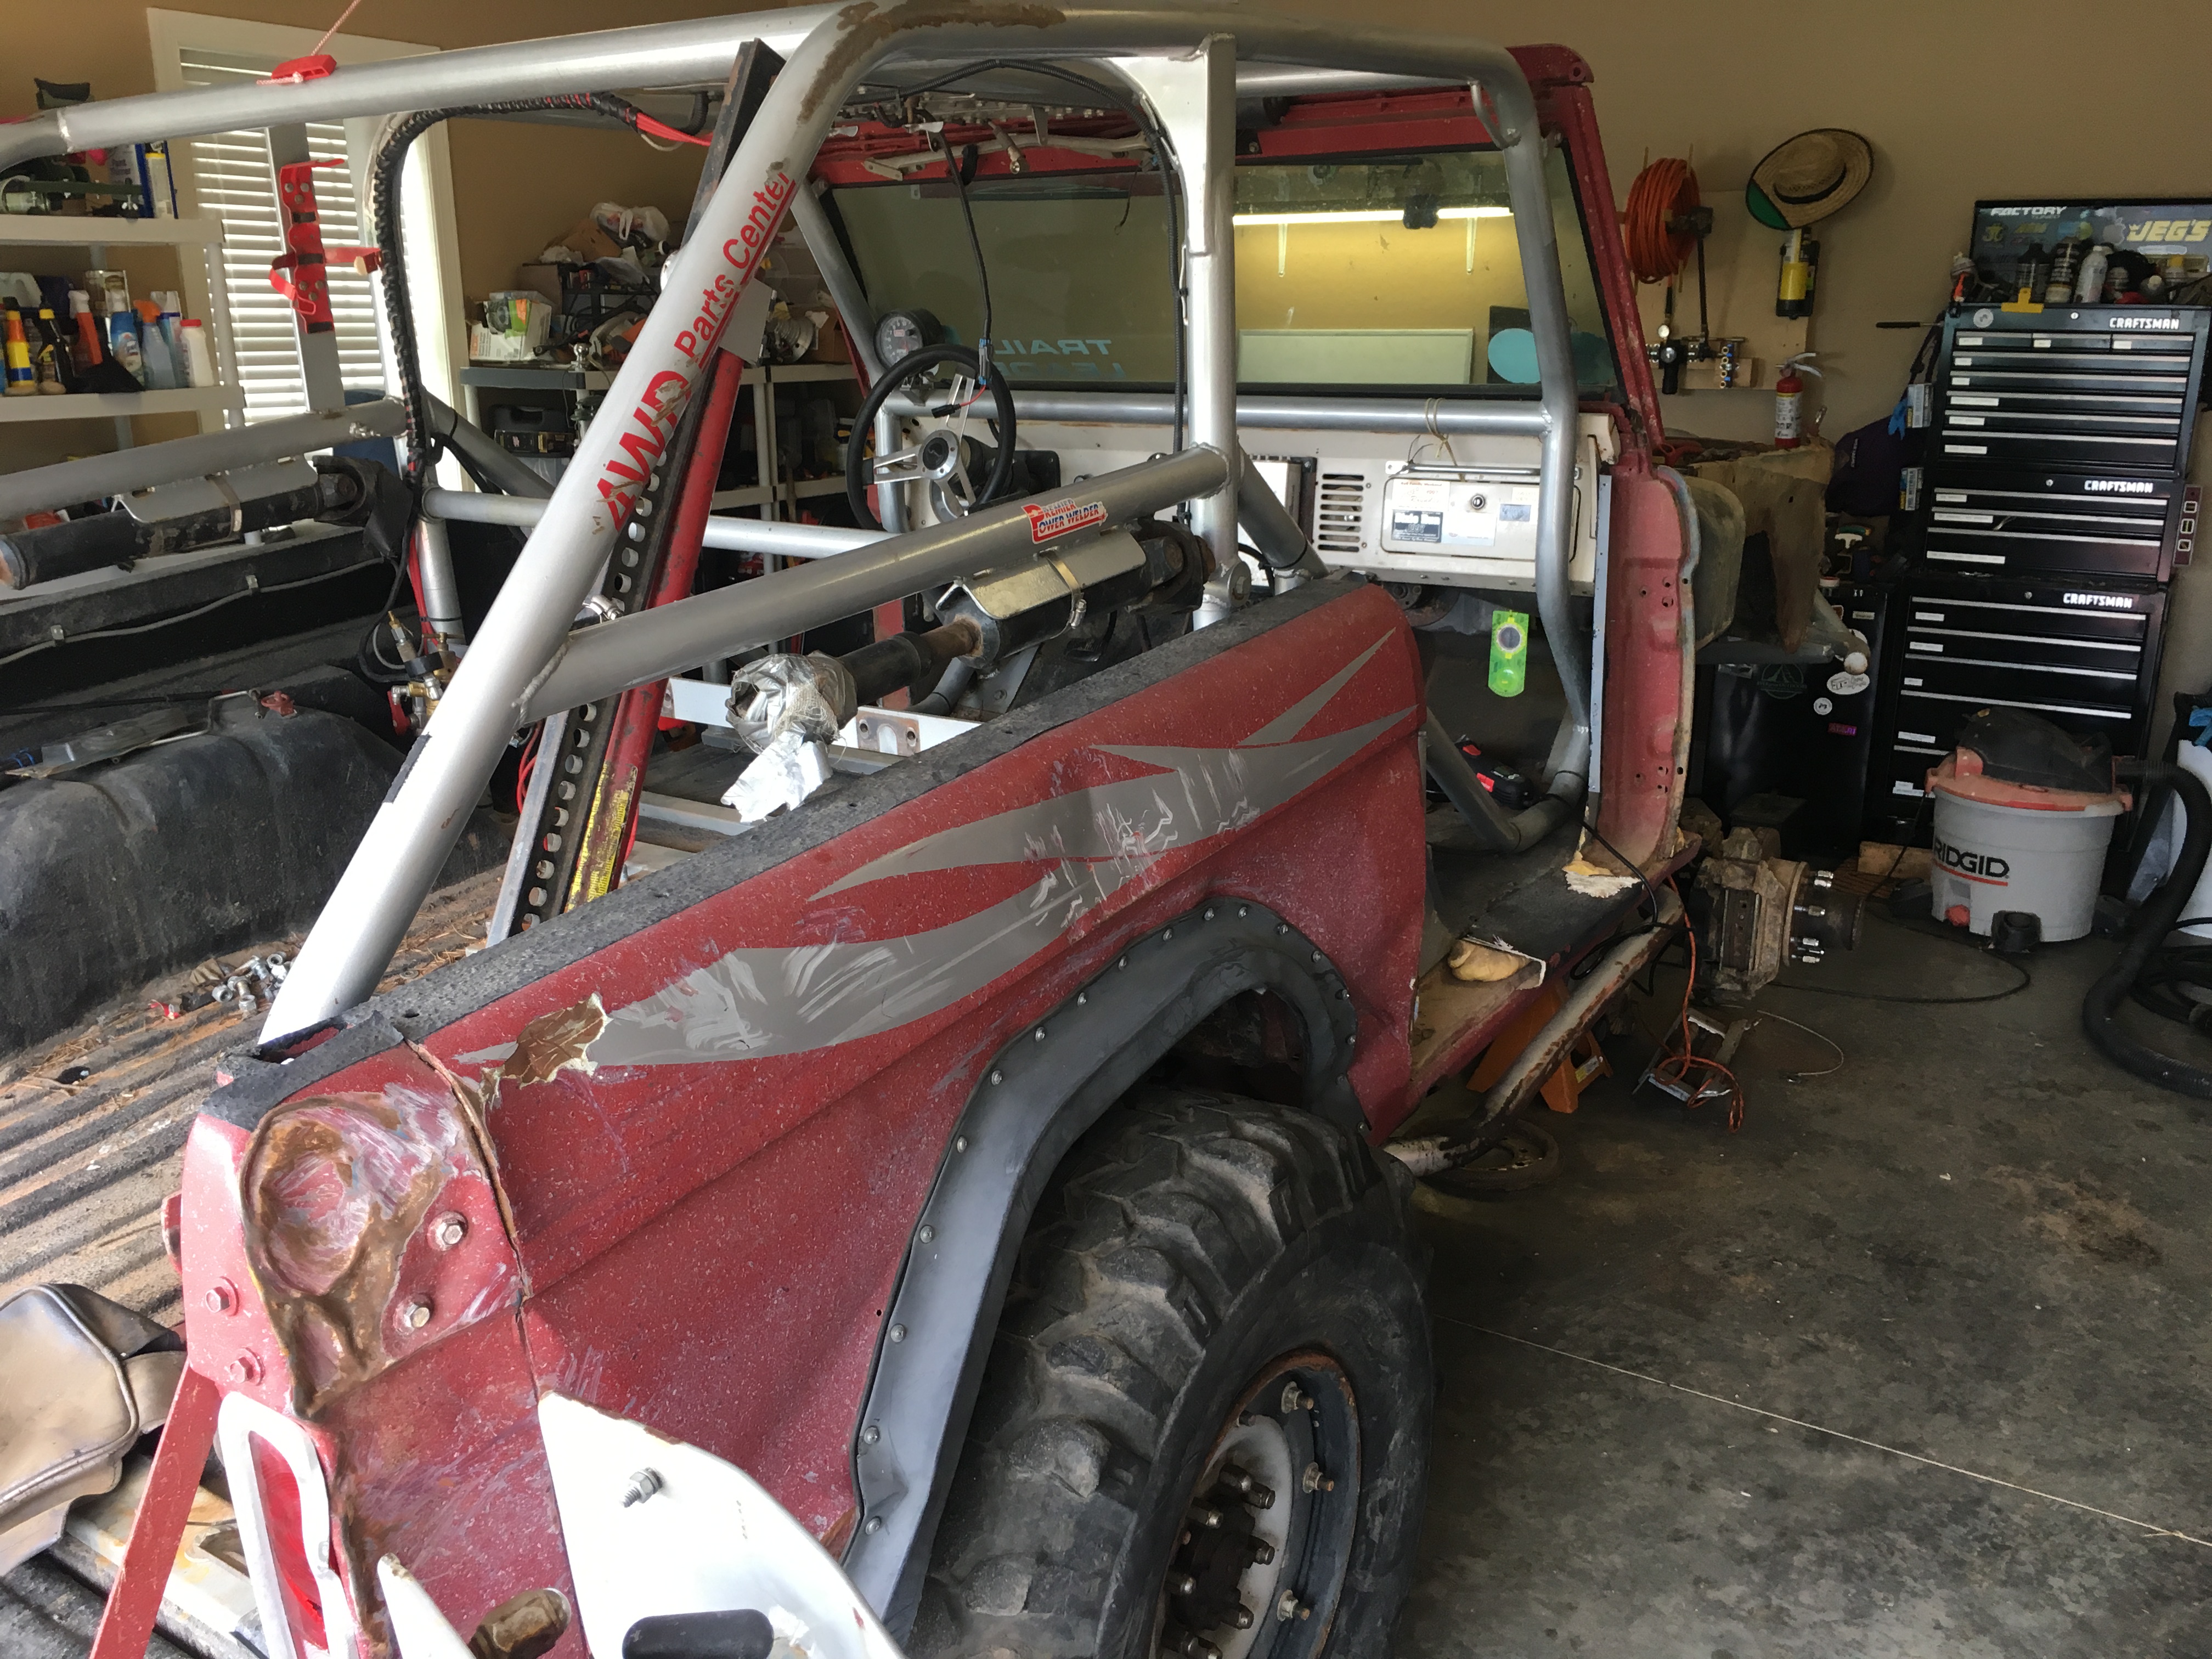
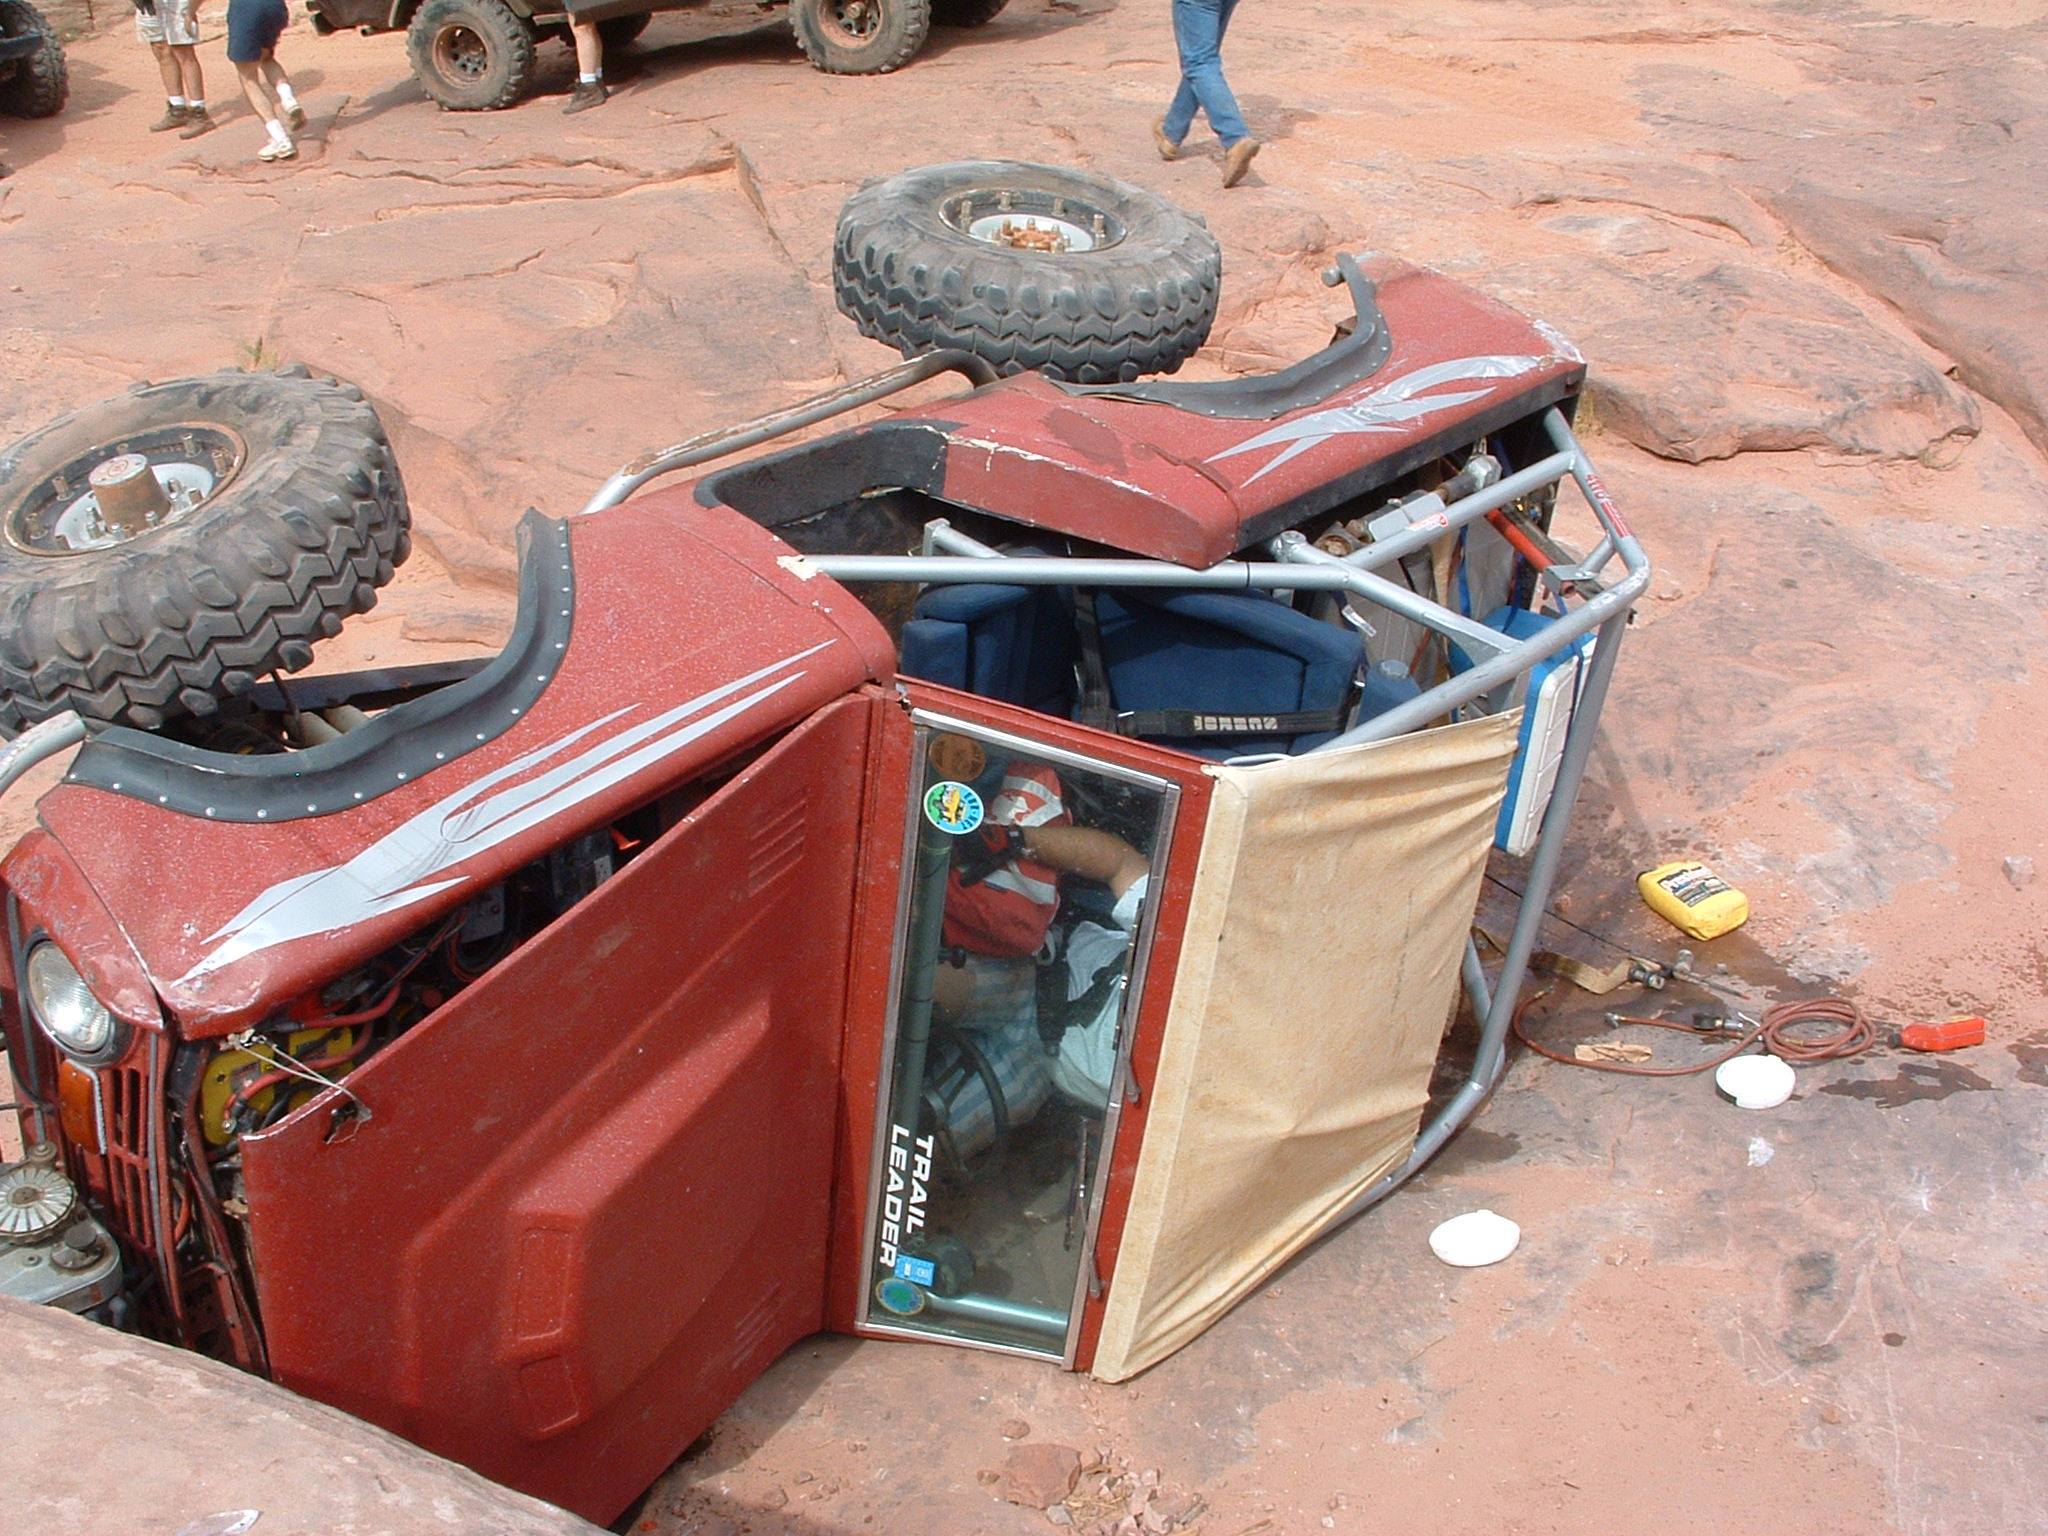
One of the reasons the body is thrashed
Looking forward to a great build with my son and many more years of fun. I'm not going to pretty it up too much, but it does need to be somewhat respectable. More to come as I amass parts and continue stripping it down and cleaning it up. Cheers!
By a stroke of luck I learned that he was taking bids on his old 69 bronco. Sure it's a little beat, sure it's a little old, sure it's seen better days, but the bones were still good.
I put in a bid and ended up winning.
My 11yo son and I made an epic road trip from Western NC to Colorado over the 4th of July weekend to pick it up. We drove to Columbia, MO, spent the night, then on to CO, spent the night, picked it up the next morning, drove back to Columbia, spent the night, and headed home the next day.
A few asides..
- We had an amazing trip. It was much needed "guy time". Lots of bonding, discussion, and we listened to some audiobooks to pass the time.
- Out and back we hit 9 states. My son is well traveled, but not by car. He now has a better understanding of just how big this country really is.
- A truly good friend let me borrow his 2016 f350 King Ranch dually AND a trailer for the journey. I still don't know what I did to get so far onto this guy's good side, but what a friend!
Specs on the Bronco:
- 1969 model. It's well used (in other words, the body is BEAT!)
- 351w, fuel injected
- np435 with custom hydraulic clutch
- T-shift Dana 20, cryo'd input shaft
- hydroboost brakes
- f150 steering conversion
- dana 60 front, ARB, 35 spline stubs, full time hubs, 1 ton brakes
- dana 60ff rear, moser 35 spline shafts, 1 ton brakes
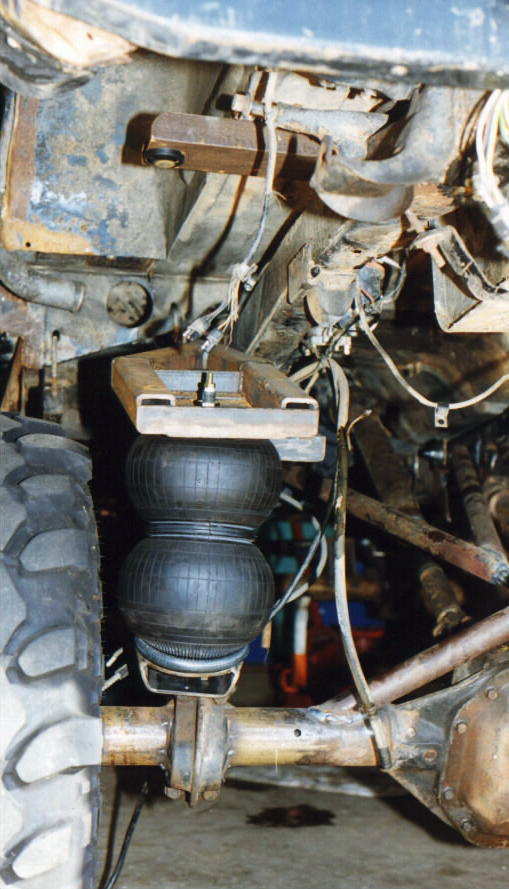
- custom long radius arm rear suspension on airbags with forced articulation
- long radius arm front suspension
- full cage
- premier power welder
- Set up for 38s on stock H1 rims - came with a set of recentered H1s which I'll use in order to step up to 42s.
- 8274 with custom 15" drum
- an entire truck bed full of all sorts of spare parts. Example - a complete second fuel injection system.. A 750 demon carb with all AN connections to hook it up.. All sorts of great stuff.
The air source was an old CNG tank which Toby would pressurize to 3000psi. I'm dumping that and going with something else - likely a CO2 setup, but maybe a viair and small storage tank. Looking for simplicity.
Plans:
- Fix the front end.. Needs a new core support, inner fenders, fenders, grille, and hood (if you have any parts laying around please message me!!)
- Fix the minor wiring issues with the injection setup. I can make it run, but something's up with one of the fuel pump relays.
- Discover and chase down any other electrical demons
- Install a new air source - CO2 or compressor / tank
- Replumb the air system - it's leaky after all these years. Will likely use solenoids instead of manual valves.
- Add gussets and rock rings to the recentered H1 wheels, blast, paint
- Cut and trim to fit 42s
- New harnesses, maybe reupholster the seats, clean up the interior
- Lighting
- Radios
- Wheel the heck out of it
Here are some pics
From left to right - Toby, my son, Me
How it was when we picked it up.
On the way home.. Nice setup, even better friend who let me borrow it
Somewhere in Nebraska.
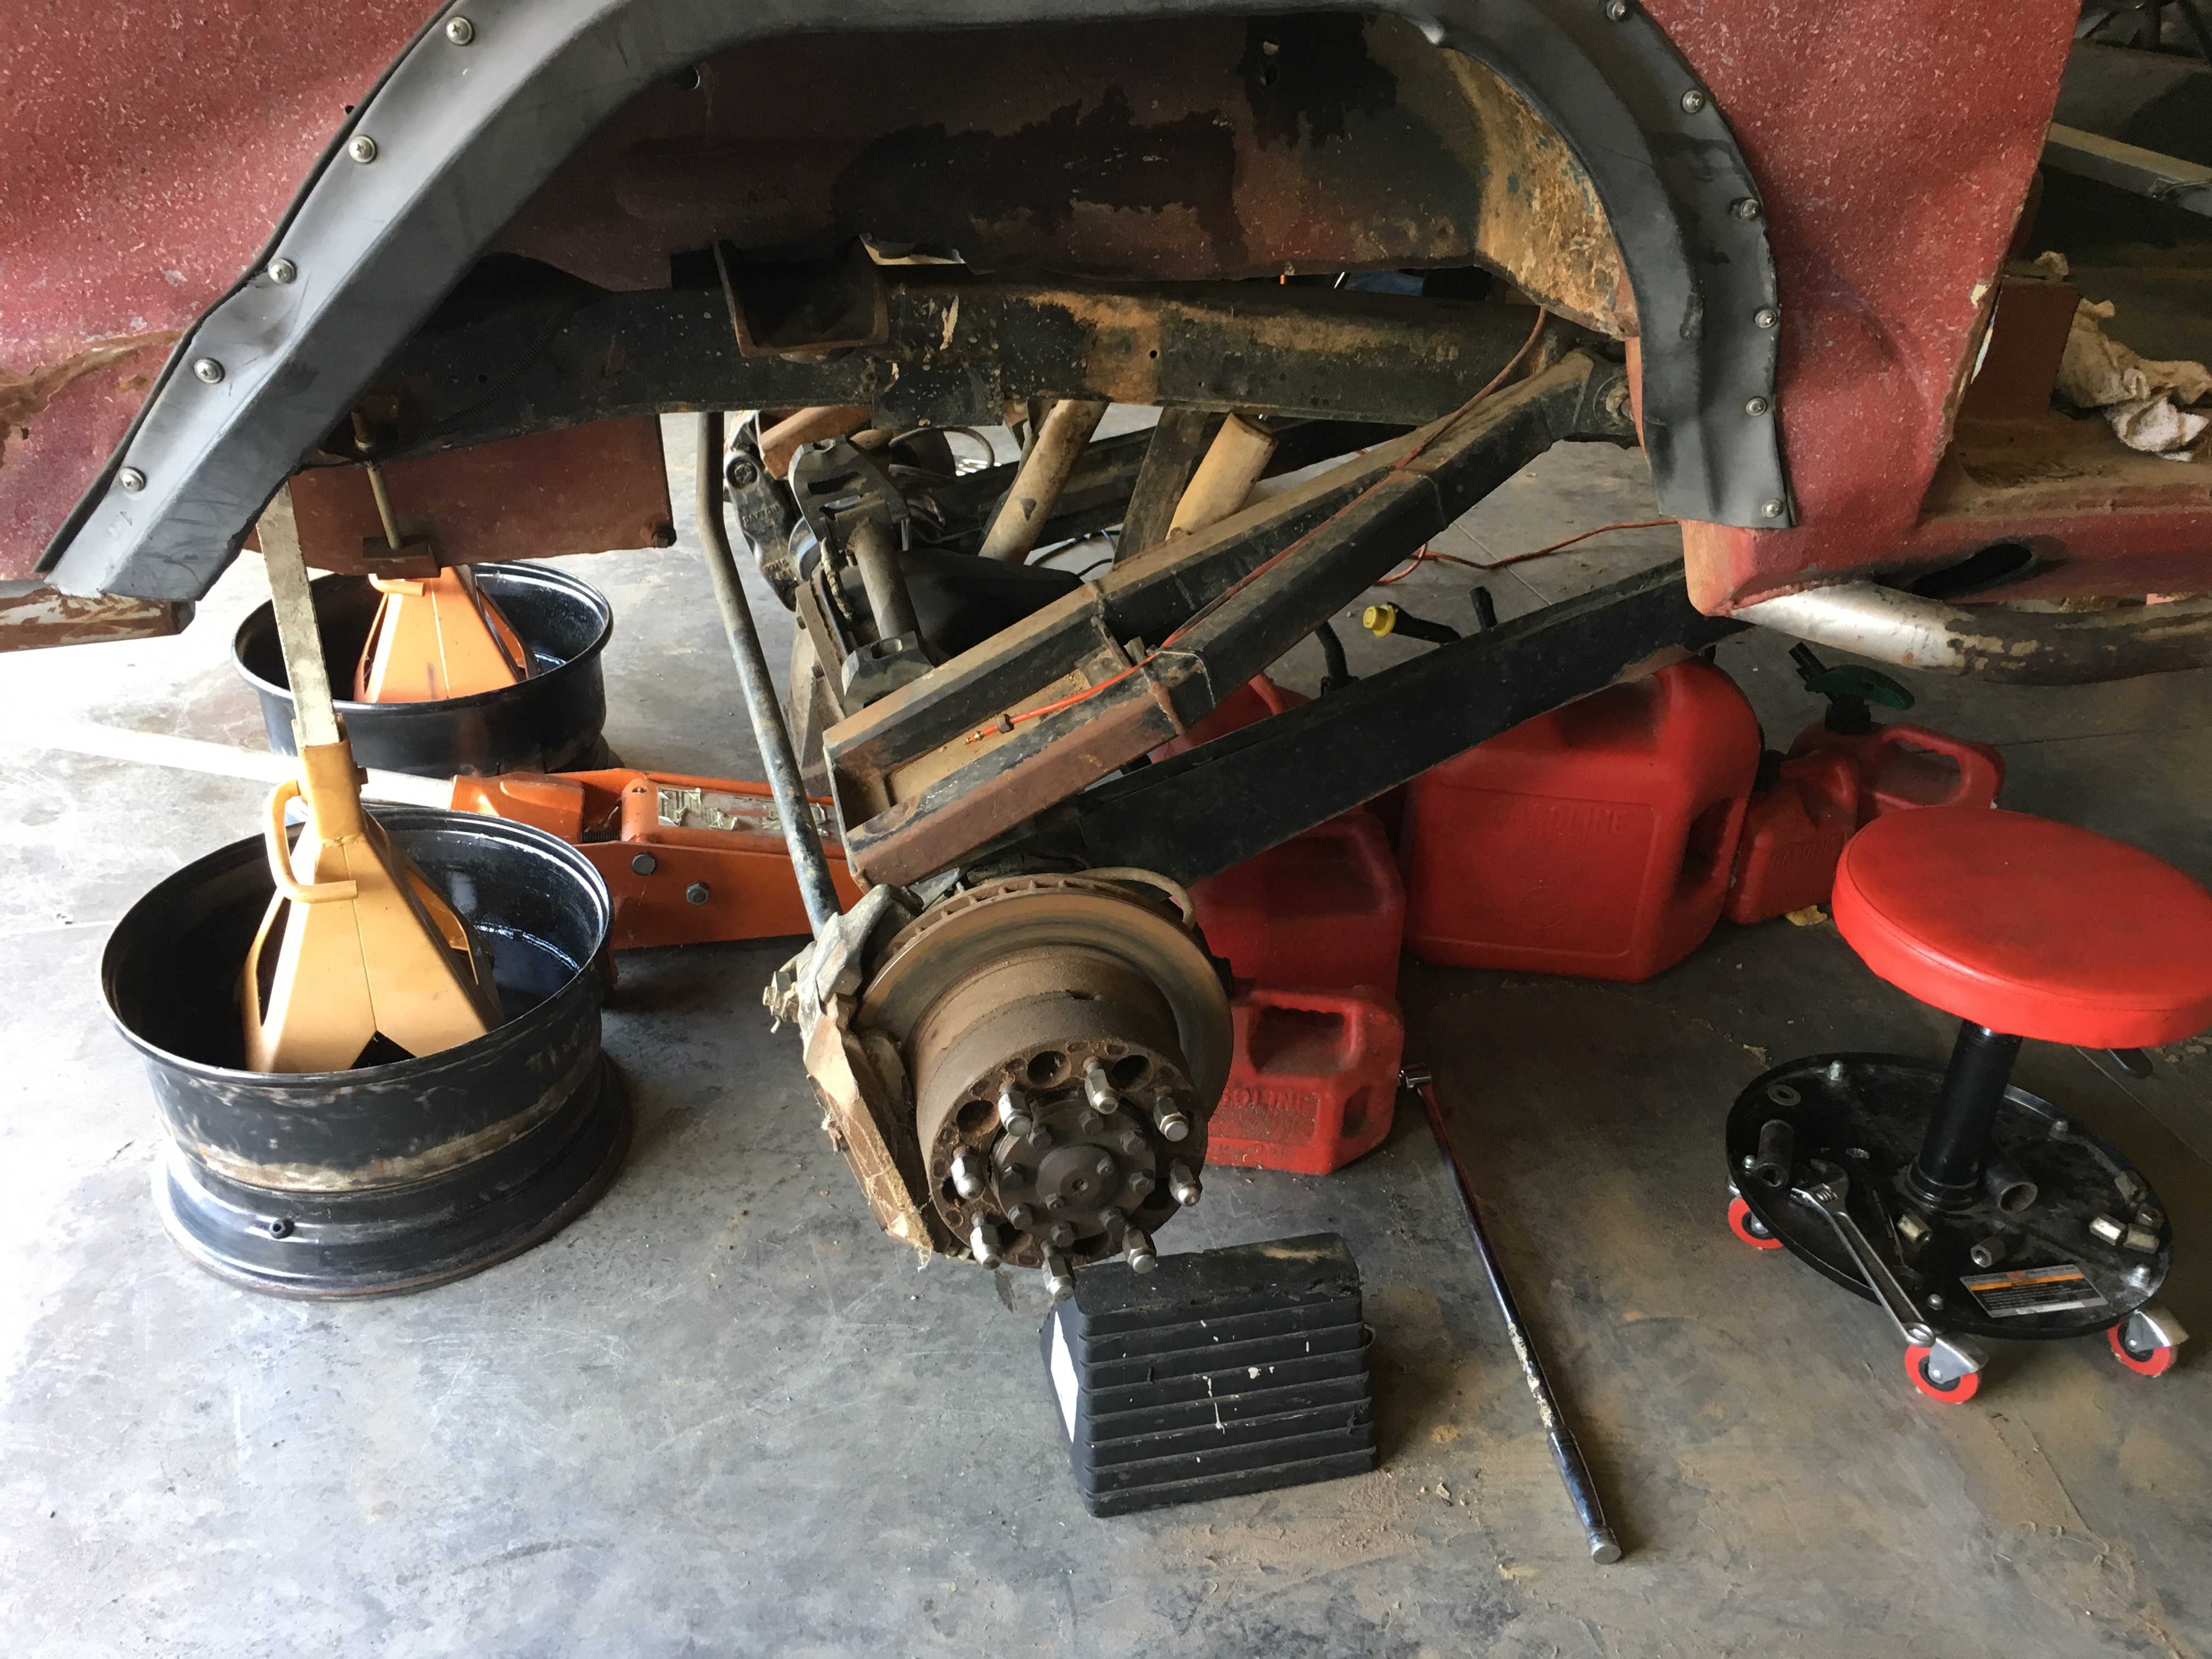
How it's sitting right now.
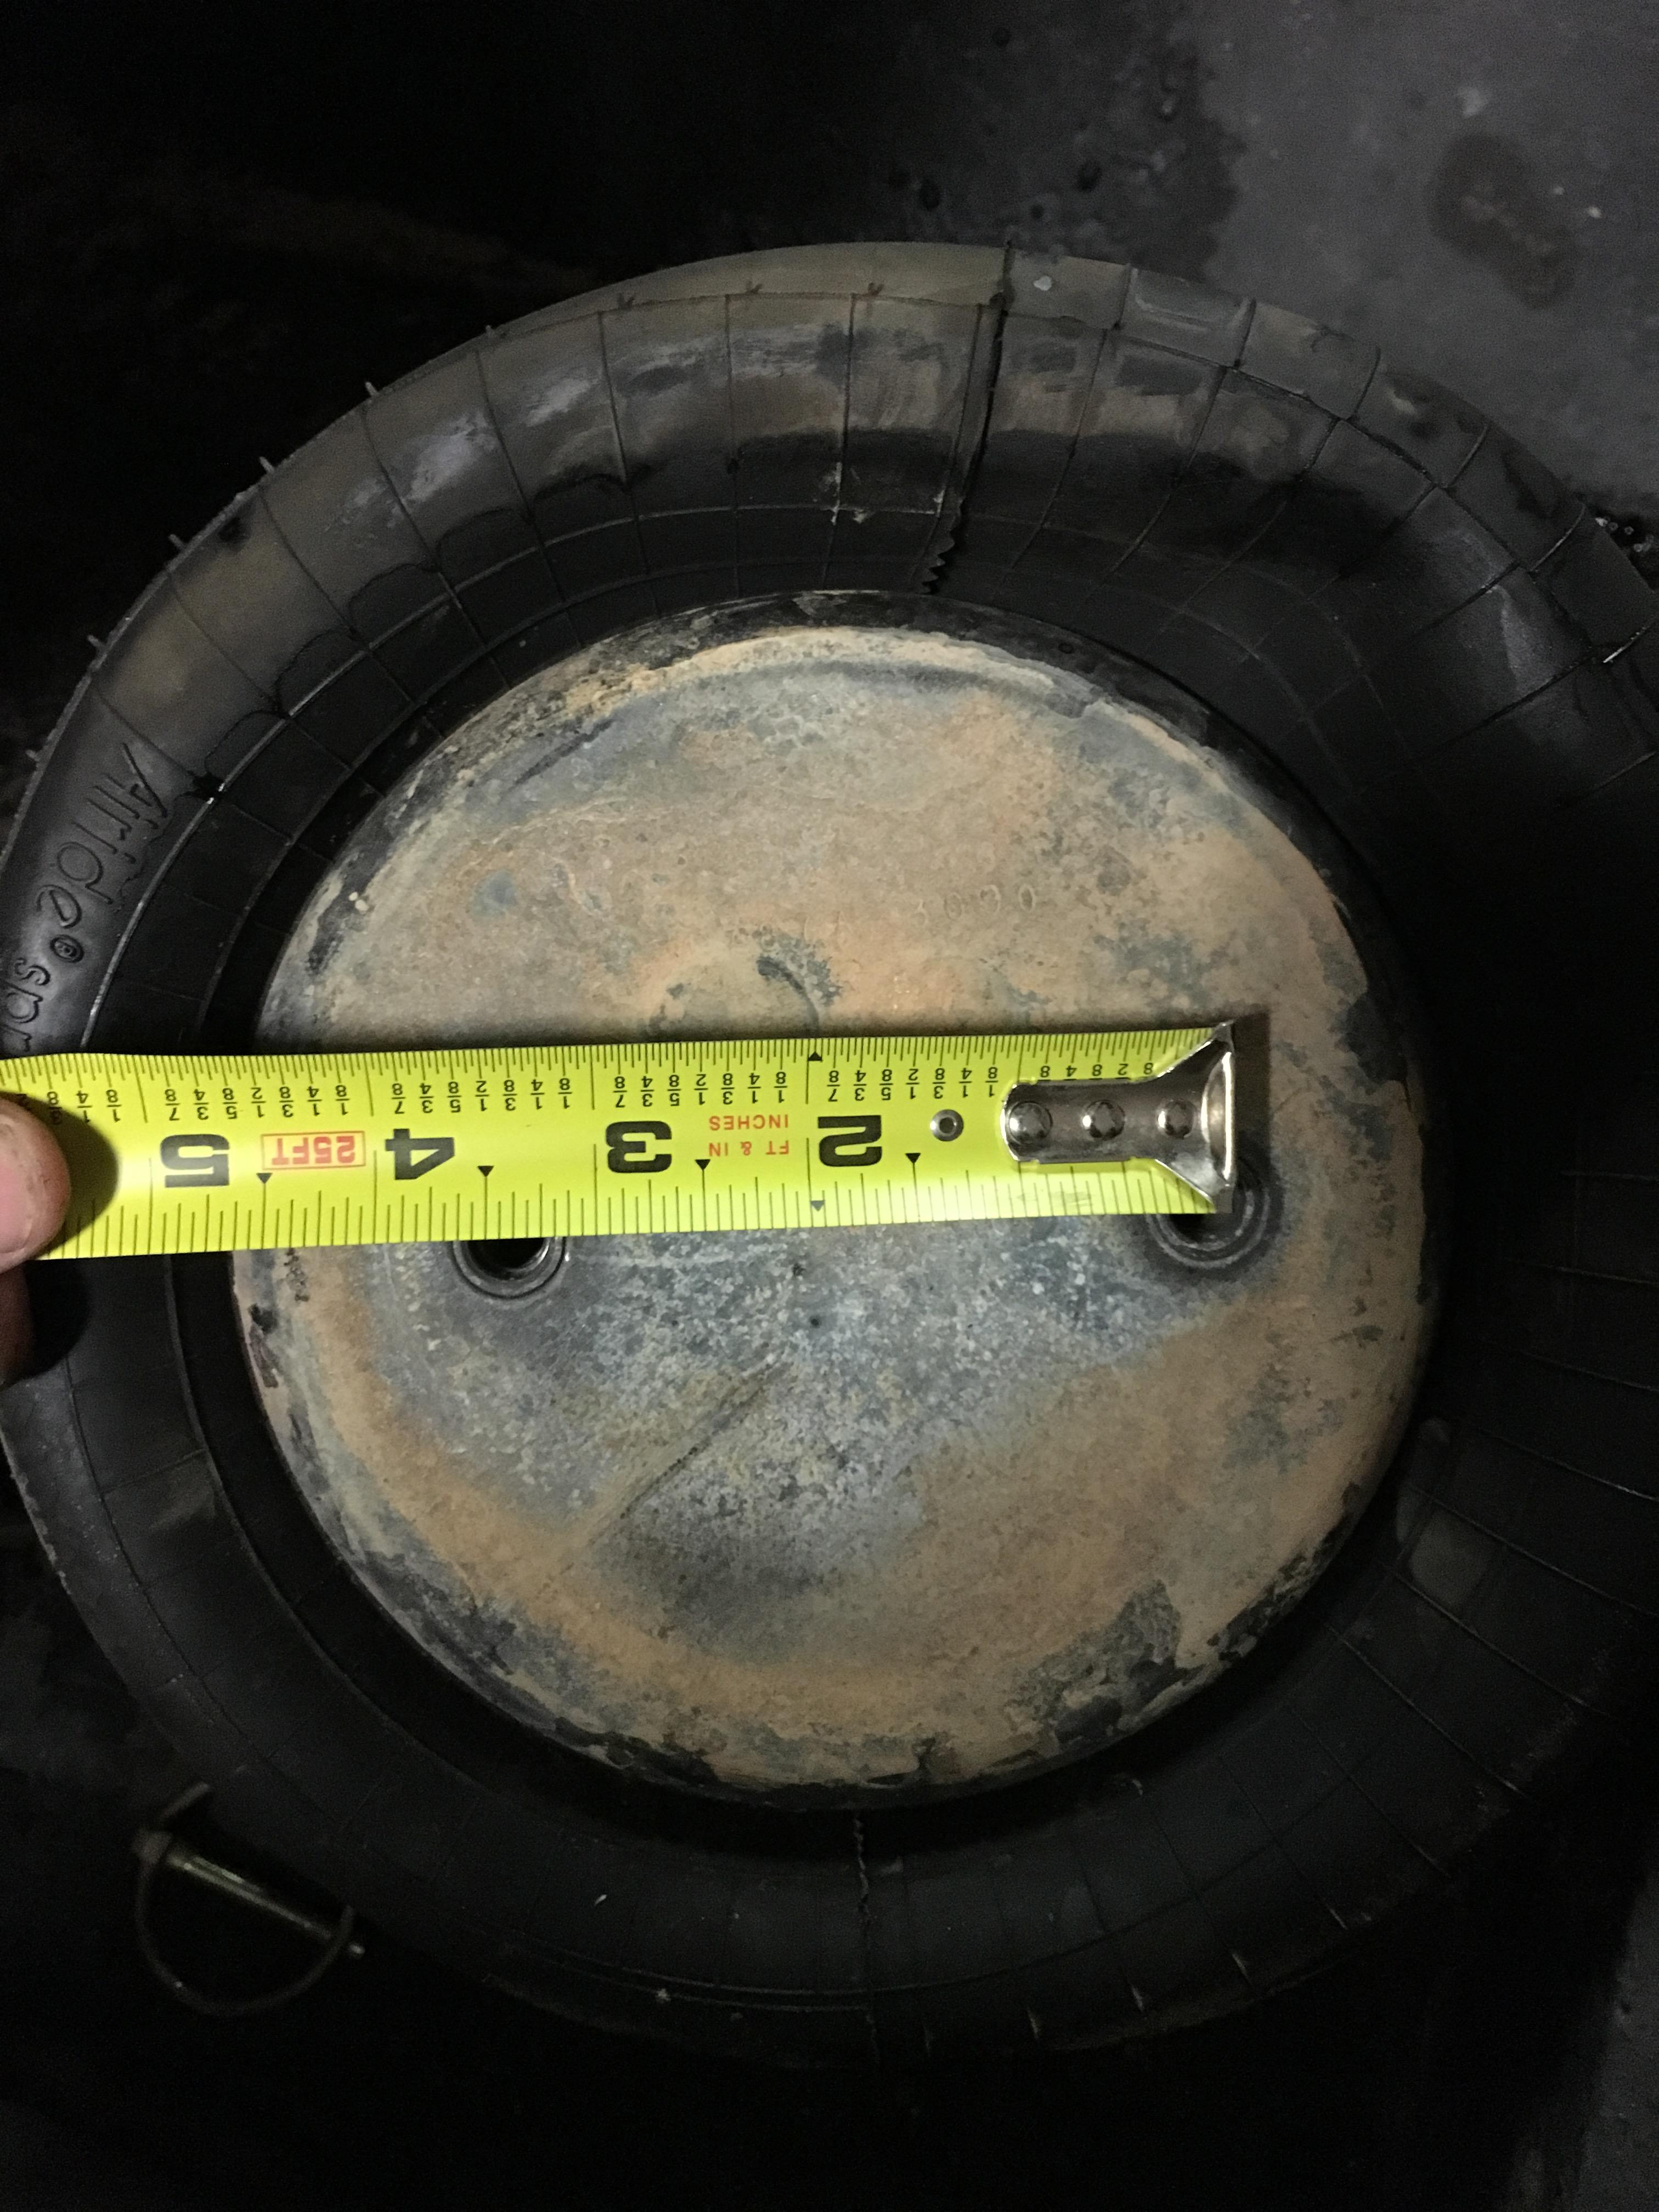
Seats and tank removed for access to clean everything up.
Some of the parts we've yanked. Believe me, the grille is way, way worse than it looks in this photo
Here's how it looked when Toby finished the second build years ago.. Found these on his old website along with a TON of details on the custom work. Priceless info about the hydroboost, hydraulic clutch, and suspension setup. I'm glad the internet never forgets
And here are a few from the last ride it ever took before he parked it.. Moab with the GBR.
One of the reasons the body is thrashed
Looking forward to a great build with my son and many more years of fun. I'm not going to pretty it up too much, but it does need to be somewhat respectable. More to come as I amass parts and continue stripping it down and cleaning it up. Cheers!