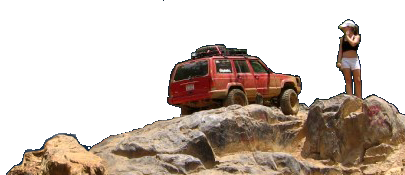
'85 4runner Beach Cruiser buildup

chrishf12

Well-Known Member
Joined
Jun 8, 2010
Location
RDU
Bear with me as I get this up to date and add pics.

Brought home this 85 4runner in February of 2014 with Transmission issues. Whining in 5th gear and a loud clunk from the transfer case.

176k miles
Standard DLX model
Unknown lift with 33x12.50 tires

I plan to bring this thing back to DD status as a Summertime beach cruiser and capable weekend rig.

qLEPVxH.jpg


oY5zVyM.jpg


---

Used W56 and Tcase fixed the drivability issue.

Next step was to start the tear down, rear window didn't work, and interior had turned to a nasty shade of green from the original brown. And I knew I had some rust to deal with.

I haven't seen too many 1st gens with carpet covered rear panels. I am guessing this was aftermarket as all the carpet was glued to the bodypan.

HUfxRFN.jpg


---

A few fun spots showed up under the carpet once the interior was removed. The small spots blended in with the brown carpet and glue reminants. The driver floorpan and rollbar mounts were a little further gone. New carpet will go back in the front and bedliner in the cargo area.

atStnJD.jpg


4NgOqIK.jpg


3zaCpSb.jpg


D55d16t.jpg


Prep for bedliner. Primer to cover the bare metal spots in the interim. Also lifted the body from the frame. Clean, POR15, paint, new body mount bushings yada yada.

o7qL6We.jpg


Obligatory pre-POR15 underbelly photo. I got lucky with no holes in the frame, I plan to plate the frame in the future just in case. Exhaust was swiss cheese and scrapped.

oCzOvpX.jpg


N7mr6s7.jpg


POR15 Progress

iguNxT2.jpg


LmLnFUi.jpg


New fuel pump for good measure. Gas tank POR15'ed undercoated and remounted.

G9P1FVz.jpg


Any ideas on the brand of these springs?

l2lcWH3.jpg
 
Rear Axle Refresh

mrU7Yqf.jpg


Pile 'o' parts for the rear axle refresh. Rear brakes and brake lines needed replacement.

LLCoJxN.jpg


zqJbXv3.jpg


Time to fix the Ebrake found that the Bell crank on both rear drums were seized. The oxidation expanded and cracked the cast aluminum of the bell crank.

0sDu0pT.jpg


All cleaned up. Must not have gotten a finished assembly pic.

gmpOEMd.jpg
 
Last edited:
Found some decent fenders. They got POR15 and undercoat treatment before install.

wzKpTps.jpg


2ABIlL2.jpg


gLMpIm0.jpg


Driver side rear patching.

LJUAX98.jpg


Passenger side had some previous patch work done to it. Final pic with mud.

Fbp4J5J.jpg


djVjQ5r.jpg


Wet sand

tgymgte.jpg


Sometime during the rust repair process I made the journey over to the local exhaust shop and had new pipe put in from the downpipe back.

After prep, we sprayed it back to factory white. This was my first paint job went cheap with acrylic enamel, pinstripes wont make me feel soo bad.

jOiUB6u.jpg


Ow9f7rD.jpg


u9ve32D.jpg


AgdG4ON.jpg


Reassembly

Grill, Bumper, Mirrors, rock guards. Also redid my b-pillar trim and emblems. Somewhere in here I refreshed the rear gate internals and made sure everything was operating smoothly.

hxVs1cp.jpg


phtjkmE.jpg


kqGljgV.jpg
 
Last edited:
Interior Reassembly

Added some peel and seal in the body panels and doors for sound deadening. Also added some matting to the floor pans since the passenger area will be carpeted.

IbhwQbc.jpg


Used Monstaliner for the rear cargo area. Tan to match the rest of the interior when finished.

4rVpXg2.jpg


Carpet installed.

iGKNQQp.jpg


Ran into the common Toyota clogged fan blower.

V25dGQ3.jpg


cStpQrW.jpg


Hated the factory 85 port added bench seat. Started searching for a split bench. Ended up with an 87 sr5 rear. It fit better aesthetically vs the 95 model rear seat.

tnWpIUr.jpg


My seats came back from my upholstery guy. I was super impressed. He said that the Cordura I ordered was hard to work with but they look awesome and was just what I was going for.

eZvyLQr.jpg


JXI9os4.jpg


Removed and painted the entire dash. Also added an Sr5 console, inclinometer, and a new stereo with all the "new age" features. Navigation, Bluetooth, Backup camera, and dash cam seemed like good upgrades for a possible DD.

I made my own interior panels for the rear seat. The old ones were getting kind of tired.

6gYuanU.jpg


cd2w7rd.jpg


Bedlined the cargo panels and added 6x9s. I may make some cloth panels to match the others in the future.

aCKkTGp.jpg


Wf1VKGw.jpg
 
Last edited:
Front Axle refresh

Went back with FJ 60 rotors, IFS calipers, and Knuckle rebuild kit with bearings. Also jumped up to a 1" bore MC at this time.

Teardown
2THdd1p.jpg


Pulled some 87 IFS Calipers from the parts truck for rebuild.

eCZEVui.jpg


VF0NCSm.jpg


X2dKXpA.jpg


I wasn't happy with the stopping power of these calipers. Felt like the rear was doing all the braking. Swapped them out for some new 94 v6 calipers and these went back to the parts shelf. Much better feeling pedal.

OME Nitrochargers added all around.

o94QH31.jpg
 
Last edited:
Rear bumper build

Somewhere around this time my dad ended up with a first gen off the forum. He had his painted and finished for DD not long after.

3wkNL6R.jpg


Bumper build. I still need to add the side supports to the frame.

gT6aZCd.jpg

k6GX6Do.jpg

WbsqspA.jpg

ynhNBH2.jpg

flGmDXS.jpg

KiwgV2K.jpg


Finally got my camo paint job to blend in.

yAPzgZg.jpg
 
Last edited:
Re-gear & Transmission

East Coast Gear supply hooked me up by installing 4.88s into my extra Trutrac differential. I added a factory 4.88 open diff from a 94 model to the front axle to match it up.

AllInei.jpg


The used transmission I installed had been whining in all gears besides 4th. I'm pretty sure it needed an input bearing replacement. I ended up ordering a Marlin W56 and the shifter bushings and installing that. Hoping this will give me less problems than a used trans.

GjthARg.jpg
 
I picked up a used e-locker diff off of another forum over the summer. The e-locker had already been re-geared to 4:88's which was a big win. I finally got around to installing it in the rear axle from my 87 parts 4runner. All new seals brakes etc. to freshen up that rear axle before it goes under the 4runner.

TK6Zlyd.jpg


Sometime in August I was able to get the new IFS rear axle installed and wired up the e-locker. Works like a charm.

Added 1" wheel spacers up front and fabbed up some 2" square tube sliders.

Made a trip to Uwharrie with a buddy for a shakedown run. Ran Dickie Bell backwards and Dutch John along with a couple other trails. The only carnage was from him rolling backwards into me. All-pro rear bumper vs. my stock front was not an even match up.

Speeds up the search for me a front winch bumper. I like the look of the old Front Range Offroad design but they are hard to find.

LxdNJAC.jpg
 
Last edited:
So I have been having some oil problems since the motor rebuild. It has been using about a quart of oil every 250 miles. Turns black very quickly. Soot buildup on the tailpipe. Yada Yada. I have been nursing it along driving very sparingly since it started.

I had some time to dig into it about a week ago. Ran a compression test and was getting 170+ on #2-4. Cylinder #1 was only showing about 100. The spark plugs show it is firing on cyl 1 but may be burning a slight amount of oil, but not enough getting in to foul the plug.

Ran a leakdown test and determined that the exhaust valve isn't closing on #1 TDC. I finally had a direction to start looking!

Pulled the valve cover and the cam lobes are trashed. This is a new cam with about 5k-7500 miles on it. Cam was installed with good condition rocker assembly. I'm not sure what happened to cause this wear. This was a new Enginebuilder head with 261C cam. I reused my stock rocker assembly that had 176k miles on it. All pads were in good condition and virtually no wear on the cam.

My plan is to replace the rockers and install my stock good condition cam for now to make sure this fixes the oil issue. Parts should be in this weekend.

make sure the oil passages feeding the cam/rockers are all clear. if you dont have sufficent oiling to the cam you will wipe lobes like that regardless of what engine it is
 
make sure the oil passages feeding the cam/rockers are all clear. if you dont have sufficent oiling to the cam you will wipe lobes like that regardless of what engine it is

That's where I'm stumped. I pulled out my stock head and cam that the rocker assembly came off of. No cam wiping and I am positive I checked the rocker arms for wear prior to installing on my new head and cam. I didn't disassemble the rocker assembly as it was working fine for the stock head and cam. The worst damage was on the #4 exhaust lobe. The good thing is a new cam and rocker assembly are simple.

Since I have the cam and rocker assembly off for replacement, I need to hook up the leak down tester and see if #1 exhaust valve is still not sealing fully. Fingers crossed.
 
Well head is coming off. Definitely an issue with the #1 exhaust valve. My question is would this be causing a lot of oil consumption or could that be another problem altogether?

1HbXYG6.jpg
 
Only 85 psi of cylinder pressure is bad. Why does the gauge only go to 100?
 
Only 85 psi of cylinder pressure is bad. Why does the gauge only go to 100?

It's a leak down test, pressurizing the cylinder with 85# from air compressor. 100% leakage via the exhaust valve. This is without the cam installed so all valves are closed.
 
Last edited:
Well #1 burnt exhaust valve. What could cause this on a new engnbldr head? 5-7k miles on it since rebuild. I have not reached out to them yet since their website states they are closed due to illness.

lyBH5xQ.jpg


lqVKSAv.jpg
 
What's the cam look like? Did it get replaced when heads reworked?? Pushrods working the valves properly? I'm not good with Yota stuff just know a lil about cylinder heads and valve stuff what was reason to get head rebuilt to begin with?? Nice yotas btw I'd drive the hell out of that 4Runner!!! Lol
 
What's the cam look like? Did it get replaced when heads reworked?? Pushrods working the valves properly? I'm not good with Yota stuff just know a lil about cylinder heads and valve stuff what was reason to get head rebuilt to begin with?? Nice yotas btw I'd drive the hell out of that 4Runner!!! Lol

Thanks, I plan to put plenty of miles on it once I get this motor figured out.

Motor had 176k with a rod knock. Full rebuild with engnbldr kit head and cam. Reused the rocker assembly from my stock head, it was in good condition with no wear as recommended by EB.

I have been chasing an oil consumption issue on the rebuild as well. About 1 qt every 200 miles. No leaks and barely noticeable smoke from tailpipe only at dusk.

The cam did wear on a few of the exhaust lobes but did not go flat. Valves were adjusted cold, after cam break in, and checked several times since break in only needed adjustment 1 other time. Adjusted to .007 intake .009 exhaust per EB cam card.
 
Well machine shop stated that in addition to the burnt valve on #1 all the other exhaust valves had started to burn. Contacted EB and he stated that the fault was in my setup of the motor. Since they have never seen this issue in hundreds of heads sold.

Anyways I am in the process of rebuilding this again with new rings and a new head.
 
i'm sure that when you rebuilt the engine that you used assembly lube on the camshaft
lobes and rocker arms. but did you pour oil on the cam-rockers just before starting?
i ask this cause as the camshaft turns it dips into the little puddle of oil standing in the
pockets under it. and also did you add any break in additive to your oil.
breaking down the rocker assembly is not hard and make sure to clean out all the little
passages that supply oil to the rockers. a rifle bore brush and welding tip cleaners work good to do this.

after rebuilding adjust valves hot and make sure the timing is correct.
 
X2 ^... I did opposite of everything @DAWGTOY mentioned above on my first sbc400 and ended up with 2 valves burnt and wiped out lobes on new cam!!lol priming oil pump properly usually gets most folks tho... and QUALITY assembly lube and break in oil! Some use additive I've had best luck with break in oil and drain after break in!! I also always flush engine with cheapo Dino oil after break in too bc I'm paranoid of metal particles... lol
 
Back
Top