Advice on shower project

hunterdan

Well-Known Member
Joined
Apr 13, 2009
Location
Morganton,NC
Hey all,
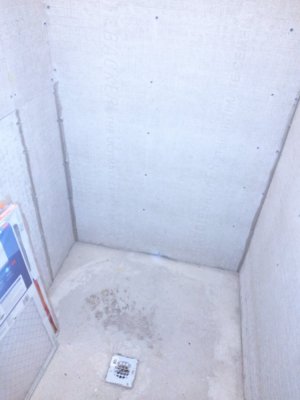
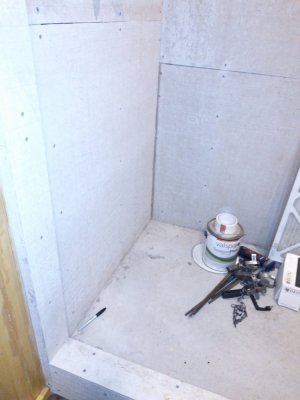
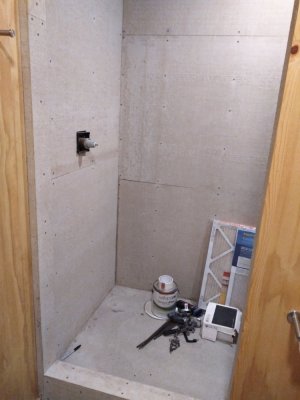
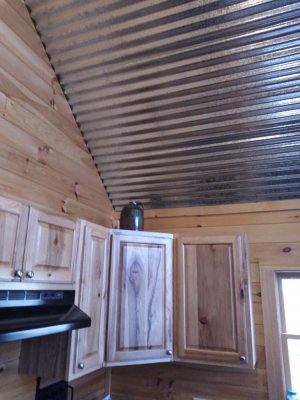
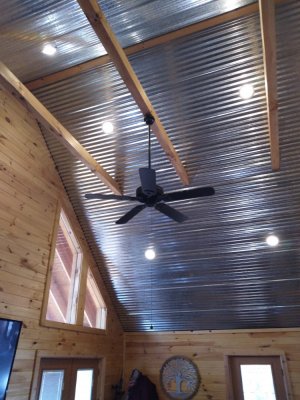
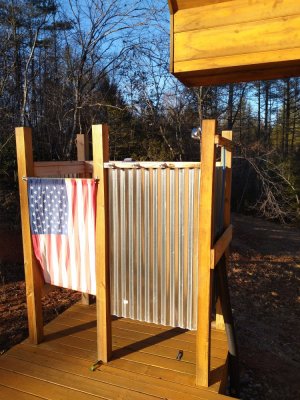
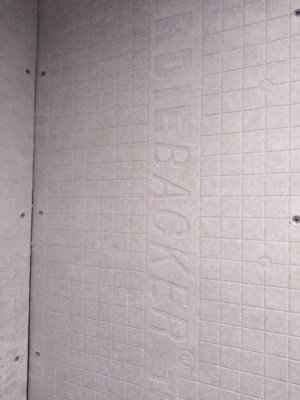
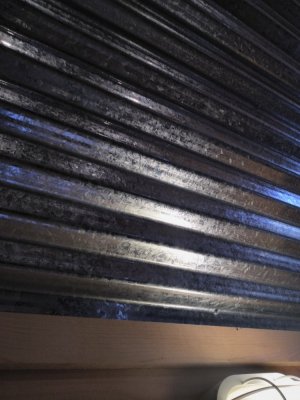
I'm wanting to finish our upstairs bathroom. I already have backer board on walls and concrete floor lined and poured. We were planning on doing tile but We are leaning towards corrugated steel walls and one of those epoxy type floor coverings. The reason I want to do corrugated walls is that's what we used for ceilings and it hasn't rusted or discolored on outside shower after 2 years. My main concern is can I use the epoxy on the Hardie board? Hardie board has kind of a waffle pattern on it. I'm thinking maybe use a thinset mortar on the Hardie board to keep whichever coating we use from just following the pattern of the Hardie board. The only areas that will have coating on Hardie board are the bottom foot of shower walls, step in and right /left side of entry. What say y'all? Looking forward to any suggestions.
Thanks, Daniel
 

Attachments

  • IMG_20210217_162511.jpg
    IMG_20210217_162511.jpg
    73.9 KB · Views: 150
  • IMG_20210217_162538.jpg
    IMG_20210217_162538.jpg
    81.9 KB · Views: 151
  • IMG_20210217_162632.jpg
    IMG_20210217_162632.jpg
    94.9 KB · Views: 159
  • IMG_20210217_164315.jpg
    IMG_20210217_164315.jpg
    121.4 KB · Views: 164
  • IMG_20210217_164656.jpg
    IMG_20210217_164656.jpg
    163.8 KB · Views: 163
  • IMG_20210217_164726.jpg
    IMG_20210217_164726.jpg
    225.8 KB · Views: 143
Last edited:
whatever you do waterproof the hell out of it. if its waterproofed correctly youd only need the epoxy on the floor and a few inches up the wall with the corrugated over it. peronally i would find some different materials corrugated is going to oxidize and show hard water stains pretty fast i would think. either way your going to have to do just as much prep as you would for tile otherwise your going to have leaking.
 
What's the plan for attaching it to the wall ? Any water proofing applied to the hardi will be punctured by any mechanical fasteners. I also don't see a good way to seal off around your valve.
 
I planned to use stainless screws sparingly and when I install one to take it out, smear some liquid nails in hole, put back screw and wipe off any excess. I also plan to use an adhesive on every 3-4 ribs top to bottom to help hold and use less screws. Of course sheeting would be lapped a couple ribs and seam not facing shower head. As far as valve I planned to use a square mount and caulk where ribs meet it. I worked in metal roofing patios...for 30+ years. I can make it pretty tight. As far as deposits on metal Im not too worried about that. As mentioned in OP I have it outside on multiple items and it still looks new. Hard water I'm sure will be a different story but many people do the same shower walls. They either coat the steel with a layer of lacquer or use CLR to remove build up. My wife actually wanted me to use lightly rusted metal with a lacquer. Our colors throughout house are galvanized, rust and natural pine.
 
Last edited:
Only thing I will mention is that steam has an interesting effect on metal other than stainless. I used to work for Ecolab and had to do a lot of work in commercial kitchens and laundries. One particular kitchen I remember working in used galvanized roofing material for walls (it was bear to mount equipment on, by the way!) and I remember the steam from the high temp dish machine would flash rust the galvanized steel. it had a cool look for a while, but where it would condensate, the water eventually rusted the panels causing them to fail. might just have been the water quality, but I don't think the look is cool enough to risk the results of failure.
 
If you’ve been in the roof industry than you realize construction adhesive (liquid nail) is not a sealant and shouldn’t be uses as one.

The concrete and backer board are both porous and WILL absorb water from direct contact or from the steam and humidity of the shower. Cause big issues for yourself in 10-15 years.

If your set on metal I would install it all with track to lock it into place and waterproof the track into place before installing the metal.


Sent from my iPhone using Tapatalk
 
Great advice guys. Glad I asked. I think I'll waterproof the entire thing less the floor. Then coat floor and bottom of wall with the epoxy. I'll make sure I install metal so it can be easily removed if by chance it gets funky.
 
Large format tiles will take you as long to install as the corrugated and will last as long as your house, you've already done the hard work why put up the metal.
 
Large format tiles will take you as long to install as the corrugated and will last as long as your house, you've already done the hard work why put up the metal.
1) I've had to repair grout work on remodels in past that weren't that old. My parents built a home in 2009 and shower floor grout had pretty bad cracks by 2018. Builder who did work was.known as one of best in Burke co.
2) we like the look and don't want leaks. If I can waterproof the Hardie board and protect from steam then sheet metal over it would be much better than 150 SQ ft. Of tile and all that grout. I don't think steel sheeting will leak anywhere until it has an obvious hole.
We are thinking about just putting the epoxy on floor and walls to be sure.
 
Now that we are considering just covering it all with the epoxy coating I think I'd like to prep walls. The Hardie board has shallow waffle look squares which I think would be easily covered. The "Hardie" logo and printing are a bit deeper. There are also of course seams. Is there a certain kind of thinset that I could apply and leave a nice surface to epoxy?
Thanks again for any suggestions
 

Attachments

  • IMG_20210218_165741.jpg
    IMG_20210218_165741.jpg
    88 KB · Views: 116
cover the whole thing in a schluter membrane, and their sealer glue stuff. then put any kind of thinset on it. i wouldnt trust thinset as the waterproofing layer in a shower.
 
cover the whole thing in a schluter membrane, and their sealer glue stuff. then put any kind of thinset on it. i wouldnt trust thinset as the waterproofing layer in a shower.
Ok but if I'm going to use garage floor epoxy over thinset. Wouldn't the epoxy be the waterproofer?
I do have a couple gallons of the red rubber like stuff that is supposed to be used on top of floor, on joints with tape...When I was initially planning to do tile II was wondering how is the grout/ mud or whatever it is called supposed to stick to a rubbery coating?
Again though... wouldn't the epoxy coating be enough waterproofing? When people do garage floors do they first roll on the rubber stuff before epoxy?
 
I use aquadefense....Thinset wiilll stick to it. I guess you could stucco over that to get a smoothish surface then epoxy?
I just need to figure out what I can use for a stucco that can be applied in a thin coat to the Hardie backer board like maybe 1/8"-3/16" and epoxy will stick too. I don't see why I would need any waterproofer under the epoxy.
For example, I have Formica countertops and no waterproofer under Formica. Formica is the waterproofer.......over the particle board underlayer
ANY IDEAS ?
 
Last edited:
I'm not a builder, but I'm an adhesives nerd.
I've seen people doing epoxy coated panels for showers, but they're generally a piece of whatever material that is coated with epoxy and then bonded to the waterproofed panel underneath, so basically you bond a big panel in place instead of using tile/thinset or a solid surface panel. Joints at corners, etc., are still caulked/sealed the same way as you would with solid surface or fiberglass panels.

If you're going for a budget install and want to use flooring epoxy, is there any reason you can't do a full-height coated panel on each wall instead of applying epoxy directly to the existing tile backer?
People say I'm hard headed. I feel like adding panels to the shower would be like using 2 red solo cups instead of 1.
Back when I built our house I was advised that I couldn't put up pine wall boards and corrugated ceilings without first sheetrocking the entire interior. Some said inspectors would not allow. Well I did it and all is well. Power bill is around $100. Some claimed I must have interior air barrier along with outer house wrap. Turns out that wind can't blow through solid cedar lap siding, house wrap, OSB, paper backed insulation and interior tongue and groove. Go figure?
I already have a wall that is used to mount tile in a shower. I see no need to install wall sections on top of that wall. I need something that will stick to tile board (allowing me to make smooth surface and fill gaps/corners) and epoxy can stick to. I will get coating and do a test on Hardie board using some various thinsets and epoxy to see what bonds best.


Google found the method I've seen people do:

Thanks for the link
 
Last edited:
People say I'm hard headed. I feel like adding panels to the shower would be like using 2 red solo cups instead of 1.
Back when I built our house I was advised that I couldn't put up pine wall boards and corrugated ceilings without first sheetrocking the entire interior. Some said inspectors would not allow. Well I did it and all is well. Power bill is around $100. Some claimed I must have interior air barrier along with outer house wrap. Turns out that wind can't blow through solid cedar lap siding, house wrap, OSB, paper backed insulation and interior tongue and groove. Go figure?
I already have a wall that is used to mount tile in a shower. I see no need to install wall sections on top of that wall. I need something that will stick to tile board (allowing me to make smooth surface and fill gaps/corners) and epoxy can stick to. I will get coating and do a test on Hardie board using some various thinsets and epoxy to see what bonds best.


Thanks for the link
As someone who has put epoxy on a garage floor, it doesnt seal perfectly, and will thin/wear over time. Atleast that is my experience. I would use a sealer over the backer and then epoxy over that.
 
People say I'm hard headed. I feel like adding panels to the shower would be like using 2 red solo cups instead of 1.
Back when I built our house I was advised that I couldn't put up pine wall boards and corrugated ceilings without first sheetrocking the entire interior. Some said inspectors would not allow. Well I did it and all is well. Power bill is around $100. Some claimed I must have interior air barrier along with outer house wrap. Turns out that wind can't blow through solid cedar lap siding, house wrap, OSB, paper backed insulation and interior tongue and groove. Go figure?
I already have a wall that is used to mount tile in a shower. I see no need to install wall sections on top of that wall. I need something that will stick to tile board (allowing me to make smooth surface and fill gaps/corners) and epoxy can stick to. I will get coating and do a test on Hardie board using some various thinsets and epoxy to see what bonds best.

What you're actually asking is whether you can cut one red Solo cup into pieces and then patch it back together instead of just adding a less-compromised Solo cup inside to hold the water. ;)

The reason an air barrier is required with a T&G ceiling is because air leakage (from conditioned interior) can let air through the ceiling, which can condense on the roof deck and rot the roof deck. Also, energy leakage. Whether you will have a failure versus whether there's enough of a failure risk to do something the proper way are two different things. Just like making a shower enclosure.
 
Last edited:
Actually we did have to put a second air barrier on the ceilings. It covered the paper backed insulation but not the walls for the reason you described.
As far as wearing out the epoxy floor I do have some rough feet but I won't park my car on it.
As someone who has put epoxy on a garage floor, it doesnt seal perfectly, and will thin/wear over time. Atleast that is my experience. I would use a sealer over the backer and then epoxy over that.

What you're actually asking is whether you can cut one red Solo cup into pieces and then patch it back together instead of just adding a less-compromised Solo cup inside to hold the water. ;)

The reason an air barrier is required with a T&G ceiling is because air leakage (from conditioned interior) can let air through the ceiling, which can condense on the roof deck and rot the roof deck. Also, energy leakage. Whether you will have a failure versus whether there's enough of a failure risk to do something the proper way are two different things. Just like making a shower enclosure.
 
Where are you sourcing your steel. Much nicer than 5 v
Thanks. We ordered it from Lowe's. We had to make sure we ordered a little more than needed because every batch the factory makes has a different look. Some like ours is a fragmented look. Other batches may come out with very little design. Hard to see fragmenting in pic unless you zoom it in
 

Attachments

  • IMG_20210219_174613.jpg
    IMG_20210219_174613.jpg
    124.7 KB · Views: 114
Last edited:
Use Red Guard to waterproof. Good stuff.

personally, I wouldn’t use the metal or epoxy. It’s too much worry to screw up a shower. Sounds like a good start to a bad mold problem.

Big tile is cheap and easy to install. Use some fiber tape on the joints set in mortar, paint with red guard, and set tile and be done. Easy. Make sure you have a waterproof floor. This is the biggest mistake by most people and it will rot the floor real quick. By the time you realize it, it’s too late and you have to redo it.
 
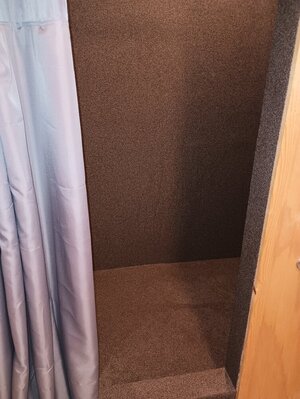
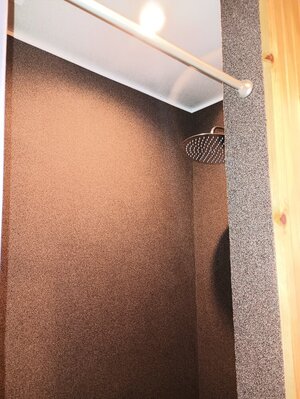
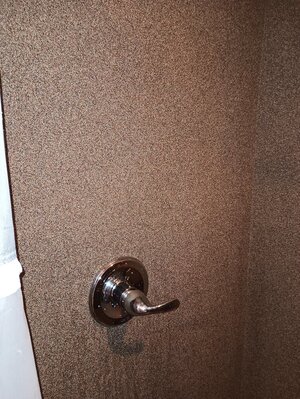
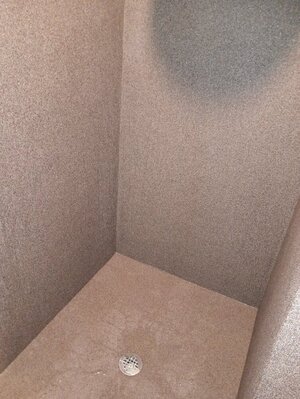
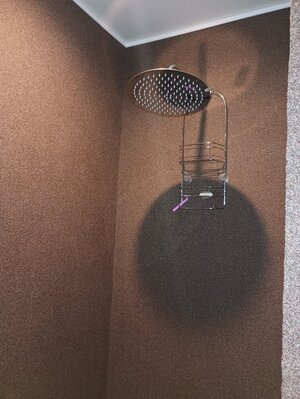
Had to update this thread...Sorry for the delay.
Quick update about steps...
Concrete floor pan with rubber membrane under and up the wall a bit.
Hardiebacker installed on all walls
Mesh,mortar on all joints
Thinset on everything to fill all the dots and hardie backer logos for a smooth surface.
Primer on all
Redguard on all walls/joints...entire envelope.
Another proprietary primer on all envelope
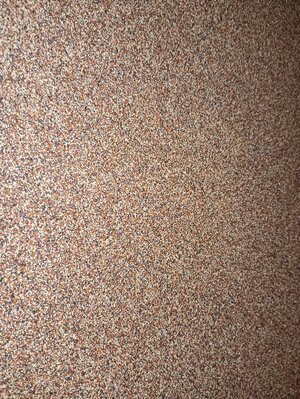
3-4 coats of Daich epoxy stone coat.
The coating is a tiny stone impregnated epoxy. If you zoom in on the pics you can see the individually...grains.
After all that 3 coats of a proprietary sealer was the last step.
Love the shower but it was painstaking.
Next time I'd go with a common size shower for a fiberglass pan. Custom size meant custom problem. Tile would have been easier but just don't like it....
No leaks or issues yet. Lol
Just took a shower so pics aren't the best. Ehh
Frp ceiling.
 

Attachments

  • IMG_20231210_125253440.jpg
    IMG_20231210_125253440.jpg
    192.5 KB · Views: 70
  • IMG_20231210_125311863.jpg
    IMG_20231210_125311863.jpg
    250 KB · Views: 67
  • IMG_20231210_125326383.jpg
    IMG_20231210_125326383.jpg
    316.8 KB · Views: 68
  • IMG_20231210_125344390.jpg
    IMG_20231210_125344390.jpg
    203.5 KB · Views: 66
  • IMG_20231210_125356637.jpg
    IMG_20231210_125356637.jpg
    209.7 KB · Views: 67
  • IMG_20231210_125444141.jpg
    IMG_20231210_125444141.jpg
    381.4 KB · Views: 74
Back
Top