Black Betty "Build"

Lurch830

messin' with sasquatch
Joined
Mar 1, 2007
Location
Wilton & Albemarle, NC
Doesn't really qualify as a build, but its definitely not stock!

Disclaimer: I am horrible about not taking pictures and my hat's off to anyone who takes the time and has the patience to do a step-by-step write-up. I do have more pictures of some stages. If anyone's curious, just ask me and I'll check.

Bought a '97 Nissan Extended Cab back in '05-'06; its a 2.4l 5-speed 4WD.
When I bought it, it had some worn A/T tires, aluminum wheels & a 3" body lift. (no pics)

STAGE 1
Within a few months I had ordered new wheels, tires (32" Maxxis Bighorns) & a 3" suspension lift.
Put them all on one afternoon. Had the truck sitting level on the cranked torsion bars and it rode like a horse & buggy! Turned them back down and drove/lightly wheeled it for a couple years.
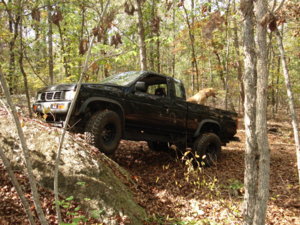
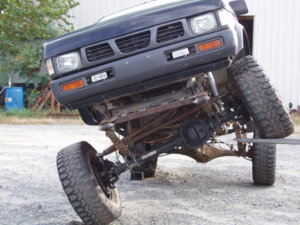
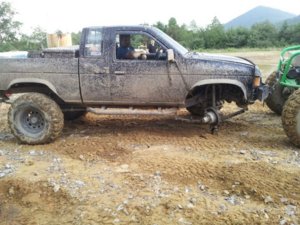
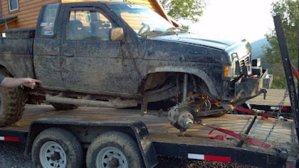
Rock Crawling.jpg Picture 171.jpg
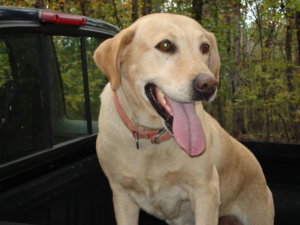
^ Betty and my best friend of 10+ years...RIP

Did a few odds and ends during this stage:
rear bumper/tire carrier/hi-lift jack carrier
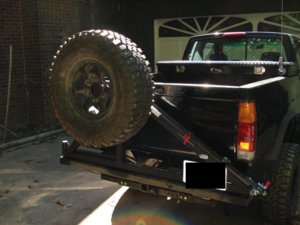
351_561683584797_3982_n.jpg

York 210 OBA system (no pics)

tube doors for summer days (swapped out the bug-eye mirror for euro-style)
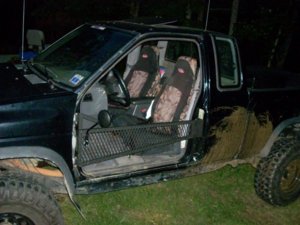
351_561705740397_4048_n.jpg

disc brakes from a V6 pathfinder in the rear
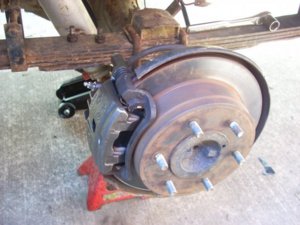
3046_613290768587_1912762_n.jpg

STAGE 2
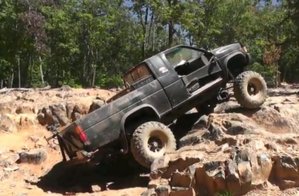
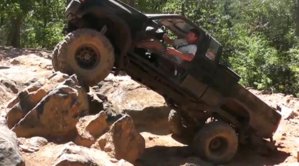
With a lot of research (and help from a friend & his dad), I decided to take a torch to the front end and put a d44 from a '89 Grand Wagoneer. Took a total of 40 hours from all three of us spread over about 1.5 months. Geared 4.88 up front & 4.9 in the back (gears from '04 Xterra). Running rear springs +AAL up front and 63" chevy springs in the back (think 'yota w/ a twist). 'Lincoln Locker' in the rear (lock-rite requires a split case from a V6) & a lock-rite up front. Also, at this time I bolted a d300 t-case under it behind the stock t-case (split and made into a range box). And upgraded to 36" IROKs
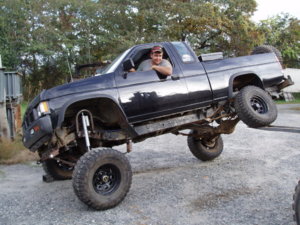
PA100013.JPG PA100008.JPG Rocky Mountatin Loop_URE 2010-1.JPG Rocky Mountatin Loop_URE 2010-4.JPG

Stage 2.1
Took the 3" body lift out about a year ago to lower the stance
Added a drop pitman arm from a toyota to get more out of the steering
Re-did the rear bumper for a C-channel style with a winch & built a winch bumper up front
Fabbed up some step bars/rock sliders that are welded to the chassis
Added a 120amp alternator from a Quest and did a dual-battery set-up
That is how she sits now....
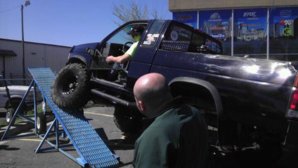
430353_10100294011256247_36602590_44188613_1578355627_n.jpg
 
Last edited:
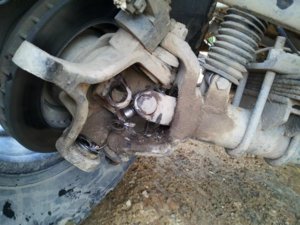
Went to Coal Creek and busted my passenger side ball joints and u-joint....got some weird looks on the trip home
547803_4300089624183_598338152_n.jpg 552452_4300094184297_1452332925_n.jpg 2012-07-21_19-54-43_355.jpg

upgrading to chromo shafts and replacing all the ball joints

STAGE 3
My final plan is to upgrade to a ford d60 kingpin axle with a 14 bolt rear geared 5.38 within a few years (sooner if I win the lottery)...that and an atlas t-case!
:bling:
 
Last edited:
Got a buddy right down the road from me who just picked up a Wagoneer front, said he's probably going to get the rear too or a 44 from a Rodeo or something with disc brakes....

Anyway, I'll be doing the SAS for him and any welding. Any close up pics of the front hanger setup and the rear 63" setup? I've seen some of the 63s that hang down under the frame a lot, but I'd like to keep them tucked up...might even french them in if I have to. Also, what springs are you running up front?

Oh...and how's the steering with the front locker? Do you think hydro assist is necessary? I know I could really use it on my SAS'd Silverado...and it's only on 35s.

The front spring hanger I bought from Calmini (purenissan.com), the rear spring hangers and all the other brackets I bought from RuffStuff...seemed easier/quicker than trying to fab them! I'll try to snap some pics this week.
The rear hangers don't hang down too much, they're welded in right as the frame turns up...although they got caught on one of the ledges at Mtn. City and I had to winch over it. When I get some time, I'd like to add another plate w/ bracing to make a smoother transition
I'm running the stock rear springs with Add-a-Leafs from my old 3" lift in the front.
Steering w/ the locker is fine since its the lock-rite...it unlocks when it senses the two tires moving at different speeds.
I'm not sure if hydro assist is necessary, but its a good idea. I'm looking into adding it since I think I'm pushing the limits of my stock power steering pump
 
I've got lockers in both of my fullsize trucks....the CUCV has hydro, the Silverado doesn't. Guess which one goes where it wants to! Both have lock rights, but there's a big difference in weight between my trucks and yours, lol.

I'm pretty excited to start workin on his rig...hoping he wants it to be as flexible as yours.
 
Any close up pics of the front hanger setup and the rear 63" setup?

Warning: pictures taken with cell phone at night with a flashlight!

Front spring hanger
2012-08-07_20-46-30_517.jpg


Up close of front spring hanger:
2012-08-07_20-46-49_13.jpg


Front spring shackles:
2012-08-07_20-56-37_475.jpg


Rear spring hanger:
2012-08-07_20-58-22_833.jpg

^ the plate I'm thinking of adding will act as a ramp from the hanger to the slider mount plate

rear shackle: (revolver shackles came with my 3" lift)
2012-08-07_21-00-10_404.jpg
 
Ahh, I see. Revolver shackles....I was wondering how that thing was so flexible! So you just did an under the frame front spring shackle instead of the through the frame. I don't blame you.

Any idea what the caster is on the front axle? My buddy is worried about the relationship between decent caster and pinion angle. He's fairly worried about having to cut and rotate the inner Cs. I figure if I can get about the caster between 4 and 6 degrees, I'll roll with that.
 
Any idea what the caster is on the front axle?

No idea on the caster, but I'll look tonight.....turns out it is ~5*.
When we did the SAS, we put more priority of the pinion angle since its mostly a trailer queen, but it does see some street time.
So we settled on putting the leaf perches on at the point of almost having to turn the 'C's....if that makes sense.
 
Last edited:
Yeah, I follow you. Did the same thing with the HP60 I just stuffed under my Silverado.
 
Still haven't checked the caster, but I found this video from my first wheeling trip after the SAS...I've got much more seat time under my belt now!

 
Hell yes :D
 
Ha! I remember that, thank God it worked. I damn sure didn't wanna push it up there!
 
Truck seems to have a good starter on it. Lol :beer:

True...I also carry a spare starter & alternator in the trailer toolbox "just in case"!
 
Stage 2.2
While I had some time off for Christmas & New Years, I did a few upgrades:
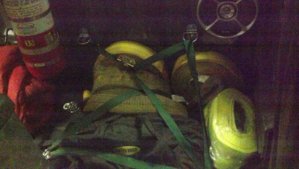
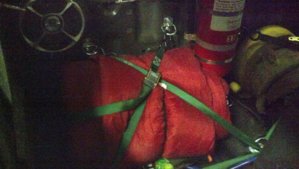
~gutted the interior & sprayed down bedliner
~added D-rings to the extended cab area to tie down cargo
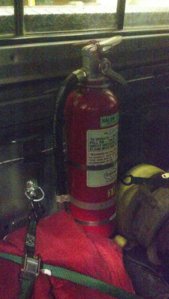
~built a quick release fire extinguisher mount (based off the one on Pirate4x4)

Things I'd like to get done before 'wheeling this year:
~troubleshoot & fix the TX10 range box (pops out of low)
~swap to a 1-ton master cylinder with electric line locks
~hydro assist
 
Pics.....:flipoff2:
 
Pics.....:flipoff2:

Crappy cell phone pics....
behind the driver's seat: 2013-01-19_19-33-41_503.jpg

behind the passenger's seat: 2013-01-19_19-34-46_948.jpg

fire extinguisher: 2013-01-19_19-35-23_20.jpg...pull a hitch pin at the bottom and it lifts right out

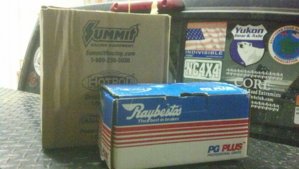
parts for my 1-ton brake set-up: 2013-01-19_19-36-20_737.jpg
 
Have any pictures of the truck on flat ground? I'm torn between through frame shackles up front or doing them as you did. If through frame will keep me and inch or two lower I'll go that route. But if its not that big of a difference between the two then I'll just mount the shackle below the frame.
 
Have any pictures of the truck on flat ground? I'm torn between through frame shackles up front or doing them as you did. If through frame will keep me and inch or two lower I'll go that route. But if its not that big of a difference between the two then I'll just mount the shackle below the frame.
I don't have any pictures on flat ground, but it is fairly tall as it sits. It only clears my 7' garage door by a few inches! I would think going through the frame would let it sit that much lower, its just up to you if its worth the extra time to drill/torch/plasma out the frame & weld in the bushing mounts.
 
Your ride height change will be about one-half the shackle height difference of the two mounting options since the leaf still pivots about the same point. i.e. if putting it through the frame moves it up say 3" then your front ride height will be about 1.5" lower.
 
Thats with the body lift off, correct?
With the body lift off, my roof line is at 77". With the body lift on & before adding my bumpers, sliders, winches & batteries, I'm gonna guess it was around 82".

My front spring mounts are 1.5" below the frame, the shackle mount is also 1.5" below the frame & the shackle holes are 5" on center.
 
Made an executive decision to keep my stock steering until next winter when I'll go full hydro. I reworked my steering for this year, hopefully the stock pump keeps up!

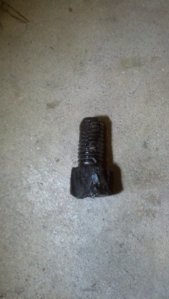
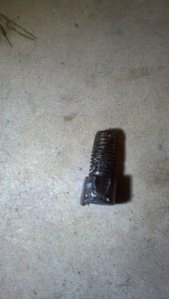
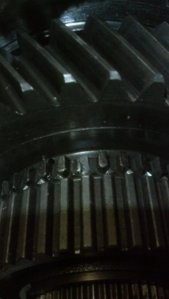
Found the culprit to the range box...three of these bolts had come out of the clocking ring and fell down into the gears of the range box. The 'shaved' smooth areas were caused by the bearings. Putting it in low would bind the gears and it would pop itself into neutral. I also found a missing tooth on on of the splines...not sure how/when that happened, but I figure 1 out of 40 isn't too bad. New bolts were ordered that have a nylon patch added to prevent vibrations from loosening them and I used blue lock-tite to hopefully hold them in place.
2013-02-28_21-17-34_747.jpg 2013-02-28_21-17-54_721.jpg 2013-02-28_21-19-25_440.jpg
 
Last edited:
Haven't had a lot of time to work on the brakes lately, but I've managed to get all the parts together and installed....lines are another story!
Master Cylinder mounting holes had to be slotted to fit on the Nissan booster, mounted the proportioning valve on a bracket that a piece of the ABS came off of.
IMG_20130326_215051_473.jpg


Made a bracket that will let me mount the line locks beside the master cylinder and will space the master cylinder off the booster (the plunger was touching and putting a slight constant pressure). Pretty pleased with how it turned out, welded some 10-32 machine screws through the 4 small holes so I only need 1 tool to install/remove/replace the line locks.
IMG_20130329_121021_906.jpg


Now I'm at the point of making the brake line connections. At the same time I re-did the rear brake line since I thought what I had hung down too low. 10 of the 13 worked great, but the last 3 won't flare...hopefully get that resolved tonight and make it to URE this weekend.
 
Back
Top