How to: Bob and dove a bed

47willys

Active Member
Joined
Sep 22, 2009
Location
Raleigh
There are plenty of pictures around of bob and dovetailed beds but I couldn't ever find a clear thread on how it was done. Hope this helps out anyone else.

Materials
-Rotating laser Level
-5 cut off wheels
-2 sawzall blades

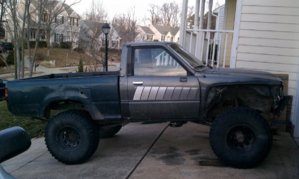
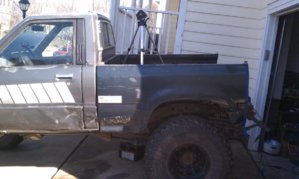
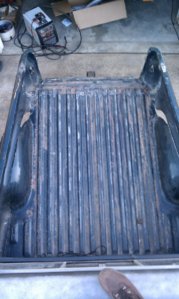
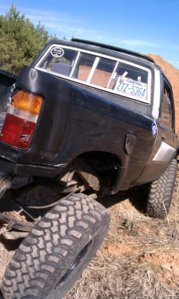
1st. Decide I decided how short I wanted the bed to be. I chose to take out 14 inches, this way the end of the frame rail would sit directly behind the license plate.

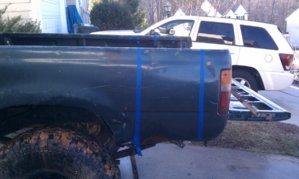
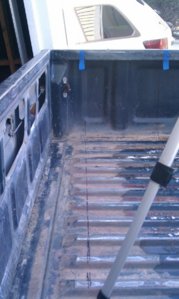
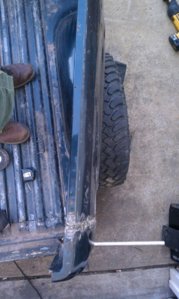
The last section (tailgate, and lights) will be cut off first. The cut line on this is not directly behind the lights because I want to keep the structural supports built into the bed on the inside of the corner. measure from the front bed rail to the first cut line just past the inner structure of the bed, then mark the next point the length that you want to cut out. Mark with tape on both sides.

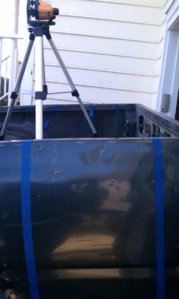
Now take the laser level and mark on the bed floor and up the inside walls, making sure that your laser is hitting the marks made for the cut on the outside.

Now cut. I found an angle grinder to be easier than the sawz-all due to less vibrations.
 

Attachments

  • IMAG0029.jpg
    IMAG0029.jpg
    124.1 KB · Views: 909
  • IMAG0098.jpg
    IMAG0098.jpg
    114.1 KB · Views: 845
  • IMAG0100.jpg
    IMAG0100.jpg
    72.9 KB · Views: 749
  • IMAG0101.jpg
    IMAG0101.jpg
    109.2 KB · Views: 688
  • IMAG0103.jpg
    IMAG0103.jpg
    98.4 KB · Views: 784
  • IMAG0105.jpg
    IMAG0105.jpg
    87.7 KB · Views: 712
The hardest thing about this is cutting in a straight line. The better your cuts are the easier it is going to be when you have to weld it back together, so TAKE YOUR TIME. I was in a hurry at first which I paid for in the end.

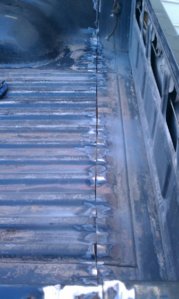
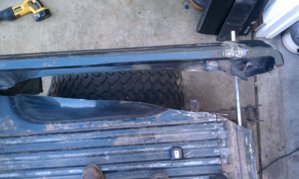
Once your cuts are made, clean them up with a grinding wheel and set the back half back on. This is where having 2 people really helps, I was alone so I welded a piece of angle iron to each half so that I could clamp the back half on until I got it welded up.

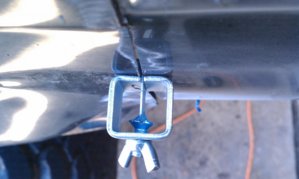
You may also want to consider a set of panel clamps. They help align everything and hold the 2 halves together. Now start tacking the 2 together. Weld the outside and bed floor, but it does not have to be fully welded just because we are going to cut it up again.

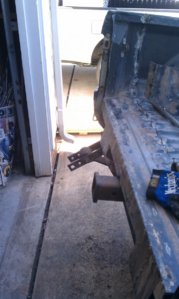
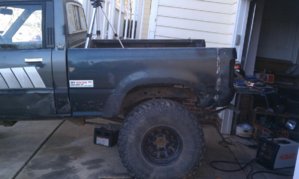
You can see the spring hangers sticking out the back. If you have longer springs (like 63in chevies) keep this in mind when you decide how much to cut out. You can also see the receiver hitch that is welded to the frame
 

Attachments

  • IMAG0116.jpg
    IMAG0116.jpg
    106.9 KB · Views: 760
  • IMAG0109.jpg
    IMAG0109.jpg
    92.4 KB · Views: 1,006
  • IMAG0108.jpg
    IMAG0108.jpg
    111.3 KB · Views: 708
  • IMAG0107.jpg
    IMAG0107.jpg
    70.7 KB · Views: 774
  • IMAG0106.jpg
    IMAG0106.jpg
    91.7 KB · Views: 775
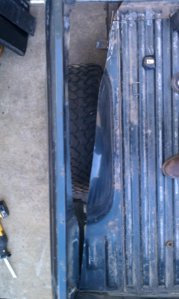
Now we are ready to dove. The rotating point at which the outside of the bed will pivot is the inside of the corners behind the cab. I have seen the pivot point in the middle but it will make the bed into a diamond shape once the sides are brought together.

Start by using your laser level to draw a line parallel to the bed rail from the front corner to the rear.

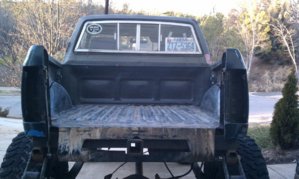
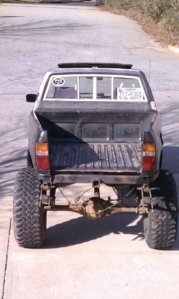
Just as you did with the bob, you need to decide how much to narrow the bed. I wanted the tail lights to be directly over the corners of the frame to keep them as far out of the way of rocks and trees as possible. I ended up with 18 inches total.

Now we take half of that measurement (half on each side) and measure it from the parallel line inward. Now take the laser level and draw the line from the pivot point to your dove marks.

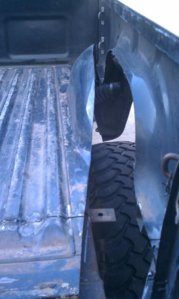
These 2 cuts are the hardest part of the process. You will have to cut through all the underbody structure of the bed, this is where the sawz-all comes in handy. It will take a lot of cuts to release the bed completely, the sides must pivot without any distortion. Once you get to this point you can bring the sides in and begin welding the bed floor to the bed sides.
 

Attachments

  • IMAG0119.jpg
    IMAG0119.jpg
    132.8 KB · Views: 789
  • IMAG0118.jpg
    IMAG0118.jpg
    121 KB · Views: 772
  • IMAG0117.jpg
    IMAG0117.jpg
    112.1 KB · Views: 754
  • IMAG0114.jpg
    IMAG0114.jpg
    95.3 KB · Views: 803
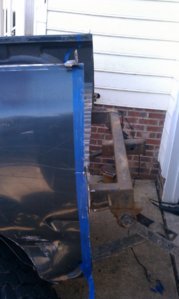
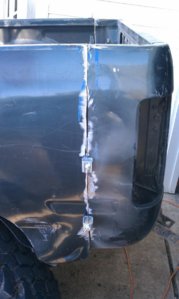
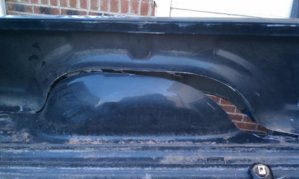
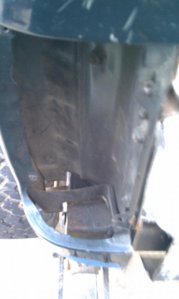
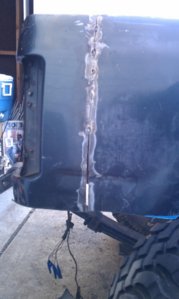
Where the section is cut out of the fender where is going to be a gap between the 2 halves, you can either weld a small piece of sheet metal vertically to connect the 2 or some people take the whole fender out and make a new square one.

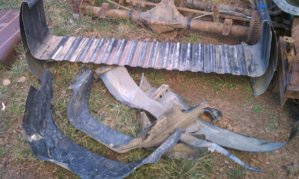
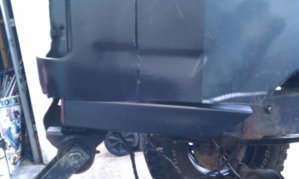
Also I ended up cutting the corners off underneath the taillights just to keep them out of the way.

From this point the entire bed needs to be welded up, also some bracing will have to be added back in where the underbody supports were cut.
 

Attachments

  • IMAG0123.jpg
    IMAG0123.jpg
    127.1 KB · Views: 779
  • IMAG0120.jpg
    IMAG0120.jpg
    101.1 KB · Views: 821
  • IMAG0124.jpg
    IMAG0124.jpg
    148.1 KB · Views: 838
  • IMAG0121.jpg
    IMAG0121.jpg
    191.8 KB · Views: 787
  • IMAG0125.jpg
    IMAG0125.jpg
    64 KB · Views: 747
  • IMAG0115.jpg
    IMAG0115.jpg
    80.2 KB · Views: 787
You will also have to move the 2nd and the 3rd body mounts (I just deleted the 2nd mounts) since you have moved where they attach to the bed.

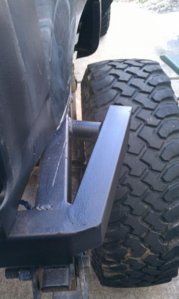
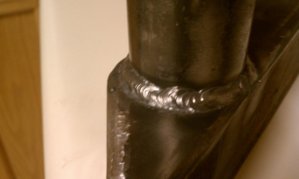
I decided to protect the rear corners by extending the frame a little to make little 'wings'.

The last step is to cut and re-weld the tailgate. Since all you have to do is just cut out however much you did in the bed OR just make one out of tube, I decided to leave this part out (and I havnt done it yet)
 

Attachments

  • IMAG0196.jpg
    IMAG0196.jpg
    70.9 KB · Views: 730
  • IMAG0195.jpg
    IMAG0195.jpg
    96.4 KB · Views: 695
  • IMAG0193.jpg
    IMAG0193.jpg
    57 KB · Views: 719
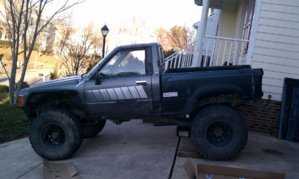
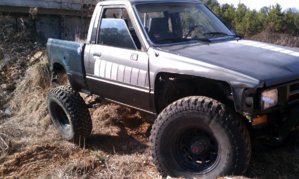
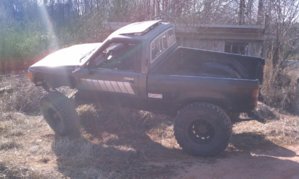
After a little paint, I am really happy with the way it turned out. Def the best way to get a trail ready rig with a usable bed.

Hope this helps someone out there in internet land. Here are a few finished shots
 

Attachments

  • IMAG0122.jpg
    IMAG0122.jpg
    126.9 KB · Views: 880
  • IMAG0207.jpg
    IMAG0207.jpg
    125 KB · Views: 2,322
  • IMAG0201.jpg
    IMAG0201.jpg
    181.4 KB · Views: 872
  • IMAG0198.jpg
    IMAG0198.jpg
    140.9 KB · Views: 823
  • IMAG0205.jpg
    IMAG0205.jpg
    162.3 KB · Views: 787
man great writeup. you got this yota lookin super sexy. i def miss it bad. i bout cried when i seen it just now. did you rechannel the frame or what? you runnin those 2in springs i gave you up front? welded rear? hows she runnin? one more question, wana sell it? seriously
 
thanks for the comments. Im working on the Hobart-locker right now and buttoning up some stuff for Devils Playground. The laser seems like over kill but it really made a difference when cutting the fenders and ribs. For yoder519- its running like a charm now, had to replace the alternator and water pump but, its got the 2 in super-lift springs up front and 63 chevies out back, and no I will not be selling it anytime soon, the fun has only just begun.
 
thanks for the comments. Im working on the Hobart-locker right now and buttoning up some stuff for Devils Playground. The laser seems like over kill but it really made a difference when cutting the fenders and ribs. For yoder519- its running like a charm now, had to replace the alternator and water pump but, its got the 2 in super-lift springs up front and 63 chevies out back, and no I will not be selling it anytime soon, the fun has only just begun.
niice. glad to see your enjoying it. i got soem 4.88s fro my 95 yota and a spartan locker fro teh front. gettin a locrite fro the back. hit me up and well go to mtn city or somethin
 
Back
Top