So, I've been wanting another project so here we go....my buddy's Shitbox Choptop Cherokee Rework!
My buddy Joe came to me a few months ago and wanted me to fix and finish his XJ that has had a million different additions, revisions, shops cut on it, 4wheelin' and owner abuse, etc. He's a great friend and has always been super helpful with things I'm working on so this is my way of paying it back a little bit (and trust me, he's letting me know it's time to cash in those dividend miles -Hah!).
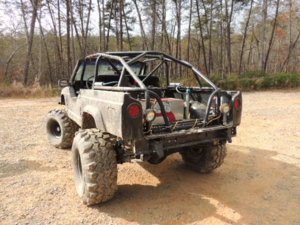
The Jeep's been sitting since it broke at URE Fall 2013. He wants a safe offroader that him and his family can enjoy so my plan is to do just that. Fix the issues at hand and address the safety behind the rig and what is needed to keep him and his family safe. This thing is a HUGE “project” so I am doing my best to fix the issues, clean up some of the fab work and modifications (some of which was very subpar), make it safe for him and his family and add some cool custom touches to it along the way so it actually looks like a Jeep again. I hope you enjoy the build. I'm posting up some early photos so you can see what it came to my house looking like. It has some nice parts overall, it is just cobbled together and if anyone knows Joe, they'll know he's super spastic and jumps from project to project and doesn't seem to pay attention to the details of finishing each step. You can say...A.D.D......Squirrel!
Basic specs (these will remain the same, just fixing lots of issues so the jeep runs like it should with these parts)
'91 2dr XJ w/ 4.0L, AX-15 5spd manual and NP231 w/ SYE kit already installed
Front Axles and Suspension:
Ford Full Width HP Dana 44 (approx. year '73-'76 axle), 4.88 gears, Warn hubs, TNT Customs Dana 44 Truss w/ coil buckets, .250 wall Heim steering with double sheer pitman arm
Rock Krawler 3-link XJ kit w/ Rubicon Express Coils and Fox Racing Shocks
EOS Coil retainers
Rear Axles and Suspension:
Rear Full Width Ford 9” w/ 4.88s, Chevy disc brake conversion and full spool
Rubicon Express rear leaf springs w/ Profender 14” travel air shocks
Miscellaneous:
Chopped top w/ bedsides capped
Full Roll Cage that is well constructed (just didn't have seat brackets tied to it)
Heavy duty driveshafts
Onto the work ahead of me.....
Repairs/Fixes/Issues at hand:
#1 Thorough cleaning: This thing was disgusting when it arrived to my house so step one is cleaning the inside and out before anything begins.
#2 Seat Brackets: Jeep came to me with broken seat brackets so I plan to mount the seats to the chassis and the roll cage for safety. Tying to both will help with rigidity of the chassis that this Jeep lacks. Add 4pt harnesses.
#3 Fuel Pump Booty Fab: Hard mount the fuel pump to the under carriage for safety instead of with zip ties and bungy cords (I'm still shaking my head about this crap).
#4 Make it street legal: Re-wire front headlights, wire tail and brake lights, make mounts for rear brake lights, clean up old wiring in back.
#5 Random fab: Build cool custom drop down tailgate for the rear to match the bedsides, rear corner armor with integrated tail light mounts, build rear bumper, tie windshield to roll cage, tie bedsides to roll cage, build half doors that don't suck (like what is on there), Add dimple dies to alloy plate on front bumper and straighten that metal, trying to figure out a way to add some rocker guards but it's difficult since the body is so mangled, etc, etc.
#6 Unibody issues: Plate the front unibody where the steering box is located. Joe ordered a kit from C-Rok Offroad to address this issue. I'll weld it on when it arrives. Add front frame plates also.
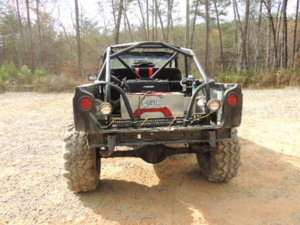
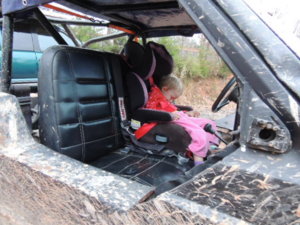
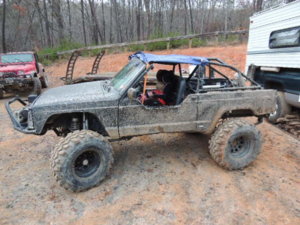
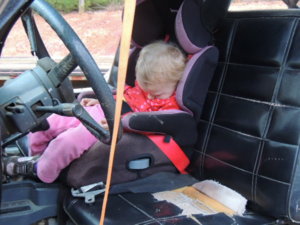
Onto some photos. These show the jeep in it's condition when it arrived to my house. As my friends know, I can't stand booty fab and dirty rigs. Joe's Jeep is lots of both! My first step was to give the jeep a thorough cleaning so it didn't drop dirt, rust or parts on my garage floor or driveway.
Side note: If you like this build and want to check out my other builds see the links below for my Mail Jeep and YJ Wrangler builds.
Mail Jeep - “Gone Postal”
http://www.nc4x4.com/forum/threads/gone-postal-mail-jeep-build.100713/
YJ Build “Old School Hardcore”
http://www.nc4x4.com/forum/threads/old-school-hardcore-yj-soa-hp44-build.97077/
These photos are of what the Jeep looked like when it was brought to my house.


Yep! The seat brackets broke and they were held in on the last trail ride with ratchet straps. Still shaking my head.

The reason the seat brackets broke. Boogers!

Filthy!

"Custom" seat belt bracketry. Those are zip ties!

My buddy Joe came to me a few months ago and wanted me to fix and finish his XJ that has had a million different additions, revisions, shops cut on it, 4wheelin' and owner abuse, etc. He's a great friend and has always been super helpful with things I'm working on so this is my way of paying it back a little bit (and trust me, he's letting me know it's time to cash in those dividend miles -Hah!).
The Jeep's been sitting since it broke at URE Fall 2013. He wants a safe offroader that him and his family can enjoy so my plan is to do just that. Fix the issues at hand and address the safety behind the rig and what is needed to keep him and his family safe. This thing is a HUGE “project” so I am doing my best to fix the issues, clean up some of the fab work and modifications (some of which was very subpar), make it safe for him and his family and add some cool custom touches to it along the way so it actually looks like a Jeep again. I hope you enjoy the build. I'm posting up some early photos so you can see what it came to my house looking like. It has some nice parts overall, it is just cobbled together and if anyone knows Joe, they'll know he's super spastic and jumps from project to project and doesn't seem to pay attention to the details of finishing each step. You can say...A.D.D......Squirrel!
Basic specs (these will remain the same, just fixing lots of issues so the jeep runs like it should with these parts)
'91 2dr XJ w/ 4.0L, AX-15 5spd manual and NP231 w/ SYE kit already installed
Front Axles and Suspension:
Ford Full Width HP Dana 44 (approx. year '73-'76 axle), 4.88 gears, Warn hubs, TNT Customs Dana 44 Truss w/ coil buckets, .250 wall Heim steering with double sheer pitman arm
Rock Krawler 3-link XJ kit w/ Rubicon Express Coils and Fox Racing Shocks
EOS Coil retainers
Rear Axles and Suspension:
Rear Full Width Ford 9” w/ 4.88s, Chevy disc brake conversion and full spool
Rubicon Express rear leaf springs w/ Profender 14” travel air shocks
Miscellaneous:
Chopped top w/ bedsides capped
Full Roll Cage that is well constructed (just didn't have seat brackets tied to it)
Heavy duty driveshafts
Onto the work ahead of me.....
Repairs/Fixes/Issues at hand:
#1 Thorough cleaning: This thing was disgusting when it arrived to my house so step one is cleaning the inside and out before anything begins.
#2 Seat Brackets: Jeep came to me with broken seat brackets so I plan to mount the seats to the chassis and the roll cage for safety. Tying to both will help with rigidity of the chassis that this Jeep lacks. Add 4pt harnesses.
#3 Fuel Pump Booty Fab: Hard mount the fuel pump to the under carriage for safety instead of with zip ties and bungy cords (I'm still shaking my head about this crap).
#4 Make it street legal: Re-wire front headlights, wire tail and brake lights, make mounts for rear brake lights, clean up old wiring in back.
#5 Random fab: Build cool custom drop down tailgate for the rear to match the bedsides, rear corner armor with integrated tail light mounts, build rear bumper, tie windshield to roll cage, tie bedsides to roll cage, build half doors that don't suck (like what is on there), Add dimple dies to alloy plate on front bumper and straighten that metal, trying to figure out a way to add some rocker guards but it's difficult since the body is so mangled, etc, etc.
#6 Unibody issues: Plate the front unibody where the steering box is located. Joe ordered a kit from C-Rok Offroad to address this issue. I'll weld it on when it arrives. Add front frame plates also.
Onto some photos. These show the jeep in it's condition when it arrived to my house. As my friends know, I can't stand booty fab and dirty rigs. Joe's Jeep is lots of both! My first step was to give the jeep a thorough cleaning so it didn't drop dirt, rust or parts on my garage floor or driveway.
Side note: If you like this build and want to check out my other builds see the links below for my Mail Jeep and YJ Wrangler builds.
Mail Jeep - “Gone Postal”
http://www.nc4x4.com/forum/threads/gone-postal-mail-jeep-build.100713/
YJ Build “Old School Hardcore”
http://www.nc4x4.com/forum/threads/old-school-hardcore-yj-soa-hp44-build.97077/
These photos are of what the Jeep looked like when it was brought to my house.
Yep! The seat brackets broke and they were held in on the last trail ride with ratchet straps. Still shaking my head.
The reason the seat brackets broke. Boogers!
Filthy!
"Custom" seat belt bracketry. Those are zip ties!

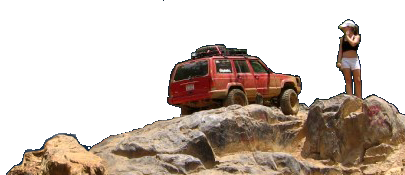


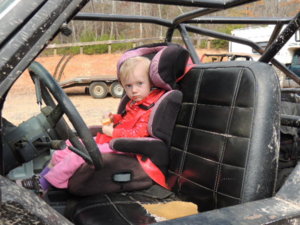
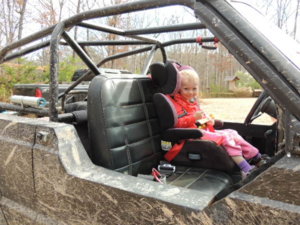
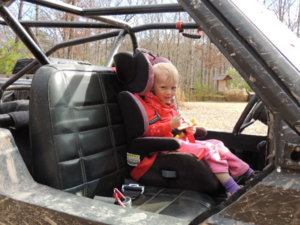
 , and ran new fuel line. I locked the front(spartan), replaced the hubs w/mile marker premiums, and that's about it. We finally got around to taking it to Uwharrie today and was pretty pleased with it. Good flex, decent ride, and I actually didn't break any thing. Here are a few pics from today. By the end of the day she was out!