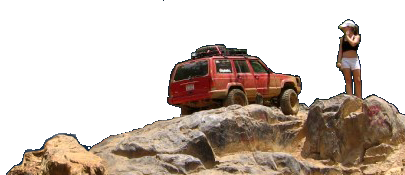
Project Southern X-Posure

rswords

Well-Known Member
Joined
May 12, 2013
Location
United States
It's been about 6 years since I've had a play toy so when a buddy offered up this 85 he just picked up I jumped on it.

85
305 SBC
TH350
NP205
Bed bobbed 14"
Welded rear
detroit in the front
rear springs up front and Chevy leafs in the rear
8k winch

ai211.photobucket.com_albums_bb122_RESWORDS_IMAG0383.jpg

ai211.photobucket.com_albums_bb122_RESWORDS_IMAG0384.jpg


Gotta get some decals made up...
ai211.photobucket.com_albums_bb122_RESWORDS_SoutherX_Posure.png


When every weekend was ending this way the longfields came quick...

ai211.photobucket.com_albums_bb122_RESWORDS_IMAG0395.jpg

ai211.photobucket.com_albums_bb122_RESWORDS_IMAG0397.jpg

ai211.photobucket.com_albums_bb122_RESWORDS_2012_07_27_10_59_05_839.jpg


Comp cut the fenders
ai211.photobucket.com_albums_bb122_RESWORDS_2012_07_21_19_53_40_931.jpg

ai211.photobucket.com_albums_bb122_RESWORDS_2012_07_21_13_39_09_505.jpg

ai211.photobucket.com_albums_bb122_RESWORDS_2012_07_21_13_39_37_142.jpg


And got the cab gutted to put the cage in. 1.75" DOM

Got the GF to help out...
ai211.photobucket.com_albums_bb122_RESWORDS_2012_07_27_18_57_57_998.jpg

ai211.photobucket.com_albums_bb122_RESWORDS_2012_07_27_19_07_37_536.jpg


All loaded up and ready to head out to Chris at RockWorks Fab to get the Cage.
ai211.photobucket.com_albums_bb122_RESWORDS_2012_07_27_17_41_39_481.jpg
 
Last edited:
Got some 4xInovations tube doors and got them hit with some primmer to keep them from rusting up around all this salt water.
ai211.photobucket.com_albums_bb122_RESWORDS_2012_08_03_11_44_27_645.jpg

ai211.photobucket.com_albums_bb122_RESWORDS_2012_08_03_11_44_56_337.jpg


Also pulled some spare axle housings out the storage shed and took them to the shop to start the rebuild.
ai211.photobucket.com_albums_bb122_RESWORDS_2012_08_03_11_49_18_865.jpg
 
So took the truck to the shop to use the forklift to get some measurements for the front shocks. big flex.... like 7" total travel... :laughing:
Also found out that the RUF's are not really rear springs... Who knows what they are so that gets added to the list to do. Here are some poser flex pics. The rear seams to be working well but the front sucks...
Front springs go negative pretty quick... Also shackle angle blows
ai211.photobucket.com_albums_bb122_RESWORDS_2012_09_15_11_21_42_917.jpg

ai211.photobucket.com_albums_bb122_RESWORDS_2012_09_15_11_21_36_427.jpg

ai211.photobucket.com_albums_bb122_RESWORDS_2012_09_15_11_21_23_898.jpg

ai211.photobucket.com_albums_bb122_RESWORDS_2012_09_15_11_21_10_229.jpg

ai211.photobucket.com_albums_bb122_RESWORDS_2012_09_15_11_20_58_472.jpg

ai211.photobucket.com_albums_bb122_RESWORDS_2012_09_15_11_20_47_365.jpg

ai211.photobucket.com_albums_bb122_RESWORDS_2012_09_15_11_19_21_141.jpg

ai211.photobucket.com_albums_bb122_RESWORDS_2012_09_15_11_19_10_995.jpg

ai211.photobucket.com_albums_bb122_RESWORDS_2012_09_15_11_18_55_613.jpg
 
Got Marlin Crawlers new Heavy Duty Knuckle Bracing Kit installed. Very nice kit, required minimal grinding to the axle housing. I really need to practice my welding more...
ai211.photobucket.com_albums_bb122_RESWORDS_2012_09_22_18_23_11_978_zps791ee60b.jpg

ai211.photobucket.com_albums_bb122_RESWORDS_2012_09_22_18_23_26_409_zps5f8e0847.jpg

Got the old axle out of the truck with some help from the girlfriend and tore it all apart and cleaned it up.
ai211.photobucket.com_albums_bb122_RESWORDS_2012_10_08_13_33_33_752.jpg

ai211.photobucket.com_albums_bb122_RESWORDS_2012_10_08_16_34_21_802.jpg

ai211.photobucket.com_albums_bb122_RESWORDS_2012_10_08_16_34_43_448.jpg
 
That weekend we spent the weekend at Crozet, Had a blast! Broke the lock right first thing saturday, it would pull both tires fine in forward, nothing but clicking in reverse. Also sheared 5 of 6 hub studs sunday morning.

ai211.photobucket.com_albums_bb122_RESWORDS_2012_11_03_11_50_08_342.jpg

ai211.photobucket.com_albums_bb122_RESWORDS_2012_11_04_10_12_34_489.jpg
 
While working on putting a IFS rear in.... Found this
ai211.photobucket.com_albums_bb122_RESWORDS_2013_03_09_14_22_51_908.jpg

I thought I busted some teeth off when I broke the u-joint... Confirmed.... :D
When I got the truck I knew that the frame was rusted out, a few to many wheeling trips finished it off...
Looks like a back half has moved up on the priority list...
ai211.photobucket.com_albums_bb122_RESWORDS_IMG_20130328_161208_625.jpg

ai211.photobucket.com_albums_bb122_RESWORDS_IMG_20130328_161151_891.jpg
 
So we move on to this pile....

Ruff Stuff Kit, 2"x.250" links, 2.5x18" kings...
ai211_photobucket_com_albums_bb122_RESWORDS_IMG_20130508_175510_520_jpg_original_.jpg


Numbers
ai211.photobucket.com_albums_bb122_RESWORDS_05_5.png

ai211.photobucket.com_albums_bb122_RESWORDS_06_5.png


While its apart might as well pull the POS 305 and drop in a vartec 4.3... So I need a parts truck... This should do.
ai211_photobucket_com_albums_bb122_RESWORDS_IMG_20130512_112924_429_jpg_original_.jpg
 
After being put on hold and back burner MANY times due to , life, funds, ect. I started the back half today. trying to keep it as compact as can be.

I loving this damn Baileigh Industrial RDB-050, Never bent tube before do nothing to compare to but this thing is smooth, easy to use, and fucking BEEF! Got the main bar bent up before work got in the way again today.

ai211.photobucket.com_albums_bb122_RESWORDS_IMG_20131109_124428_342.jpg

ai211.photobucket.com_albums_bb122_RESWORDS_IMG_20131109_124359_732.jpg

ai211.photobucket.com_albums_bb122_RESWORDS_IMG_20131109_124416_857.jpg

ai211.photobucket.com_albums_bb122_RESWORDS_IMG_20131109_125134_817.jpg
 
Spent a good bit of time trying to get a odd complicated notch figured out. Think I got it and once past that progress should move pretty quick.
ai211.photobucket.com_albums_bb122_RESWORDS_IMG_20131110_172306_478.jpg

ai211.photobucket.com_albums_bb122_RESWORDS_IMG_20131110_172314_983.jpg

`Here are a couple awesome skilled MS paint pictures to give you an Idea of the rest. I'll add more bracing then this but you can get the idea...
ai211.photobucket.com_albums_bb122_RESWORDS_IMG_20131110_172306_478_1.jpg

ai211.photobucket.com_albums_bb122_RESWORDS_IMG_20131110_172314_983_1.jpg

And as it sits today.
Coming along slow but steady. Provence came out and helped with the notching and head scratching.
ai211.photobucket.com_albums_bb122_RESWORDS_IMG_20131116_154331_801.jpg

ai211.photobucket.com_albums_bb122_RESWORDS_IMG_20131116_154337_725.jpg

ai211.photobucket.com_albums_bb122_RESWORDS_IMG_20131116_154348_943.jpg

ai211.photobucket.com_albums_bb122_RESWORDS_IMG_20131116_154357_529.jpg
 
Still plucking along!
ai211.photobucket.com_albums_bb122_RESWORDS_IMG_20131124_141059532.jpg

ai211.photobucket.com_albums_bb122_RESWORDS_IMG_20131124_141109554.jpg

Tossed a shock on real quick., with 8" of shaft showing it will fit perfect. That will give me 8" compression and 10" of drop.
ai211.photobucket.com_albums_bb122_RESWORDS_IMG_20131124_142831673.jpg

the only problem I'm going to have is the driveshaft will go right through the crossmember/link mounts. Once I get dual cases/planetary box it will clear but until then I'm thinking about running a two piece rear shaft with a carrier bearing mounted on the link cross member. Thoughts?
 
Knocked it in half, not sure on the lines and if it will be strong enough. I'll add gussets but i'm not sure if I need more "main" tubes. Thoughts?

ai211.photobucket.com_albums_bb122_RESWORDS_IMG_20131220_183750093.jpg

ai211.photobucket.com_albums_bb122_RESWORDS_IMG_20131220_182633582.jpg

ai211.photobucket.com_albums_bb122_RESWORDS_IMG_20131220_182722296.jpg


Frame conection
ai211.photobucket.com_albums_bb122_RESWORDS_IMG_20131220_182141805.jpg


Also got the 4.3 cleaned up
ai211.photobucket.com_albums_bb122_RESWORDS_IMG_20131217_165531652.jpg
 
I like the way the back turned out. Pretty cool.
 
Thanks, I've been trying to keep it compact as possible.

Got the axle cleaned up and the horse collar cross member cut out. Added some fish plates to the frame where the crossmember for the lower links will go.

ai211.photobucket.com_albums_bb122_RESWORDS_IMG_20131221_155001451.jpg

ai211.photobucket.com_albums_bb122_RESWORDS_IMG_20131221_154957119.jpg
 
got my crossmember for the lower links in and the upper link frame and axle mounts tacked in place before running out of wire. I will say the Baileigh bender made quick work of the 1.75 .250 wall DOM I used for the crossmember. I love that damn thing!

ai211.photobucket.com_albums_bb122_RESWORDS_IMG_20131222_142523600.jpg

ai211.photobucket.com_albums_bb122_RESWORDS_IMG_20131222_142546056.jpg

ai211.photobucket.com_albums_bb122_RESWORDS_IMG_20131222_142603666.jpg


Also got some 39.5" Iroks bye-bye ring gears...
ai211.photobucket.com_albums_bb122_RESWORDS_IMG_20131222_142148274.jpg
 
Thanks

Found some time to pull it out and check clearance with the forklift. the shock is close to the tire under full compression, I think I will toss a spacer on the wheel.

Ride height-ish
ai211.photobucket.com_albums_bb122_RESWORDS_IMG_20131226_152554594.jpg


Full droop
ai211.photobucket.com_albums_bb122_RESWORDS_IMG_20131226_164041236.jpg

ai211.photobucket.com_albums_bb122_RESWORDS_IMG_20131226_164049236.jpg


Full bump
ai211.photobucket.com_albums_bb122_RESWORDS_IMG_20131226_164124003.jpg

ai211.photobucket.com_albums_bb122_RESWORDS_IMG_20131226_164130697.jpg


Flexed about 36" under front tire
ai211.photobucket.com_albums_bb122_RESWORDS_IMG_20131226_164511137_HDR.jpg

ai211.photobucket.com_albums_bb122_RESWORDS_IMG_20131226_164653841.jpg

ai211.photobucket.com_albums_bb122_RESWORDS_IMG_20131226_164705718.jpg

ai211.photobucket.com_albums_bb122_RESWORDS_IMG_20131226_164354366.jpg
 
hhmmmm lets see....

Started mocking up the fuel cell. All pics are at full bump.

My cell is going to be right above my yoke. Having alreadt spent 3 days in a ICU burn unit I don't like the idea of sending u-joint parts into my fuel cell, so here is what I'm thinking. All 3/16 plate.

ai211.photobucket.com_albums_bb122_RESWORDS_IMG_20140104_142944998.jpg

ai211.photobucket.com_albums_bb122_RESWORDS_IMG_20140104_143752435.jpg


Now for mounting it. You can see my little "plate" template to the tube coming from the frame. Not sure if I'm going this way or not. The cell must come out through the bottom due to the design of the tube work.

ai211.photobucket.com_albums_bb122_RESWORDS_IMG_20140104_145218128.jpg

ai211.photobucket.com_albums_bb122_RESWORDS_IMG_20140104_145224150.jpg


Also made a Baller on a budget Nitrogen Fill setup for sub $150.

New 20CF tank off ebay $75
Used regulator off ebay $15
Aircraft tire chuck (no leak) $15
Hydro Hose from napa $35
Tank fill $15

ai211.photobucket.com_albums_bb122_RESWORDS_IMG_20140117_082002570.jpg


Filled the shocks at lunch, works like a charm.

ai211.photobucket.com_albums_bb122_RESWORDS_IMG_20140120_130906019.jpg


Then after work it was on of them nights.... Took 4.5 hours to put my relocation brackets on the front spring perches pushing the front axle 1.75" forward and mount two 39.5 Iroks. I remembered how much I hate fucking mounting tires by hand but at least the 35's are gone.

ai211.photobucket.com_albums_bb122_RESWORDS_IMG_20140120_195116797.jpg

ai211.photobucket.com_albums_bb122_RESWORDS_IMG_20140120_184625792.jpg
 
That's a good looking build! I like the back half. I would find something lighter than 3/16 for you fuel cell protector. That would be hella heavy. Links will protect it from rocks etc, so all you have to worry about is u-joint failure. I'd make a frame out of 1"x1" square tube and cover it with sheet metal. To make it removable, just weld some little 3/16" tabs on the side of the tank skid frame that would bolt to a tab welded to the cage. Then its removable without a torch. Just a thought.

Keep it going!

Thanks, I'm real happy how its turning out.

I've sent u-joints parts through light gauge steel. Not in a crawler but I have done it in a pulling truck. Plus the drive shaft has a chance, not a big one, of making it through the links and into the cell when a u-joint goes. Plus 19x19 piece of plate is only 20ish pounds so I'm not to worried. It will be bolted in. I'm not 100% how I want to do it. Kinda want it to flow with the rest of the build.
 
Got an idea for the fuel cell mount that need some bent plate. So I made a quick press brake and tossed a 6" piece of 3/16 in it. Worked great

ai211.photobucket.com_albums_bb122_RESWORDS_IMG_20140124_142035138.jpg


Got the frame tie in done, braced the receiver hitch in the rear (recovery point)

ai211.photobucket.com_albums_bb122_RESWORDS_IMG_20140125_115241840.jpg

ai211.photobucket.com_albums_bb122_RESWORDS_IMG_20140125_115251218.jpg


And tossed a drive shaft up to get an idea on what I have to do.... Gonna be tight. Only got about 24" or so ujoint center to ujoint center for the rear shaft. The Carrier bearing/pillow block will mount on the "blue" tube. The red tubes are support going from the lower link cross member up to the frame.

ai211.photobucket.com_albums_bb122_RESWORDS_CB.jpg


Also still trying to figure out how I want the lines to go for the rest of the tube.... What y'all think of this?

ai211.photobucket.com_albums_bb122_RESWORDS_IMG_20140124_194313794.jpg
 
How close is the airshock to the blue tape. Not sure how much that shock rotates when that side drops and moves closer to the inside. But seems to have good strength. I'm wanting to do airshocks on mine. How much do you think you have $ into 4 linking the rear and that whole setup. Looks awesome tho. looking forward to seeing the finished product.
 
Back
Top