04 Dakota Quad Cab SAS

RiverRat88

Active Member
Joined
Jun 1, 2009
Location
raleigh NC
I have collected almost all the parts and plan to start cutting either tomorrow or Friday. I have until next Saturday to be drivable again.

Specs:
Front-
-79 F250 Dana 44 with Tru Trac differential and 4.56 gears
-56" Dakota rear leaf springs with shackles in the rear
-Durango steering box with Waggy pitman arm, plan to use the flat arm but have a 3" drop arm coming just in case
-crossover steering

Rear-
-89 E350 Dana 60 FF with 3.5" tubes open differential with 4.56 gears
-disc brake conversion with ruff stuff brackets
-shackle flip and possibly Chevy 63s
-adding tone ring and VSS to axle

Tires-
Have 16x8 aluminum wheels with 315/75R16 rollers
also have hummer bead locks will decide which I am going to use after suspension, steering, and brakes are all in working order.

Parts that are ordered but I am still waiting on-
-tone ring
-9/16 front wheel studs
-wheel studs for rear discs
-rear calipers
-rear brake hardware
-drop pitman arm
-front brake lines
-rear disc brackets

Parts I need that I have not ordered or located-
-drag link
-Chevy 63s?
-miscellaneous power steering and brake lines
-shocks
-find a double cardan drive shaft for the front with 1330 joints
-get flange made to bolt 1330 joint onto front output

Need to do before cutting and truck becomes undriveable-
set up Dana 60 with tone ring and drill housing for sensor
 
A few pictures, I will have to take some pictures of where I am at now and will try to post some along the way

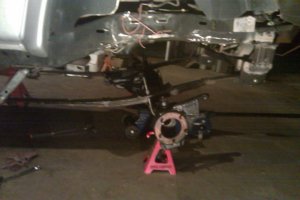
Truck as it sits now but without the camper shell-torsion keys, blocks, 3.55s and 285/75R16


Dana 44 when I brought it home


Tearing down Dana 44 and crossover knuckle


missing enough parts to be easy to carry


Dana 60 when I brought it home, brakes frozen and once I got it apart found that I was going to need all new hardware, adjusters, shoes, wheel cylinders, hard lines, and to replace atleast one cracked drum so decided to go with discs


TTB Dana 44 I bought for the Tru Trac, 4.56s, and spare parts


Hummer Bead Locks with many layers of paint
 
Today was mostly pointless, I got the drop pitman arm, tone ring, and disc brackets, and my calipers and other parts shipped. I started to assemble the 60 and spent a while at work searching through the special tool room to set pinion depth, and got the pre-load perfect. But, then I pulled the carrier out of the freezer, heated up the tone ring and it wasn't even close, there is about a 1/4" difference in diameters. I double checked with parts about the ring and double checked the spicer carrier and both seemed right. Tomorrow I will use the axle id tag to see if they can find a different ring to fit, if not I plan to use the brake lathe Friday to either machine a groove for the ring or to just make the carrier a little smaller. I also got my rear brake studs today and they are much too small so I need to figure out what to do with that. But, I did manage to take a few pictures

Dana 44 cleaned, painted, with gears installed


Box of other painted parts, shackles and spring plates


Other assorted parts and boxes


Kiddie pool with growing pile of scrap-carriers, gears, brakes, brackets


Rollers mounted and balanced


Reid-
I love the way they look too, but I'm hoping it doesn't end up too tall like some I have seen.
 
I'm glad to see another Dakota build. They are great trucks. Good luck with the build. I will go ahead and warn you that removing the front IFS is labor intensive. The front diff and rack-n-pinion setup is all tied into the motor mounts. You will have to do some fabricating on the frame because there is not a flat spot to easily mount a power steering box because the frame flares and the motor mounts are hugh and cause problems to work the steering shaft around. I went with full hydraulic on mine, but it was built for 95% offroading and 5% driving (although not legally because of the steering).
You can get a front output yoke from a 231 out of a rubicon and it will fit into your tcase so that you can use standard joints instead of a flange if you want, or Dave at Olivers in Winston can fix you up.
If you can't get the tone ring and vss working, you can always try this route http://www.dakotadigital.com/index.cfm/page/ptype=product/product_id=126/mode=prod/prd126.htm
http://www.dodgetalk.com/forums/showthread.php?t=133103
http://www.pavementsucks.com/board/thread-Its-a-Festivus-Miracle-Dakota-Digital-SGI-5-WORKING
This is what I am working on doing to get my speedo and odometer back working.
Not sure if any of this will help, but if you need any more info, I will help if I can.

Keep the updates and pics rolling, I always like to see a new build happening.
 
That was very helpful, I should be able to get the tone ring to work somehow. I will probably need a Dakota digital box to get the speed right. I will look into the rubicon yoke, I had not even thought about a factory yoke. I am considering renting a small plasma cutter to make ifs removal quicker.
 
That was very helpful, I should be able to get the tone ring to work somehow. I will probably need a Dakota digital box to get the speed right. I will look into the rubicon yoke, I had not even thought about a factory yoke. I am considering renting a small plasma cutter to make ifs removal quicker.

Did you get my pm? Also I think I have the yoke that you need for your front driveshaft.
 
Thursday was my girlfriend's birthday so I was not allowed to work on it, and yesterday I did not get nearly as much accomplished as I had hoped. I put the carrier on the brake drum lathe and ended up machining .185" out of the radius, so the tone ring was almost 3/8" too small but I have it on now. I still need to drill a hole for the sensor and since we do not have any of the thick shims I am going to need to find a case spreader to set the preload or work on my skill of keeping paper thin shims straight while sliding the carrier in. I did pull the truck into the garage last night and started disassembly. I also turned on the photo time stamp so I can keep track of how long it takes and taking pictures when I start and stop each day, not counting breaks. I also forgot to bring home air tools and pry bars and the battery on my cordless impact was dead, I forgot how slow things go with hand tools.

---Also I just wanted to say how well Dan at ruffstuff took care of me, after the brake brackets didn't make it into the first box, he rushed not one but two sets of brake brackets. I got one box Wednesday and another Thursday, I'm gonna send one set back Monday but it was a little of a surprise and great service.


Last time with IFS


Finally got the rear calipers


planned ride height


Comparing front calipers


IFS parts


My little helper


Progress for the night


Dana 60 with tone ring installed, i think the machining almost looks professional.


Brake rotors machined and getting studs, pile of tools to bring home for more enjoyable work.
 
Air tools made a world of difference, but the compressor couldn't keep up with my impact very well. All IFS is out some frame brackets are off, I am going to install a new front crossmember before cutting the rest of the brackets off.

compressor wiring, mainly needed a start time


2 hours later all parts with bolts are out


these brackets are tough, realized I am going to need more cutting disc and head to lowes


Back from lowes and with a plug for "safer wiring"


gave up for the night, no brackets off


starting picture for this morning


first bracket is off


removal is a lot faster when i don't try and cut the welds, there will just be more grinding later


cut up the last of my 3/8" for brackets, I guess everything will be 1/4" after this


probably the ugliest welding cart you have ever seen


crossmember welded together


So far all the times have evidently been 12hrs behind but it is fixed for the next post. I will start back in a little bit and will probably put in another 5-6hrs tonight and hopefully all brackets will be off, frame reinforcements will be welded in, and the axle will at least be hung if not supporting the truck.
 
Well, I did not get as much done as I had hoped. The crossmember was pretty stout and cutting out brackets is becoming time consuming, next time I will spend a little extra and buy all the brackets that don't have to be made.

Starting time, put the crossmember on jackstands


crossmember welded into place


had to bend the hard brake lines out of the way before cutting


the rest of the IFS bracketry is finally gone


all my old front parts, they take up a lot of space


axle sitting underneath


leaves bolted on, finding best place for front leaf bolt to get the wheelbase I want, and I looks like it may be a lot taller than I had planned and is going to need some degree shims. Done for the night


Starting on leaf brackets


got the notches cut but no holes drilled but time to go to work


dana 60 with no speed sensor


new hole for sensor and a notch for the plug, surprisingly easy to drill


Speed sensor in, very hard to tap the bolt hole, and there is about .150" gap between the sensor and the ring so i will either need to shave the housing 1/8", trim the seat on the sensor, or find another longer sensor and change pigtails. I am going to check on a sensor from a dodge 60 rear tomorrow and see if it fits and possibly has the same plug.
 
Looks like you are making pretty decent progress. I warned you removing that IFS is a bastard! Most people can't appreciate how much time is involved doing a project like this just because of little things like removing brackets and grinding down welds. Keep up the work and pics.

You have a nice looking truck. Is it a DD, building for dual purpose or just wanted to ditch the IFS?
 
I really had thought that cutting off the brackets would take less time than unbolting everything. Even including all the time added for not having the right tools I don't think it has been close. I really should have planned better and cut out any bracket I could beforehand.

It is mainly a dd, I wanted free spin hubs, more than 4" of suspension travel, and also needed to move the front forward for clearance and weight capacity for the bumper and future winch. Also by the time I regeared, and added a body lift I figured cost would be close by the time I sold or scrapped old parts, and it gave me another reason to ditch the ifs. Mainly I want to make sure it will take me where ever I want to go and I won't be worried about breaking much if I venture onto too hard of a trail.

Basically I wanted to get rid of the ifs and would like to try something harder than mud and beaches and still be able to drive to work and on trips.
 
Another night with not much progress, I got the spring hangers welded on and measured for the shackle hangers. I then realized I was going to have to essentially widen the frame so started making the brackets, I got them tacked together and ran out of wire.

This morning I went to the junkyard to get some kind of drag link. I ended up getting the tie rod off a wagoneer and will see what needs to be changed to work, mostly I am just hoping the taper is right. This is actually the same wagoneer I got the pitman arm off of sunday before last. I was having trouble getting the pitman arm off with no puller and he was having trouble getting the first snap ring out of the warn hubs. We managed to both help each other get the parts and go on our ways, I make it there today and roll a tire away from the hub and my pliers are sitting inside the knuckle. This was a nice surprise and if you happen to be a member here and reading this, thank you.

At work I finished putting new studs in the front hub/rotors. This was a little difficult, the rear axle came with 9/16 studs and the front came with 1/2 so I decided to change them 9/16. The 79 F250 didn't come with 9/16 on any package so after some research I had ordered front studs off a 90 F250. The original knurl size was .600 and the new knurl size was .622, I thought this would be close enough. First I hammered them in but they wouldn't quite go through, then I tried the press and I couldn't keep the rotor from tilting under pressure. Today I decided that I would just go back to the 1/2" studs since I will probably need wheel spacers for the hummer wheels anyway, they fall into the hole and spin. Now there is no choice really and I used a reamer for tire repairs and after a while got all of them pressed in.

Spring hangers tacked into place


Spring hangers welded in, you can see red sharpie on the closest one, I am going to trim it so it looks a little better but with a spare car for three more days it needs to drive first


Shackle hanger sitting on frame rail


Passenger bracket mocked up


Driver bracket mocked up, I'm not going to like welding that close to the fuel line


1/4" cut for bracket
 
I've tried to keep up with any detail that wasn't easily found. Last night I got the shackle hangers mounted, hung the axle, realized my shackles were too short and quit for the night. This morning I went to autozone and got some cheap shackles mounted everything again and checked ride height. It looks like it will be about 5" taller and I was shooting for 3-6" so it somehow came out right. I'm hoping its because of the floor jack but the leaves are in a s-shape and I need to get that fixed.

New big spool of wire, I'm glad to finally have a welder that can use them


Shackle hanger welded in place


Trying to get the bushing fully seated


The corners of my shackles were hitting the frame so I need to round the ends


These were just for mock-up so didn't try to make them pretty


I had to move the shackle hangers forward to be able to get the transmission crossmember bolts out, and the shackles became too short.


Went to autozone when they opened and got a box of adjustable height shackles, then after some cleanup around the house got started


Ended up using the hole for 6" but may switch to 7" if it doesn't make my caster much worse. The weight of the truck is now on the springs and it will be 2" taller than this with tires mounted.


I still need to reassemble the front axle, mount the steering box, shorten/lengthen the drag link, mount shocks, and put wheels back on. I also need to hook up brakes and power steering hoses both of which may require some fitting changes but I have the lines that were made for the steering box and the lines made for the calipers but made need to make some way the splice them onto the current lines.
 
Any possibility of moving the front spring mount forward? The angle on those shackles doesn't look to good. What are those springs from?
 
Yeah, those springs are in a terrible bind. have you tried one of the longer holes in the shackle? Also, like sqrl said, it would really help to push the front mount forward an inch or two if possible.
 
...it somehow came out right... but the leaves are in a s-shape and I need to get that fixed.


Shackle hanger welded in place


Ended up using the hole for 6" but may switch to 7" if it doesn't make my caster much worse. The weight of the truck is now on the springs and it will be 2" taller than this with tires mounted.

.

Oh my...
 
Those look like grand wagoneer springs. If they are then best of luck with them. I have trashed probably a half dozen of them because they are so soft they bend/break easily. You might be fine with them since you have them set up with the shackle in the rear, but from the pics it looks like they are already tweaked.

Not busting on anything, but you really need to look into doing something different with that shackle angle or you are gonna have more issues to deal with, poor ride quality, suspension binding, etc. I know you are on a limited time frame with a loaner vehicle, but please take the time to do things right the first time so that it is dependable and safe to be on the road.
 
I just tried to upload a pic I haven't tried from the phone before but we will see. I loosed all the shackles and spring bolts, nothing. I moved it down a hole and it has gotten worse. The springs are durango tears, 56" with the spring pin offset 24" ahead, 32" behind I looked at my rear leaves and the durango spring eyes create a more positive caster. At ride height the rear eye is 4.5" higher than the front. Currently with the 7" shackles my rear is 8" lower than the front. I think this 12.5" difference in relationship to each other is causing this issue.

I see three options
1. Reverse the main leaf and redrill the center pin.
2. Find another leaf with 24" from front eye to center pin and make a new shackles hanger.
3. Run it as is? Realistically though what negative effects would this have in the short run?

If anyone has any other options let me know, or just if you have an opinion on it, (productive please, it looks like crap doesn't help me)

I will probably make a decision before I go to bed, hopefully its a good one.

Sent from my HERO200 using Tapatalk
 

Attachments

  • uploadfromtaptalk1311211390543.jpg
    uploadfromtaptalk1311211390543.jpg
    96.7 KB · Views: 742
Doubt you can drill those leaves. My suggestion would be to either find different springs or move the front hanger forward. Honestly, it looks like those springs are shot anyway. Maybe a shorter spring would be best. Grand Wagoneer springs have an offset center pin like those and may be a little shorter (24.5" to center pin and 22.5 other end, not sure) but like I said for heavy offroading they are soft. If you are just using it for a DD with occasional offroading, they would probably be fine.
Grand Wagoneer front springs 86-89 model.
 
Are the leaves on the wagoneer and grand wagoneer the same, and I'm assuming they are also rears.

I looked up some springs and found that bronco 2 rears may be the closest fit but I doubt I can find a set tomorrow. It looks like xj rears may work but are a little shorter, but easy to find. Strength wise I am not too worried if it work for now and as little as it sees anything too rough offroad.

I tried to look at Mr. N's chart to find more but my computer and printed copy are both at my parents house and with no internet here anyway. It is just too hard to read on my phone. It does mean maybe I can get decent night sleep tonight though.

This is getting a little stressful, and to think my original plan was to take a 3 day weekend to do it all. I would suggest giving a little more room on the timeline to anyone considering a sas. Also I went with leaves for simplicity, but I think radius arms would have been easier. At the same time, obviously this is my first major project.

Sent from my HERO200 using Tapatalk
 
Back
Top