88 Samurai Build

Brownsxj

Well-Known Member
Joined
Mar 19, 2008
Location
Durham NC
There has been a lot of nice builds popping up on here lately that have inspired me to start my own thread. Be patient as it will take me a little time to get all the photos in order and bring you guys to where it is now.

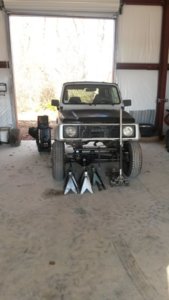
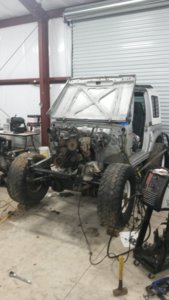
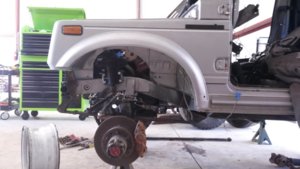
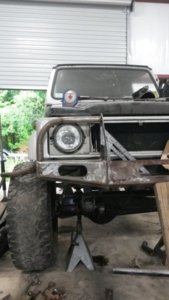
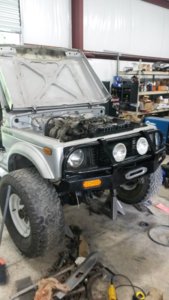
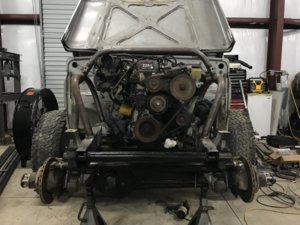
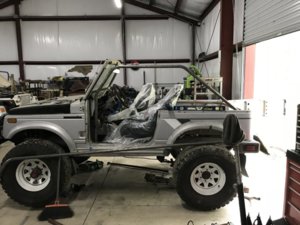
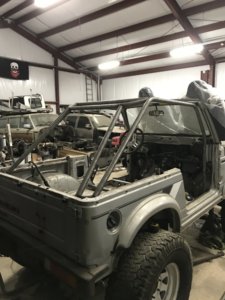
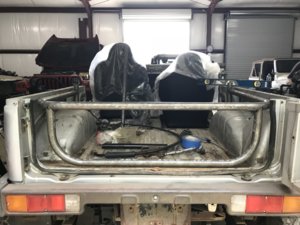
So I picked up a 88 Samurai in October ‘17 complete without a motor or transmission. I saw it for sale on Craigslist here in NC out towards the coast. It was a clean little thing with 99 percent rust free tub and frame.

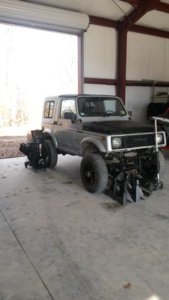
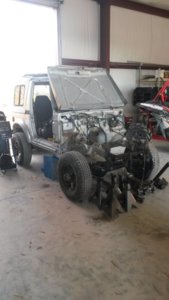
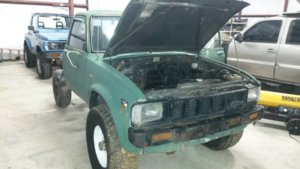
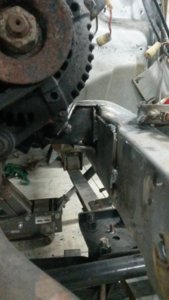
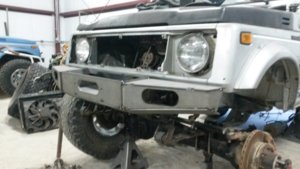
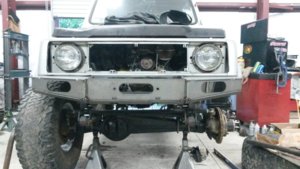
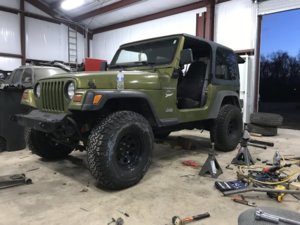
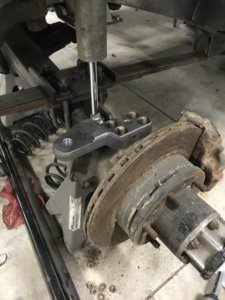
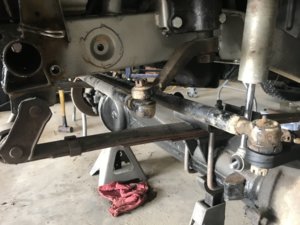
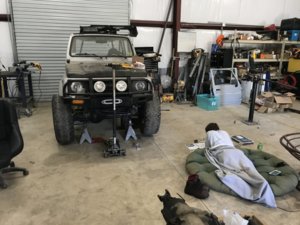
So I called up Sam Winget to see if he still had my old Toyota axles from a previous build. I was able to purchase them back and threw them in. I also painted the hood black in memory of my old samurai I had a long time ago.

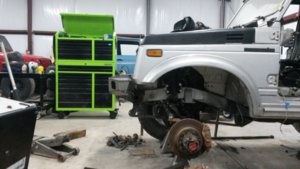
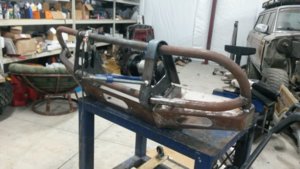
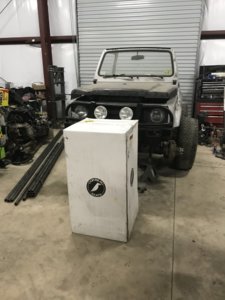
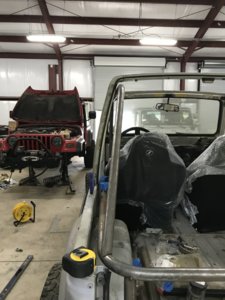
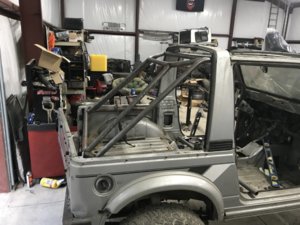
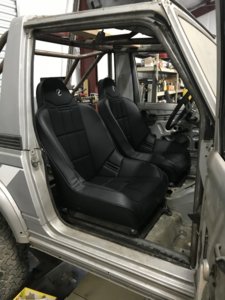
I was able to get a spot in Justin Horton’s garage to have a good covered workspace.
 

Attachments

  • 3CCA3D69-4CB3-4735-A76F-CF20399EF672.jpeg
    3CCA3D69-4CB3-4735-A76F-CF20399EF672.jpeg
    81.4 KB · Views: 832
  • E7499D1F-72AD-459E-B689-E6AED1F789EB.jpeg
    E7499D1F-72AD-459E-B689-E6AED1F789EB.jpeg
    77.3 KB · Views: 992
  • 9F15E6BF-DDBA-48A3-B141-5EFFE6C664EE.jpeg
    9F15E6BF-DDBA-48A3-B141-5EFFE6C664EE.jpeg
    76.2 KB · Views: 863
When I met Sam to get the Toyota axles, he happened to have a 92 22re, trans, and tcase in his shop. I wasted a bunch of time and effort with a Grand Vitara setup and ended up calling Sam to see if he would let the Toyota stuff go. Justin Horton was thinking about the samurai idea too, so we made a day trip out of it.
 

Attachments

  • C6B1E1D9-4401-41F5-895E-D8383B235F75.jpeg
    C6B1E1D9-4401-41F5-895E-D8383B235F75.jpeg
    129.7 KB · Views: 765
In the quest for more Toyota parts we acquired a first gen pickup. Off this we were able to get rims, rollers, brake booster, clutch master, pedal assemblies, motor mounts, and some other random parts.
 

Attachments

  • 0D5D771F-1193-4E05-8956-DEDA3C482DF1.jpeg
    0D5D771F-1193-4E05-8956-DEDA3C482DF1.jpeg
    95.5 KB · Views: 696
The rims were in really nasty shape. So I scraped, wire wheeled, and threw some paint on them.
Some used 33x12.50 Ko1s were then mounted.
 

Attachments

  • B747161F-F84E-4B9C-8B99-9AEA78ECD49A.jpeg
    B747161F-F84E-4B9C-8B99-9AEA78ECD49A.jpeg
    114.3 KB · Views: 738
  • 91760FD0-33BD-4293-B145-EE39EF16F151.jpeg
    91760FD0-33BD-4293-B145-EE39EF16F151.jpeg
    114.1 KB · Views: 703
  • B274E230-55C9-4D6D-9C02-287911FFF222.jpeg
    B274E230-55C9-4D6D-9C02-287911FFF222.jpeg
    81.2 KB · Views: 718
  • 03487F73-075B-4CBF-ACEB-99839838CD36.jpeg
    03487F73-075B-4CBF-ACEB-99839838CD36.jpeg
    100 KB · Views: 740
Before I worked on the rims and tires, it was time to finally see a motor in this thing.
 

Attachments

  • E01FCC6D-E0A5-40EE-8268-A78D44F2A89B.jpeg
    E01FCC6D-E0A5-40EE-8268-A78D44F2A89B.jpeg
    97.2 KB · Views: 783
  • F39276FE-84B3-40FD-BFAA-BABEE01D16A8.jpeg
    F39276FE-84B3-40FD-BFAA-BABEE01D16A8.jpeg
    92.5 KB · Views: 763
  • 48121A43-AA87-4C78-9E5F-7D2A1E5874BB.jpeg
    48121A43-AA87-4C78-9E5F-7D2A1E5874BB.jpeg
    96.6 KB · Views: 778
I picked up a Fj80 steering box from Frankenyoter. I wanted to use this because of the forward facing pitman arm. For the mount I reused the old samurai 1.3l frame side motor mount.
 

Attachments

  • 08C846E6-682F-44CC-B4FA-DB7AF86DF790.jpeg
    08C846E6-682F-44CC-B4FA-DB7AF86DF790.jpeg
    65.1 KB · Views: 756
  • 0176EA22-FC78-409F-8F70-75DB0DB7AC8B.jpeg
    0176EA22-FC78-409F-8F70-75DB0DB7AC8B.jpeg
    98.5 KB · Views: 733
  • 510E04CE-DDD4-4F0E-BA58-E9AF86B55B87.jpeg
    510E04CE-DDD4-4F0E-BA58-E9AF86B55B87.jpeg
    84.5 KB · Views: 706
  • 2E60FC88-6B81-4F26-B3B7-044F91D1848A.jpeg
    2E60FC88-6B81-4F26-B3B7-044F91D1848A.jpeg
    86.8 KB · Views: 706
I bought a Dr. Z Fab kit bumper for the front. I had to modify some of the pieces to get a good fit on how they all interlock.
 

Attachments

  • 9FEC7677-A5B6-4E7A-9BAF-3FFE615ABC7F.jpeg
    9FEC7677-A5B6-4E7A-9BAF-3FFE615ABC7F.jpeg
    90.3 KB · Views: 777
  • A79D948A-BCCC-4741-80CF-ECE74BA6DD47.jpeg
    A79D948A-BCCC-4741-80CF-ECE74BA6DD47.jpeg
    110.5 KB · Views: 731
  • B917EC4C-101D-4FC2-8171-70B9CDDA876B.jpeg
    B917EC4C-101D-4FC2-8171-70B9CDDA876B.jpeg
    94.6 KB · Views: 717
So I love doing fab work and always wanted an ARB bumper. So I added more metal to the kit bumper.
 

Attachments

  • 4B97C4F7-D036-456B-8773-922D71D9D795.jpeg
    4B97C4F7-D036-456B-8773-922D71D9D795.jpeg
    85.3 KB · Views: 732
  • D674655C-698A-4F6F-969D-029C54C3951B.jpeg
    D674655C-698A-4F6F-969D-029C54C3951B.jpeg
    64.5 KB · Views: 710
  • 3B927CEB-FED6-4E72-9BFA-54485C7103FE.jpeg
    3B927CEB-FED6-4E72-9BFA-54485C7103FE.jpeg
    91.6 KB · Views: 720
  • 7A902DBF-4FEF-4AAB-8042-E755EEB09765.jpeg
    7A902DBF-4FEF-4AAB-8042-E755EEB09765.jpeg
    102.2 KB · Views: 765
  • 8592216B-D657-4D59-9944-07F17451D9C0.jpeg
    8592216B-D657-4D59-9944-07F17451D9C0.jpeg
    145.9 KB · Views: 767
Next was fitting a radiator. Everything is starting to get real tight in there. I ordered a Spal 16” fan from Griffin.
 

Attachments

  • CD176AF8-E646-4F64-A068-8556FD1ED78C.jpeg
    CD176AF8-E646-4F64-A068-8556FD1ED78C.jpeg
    99.4 KB · Views: 692
  • DE9B743B-B36B-496E-BEFA-8B1490C6B6BA.jpeg
    DE9B743B-B36B-496E-BEFA-8B1490C6B6BA.jpeg
    103.7 KB · Views: 684
  • AD8D2F30-A22C-4234-BBED-63A4EAADCA9A.jpeg
    AD8D2F30-A22C-4234-BBED-63A4EAADCA9A.jpeg
    101.5 KB · Views: 724
  • AC38A944-8F08-441B-B021-C8B0470EE450.jpeg
    AC38A944-8F08-441B-B021-C8B0470EE450.jpeg
    87.5 KB · Views: 670
So the Friday of Hurricane Florence I ran up to Alro Steel in Greensboro to get some 1.5” DOM. They agreed to stay open long enough for me to get there. Really nice people to work with.

I started with the engine bay so I could finally bolt the front end back on for the last time of the build.

Also bought some Baja SS seats. I have always wanted a set.
 

Attachments

  • F7E2CBBF-A4C2-43B6-99F1-D3BC24403E76.jpeg
    F7E2CBBF-A4C2-43B6-99F1-D3BC24403E76.jpeg
    167.2 KB · Views: 746
  • 82CD65B4-70F1-4159-9427-F4150B794623.jpeg
    82CD65B4-70F1-4159-9427-F4150B794623.jpeg
    128.5 KB · Views: 703
  • 8E91A591-4611-4D2A-A0B4-85E97CA35247.jpeg
    8E91A591-4611-4D2A-A0B4-85E97CA35247.jpeg
    115.2 KB · Views: 731
  • DC533955-3883-4994-821E-FB4A4BA020C0.jpeg
    DC533955-3883-4994-821E-FB4A4BA020C0.jpeg
    143.1 KB · Views: 758
  • 9CDEA893-2587-4B70-A8E7-8231ED35A3ED.jpeg
    9CDEA893-2587-4B70-A8E7-8231ED35A3ED.jpeg
    162.6 KB · Views: 767
Blue Can Mafia
 
Doug Lane, who used to get on here a lot, has almost the identical setup. Toyota drive train, even blue. That thing would flat out go on some 33” boggers! I wheeled all over Harlan with him years ago. I don’t think he wheels anymore. This makes me want to reach out to him and try to get him to come out again.

Nice build!
 
Thank you 77GreenMachine. The blue one on here is gone now, mine is the silver one.

Let the cage work get started!
 

Attachments

  • D8C1DC6C-6F76-49F4-8B52-B8AD4AA041ED.jpeg
    D8C1DC6C-6F76-49F4-8B52-B8AD4AA041ED.jpeg
    132.8 KB · Views: 790
  • F895E2EE-DEBC-4BDE-A88A-388D3110D724.jpeg
    F895E2EE-DEBC-4BDE-A88A-388D3110D724.jpeg
    136.1 KB · Views: 798
  • 3C5A5879-06ED-4FF9-83A9-EECA985DB0A8.jpeg
    3C5A5879-06ED-4FF9-83A9-EECA985DB0A8.jpeg
    147.8 KB · Views: 890
  • E653D556-D131-439A-A681-5AC78E12F1A4.jpeg
    E653D556-D131-439A-A681-5AC78E12F1A4.jpeg
    131.7 KB · Views: 829
  • 9DBDBD5B-FEA9-49F1-B571-071E54C91E37.jpeg
    9DBDBD5B-FEA9-49F1-B571-071E54C91E37.jpeg
    138.5 KB · Views: 795
A family friend/ co-worker of mine pulled up to the job site a couple of weeks ago with a transmission issue in his wrangler. The AX15 blew a bearing and took some gears out with it, so we had his trans rebuilt. While waiting for it to be finished, we went ahead and put a 2.5” lift (springs, uppers, lowers), wheels, and 33” Ko2s. Why not right?

33s came from #89wrangler. Thanks again.
 

Attachments

  • 344EF806-D9EA-4029-9F0D-27F66D952735.jpeg
    344EF806-D9EA-4029-9F0D-27F66D952735.jpeg
    125.8 KB · Views: 709
  • A0734F8A-0C6B-44CC-AC5D-B28C51AC1D23.jpeg
    A0734F8A-0C6B-44CC-AC5D-B28C51AC1D23.jpeg
    138.6 KB · Views: 660
So this brings us to now. Tonight I hope to get more done on the cage.

The pics were from last weekend. New highsteer arms were a must. The last set I screwed up drilling them out for a 5/8” bolt. The framing for the seats should move pretty quick I feel. It will be real nice to bolt in the seats and get a feel for how I will be in it. But also to be able to move into the spreader bars behind the seats as well.
 

Attachments

  • 48683EE6-F0F6-4B19-B07C-4135BFCB7ECA.jpeg
    48683EE6-F0F6-4B19-B07C-4135BFCB7ECA.jpeg
    126.7 KB · Views: 719
  • A9029145-6D84-4D1B-B324-632E4DD22F05.jpeg
    A9029145-6D84-4D1B-B324-632E4DD22F05.jpeg
    137.2 KB · Views: 752
  • 111280FE-FB29-41C7-8B14-18256A8355E0.jpeg
    111280FE-FB29-41C7-8B14-18256A8355E0.jpeg
    142.8 KB · Views: 715
I made this little guy just now before coming home for dinner. I had a bunch of work calls flood in walking into the shop (aka no service area)... should have kept walking. But got a solid hour. Should help as I can’t bridge between the seats and keep the tube from clapping the floor.
 

Attachments

  • 338281CF-4000-40AA-B508-88C4C1249FA3.jpeg
    338281CF-4000-40AA-B508-88C4C1249FA3.jpeg
    109.7 KB · Views: 687
  • C98A756F-EF5B-4689-9AC8-12811B23BC1E.jpeg
    C98A756F-EF5B-4689-9AC8-12811B23BC1E.jpeg
    137.2 KB · Views: 733
  • 4012A385-247D-419D-BCD5-076750174275.jpeg
    4012A385-247D-419D-BCD5-076750174275.jpeg
    103 KB · Views: 677
Had some help in the shop today. My wife Marie wanted to hang out building a 4x4 Lego’ish thing while I worked on my Suzuki’ish thing.

More done on the subframe and seats mocked up.
 

Attachments

  • 5A76E9AD-FC77-4D02-863D-81CCAA5BEB22.jpeg
    5A76E9AD-FC77-4D02-863D-81CCAA5BEB22.jpeg
    149.9 KB · Views: 769
  • B6CBE305-12BF-44DD-B450-A327575627DF.jpeg
    B6CBE305-12BF-44DD-B450-A327575627DF.jpeg
    153.5 KB · Views: 758
  • 071D9E34-213D-425D-BFD8-5473F872BD6F.jpeg
    071D9E34-213D-425D-BFD8-5473F872BD6F.jpeg
    129.8 KB · Views: 750
It has been sitting for a while since I have been traveling a little with work. I haven’t accomplished much since the last update. I pulled the gas tank but tonight I had some time and a spark of motivation. I notched the dash to get around the a-pillers to see where I can put in my spreader bar concealed under for visibility. This is a crucial moment too because this effects wiper motor, hvac, and most important...my dash cluster... I still have hopes I can graft my Toyota one in somehow.
 

Attachments

  • 497486BA-4919-45A4-9E01-8A944702CC49.jpeg
    497486BA-4919-45A4-9E01-8A944702CC49.jpeg
    132.6 KB · Views: 694
A little more cagework tonight. A-piller spreader under the dash with about 4.5” space to help fit a cluster back in there.
 

Attachments

  • 99A90BB2-ABDB-4DE4-847B-362EB155AFE3.jpeg
    99A90BB2-ABDB-4DE4-847B-362EB155AFE3.jpeg
    117.9 KB · Views: 637
  • 9F87FA46-6982-4CB1-9606-F2CF0DFFF737.jpeg
    9F87FA46-6982-4CB1-9606-F2CF0DFFF737.jpeg
    122.6 KB · Views: 718
Back
Top