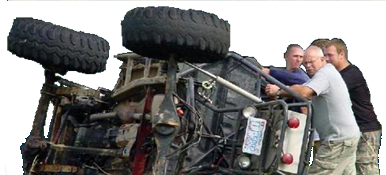
"Special Delivery" another postal build........

Man, havent checked on this build in a while. You have been very busy! looking good brother. Keep it up and maybe we'll get to see some wheeling shots soon.

I have a grand prolly not likely plan to be mild wheelin over the halloween weekend our local orv park is having some kind of function...so wish me luck
 
ok so as i keep saying...lol..its pic update time again

first ill back up to the before and after pics of the 3/8 round trimming of body armor....now bear with me the pics are from two different sides of truck but you can get the jist of it all...

before
awww.supermotors.net_getfile_949733_fullsize_imag0289.jpg

awww.supermotors.net_getfile_949734_fullsize_imag0293.jpg

awww.supermotors.net_getfile_949735_fullsize_imag0294.jpg

after
awww.supermotors.net_getfile_949736_fullsize_imag0288.jpg

awww.supermotors.net_getfile_949738_fullsize_imag0286.jpg

awww.supermotors.net_getfile_949737_fullsize_imag0287.jpg


now on to some "Colt Ford"...lol

motor hangin from a tree..la la lalala la
awww.supermotors.net_getfile_949739_fullsize_imag0343.jpg

awww.supermotors.net_getfile_949740_fullsize_imag0344.jpg

awww.supermotors.net_getfile_949741_fullsize_imag0345.jpg


and so here it it as im trying to get it where i want it...lol and prior to eliminating factory firewall...notice the modern "Cab Forward" placement...lmao
awww.supermotors.net_getfile_949743_fullsize_imag0348.jpg

awww.supermotors.net_getfile_949744_fullsize_imag0347.jpg


bye-bye firewall...and look at those lovely comfy seats...lol
awww.supermotors.net_getfile_949745_fullsize_imag0352.jpg

awww.supermotors.net_getfile_949746_fullsize_imag0353.jpg

awww.supermotors.net_getfile_949747_fullsize_imag0355.jpg


new firewall going in...lol im using more of the diamond plate on the sides as the factory tinfoil firewall was not up to the task of having booster/mc and or battery relocation...thesee peices will tie into thee floors...trans tunnel and center of firewall will be 14ga sheet...
awww.supermotors.net_getfile_949748_fullsize_imag0361.jpg

awww.supermotors.net_getfile_949749_fullsize_imag0363.jpg


i put the tread towards the inside for consistency reasons plus it will make it a little smoother in the engine bay(easier to clean...lol)
i should have the driver side knocked out here in a bit as well as mounting the booster/mc and gas/brake pedal assembly...

well thats it for now..sorry for the lack of pics...lol ill do better next time
 
Do ya ever get the feeling you migh have over complicated things....i do..doh
 
so i guess ill start witok so like its long awaited pic time again...sorry having problems with wisdom teeth getting surgery monday....lol...h some more pics of the still not finished firewalldrivers side with 94 accord pedal assembly...if you look closlely you can see where i had to flip the section behind pedals because first tim i had them too low
awww.supermotors.net_getfile_950776_fullsize_imag0370.jpg
awww.supermotors.net_getfile_950775_fullsize_imag0369.jpg
94 accord master cyl/booster assembly...im going to change the vacuum line of course
awww.supermotors.net_getfile_950774_fullsize_imag0366.jpg
awww.supermotors.net_getfile_950773_fullsize_imag0365.jpg
both sides in still waiting on metal for tunnel...surgery setting me back 400$ after insurance...ouch
awww.supermotors.net_getfile_950760_fullsize_11aac118d319944401280100.jpg
ok on to new dash and partial interior mock up photos...starting with my helper(youngest daughter out of 3)
awww.supermotors.net_getfile_950779_fullsize_imag0375.jpg
dash panel layout(daughter is labeler...lol)
awww.supermotors.net_getfile_950778_fullsize_imag0378.jpg
awww.supermotors.net_getfile_950777_fullsize_imag0377.jpg
dash with some work and console mock up/fitting...also out of 94 accord(console not dash...lol)
awww.supermotors.net_getfile_950780_fullsize_imag0381.jpg
awww.supermotors.net_getfile_950781_fullsize_imag0382.jpg
awww.supermotors.net_getfile_950782_fullsize_imag0383.jpg
awww.supermotors.net_getfile_950783_fullsize_imag0380.jpg
and now on to front shocks...lower mount tabs
awww.supermotors.net_getfile_950765_fullsize_imag0387.jpg
upper mount(re-allocated original body mounts)
awww.supermotors.net_getfile_950766_fullsize_imag0388.jpg
shocks mounted
awww.supermotors.net_getfile_950767_fullsize_imag0393.jpg
awww.supermotors.net_getfile_950768_fullsize_imag0395.jpg
moving right along to the front bumper and stinger..and more body mock ups....i like to continually see what it looks/is going to look like as i work on it...
awww.supermotors.net_getfile_950761_fullsize_imag0402.jpg
awww.supermotors.net_getfile_950762_fullsize_imag0403.jpg
awww.supermotors.net_getfile_950763_fullsize_imag0404.jpg
awww.supermotors.net_getfile_950764_fullsize_imag0409.jpg
i still have to drill and slot winch mount plate and them front bumper is finished.....but after monday ill have to wait till some of the pain subsides before i get to crankin on it hared again...im going to try and get out there tomorrow and get some more finish welding done but prolly wont be anything to write home about...lol..well hope you enjoyed this pic filled update...untill next time...cheers
 
You figure out what you're going to use for the steering? you going to mount a steering box or just run hydro steering? Remember if you're planning on running the traditional steering box, you'll need to squeeze the steering shaft around where your brake master cylinder is located.

dash looks good with the speakers. also clever way of incorporating a refurbed center console.
 
You figure out what you're going to use for the steering? you going to mount a steering box or just run hydro steering? Remember if you're planning on running the traditional steering box, you'll need to squeeze the steering shaft around where your brake master cylinder is located.

dash looks good with the speakers. also clever way of incorporating a refurbed center console.

Thanks..i have a complete hydro setup ive been using for about 5yrs...i would never ever run traditional steering offroad again(im spoiled)...lol...and as for the console i had to.scrap that idea...it interfered with t-case shifter..i do plan on eventually twin sticking th 205...so..but anyways...lol
 
You figure out what you're going to use for the steering? you going to mount a steering box or just run hydro steering? Remember if you're planning on running the traditional steering box, you'll need to squeeze the steering shaft around where your brake master cylinder is located.

dash looks good with the speakers. also clever way of incorporating a refurbed center console.

Thanks..i have a complete hydro setup ive been using for about 5yrs...i would never ever run traditional steering offroad again(im spoiled)...lol...and as for the console i had to.scrap that idea...it interfered with t-case shifter..i do plan on eventually twin sticking th 205...so..but anyways...lol
 
This thing is coming along pretty good! That console looks right at home, should keep your dash nice and clean, I like it.
 
This thing is coming along pretty good! That console looks right at home, should keep your dash nice and clean, I like it.

Thanks man but console turned out to be a bust.....dash turned into a hot mess real quick...lol...biggest reason is wife decided(let me dephrase that)...demanded I put heat and defrost back in....I'll post pics of what my dash now looks like...lol
 
Ok I'm back...sorry just sorta fell asleep at the wheel...
 
ok so like im not sure what happened but im back...got a lot of catching up to do so hope you guys are in for some reading...and lots of pics and a second DJ to boot...

so on to pics

firewall and trans tunnel
awww.supermotors.net_getfile_964346_fullsize_imag0066.jpg

awww.supermotors.net_getfile_964345_fullsize_imag0065.jpg

awww.supermotors.net_getfile_964344_fullsize_imag0064.jpg

awww.supermotors.net_getfile_964343_fullsize_imag0062.jpg

soft door frame
awww.supermotors.net_getfile_964342_fullsize_imag0061.jpg

awww.supermotors.net_getfile_964341_fullsize_imag0060.jpg

awww.supermotors.net_getfile_964340_fullsize_imag0058.jpg

steering
awww.supermotors.net_getfile_964339_fullsize_imag0057.jpg

awww.supermotors.net_getfile_964338_fullsize_imag0054.jpg

ok thats it for now...time to go hunt...lol
 
was gonna have frames covered on canvas like jeep doors but went steel instead

after tacking...
awww.supermotors.net_getfile_964835_fullsize_imag0068.jpg

awww.supermotors.net_getfile_964836_fullsize_imag0069.jpg

awww.supermotors.net_getfile_964837_fullsize_imag0070.jpg

some finish welding grinding and primer
awww.supermotors.net_getfile_964832_fullsize_imag0071.jpg

awww.supermotors.net_getfile_964833_fullsize_imag0072.jpg

awww.supermotors.net_getfile_964834_fullsize_imag0073.jpg

in the dark...lol
awww.supermotors.net_getfile_964831_fullsize_imag0080.jpg

awww.supermotors.net_getfile_964830_fullsize_imag0079.jpg

ok so thats what i got...lol will post pics of actual skining process on next door...as well as pics of my at the moment non exsistent latch system...lol:D
 
so between now and then I picked up another DJ think ill refer to it as little dj for now but am toyin with the idea of "Grocery Delivery"...lol since it will be my daily driver 1) for gas reasons 2) because I need to do some serious love/maintenance to the one ton...ok enuff blabbing on to the pics

.haha ok so here goes...first some pics of the original
quick shot of the dash with speaker holes finally cut....and ready for wiring
awww.supermotors.net_getfile_987114_fullsize_imag0262.jpg

and of course every one love a well smoked jeep...lol no wait thats ham
awww.supermotors.net_getfile_987115_fullsize_imag0300.jpg

winch mounted finally as well....wish i had remembered to drill all the hole before i welded it all together...
awww.supermotors.net_getfile_987116_fullsize_imag0317.jpg

im gonna kill myself if i cant drive this badboy soon
awww.supermotors.net_getfile_987117_fullsize_imag0335.jpg

the new 77 as she looked when i found her...
awww.supermotors.net_getfile_987118_fullsize_imag0342.jpg

after a bath and inital cleaning out...
awww.supermotors.net_getfile_987125_fullsize_imag0343.jpg

awww.supermotors.net_getfile_987126_fullsize_imag0347.jpg

awww.supermotors.net_getfile_987127_fullsize_imag0348.jpg

awww.supermotors.net_getfile_987128_fullsize_imag0349.jpg

well thats about it for now.....
 
short narrative of whats to come...after locating and pricing brake parts I determined it was way too costly and well just plain stupid to justify keeping the drums...oh and a good side note " the narrowed dana 44's these have come with factory lockers don't trash your rear till you strip it if you pick one of these up"...I didn't find this out till I had thrown away 2 factory 44 lockers...doh...ok on to point...so I decided to use a pair of 4wd Cherokee axles(will eventually be 4wd) to upgrade to disc brakes for cheap...so on to pics

ok will start with axles n related crap..
old crap
awww.supermotors.net_getfile_989592_fullsize_001.jpg

pics of the dana 30 minus all the hideous cherokee mounts n brackets
awww.supermotors.net_getfile_989593_fullsize_002.jpg

awww.supermotors.net_getfile_989594_fullsize_003.jpg

awww.supermotors.net_getfile_989596_fullsize_004.jpg

rear axle(not thru cleaning yet)
awww.supermotors.net_getfile_989597_fullsize_007.jpg

pile o brackets n trash from front axle
awww.supermotors.net_getfile_989598_fullsize_008.jpg

a few dash pics...
dash of the soon to be daily driver...
awww.supermotors.net_getfile_989599_fullsize_009.jpg

dash of not so daily driver...lol...
awww.supermotors.net_getfile_989600_fullsize_011.jpg

awww.supermotors.net_getfile_989602_fullsize_012.jpg

facial comparison...
daily..
awww.supermotors.net_getfile_989603_fullsize_013.jpg

not so daily(you can see daily in background)
awww.supermotors.net_getfile_989604_fullsize_014.jpg

and then just for giggles...one of my old cherokees
awww.supermotors.net_getfile_887084_fullsize_013.jpg

well there ya go pics more soon to come...lol
 
and away we go...

ok so a quick pic update....
parts...
awww.supermotors.net_getfile_990263_fullsize_dscf1203.jpg

awww.supermotors.net_getfile_990264_fullsize_dscf1206.jpg

awww.supermotors.net_getfile_990267_fullsize_dscf1210.jpg

awaiting axles...
awww.supermotors.net_getfile_990266_fullsize_dscf1209.jpg

front bumper cut down fenders removed getting ready for facelift...
awww.supermotors.net_getfile_990265_fullsize_dscf1207.jpg

also got some of the fab work done on spring mounting locations on front...should have pics on that tomorrow...
night
 
before I just keep posting I must explain nothing went the way it was supposed to on the little dj...it was supposed to be a 2 week axle swap and off to the mall with it but, ill let the pics tell the story...as far as the original Delivery she lost a few pieces on the way ill get back to her in a bit...

ok so time for a fun pic filled update of todays activities....wooohooo!!!!!!
ok we will start with a pic of "Poor Boy Fab Shop"
awww.supermotors.net_getfile_990376_original_dscf1227.jpg

now for the before spring hanger relocation pics..front hangers have already removed for relocation....
front
awww.supermotors.net_getfile_990374_fullsize_dscf1224.jpg

rear
awww.supermotors.net_getfile_990375_fullsize_dscf1225.jpg

ok on to the fab pics...
awww.supermotors.net_getfile_990369_fullsize_dscf1215.jpg

awww.supermotors.net_getfile_990370_fullsize_dscf1219.jpg

awww.supermotors.net_getfile_990371_fullsize_dscf1220.jpg

awww.supermotors.net_getfile_990372_fullsize_dscf1221.jpg

awww.supermotors.net_getfile_990373_fullsize_dscf1222.jpg

i have step by step pics on the mounts if anyone would like them...and now for pics of the axle installed...i figured no need for step pics here its pretty self explanatory...i.e...i bolted it together loosely made sure spring perches were the same distance from the knuckles..set pinion angle to where i liked it and welded up the new perches...well on to the pics...
awww.supermotors.net_getfile_990378_fullsize_dscf1240.jpg

awww.supermotors.net_getfile_990379_fullsize_dscf1243.jpg

a couple of pics of new shackle pieces...
old ones and the new pieces after drilling...the originals were 1/8" thick 1-3/8" wide and 4" long....new ones are 1/4"x2"x4"....should be much stronger...lol
awww.supermotors.net_getfile_990367_fullsize_dscf1212.jpg

finished product...lol.....
awww.supermotors.net_getfile_990368_fullsize_dscf1214.jpg

well thats it for today....i guess i got a little accomplished today....everything still needs a little clean up and primer and paint...gonna get the rear in tomorow...well nite yall:ballchain:
 
once I had the rear tacked up and in place more prollems...as I said much more and better planning would have done me wonders..

ok well heres a lesson on springology...i.e. "Bastard Pack" 101...idea is simple take multiple junk leaf spring packs, disassemble, mix and match leaves till desired result is achieved...
ok so on to pics....
before with 3" block, and stock spring....notice how flat spring is...also how close to frame/bumpstop..
awww.supermotors.net_getfile_991273_fullsize_dscf1249.jpg

springs removed..im only gonna show pics of doing one spring...as other side is just exactly the same...
awww.supermotors.net_getfile_991274_fullsize_dscf1252.jpg

the donor springs i chose to use...also have some single long leafs as well
awww.supermotors.net_getfile_991274_fullsize_dscf1252.jpg

comparison original verses donor...
awww.supermotors.net_getfile_991276_fullsize_dscf1254.jpg

you want to make sure to clamp all the leaves together before removing the spring pack bolt/pin
awww.supermotors.net_getfile_991277_fullsize_dscf1255.jpg

awww.supermotors.net_getfile_991279_fullsize_dscf1258.jpg

the 2 packs after disassembly...
original...
awww.supermotors.net_getfile_991278_fullsize_dscf1257.jpg

donor...
awww.supermotors.net_getfile_991280_fullsize_dscf1259.jpg

i decided to just replace the two short leaves...the two nasty one(top) are from the original pack the two slightly less nasty ones(bottom) are from the donor spring...
awww.supermotors.net_getfile_991281_fullsize_dscf1261.jpg

all lined up i used a 12" long 1/4" extension and then a large c-clamp to compress the pack....
awww.supermotors.net_getfile_991282_fullsize_dscf1263.jpg

once i got it mostly compressed i tapped the extension with a hammer till it moved freely in the spring alignment holes..then i used two weld clamps to add extra compression while i bolted it together...
awww.supermotors.net_getfile_991283_fullsize_dscf1265.jpg

the newly reassembled pack...
awww.supermotors.net_getfile_991284_fullsize_dscf1266.jpg

and finally after reinstallation....notice the nice arch and distance from frame...and no block...lol...
awww.supermotors.net_getfile_991285_fullsize_dscf1268.jpg

awww.supermotors.net_getfile_991286_fullsize_dscf1251.jpg

well thats about it for this post...i hope this provides usefull to someone else...i think it was a nice improvement for $20 cash and 45 minutes a side ....stay tuned for more jeep fun...
 
ok so started on the facelift today before my angle grinder decided to die....so ill post what pics i managed to get..
so after sanding grill down i found a couple of cracks...
awww.supermotors.net_getfile_991407_fullsize_dscf1274.jpg

well some how i got 6 pics of the same crack...but there was one more it was about the same size...
after welding...
awww.supermotors.net_getfile_991408_fullsize_dscf1278.jpg

awww.supermotors.net_getfile_991409_fullsize_dscf1279.jpg

inside of grill after cleaning and a coat of rust reformer...
awww.supermotors.net_getfile_991410_fullsize_dscf1280.jpg

front of grill after coat of rust reformer.....
awww.supermotors.net_getfile_991411_fullsize_dscf1281.jpg

freshly painted bumper braces..
awww.supermotors.net_getfile_991412_fullsize_dscf1282.jpg

steering box remounted and a glimpse of mounting bracket painted red....also same cast piece on other side....
awww.supermotors.net_getfile_991414_fullsize_dscf1284.jpg

awww.supermotors.net_getfile_991415_fullsize_dscf1285.jpg

just a pic of it all back together for now....
awww.supermotors.net_getfile_991413_fullsize_dscf1283.jpg

and a pic of the old bronco...R.I.P...just for giggles
awww.supermotors.net_getfile_883083_fullsize_dscf0170.jpg

well hopefully ill have some minor things i can do to both the djs untill i get a new grinder...at least enuff to keep you guys interested...lol
 
please ignore the ugly piece of tread plate I used to stiffen firewall for brake booster as I said this was supposed to be a quick 2 week fix that turned into a nightmare as you will soon see...

ok so on to the next pic filled update.....
so here we go...firewall after i removed battery tray...
awww.supermotors.net_getfile_991511_fullsize_dscf1215.jpg

battery tray...lol
awww.supermotors.net_getfile_991512_fullsize_dscf1216.jpg

after initial grinding/sanding...
awww.supermotors.net_getfile_991513_fullsize_dscf1217.jpg

the black line represents approx where the first wo holes will be drilled...the darkish circle is come wierd indentation/outgrowth im guessing they used to take the tincan sound out of firewall(i.e. tighten up the sheetmetal)....
awww.supermotors.net_getfile_991515_fullsize_dscf1219.jpg

i didnt like how the firewall flexed when i put pressure on it so after cutting out the wierd section i plated a large area of it with 1/8" diamond plate..just some scrap i had laying around so its not super pretty but net end result was great...
weirdness removed...:hahaha:
awww.supermotors.net_getfile_991517_fullsize_dscf1221.jpg

diamond plating...
awww.supermotors.net_getfile_991518_fullsize_dscf1222.jpg

after some hole sawing and drilling...
awww.supermotors.net_getfile_991519_fullsize_dscf1223.jpg

test fit...like a glove baby...like a glove...
awww.supermotors.net_getfile_991520_fullsize_dscf1224.jpg

inside after removing existing accelerator linkage mounts...(that was a mistake):mad:
awww.supermotors.net_getfile_991523_fullsize_dscf1227.jpg

pedal assembly...was going to use the gas pedal as well but realized how much extra work/crap to find etc that was going to cause...reason for this is brake pedal was going to hit original accelerator linkage...
awww.supermotors.net_getfile_991524_fullsize_dscf1228.jpg

after removing gas pedal...
awww.supermotors.net_getfile_991528_fullsize_dscf1232.jpg

modifying original linkage...
awww.supermotors.net_getfile_991529_fullsize_dscf1233.jpg

test function/fit after welding mounts back in...lol....
awww.supermotors.net_getfile_991531_fullsize_dscf1235.jpg

clears brake pedal and works nicely...
awww.supermotors.net_getfile_991534_fullsize_dscf1238.jpg

clearance and ease of servicability in relation to factory fender with no trimming...
awww.supermotors.net_getfile_991535_fullsize_dscf1239.jpg

awww.supermotors.net_getfile_991536_fullsize_dscf1240.jpg

linkage after a coat of paint and i changed out the pedal pad area as well for the matching pedal and pad to brake pedal
awww.supermotors.net_getfile_991538_fullsize_dscf1242.jpg

rim and a 225/70/r15 on with full weight on springs...i think a set of 30-31" tires will be perfect....
awww.supermotors.net_getfile_991540_fullsize_dscf1244.jpg

well thats it for pics today...ordered a set of 15" factory 99 wrangler rims off of ebay today...will paint em up good when they get here on the hunt for tires now.....also did a little research on converting the A727 transmission to 4wd...seems all i got to do is change out the tailshaft and adaptor...then get a dana 300 and a clocking ring....well im out cheers:cheers:
 
and this is where I found out I was skrewed..

.....now i must warn you some of these pics are of a heinous and graphic nature and may cause distress even hysteria in those persons weak of heart and fab skills...lol
ok enuff babbling already on to the pics....
inside of cowl/firewall after removing dash and all wiring...you can see the surface rust and some spots at the cowl corners where there is daylight showing thru....
awww.supermotors.net_getfile_991908_fullsize_dscf1255.jpg

awww.supermotors.net_getfile_991891_fullsize_dscf1245.jpg

awww.supermotors.net_getfile_991892_fullsize_dscf1246.jpg

awww.supermotors.net_getfile_991894_fullsize_dscf1248.jpg

awww.supermotors.net_getfile_991895_fullsize_dscf1249.jpg

awww.supermotors.net_getfile_991896_fullsize_dscf1250.jpg

a better pic of pedals and modified linkage...
awww.supermotors.net_getfile_991893_fullsize_dscf1247.jpg

outside of firewall/cowl...
awww.supermotors.net_getfile_991897_fullsize_dscf1251.jpg

awww.supermotors.net_getfile_991898_fullsize_dscf1252.jpg

some yummy pics of heater box assembly and core...
awww.supermotors.net_getfile_991899_fullsize_dscf1253.jpg

awww.supermotors.net_getfile_991900_fullsize_dscf1254.jpg

awww.supermotors.net_getfile_991909_fullsize_dscf1256.jpg

awww.supermotors.net_getfile_991910_fullsize_dscf1257.jpg

awww.supermotors.net_getfile_991911_fullsize_dscf1261.jpg

to be continued...
 
previously...(continued from above post due to high # of pics)

and now for the cancer pics...and other sheet metal carnage...
awww.supermotors.net_getfile_991912_fullsize_dscf1262.jpg

awww.supermotors.net_getfile_991913_fullsize_dscf1263.jpg

awww.supermotors.net_getfile_991901_fullsize_dscf1265.jpg

awww.supermotors.net_getfile_991904_fullsize_dscf1269.jpg

awww.supermotors.net_getfile_991903_fullsize_dscf1268.jpg

awww.supermotors.net_getfile_991902_fullsize_dscf1266.jpg

nice new pad for bender...
awww.supermotors.net_getfile_991906_fullsize_dscf1271.jpg

awww.supermotors.net_getfile_991907_fullsize_dscf1272.jpg

well once again we have reached the end of our post....will have pics of the drivers side cancer soon...it was totally depressing to see what i found on passenger side so i just couldnt bring myself to dig any further at the time....stay tuned blah blah blah....
 
the postal service had thought it cute to pop rivet factory replacement pans over the rotten floor complete with part#s and everything...thus leading to my super extensive headache

ok so on to todays progress...
interior after full strip...well the ebrake handle will come out after i flip the body up on its back....
awww.supermotors.net_getfile_991945_fullsize_dscf1209.jpg

awww.supermotors.net_getfile_991946_fullsize_dscf1210.jpg

awww.supermotors.net_getfile_991947_fullsize_dscf1211.jpg

awww.supermotors.net_getfile_991953_fullsize_dscf1215.jpg

awww.supermotors.net_getfile_991950_fullsize_dscf1219.jpg

awww.supermotors.net_getfile_991949_fullsize_dscf1218.jpg

theres paint under that grime....
awww.supermotors.net_getfile_991951_fullsize_dscf1220.jpg

exterior shots...
awww.supermotors.net_getfile_991952_fullsize_dscf1214.jpg

awww.supermotors.net_getfile_991943_fullsize_dscf1207.jpg

awww.supermotors.net_getfile_991944_fullsize_dscf1208.jpg

after hanging the rear tire n rim i can plainly see ill need to work a little more on the bastard packs for the rear and or just add about a 1.5" block...just really dont want blocks and it will be easy as pie to re-disassemble after body is off...well looks like it quit raining again...ive been working like a madman between the thunder storms...lol...self washing build...haha:highfive:
 
ok update time...so todays update deals with the cancer at base of my windshield frame..i did not butt weld this for two reasons...1st off being as area was pitted pretty heavily and i needed to insure strength...second sometime in the near future i will procure a cj windshield frame and hinges and make the hard top removable(you know like a jeep)..plus nice flat area i figured if 1/8" of filler is considered acceptable for high dollar collectible cars why not my daily driver..ok so on to pics.....
we will start with a few shots of rims...lol
awww.supermotors.net_getfile_992089_fullsize_dscf1241.jpg

awww.supermotors.net_getfile_992088_fullsize_dscf1240.jpg

awww.supermotors.net_getfile_992087_fullsize_dscf1258.jpg

awww.supermotors.net_getfile_992086_fullsize_dscf1257.jpg

ok so on to windshield frame cancer....as i was battling the t-storms i did this in two stages...i started with the right side(drivers side)basicly drew a cut line where i had good metal...chopped, pieced,and welded...i let the pics tell the story....
awww.supermotors.net_getfile_992064_fullsize_dscf1221.jpg

awww.supermotors.net_getfile_992065_fullsize_dscf1222.jpg

awww.supermotors.net_getfile_992066_fullsize_dscf1223.jpg

awww.supermotors.net_getfile_992067_fullsize_dscf1224.jpg

awww.supermotors.net_getfile_992068_fullsize_dscf1225.jpg

awww.supermotors.net_getfile_992069_fullsize_dscf1226.jpg

awww.supermotors.net_getfile_992070_fullsize_dscf1227.jpg

awww.supermotors.net_getfile_992071_fullsize_dscf1228.jpg

awww.supermotors.net_getfile_992072_fullsize_dscf1229.jpg

awww.supermotors.net_getfile_992073_fullsize_dscf1230.jpg

awww.supermotors.net_getfile_992074_fullsize_dscf1243.jpg

awww.supermotors.net_getfile_992075_fullsize_dscf1244.jpg

awww.supermotors.net_getfile_992077_fullsize_dscf1246.jpg

to be continued...
 
the continuation...
some small l braces for extra strength...
awww.supermotors.net_getfile_992078_fullsize_dscf1247.jpg

awww.supermotors.net_getfile_992079_fullsize_dscf1253.jpg

passenger side...
awww.supermotors.net_getfile_992081_fullsize_dscf1260.jpg

awww.supermotors.net_getfile_992082_fullsize_dscf1261.jpg

awww.supermotors.net_getfile_992083_fullsize_dscf1262.jpg

awww.supermotors.net_getfile_992084_fullsize_dscf1263.jpg

awww.supermotors.net_getfile_992085_fullsize_dscf1264.jpg

well i did manage to just barely get a protective coat of paint on the passenger side before the rain started again....next ill get the hole in the a=pillar patched up the ill flip body up on its rear and start on floors...hope you enjoyed this...im in sheet metal h--l...uuugh...stay tuned more to come...lol
 
ok so here we go more pics...got a little done...not much tho...once again it rained...but on to the pics...
first i popped out the quarter windows...
awww.supermotors.net_getfile_992660_fullsize_dscf1179.jpg

then i patched the hole where the original brake pedal went..
awww.supermotors.net_getfile_992659_fullsize_dscf1178.jpg

awww.supermotors.net_getfile_992661_fullsize_dscf1180.jpg

then this lil guy showed up to help...
awww.supermotors.net_getfile_992662_fullsize_dscf1181.jpg

and a freshly painted dash...lol
awww.supermotors.net_getfile_992666_fullsize_dscf1199.jpg

awww.supermotors.net_getfile_992665_fullsize_dscf1198.jpg

awww.supermotors.net_getfile_992663_fullsize_dscf1201.jpg

awww.supermotors.net_getfile_992664_fullsize_dscf1202.jpg

on to removing the body so i can fix the floor/substructure....
awww.supermotors.net_getfile_992667_fullsize_dscf1186.jpg

awww.supermotors.net_getfile_992668_fullsize_dscf1187.jpg

awww.supermotors.net_getfile_992670_fullsize_dscf1197.jpg

awww.supermotors.net_getfile_992671_fullsize_dscf1191.jpg

and the chassis...
awww.supermotors.net_getfile_992669_fullsize_dscf1188.jpg

awww.supermotors.net_getfile_992672_fullsize_dscf1192.jpg

awww.supermotors.net_getfile_992673_fullsize_dscf1193.jpg

awww.supermotors.net_getfile_992674_fullsize_dscf1194.jpg

awww.supermotors.net_getfile_992675_fullsize_dscf1195.jpg

awww.supermotors.net_getfile_992676_fullsize_dscf1196.jpg

now thats cost a pretty penny
awww.supermotors.net_getfile_992677_fullsize_dscf1189.jpg

awww.supermotors.net_getfile_992678_fullsize_dscf1190.jpg

well other than that got the first 2 pieces of tubing in for the new substructure...according to the weather man no rain till saturday so loads of progress should be made or at least thats the plan..........anywho thats it for todays update....:pickle:
 
Back
Top