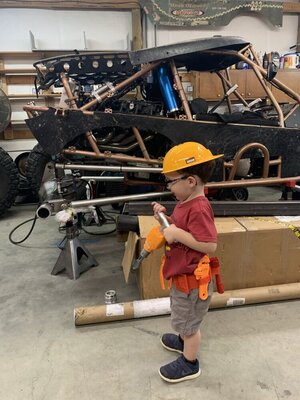
SXOR single seater build

Finally got it out of the garage for the first time yesterday. It felt good to be behind the wheel.

It’s going to be interesting to see how it does. I don’t think there will be much crawling. Haha. Going to have work on the brakes some more, they’re non-existent right now.


Getting the finishing touches done to get it ready for this weekends first trip out. I’m heading to Harlan Friday morning.

I was going to cut some new skins, and I probably still will. But in the interest of time I trimmed the original set that came with the chassis to fit some of the small changes I made for now. I painted them with black plasti-dip just like I did in the hood. We’ll see how it holds up. Got the right side finished and on today. The left side is cut and painted, just need to install the dzus fasteners and mount it up.


I still plan to make some nice dimpled aluminum panels to fill the gap between the B and C pillars on both sides as well as the back section of the chassis.

I also made up some guards for the lower schraders on my ORIs. I copied these from a post I saw somewhere on line a few years ago. I only put them on the front shocks because they hang down low and are pretty vulnerable to rocks. The rears set on top of the axle and are pretty well protected.

 
Well the first trip was this weekend and it was eventful to say the least, but a good time was had. Overall I have to say I’m happy with the buggy, but there is still some work to be done.


This thing absolutely feels like a rocket ship when you get on it low, but at only 27:1 it’s a little too “racey” in the rocks and high range is pretty useless except for flat ground. Stall seems to be ok, it just needs a little more gear to be smoother and more controllable in the rocks. Axles are currently 5.13s, probably going to try to get in the 6.xx range. Hopefully that will be better in low, and also make high more useable.

Here it is on the Waterfall Friday morning, the first obstacle ever.


Mechanically everything seemed to work well. Temperatures stayed in check. The highest water temp. I saw was 208*, that was running up to Whitetail giving it hell in low 2nd, the rest of the day was a constant 185 with the Volvo fan on low. The highest transmission temp. I saw was 155* and that was when I forgot to flip the fan back on after we stopped before Lower Profanity, the rest of the time was a pretty constant 125* measured in the output to the cooler.

It’s going to take some seat time to really get used to a rear engine rig, but I’m pretty happy with it. It did pretty much everything I asked of it.

As far as damage, let’s just say I really broke it in right. Haha! Friday afternoon I took a pretty spectacular roll off the top of Crawford’s Cry. It basically stood up and did a 180* pirouette and landed on the left side sliding down the hill. I got a pretty good scrape on my elbow, but the window nets kept it from being any worse. It actually tore a hole in the window net from sliding on my elbow. It dented the tube around my light bar a bit, scratched the roof a little, knocked one of my RaceMirrors off, killed to storage rack, cracked some body panels, and broke my pride. Haha! We rolled it back over and other than a little oil in the intake and a little smoke it started and ran fine. We headed from there to Whitetail and ran it without issue.


Saturday morning we had some late arrivals coming so we headed to the waterfall to play around until they got there. I had already climbed it once, and I circled back around to do it again. I guess it’s a good thing I did, because if this happened anywhere else on up the mountain it could’ve been a really bad day.


Just before that video I had tried it and didn’t make it, apparently when I slid back the right side upper link tower started bending. If you look close as I’m pulling up to the waterfall the link tower is already bent a little bit. Then when I hammered it and bounced it folded up. That caused the whole axle to shift left several inches and the driveshaft actually hit my engine skid and snapped the pinion shaft off.

Thankfully I have good friends that helped me get it off the waterfall and thankfully it happened where it did. I was able to go get my truck and trailer and drive right to it to load it up.


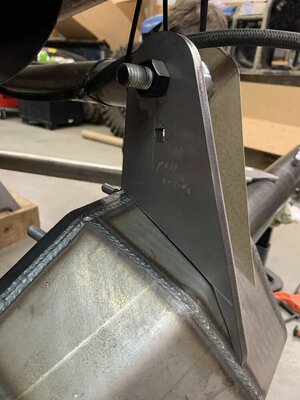
It was just a failure on my part to gusset the link mount properly. It was just too tall without enough support. Since the housing was already a little warped to begin with and I’ll have to cut so much off to fix the link tower I’m going to replace it with an aftermarket housing using all my parts from this one. I actually found a Trail Gear housing on Facebook today and made a deal on it. It may be a little slow, but I will fix it and it will be back better than before
 
No, unfortunately not. And probably won’t be for a while. I just bought some more property that borders me so most of my money is going that way. Plus a couple other things going on that will be keeping me pretty busy.

Hahah to say the least right. We will get you back on the trail as soon as things calm down in your neck of the woods.


Sent from my iPhone using Tapatalk
 
I guess this thread deserves at least an update 4.5 years later. It still sitting on jackstands. A very small amount of progress has been made. Not much, but it’s something.

In early ‘21 we found out we were going to be having our second boy. As that time got closer we decided my old shop/house that we were living in just wasn’t going to have enough room for two kids. So we listed it, and had an offer $15k over asking price in 4 days. We ended up finding a nice house, with a nice shop with a lift, and some land in a more convenient location for us.

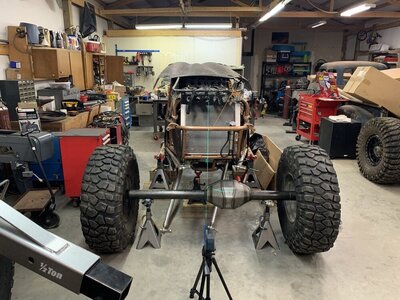
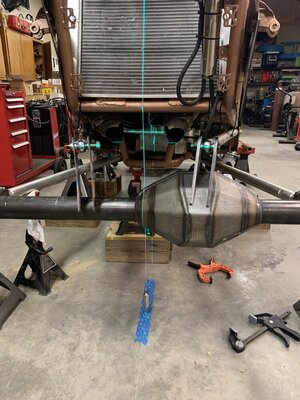
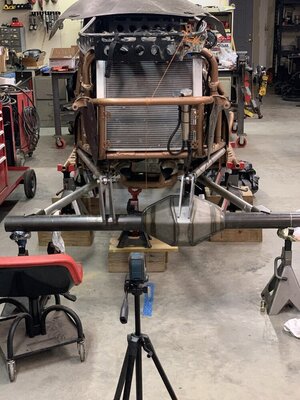
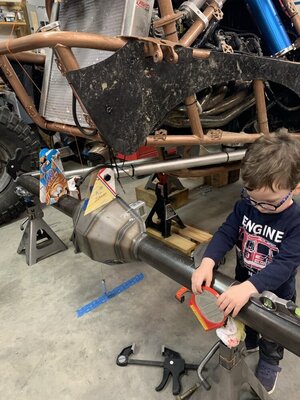
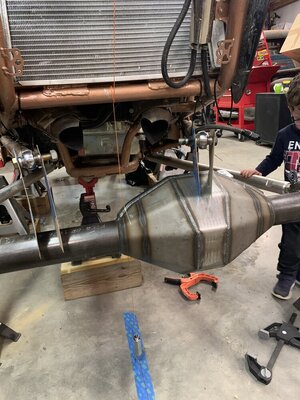
So I had to at least get the buggy movable. I already had the new TG housings and SuperDuty unit bearing cups for the rear axle, so I got started laying it out and getting it tacked together so I could load it on a trailer.

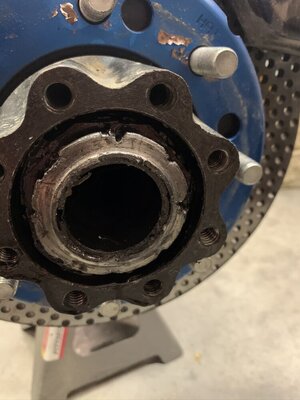
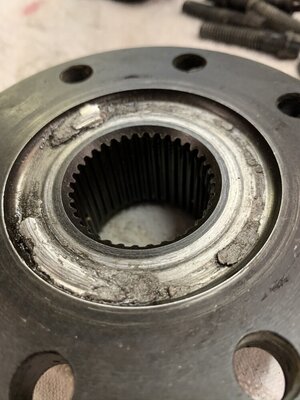
I decided to do completely new axles for a few different reasons. First was these axles were built off flimsy factory 9” housings, and the rear was already warped from trussing it. Second was the width, the rear is only 57” wide and the front is 60”. That’s just too narrow for my liking. I like my rigs low and wide. The new axles will be 67”. And the third and final reason was when I started tearing the rear axle down I found the end of the driver’s side spindle completely trashed. I don’t really know how but the bolt on drive flange for the double spline shaft had been rubbing on the end of the spindle and completely destroyed it. The spindle nut is basically welded on now. All I can figure is I didn’t have a race seated in the hub properly or something. Who knows. So new axles it is. I’ve thought about once I get the rear done slapping some spacers on the front and wheeling it that way while I build a new housing for the front. Wouldn’t be ideal, but it would work.


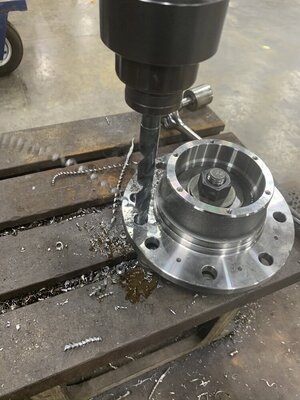
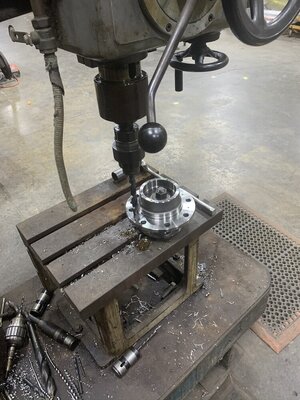
Apparently I failed to take any pictures of it but I bought a 7’ long piece of 1.5” polished shaft material to use as an alignment bar and some chunks of aluminum and had them machined to fit the carrier bearings, the ID of the axle tubes, and the UB pockets. Looking back the DIY route on that was not cost effective, but I never could get the guy that sold alignment bar kits on Pirate to message me back so I was out of options.

59A7C92D-BAA7-4D54-8393-157457B23BCF.jpegF85243A9-7F05-4CB4-9D09-49FB357A5560.jpeg79B3C3A2-9FCC-4EF8-AF2F-D419CAEEF0CE.jpegF07FED43-CD54-4C31-9A27-2E3F32129E7B.jpegE38A3B1D-0D97-4614-B671-34FCF3AC4528.jpegDE19C0A3-B714-4F3E-A26E-F1C3C11E76A5.jpeg367F0B27-70F6-48D9-BFE8-49390CAA9438.jpeg1741F597-8BEA-486A-A47A-FC7E11DE808D.jpeg3EC2529C-1FDC-442A-8EE0-90B1C3D3B8A1.jpeg994CF272-13F1-4343-BC56-42318ADCF573.jpeg9AB52825-9F85-4E43-A126-9F5363E66869.jpeg4B5093B2-85DC-45A3-A703-5AD075DB664D.jpegA26D153E-CB96-4EB7-9D2D-42B8F0E8B711.jpeg2ABDBA87-F1DA-4958-A3C0-4CC34853AA9F.jpeg6B71936E-4F0C-47B1-A98B-8E3FAA234CC7.jpeg

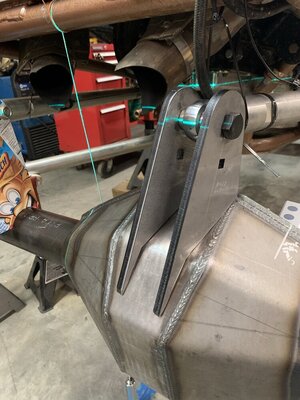
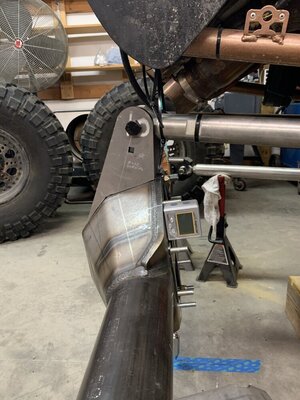
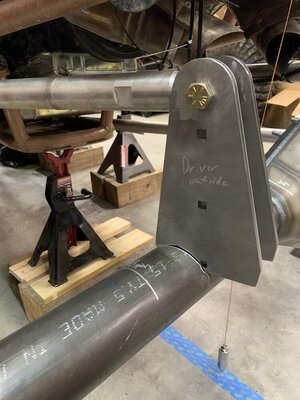
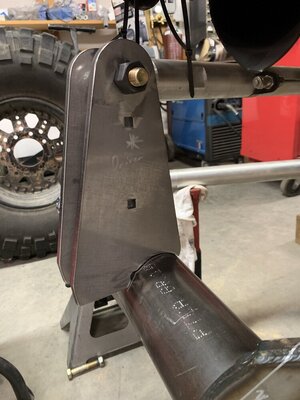
The upper link towers are Rockwell brackets from Barnes4WD. They were the only off the shelf bracket I could find that was tall enough to do what I needed. The lowers are from Barnes4WD as well.
 
Then in October ‘21 we moved. And the buggy sat untouched again for almost a year. The new house has a 30x42 shop with a lift. It has a 100amp service to it, but it only had 1 double gang 120v receptacle in the whole shop and the lighting wasn’t great. So I spent a lot of time wiring the shop. It’s still a disorganized mess, but at least I can get some stuff done in it now. I also bought my LJ last January and that stole a lot of attention from this thing too.

I have worked a little more on the rear axle. I built a backbone truss out of 3x3 .125 wall tubing. And now I’m working on the top “truss”. It’s built from 10ga plate. I’ve got a few more pieces to cut to box it all in then it will be ready to weld out. It’s getting a new Yukon load bolted 3rd member, 9.5” 5.13 gears, Strange 40 spline spool, Gearworks pinion support for flipped 3rds, Strange 1350 35 spline yoke, and 40 spline shafts and drive flanges. I have everything here but the shafts. It just all has to be put together.

A1905E9F-9045-45BF-B1DA-5373F76996A4.jpeg
EB103A67-3399-4CC0-8005-08545DF71834.jpeg


The front axle will be getting all the same parts but with 10” gears. It will have ‘05+ Superduty outers, haven’t decided yet on the Branik 32 spline direct drive stubs or 40 spline stubs, Branik 1550 joints, and 40 spline inners. I have the housing, Cs, knuckles, gears, and joints. I still gave to get the 3rd member, pinion support, install kit, and other small parts. But like I said in the last post I’ll probably finish up the rear, slap some spacers on the front, and wheel it while I build the front.
 
A year later and the rear housing is finally done minus caliper mounts. They should be here in a few days and I’ll get this thing off the table and get the SD60 for my LJ rigged up to put the new C on. It didn’t turn out quite as sexy as I had envisioned in my head, but it will be a hell of a lot stronger than what I had at least.

IMG_1563.jpeg


IMG_1564.jpeg


Next up for this will be to measure and order the shafts and drive flanges and go see
@Jody Treadway to get the 3rd built.

Just a couple weeks ago I ordered a new 5.0 Atlas to put in this thing too. The 3.0 just wasn’t enough behind the Powerglide. So as soon as I can get it pulled I’ll have a 3.0 Atlas for sale if anyone is in the market.

Then next up will be start laying out the new front axle to match this one. By my calculations it should take approximately 7 years to build. I’ve got way to many projects and big ideas in my head, and absolutely no time to complete any of them.
 
I had to be at work at 5:48 this morning and I didn’t sleep well last night so I hit the shop at 3:30 this morning. I didn’t take any pictures but I rolled the new rear housing under the buggy and loosely bolted it up. It’s done minus getting the stuff to @Jody Treadway to build the 3rd and ordering shafts when I have the $$$.

After that I got the front end up on jackstands and measured and sketched out the existing front axle. By then it was time to head to work so I brought my pad with me and sketched out the layout for the new front axle. The new axle will be about 8” wider, and I plan to move the lower link mounts and shock mounts out 1.5”, and move the pinion over 1.5” as well. Of course none of that is set in stone yet. The vertical separation between the links on the existing axle is only 7”, that seems low to me so that may need to be addressed as well.

IMG_0098.jpeg
 
I jumped back on this thing a little bit the last couple mornings. A friend is building a buggy and wants to buy my 3.0 Atlas, so I got started on getting everything out of the way so it can come out. The belly of the chassis is solid, so it has to come out from the top, so everything in the interior has to come out. I didn’t take a picture this morning, but all that’s left is one bolt still in the seat, pull the front driveshaft, and then the adapter bolts. The transmission and t-case went in already assembled, but I’m hoping to be able to pull just the case.

IMG_0215.jpeg
 
Every time this build thread pops back up with updates, my day instantly gets better. But the winch between the legs has me feeling a certain type of way. My anxiety just shot through the roof.
My wife keeps my testicles safely in her purse, so there’s no worry there. :laughing:

I always intended to put an aluminum guard over the drum or something. I need to do that while it’s apart. A couple trick tabs and some aluminum sheet is all it would take.
 
I finally got the case out this morning before work. It had it all loose yesterday morning, but it was being stubborn separating from the transmission and I ran out of time. The powerglide doesn’t have an output shaft seal so the adapter has to be RTV’d, it just needed some persuasion to come loose.

While I have it apart I’m going to follow some advice I was given during the build that I stupidly didn’t follow. The way I built the trans and t-case mounts neither could slide back far enough to separate. I cut the tabs off the t-case mount to get it out. I’m going to also cut off the trans mount tabs and clean all that up. I’ll rebuild them both, most likely hanging from the top from the removable tubes that hold the interior panels.

IMG_0222.jpeg


IMG_0223.jpeg


IMG_0224.jpeg


IMG_0225.jpeg
 
Back
Top