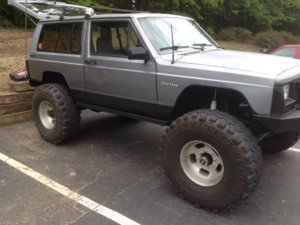
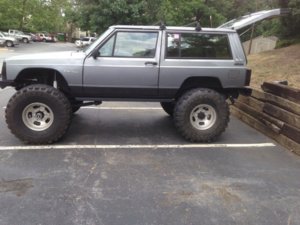
92 2 door XJ build

Most tire shops shouldnt have a problem with it if they have a decent tire machine. And they dont need to spin it on a balancer

I know that there has to be a certain speed reached before the BB's will start to find the low spots. Is there a rule of thumb to determining this speed? Like anything under 20 mph the tires wont balance?
 
I know that there has to be a certain speed reached before the BB's will start to find the low spots. Is there a rule of thumb to determining this speed? Like anything under 20 mph the tires wont balance?

Honestly I just drive mine, I don't know what speed they start doing their thing but it just works. And they are smooth up to 85-90mph I need to correct my speedo.
 
They don't balance out till 15-25 mph depending on size but at that speed you usually don't get to much wobble from the tires anyways. You may be able to just pull the valve steem and use a tube to get the bbs in, not sure of the hole size compared to the bbs but thats what i did when I ordered balance beads
 
They don't balance out till 15-25 mph depending on size but at that speed you usually don't get to much wobble from the tires anyways. You may be able to just pull the valve steem and use a tube to get the bbs in, not sure of the hole size compared to the bbs but thats what i did when I ordered balance beads
I had looked at Dynabeads and they have a version that can be fed in through the valve stem but they are pricey.
 
Got a little more work done over the past couple days. I replaced the rear pinion seal, installed new longer axle breather lines, and cut and folded the rear quarters. I did a mini flex test and wasn't very happy. Because of the new C bushings, the rear flexs much faster than the front. I believe over time these bushings will get broken in and allow the front to flex better. I have also decided I'm going to push the rear axle forward an inch. This will allow my rear driveshaft to be happy, keep me from tubing the rear, and allow me to mount the driver rear shock behind the axle tube so that it leaves plenty of room for the traction bar that I'm ordering tomorrow. Anyways, on to the pics...

ai107.photobucket.com_albums_m316_badmojokidz_BB5040BE_3B59_4E22_A397_6FBC8B50C9A3_zpspgoplivo.jpg
ai107.photobucket.com_albums_m316_badmojokidz_C6027D18_E108_4F0F_B59C_3205A57F6DBD_zpsxgpkh8ab.jpg
ai107.photobucket.com_albums_m316_badmojokidz_91717472_3E20_413F_AAED_C71F4ABB0694_zpsptw7tb92.jpg
ai107.photobucket.com_albums_m316_badmojokidz_A0AE704C_73A3_4349_86C3_67A3AC48C294_zpsy5kojcez.jpg
ai107.photobucket.com_albums_m316_badmojokidz_7929A42D_137B_4D90_BBB2_903FC08D9C18_zpsbjfnztye.jpg
 
The BBs I use are $7-8 at Wally world and you could do a few sets of tires with one thing of them.
 
The BBs I use are $7-8 at Wally world and you could do a few sets of tires with one thing of them.

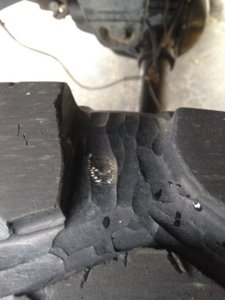
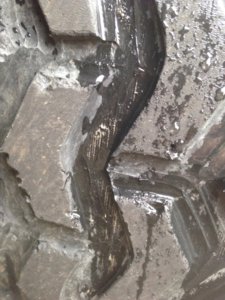
I actually have a container of them already. I use them as wheel weights on my scale crawlers lol. I'll have to go get some more I think. My concern is taking the tires to a shop and them saying they won't touch them because they have been cut and grooved. The PO cut the rears and went a little deep in spots showing some of the nylon fibers. It's not down to the metal ribs though.
 
You can break the beads yourself. Remove the wheel/tire and lay it on the ground. Drive over the sidewall with another truck. Ive done it that way many times.
 
These are just two of the multiple spots around each of the rear tires
 

Attachments

  • image.jpg
    image.jpg
    117.1 KB · Views: 401
  • image.jpg
    image.jpg
    164.8 KB · Views: 412
you'll be ok with those tires cut like that...my 35s show the nylon belts about 60% of the tire and has held up/wheeled for months now no problem. it's only an issue when u go that far on steel belts cause they will start to seperate over time. AWESOME LOOKING XJ BTW!!!!
 
you'll be ok with those tires cut like that...my 35s show the nylon belts about 60% of the tire and has held up/wheeled for months now no problem. it's only an issue when u go that far on steel belts cause they will start to seperate over time. AWESOME LOOKING XJ BTW!!!!

I figured I'd be fine. It's not even close to the steel belts.

You can break the beads yourself. Remove the wheel/tire and lay it on the ground. Drive over the sidewall with another truck. Ive done it that way many times.

I'll have to give this a try. Because these are radials, will doing it that way bend the belts and cause it to be even more unbalanced?
 
I just ordered the anti-wrap kit and some leaf shims. Because this axle was already set up for an XJ, I did not mess with the perches. The PO must have been on a shorter lift so the pinion isn't pointing at the TC. I have to use 2 sets of shims(one for the top of the springs, and one for the bottom but in opposite direction.) so that the perch and spring plate remain parallel. If I were to only use one set, it would cause some extreme stress concentration on single points of the bolt heads.
 
I'll have to give this a try. Because these are radials, will doing it that way bend the belts and cause it to be even more unbalanced?

I've mostly used that method on wheeling rigs with swampers, but I think I've done it on some radials before too. It has been a while since I have used that method.

I also have one of these mounted on my trailer. It has a bead breaker deal which comes in very handy. It has paid for itself many times over by now.
http://www.harborfreight.com/manual-tire-changer-69686.html
 
Another option is to set and engine hoist across the tire, and hook to the wheel.

As you jack up the wheel, the legs of the hoist will push the tire down. Then just take a pry bar and pop the bead down, this will give you plenty of room to add the BBs.

When done just reseat the bead. May have to use a ratchet strap around the circumference of the tire to get enough contact to hold enough air pressure to seat the bead.
 
I'm gonna measure out the bbs this weekend and then do the tires Monday.

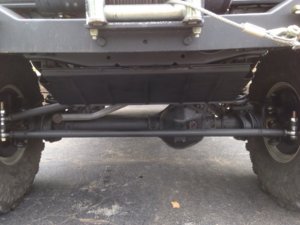
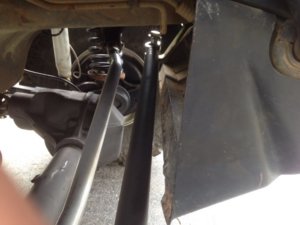
I did get some work done last night and this morning. I got grade 8 bolts in the steering with lock nuts. I moved the tie rod below the knuckle to correct my drag link angle to be parallel to the track bar. I also repainted and installed the front skid. It clears by about .25" at full lock so that'll work. I also got the rear cut and fold painted along with repainting the sliders, rockers and rear bumper.
 

Attachments

  • image.jpg
    image.jpg
    115.9 KB · Views: 432
  • image.jpg
    image.jpg
    84 KB · Views: 396
  • image.jpg
    image.jpg
    134.6 KB · Views: 394
  • image.jpg
    image.jpg
    151.7 KB · Views: 449
awesome awesome looking xj...i'm looking at buying a 2door maybe since i've never had one and looks great!!!
maybe i missed it but how much lift and what size tires u running?
 
Picked up and set of beadlocks from a member on here. They are DIY locks what look to be from speedway so the outer ring is only .100" thick. I'm going to look into having new rings cut out of .250". They are 15x10 waggy style wheels with 4.5-5" back spacing. Before I dive into having new rings cut, I'll have to make sure they clear the calipers. If not, they will go back up for sale.
 
Well I'm back to working on the Jeep. Started the process of moving the rear axle forward an inch. When I stretched it, I went a little farther than I wanted. By moving it forward an inch I will clear the gas tank with the shocks and leave myself with plenty of room for the anti-wrap bar. I am also installing 4* shims to correct the pinion angle. I bought this axle with the perches already welded on and they were set for the PO's rig. I put my inverter to work when I needed to cut one of the centering pins off because it was quite rusted. Big thanks to Will for helping out at lunch today to get this work started. Hopefully I will have it finished up this evening.

In other news, I recently picked up a new wheeling buddy. Her name is Marley. We have already gone on one trip to URE but just rode with Will since my rig still isnt ready. She did great bouncing around in the back with the camping gear.

ai107.photobucket.com_albums_m316_badmojokidz_DF3E7890_6488_4B9D_8ABD_34390DCFA27D_zps4jbh5me0.jpg
ai107.photobucket.com_albums_m316_badmojokidz_AA3BD308_5D8F_43D4_8985_F845C5C505DE_zpsxa9jwkli.jpg
ai107.photobucket.com_albums_m316_badmojokidz_297817E9_1AA1_4EED_9FD6_363DC13866F0_zpssk4jw3po.jpg
ai107.photobucket.com_albums_m316_badmojokidz_5F28641B_E0D4_4B87_A75A_31C0C1EF73FD_zps16bp41nk.jpg
 
Back
Top