Project MyCorona

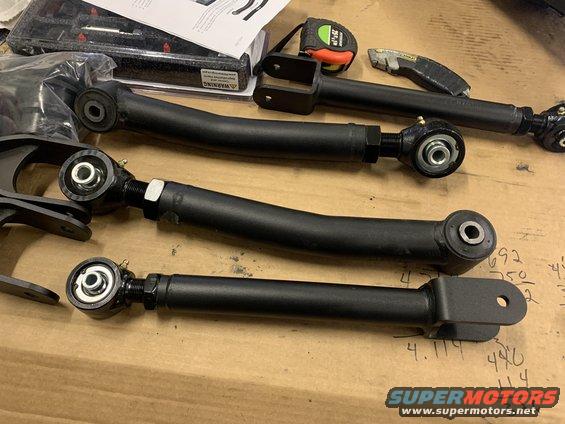
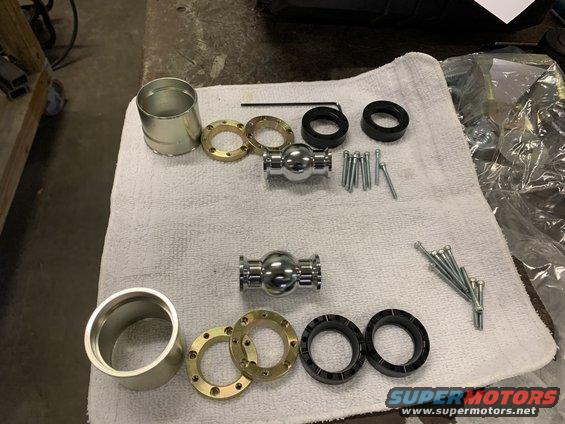
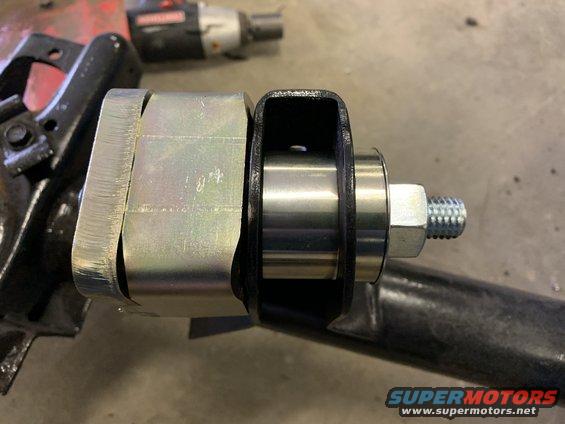
One of the upper control arm bushings needed replacing so I decided to "church it up" as Mr. Treadway says and sprung for the Iron Rock upper control arm bushings. They aren't kidding when they say they are precision machined. Thee things look like jewelry, for your axle. A bit of a pain to get them installed and assembled. Word of advice, if you plan on getting these spring for their install tool. I don't know how you could install them without it and not damage the machined body.

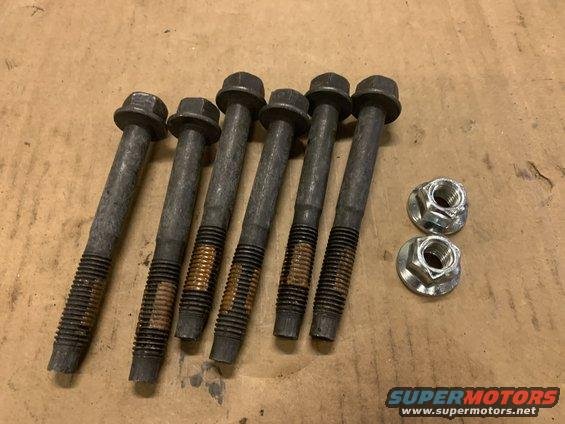
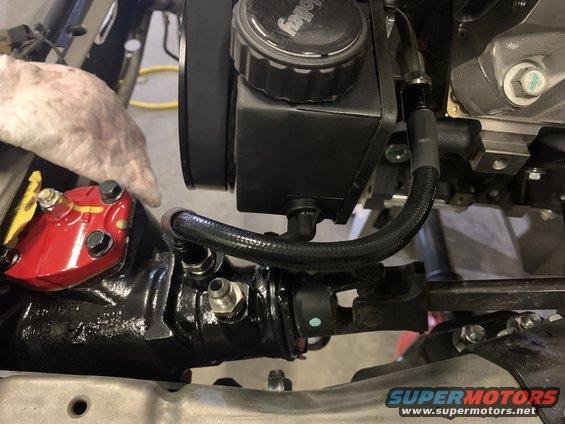
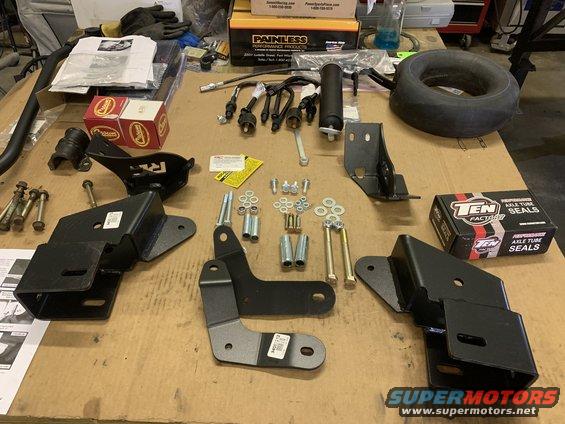
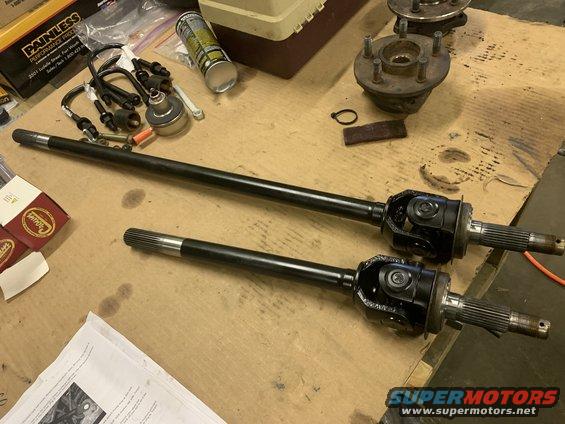
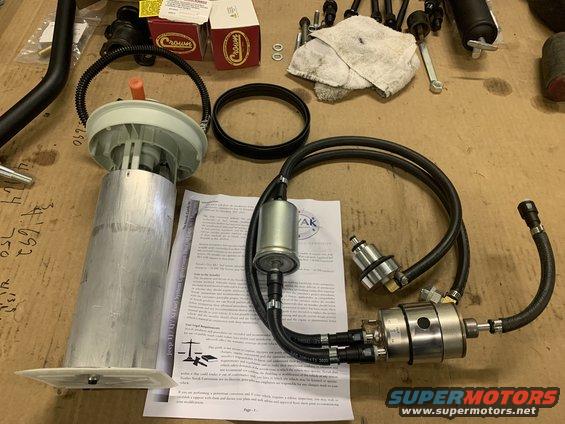
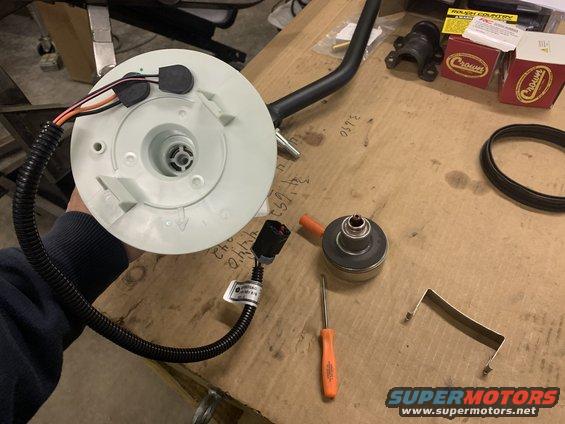
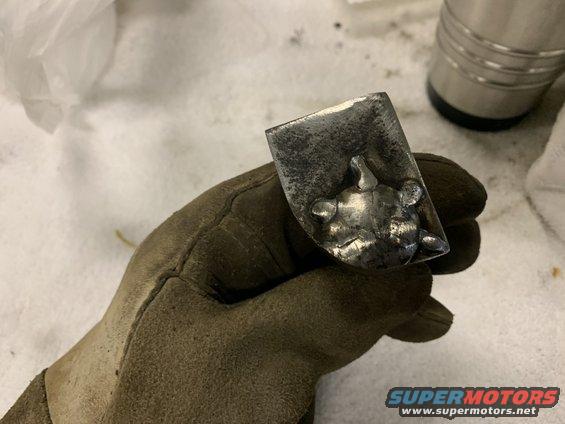
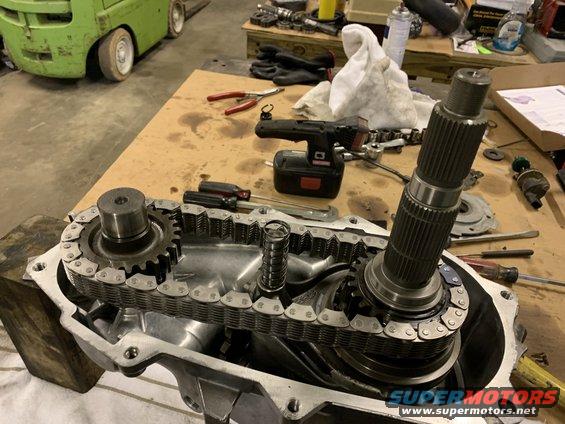
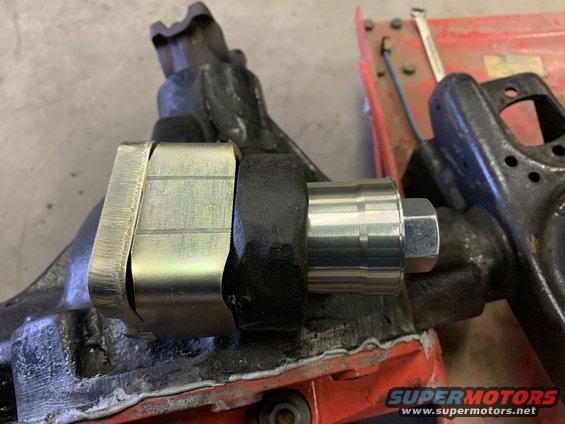
You have to install the body first and then assemble the internals afterwards. Here are all the pieces.

bb025a86cee24ed396265cb18243aa5d.jpeg


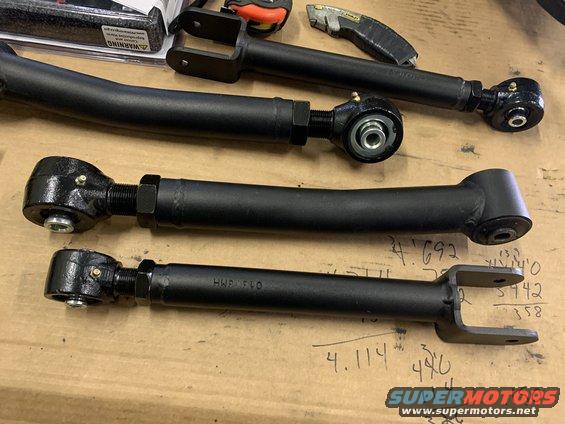
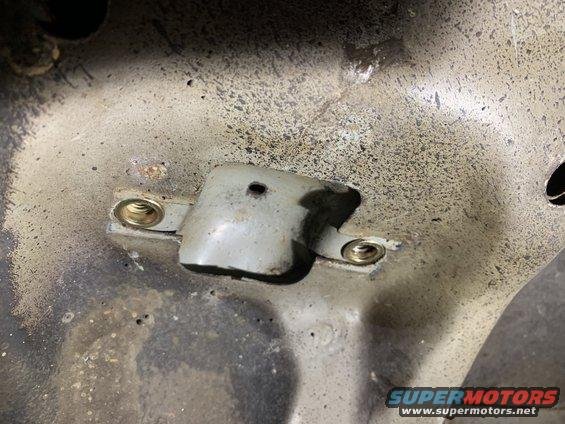
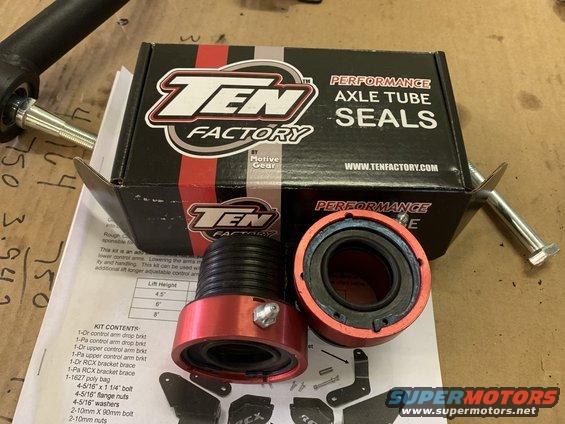
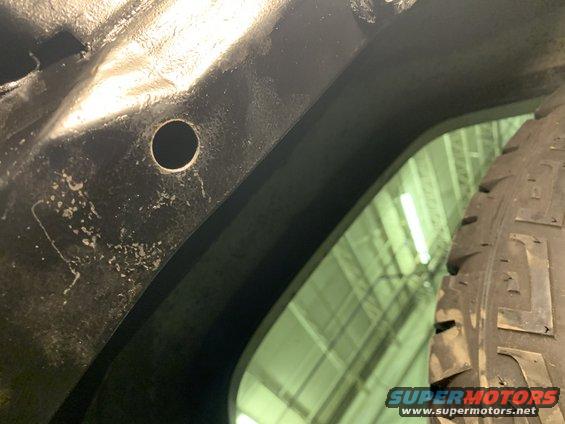
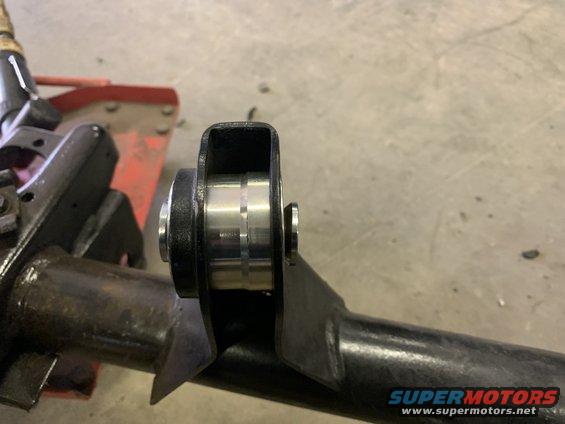
Here is a view of the two sides ready to be pressed in. Passenger side was a snap driver side was a fight!

016afc98824549aba17af21d19bece33.jpeg


faad878e05ff48a0a0b05b31458cb699.jpeg


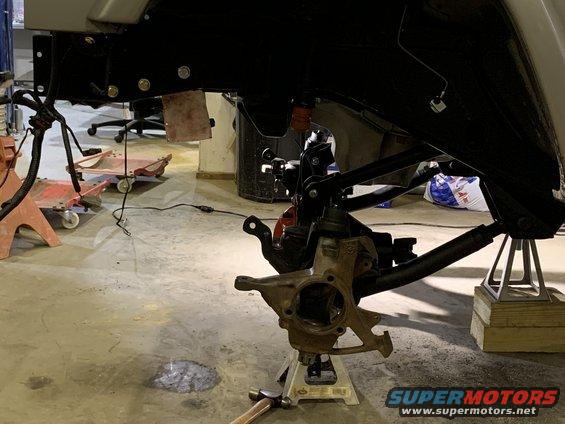
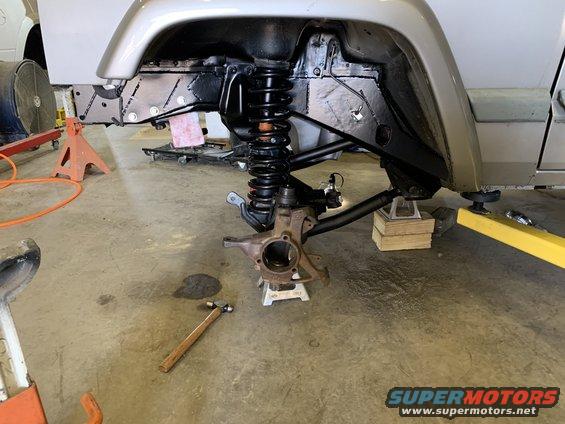
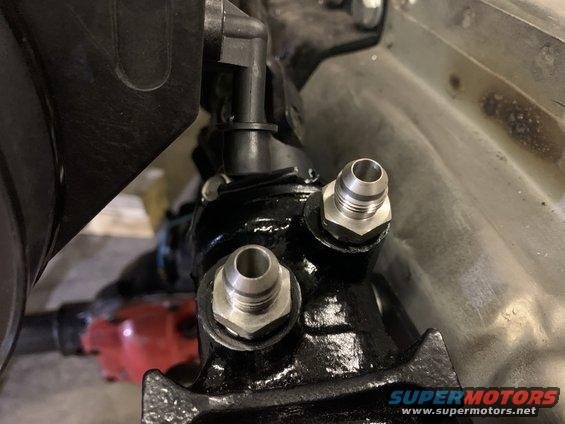
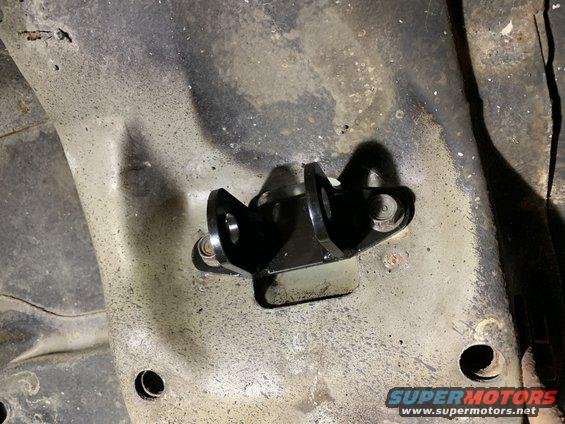
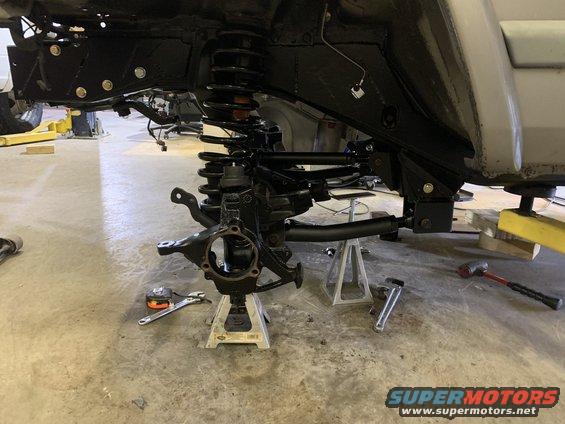
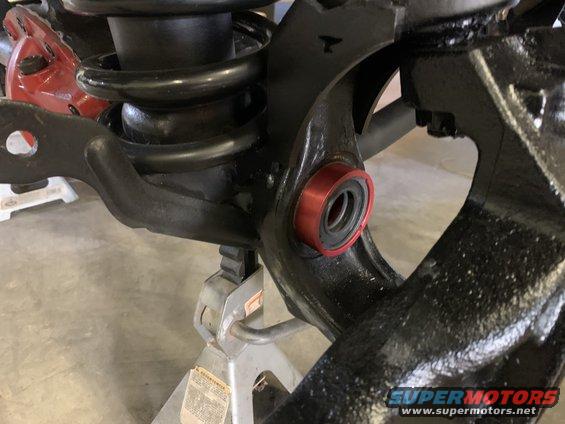
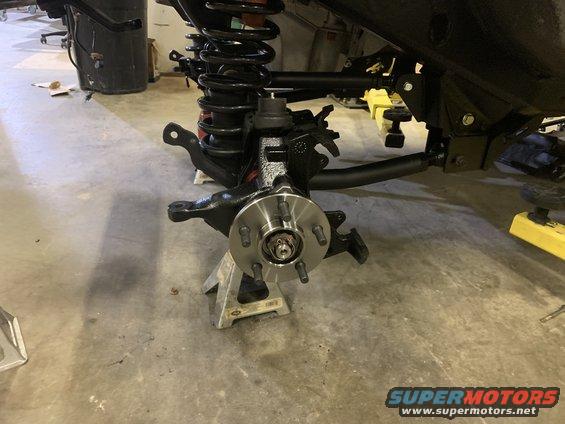
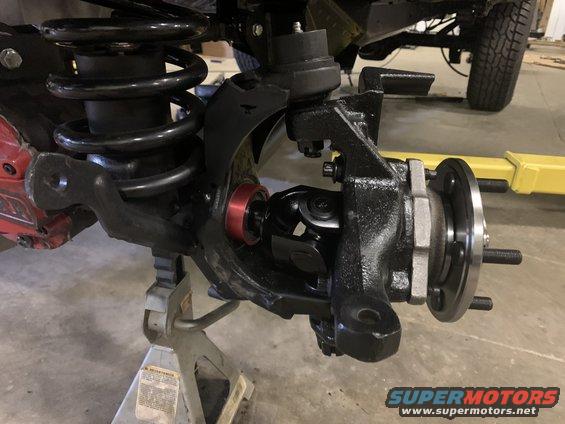
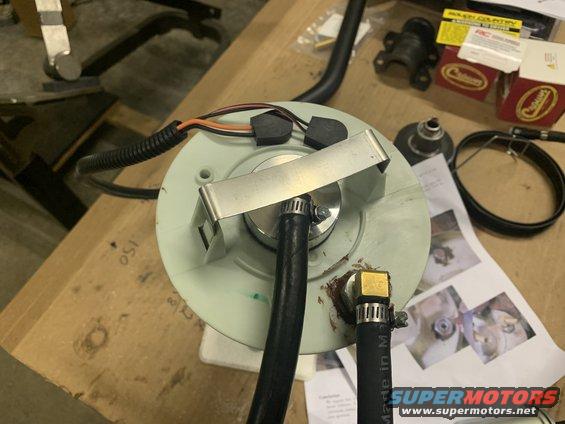
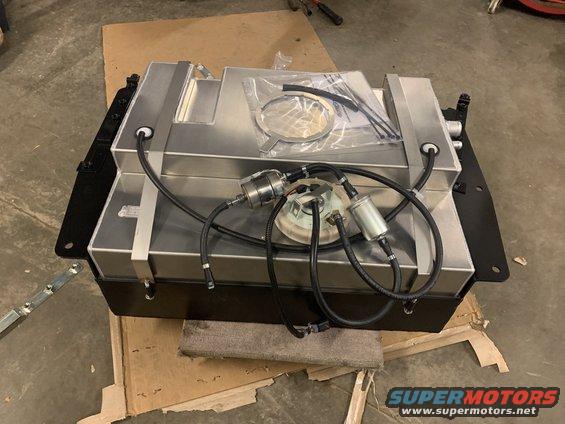
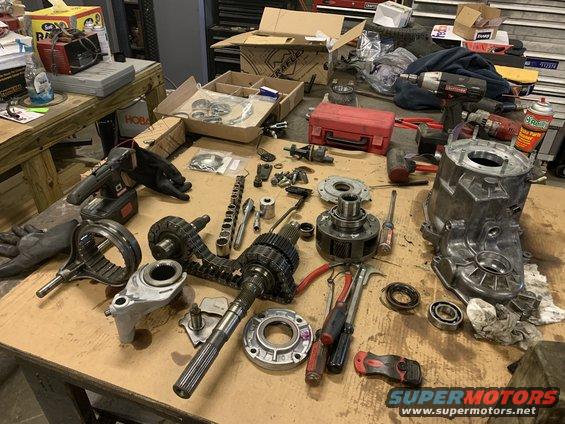
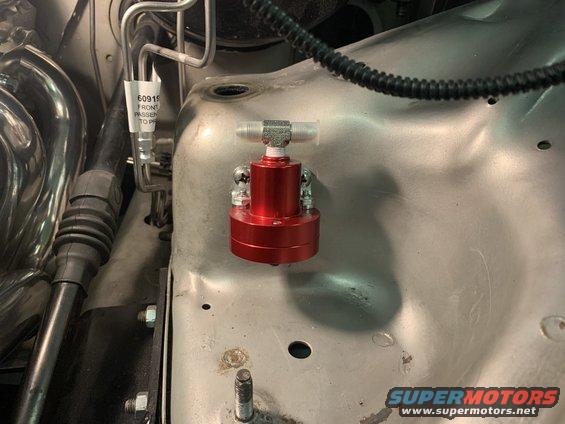
All in and assembled. There are 8 very fine threaded and tiny screws that hold everything together. Then you have to torque them all to 20 inch pounds. I was sweating bullets trying to get to that torque setting. I was expecting the screws to snap or stripping the heads off but alas I made!!

784fa25352c64b10a9c1d259e0235591.jpeg


64535dfc0cce4948abdc1bd143f29a2f.jpeg


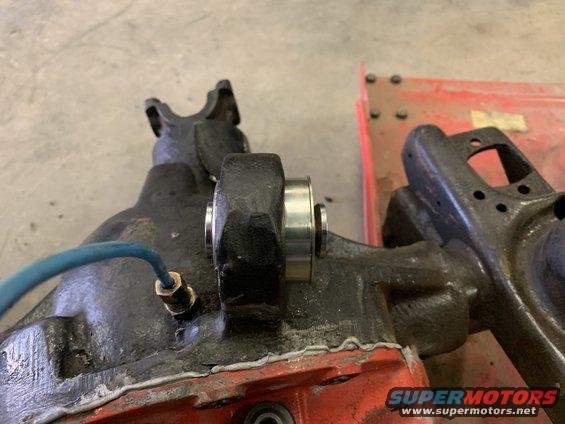
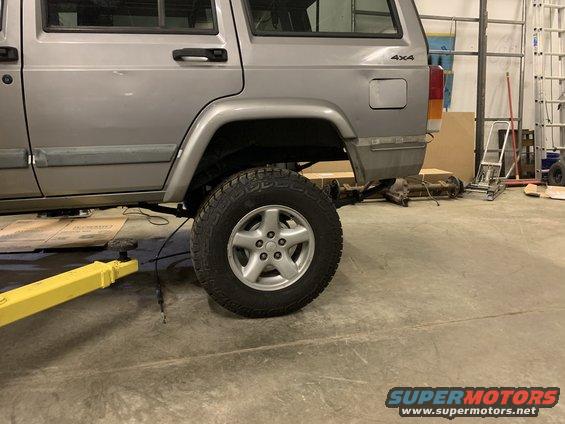
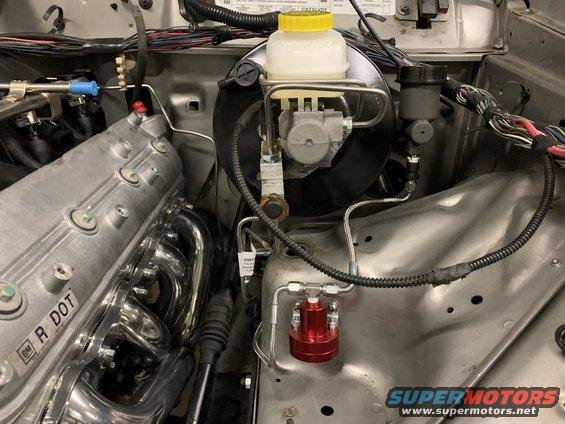
Overall I am impressed with the quality of these bushings. If they perform half as good as they look I am set.
 
So I found myself unsupervised today and decided to go play in the shop. It kept me of Craigslist and from potentially buying another project that I don't need. So in the end I saved money! :lol:

I decided to put the front axel back in to see what ride height is going to be. I was mainly interested in if the tires and wheels I have would work. The are original size and brand new so I was hoping.... It looks like I will need to upsize the tires. If I have to do that I will probably buy some larger diameter rims and upgrade the steering. But I will wait till the very end to decide all that. I know I don't want to run wheel spacers but I will sort through my options when we get there.

Here are the upper and lower control arms form the BDS kit. Looks like I will have plenty of room for exhaust clearnce.

9438a0b491c7443faa558bacc712e142.jpeg


f0498ed92885438abb7ba28a4b8e2393.jpeg


Here I've just got the axel sitting under the Jeep.

f0498ed92885438abb7ba28a4b8e2393.jpeg


And here are some in progress and the Jeep sitting on full weight on the springs.

aee9cd96bd0f40cc96c282aa18294b9d.jpeg


f351eef435d94d028e879948fa8556aa.jpeg


And finally I rolled a a tire in the wheel well to to get an idea of how it would look. The axle is roughly at ride height for these tires and wheels

55e6273ecf014e5fb24d25ba13f86120.jpeg
 
So I've been focusing my attention to the back of the Jeep this week. Gas tank is out and have been lubing the spring bolts and working on loosening them up. Thus far the only casualties are two broken shock bolts and one rounded shock bolt head. Will need to weld a nut to it and hope it will come out. Now for the funny part.... after all this time of being under this Jeep I finally took a good hard look at the rear axle.... hmmmmm guess I had a Chrysler 8.25 all along! :lol:

And if you are wondering why I removed the gas tank. I did so because I ordered a GenRight 30.5 gallon tank last week. :rockon:

Sooooo I guess I should update my for sale thread with the 8.25 axle instead of the Dana 35. :D
 
So I found myself unsupervised today and decided to go play in the shop. It kept me of Craigslist and from potentially buying another project that I don't need. So in the end I saved money! :lol:

I decided to put the front axel back in to see what ride height is going to be. I was mainly interested in if the tires and wheels I have would work. The are original size and brand new so I was hoping.... It looks like I will need to upsize the tires. If I have to do that I will probably buy some larger diameter rims and upgrade the steering. But I will wait till the very end to decide all that. I know I don't want to run wheel spacers but I will sort through my options when we get there.

Here are the upper and lower control arms form the BDS kit. Looks like I will have plenty of room for exhaust clearnce.

9438a0b491c7443faa558bacc712e142.jpeg


f0498ed92885438abb7ba28a4b8e2393.jpeg


Here I've just got the axel sitting under the Jeep.

f0498ed92885438abb7ba28a4b8e2393.jpeg


And here are some in progress and the Jeep sitting on full weight on the springs.

aee9cd96bd0f40cc96c282aa18294b9d.jpeg


f351eef435d94d028e879948fa8556aa.jpeg


And finally I rolled a a tire in the wheel well to to get an idea of how it would look. The axle is roughly at ride height for these tires and wheels

55e6273ecf014e5fb24d25ba13f86120.jpeg

It seems like you are putting a lot of thought into these modifications so I thought I would mention my thoughts on your suspension. Mall crawler or rock crawler I would consider control arm drop brackets or even long arms. Seeing the angle on the control arms looks like the ride quality would be pretty unforgiving.

I had 3.5 inch lift coils on short arm suspension for years and that was probably my biggest regret looking back. Build looks great!


Sent from my iPhone using Tapatalk

Yes I have been putting a lot of thought in this. However, this is my first Jeep build and I am seeing I've much to learn. So now I am off to research drop brackets which thus far have all been pretty much the same. The interesting thing is those manufacturers that have the additional brace behind the control arm bracket do not have provisions for frame stiffeners. So you are on your own to figure that out. Not a big deal but surprised its not offered.
 
Yes I have been putting a lot of thought in this. However, this is my first Jeep build and I am seeing I've much to learn. So now I am off to research drop brackets which thus far have all been pretty much the same. The interesting thing is those manufacturers that have the additional brace behind the control arm bracket do not have provisions for frame stiffeners. So you are on your own to figure that out. Not a big deal but surprised its not offered.

thoughts on that would be, someone running short arm drop brackets isn’t wheeling hard enough to necessarily “need” frame stiffeners. Although I would argue every Cherokee should have stiffeners before any modification.
 
Yes I have been putting a lot of thought in this. However, this is my first Jeep build and I am seeing I've much to learn. So now I am off to research drop brackets which thus far have all been pretty much the same. The interesting thing is those manufacturers that have the additional brace behind the control arm bracket do not have provisions for frame stiffeners. So you are on your own to figure that out. Not a big deal but surprised its not offered.

I think they will help with the handling and ride quality. It will also help push that front axle back towards the front of the jeep some and keep the new tires from getting into your fenders/wheel well.

Some reviews show that either rubicon express or rough country brackets work well.


Sent from my iPhone using Tapatalk

Rubicon and Rough Country are the two manufacturers I looked at the hardest. I am seeing a wide range of opinions when it comes to drop brackets and when they are needed. Rubicon does not recommend them on anything less than 5.5' of lift whereas others mention anything over 4" and other web posts say how much better their XJ drove with the brackets and 3.5" of lift. I guess it will come down to sorting through the info and doing what I think is best for my project. Like anything on the interweb everyone has their opinion and views. I do see how my control arms have a sharper angle than stock. I do know if I do the drop brackets I will probably have to make my own brace. I decided to do the frame stiffeners due to the amount of power the LS will be putting out. That and the positive reviews on how much better the Jeep drove and the squeaks and groans were gone. I will get the rear suspension and as see what it looks like and go from there. I do appreciate the info to research and see what will work for my project. Keep the suggestions coming!
 
This may have been addressed in another post but why not go with long arms?

I enjoyed the way my cherokee drove on a 3.5 inch rubicon express lift with 32s but the long arms drive and ride so much better.
 
In the rear, have you thought about going sua? I fear that axle wrap will be a real issue with the ls.

I believe @Buddy_Holly did it with his, and maybe has suggestions.

The main issue with SUA is it keeps you close to stock height. I’m maybe 2” at most with the rear shackles jacked all the way up. I think in Buffy’s case some good leaves in the back with a traction bar will be the best option for SOA.

As far as the front goes, I really like the Stinkyfab Racing Long arm kit. It’s more of a mid arm in my opinion, but you have the option to run it as a 3 or 4 link. It works with stiffeners. Very well thought out design. Aluminum links, Johnny joints, and you don’t have to drop the whole suspension to pull the trans out of the Jeep like the cheap kits.

SFR Long Arm Kits for Jeep XJ Cherokee
 
Thanks for all the thoughts and suggestions! I purchased the BDS 4.5" lift with the upgraded short arms and rear leaves and new shackles so the suspension is entirely new. I debated on the long arms and it came down to cost (funny I know considering what I've spent on this project) and how hard was I going to wheel it. I've spend so much energy and research getting that big ol honkin V8 in there that I am now looking more closely at other areas. Plus as the old saying goes "you don't know what you don't know" so I am still learning what is offered for XJs. I am thinking I will do the drop bracket for the control arms as it will free up some needed real-estate for the exhaust and will push the axle forward abut 1/2 an inch which it needs anyway. I can always do the long arm later. I may have to consider a track bar of some kind due to the HP, 4:11 gears, and a third pedal. I am sure thinks like this will crop up when I get to the test drives and heavy right foot stress tests. I don't plan on going taller that 31s on tire size. I am waiting to see how everything looks when the lift is fully installed and its back on 4 wheels. Once I get a look at that I will decide tires and wheels. I would like to upgrade the steering but do not want to spacers. Still don't understand why some ton steering kits say you'd have to run spacers with 17" rims. Much to learn I guess.

As always thanks for all the thoughts and wisdom!!!
 
It's been a while since I've been able to update my project. To be honest I've been stuck waiting on USPS to deliver my much needed parts. Ended up reordering some and had them delivered by FedEx, it's a shame when FedEx is the better carrier! So while waiting on parts I detailed the rear axle. I finally started getting parts so I was able to build out the rear brakes, install the rear springs, install the high pressure hose. I am real close to getting it back on 4 wheels!

I went with Power Stop rear drums, The new brake shoes and hardware came with the axle. Thank you Mr. Treadway

9a9f3de7b0ab4285987e02108640de73.jpeg


1190adeccf034e6791b0adabd51795ec.jpeg


79e60eb931a44f77a42ae8ed0d05221a.jpeg


23d0dc616f4b4e4fa14c44cdce2a5704.jpeg


All of the spring bolts were shot so I ordered up 6 new ones.

348984d3c7d14deeae1e075de2234763.jpeg


92569fa1e4d345caa685be2e4d461b6b.jpeg


My fittings and hose came in so I took care of the high pressure side of the power steering pump. Have the parts to build the low side but ran out of time today. Many thanks for everyone who schooled me on using the right hose. I ordered this one from Fragola. It has a working pressure of 2500 and a burst pressure of 10,000.

6253f3f4026f422d848435f43e698903.jpeg


f2d921089b2b46508841487c377a2d35.jpeg


c51fe9f6e9bb42d79ee0b7c85adf3336.jpeg


3 out of 4 shock bolts broke off on me. I ended up knocking the welded nuts off, which was way easier than expected. Turns out a M8 nut cert perfectly fits to hole left behind. Of course I spent over an hour with drills, PB Blaster, heat, and ease outs before this epiphany hit me. with a little luck I will get the axle in tomorrow. Fingers crossed!

a2f9cc7921844d808fd8f57cba93fc7e.jpeg


48336af8385d4945ae7f78b9758f1c5a.jpeg
 
I finally got the rear brakes figured out. It was kicking my butt there for a while. I can now do a rear drum setup in about 5 minutes! Don't ask how many times I did it to get that fast. I will say copious amounts of obscenities didn't help but did make me feel better.

I was hoping to keep my new tires but it looks like I will be getting bigger tires. No I am trying to decide if I want to upgrade to 17" rims.

5eb21b1f340b43cda4a02a157dc32b00.jpeg


My 30.5 gallon GenRight gas tank arrived today. Will start on that after Christmas.

ff38b46d48534ee28206d677e3bd9d64.jpeg
 
I hope everyone had a merry Christmas and happy New Year! I was able to get quite a bit accomplished while on vacation. After much consideration I decided to install Rough Country's control arm drop bracket which resulted in the bars being parallel to the ground. I also got the GenRight gas tank installed and the front axle shafts installed and am now back on 4 wheels. Now I can set my engine angle and all that fun stuff!

Rough Country drop bracket kit. What I liked about their kit is it allowed for the 3/16" for the frame plates.

f49f0870ee8b4fcc9cb283c8ef54ee33.jpeg


I purdied up the steering knuckles and yes you can see in the pictures the pinon angle needs work.

8fe25fd886594e3990a52ce9270a5968.jpeg


I read up on the Ten Factory axle tube seals and liked them so had to have them!

df71f53fa7f4488a9301faa9f64992cf.jpeg


a8e1dc47558447b99c58c6185bb92e42.jpeg


I decided to upgrade to chromoly axles for the front axle so I got a seat from East Coast Gear Supply. While I was at it I went ahead and got some new wheel hubs. The old ones were good but decided why stop now with the new stuff.

2685a9f494c244e2baaa47bd1dcc4cb1.jpeg


344954d57bb74898916a18b71f9402d8.jpeg


d6744f93bb3c40b1a97dee75e957a826.jpeg


It was at this point Donnie noticed the new brake dust shields sitting in the parts pile. He asked me if anything needed to go on.... why no why do you ask........ let the cussing begin!
 
The GenRight gas tank went in relatively smooth but there was some challenges to it as I am installing a Rough Country rear bumper at the same time and all those mounting parts have to play nice together. Since my XJ didn't have a factory skid plate I had to drill some holes and figure out some bolt holes. I also had to modify the new fuel pump for the LS engine with the Novak fuel kit. That was easy as long as you don't drill too close to the edge.... ask me how I know.

NEW Mopar fuel pump and Novak conversion kit. Did I mention the new Mopar fuel pump I am about to drill wrong??

9b7922843e87479096ea49433da94737.jpeg


f5051a84d56a4655a2d3598d806f7d57.jpeg


I drilled too close to the edge, tough to tell as the instructions is just a picture of the top of the pump with a drill bit stuck to it. So to remedy the situation I ground the the nut an nylon washer and made it work.

81c3470df03e46b2a62d0033bb80bb2e.jpeg


Fuel pump installed in the tank and ready for install.

9435a2da50464a1890671a4dac5814e2.jpeg


Here you can see the holes I had to drill in the frame. I made some "frame bolts" to fish down to the holes which was a joy to do.

08433b9cba374eb784a481d335ff5049.jpeg


ab61e343522d4e54b272b3e844fbaf0e.jpeg


I will say it tucks up into the stock location very nicely. I will need to figure out where to mount the new fuel filter and regulator and figure out the tank vent. The hoses were a challenge true to reviews. The new tank has the same size ends as the filler neck so I had to heat the hose up in some boiling water to get it to stretch over the tank end, I did have to enlarge some the mount holes on the tank to get all the bolt holes to line up. Over all the bumper and tank played well together.

2aaec65b482d44eab05d7317447d7c55.jpeg
 
One final note on the tank. I may have to change the diff cover as I can see where it could come into contact with the tank under full compression. I will have to research some different styles to see if something works. Worse case scenario is I will have to go back to a stock cover.
 
When are you gonna get back to the odd build the jeep it turning out awesome
 
Over the weekend I got around to rebuilding my transfer case and installing the SYE kit. Also got it installed back in the Jeep which was a challenge since so much has changed due to the motor swap.

My NV231 threw up on my work bench,

e02b2b1ce2d24313bb89f7ceb783c227.jpeg


Everything back together with the SYE installed and new chain.

9a6a6a2aef7f44fcb64ad74aeca9c14d.jpeg


Out with the old...

8ced06f13ccd403eaa0800368f9a27b4.jpeg


Back in the Jeep!

ffaa7e7c92cc4dd89f8ed1ec5c30eed1.jpeg
 
Been a slow week in the shop this week, My shop partner has been having to work late every night. I did get some stuff done though. Got the plugs in the engine, calipers installed and all the lines installed and tightened down. I also got the clutch master cylinder and pedal adjuster installed and plumbed in.

Here is the pedal adjuster. It is supposed to give you the ability to adjust your hydraulic throw-out bearing to release closer to the floor or wherever you want it to.

ddf00c51499c42f8a2ee97ca3bf52bff.jpeg


Master cylinder and pedal adjuster all plumbed in.

8c389255498b4312b15e4d10ab60ef73.jpeg
 
We are now moving into the wiring phase of the project. I gotta say I am getting excited. Cleaned up the old wiring harness and started running the Holley Terminator X system. Lots of head scratching and planning on starter wiring, auxiliary wiring, radiator hoses are going to be interesting, radiator overflow, and of course AC since I'm an old fart and like my AC!

Getting things laid out and figuring out the best routes to run some of the wires

14e6bcf7bb744090a91e085ab1224251.jpeg


676876092d484316b2ed937ec45295e5.jpeg


The best place, to me, to place the computer is under the driver seat. Will fab up a mounting bracket an we are good to go. We did check clearances with the seat in.

5a95fdc69d424cda907583a82bb16727.jpeg


Here we have the radiator, AC condenser and header panel all mocked in place. We had to remove the belt tensioner cover to give us more space between one of the fans and the tensioner. This is when we discovered the "opportunities" ahead of us routing the radiator hoses, especially the upper. It is looking good though.

b3e11c84d83d47d5a8a26a4c046020f3.jpeg


4700a74414eb4b16a5fb471a01bdbb23.jpeg
 
This is a no picture update, sorry. @Will Carter came by last night and helped me set my wheel base, caster, etc. I gotta say I was totally lost while he was doing it because I was wanting to move things in the other direction. I received the "that guy" approval to torque the suspension down and order drive shafts. Good times!

for those not in the know.... when Don and I were racing ECORS Will would come by the shop and look things over, shake his head and proceed to say.... "I hate to be THAT guy buuuuut....." which usually resulted in more money, hours, bad language, etc thus earning him the title of "that guy" :lol:
Hey, I think there’s a trophy or two with a big #1 on the shelf ain’t it? Worth it.
 
Back
Top