Project MyCorona

Time for an update. Still recovering from the shoulder surgery, very weak in my right arm so progress is still slow. We have made some progress though. 
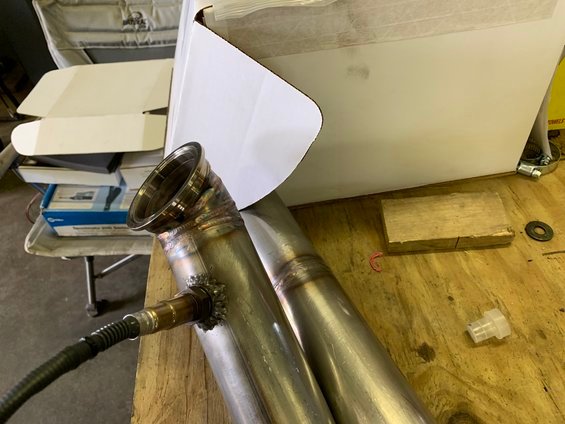
@WARRIORWELDING hooked me up and welded my exhaust ends up. Much appreciation for that, great guy who went above and beyond for me.

497774b433b6455d89b93df75da70c5d.jpeg


47169f853e5c480cb6f47dc189a0879a.jpeg


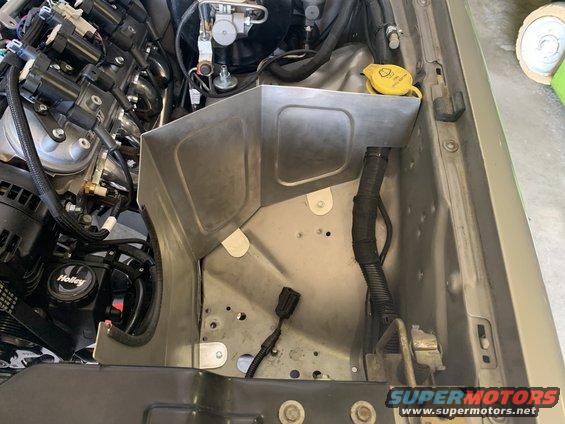
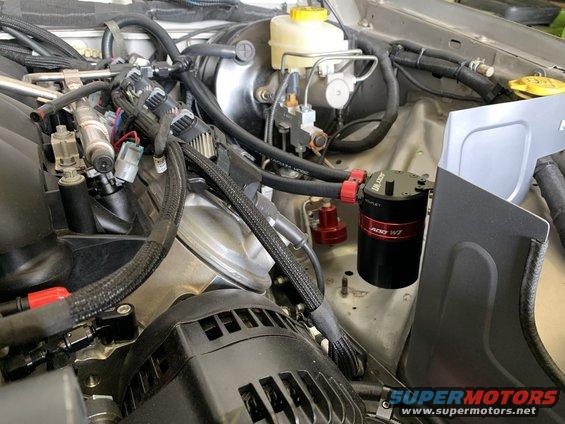
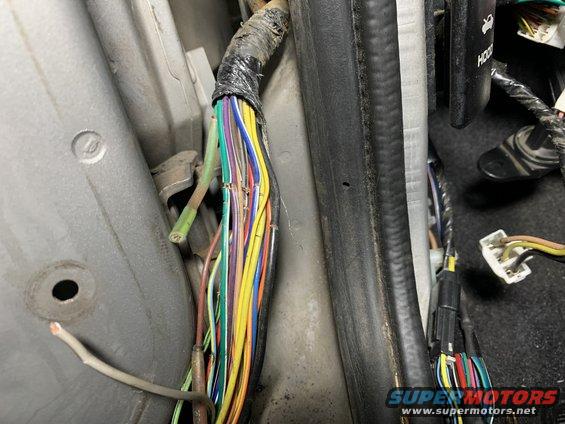
I decided to do bulkhead fittings for where I passed the air lines through the body and it worked out great. Here is a shot of where it comes through the body. A lot going on here! Break lines, fuel lines, and air lines kind of converge on this one spot.

66ba9e85cf1545a6b354a7c67f8f8801.jpeg


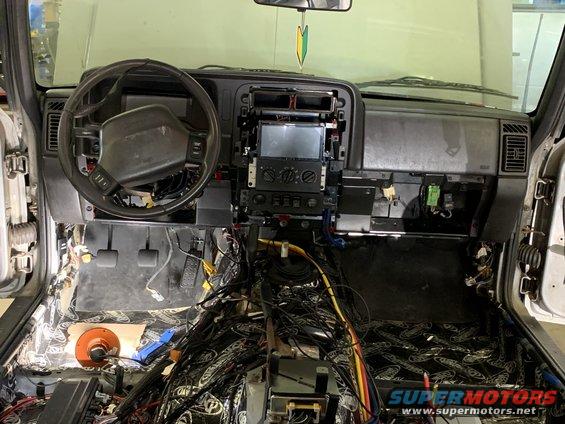
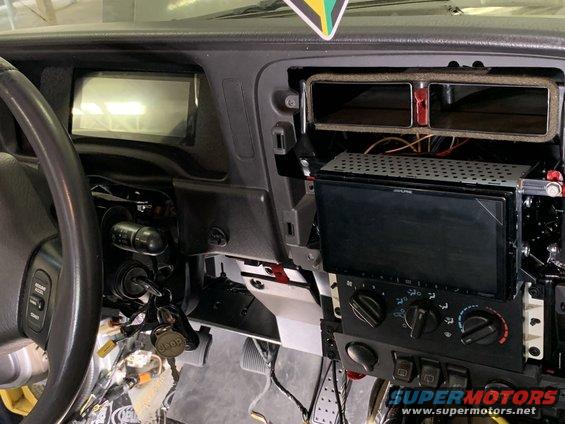
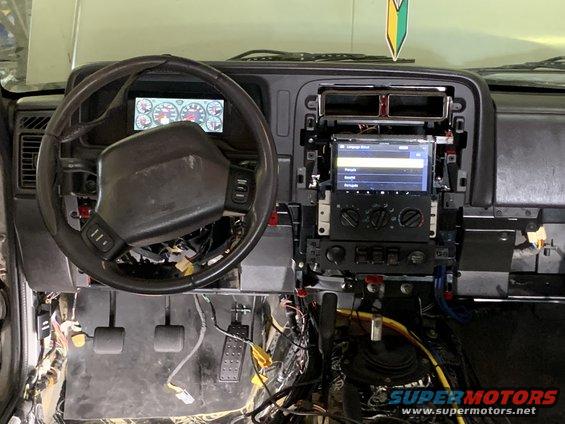
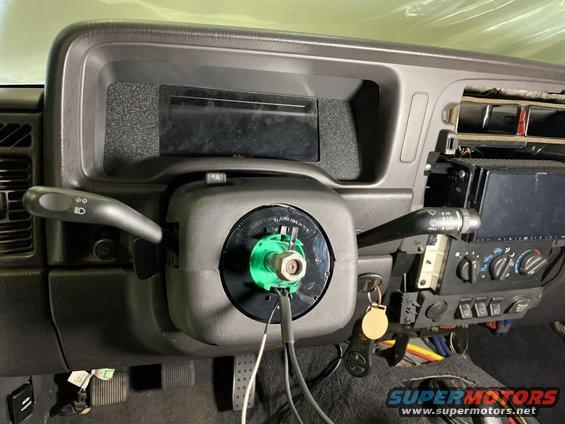
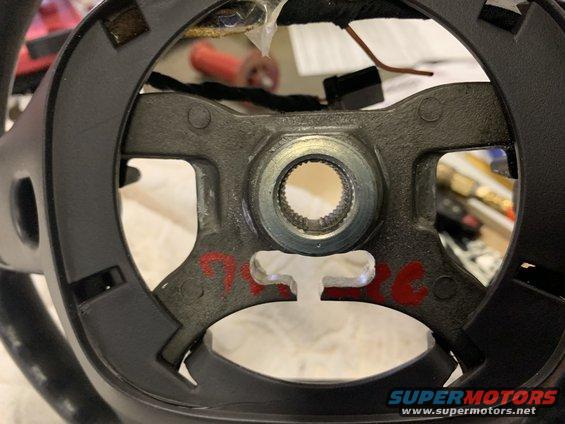
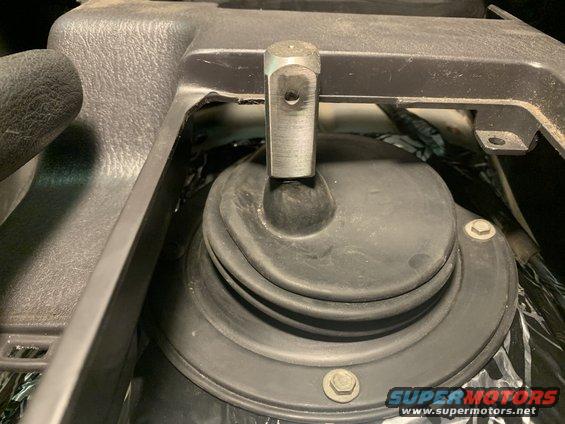
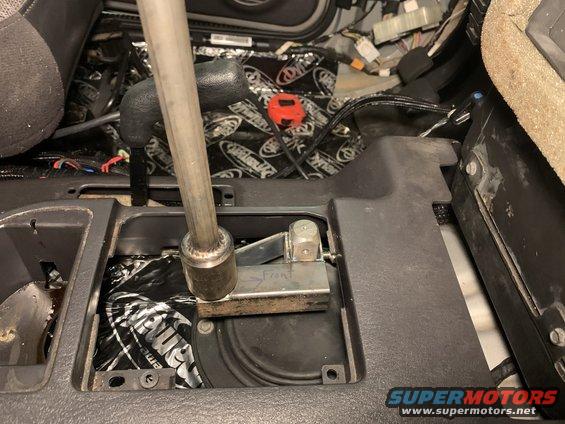
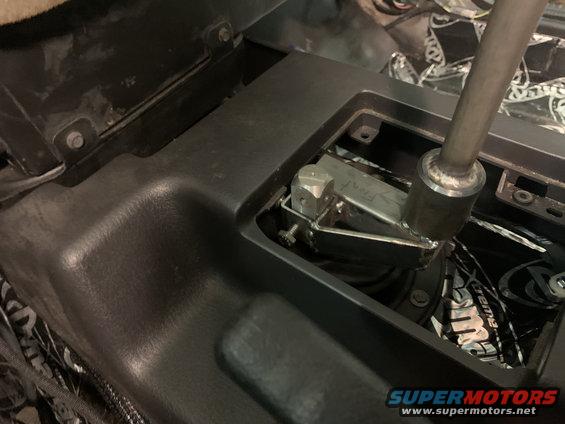
I am slowly tying up the small stuff that takes for ever. Drive shafts are in, airlines are in, on the good side of the wiring, need to try and remember how to put the dash back in. I need to get this wrapped up by the end of July and I will be starting a new build thread for my brothers CJ5 Jeep. My dad and brother will be driving out first of August to spend time in the shop working on it together. Will be once in a lifetime thing for me and I am excited. If I remember correctly it is a 79 CJ5 with the 304 V8 and only 53K original miles and practically no rust.
Closer to freedom noises from under the hood!
 
Thought I'd give a progress report on the Jeep, nothing picture worthy though. Mostly what I wanted to relay is the learning curve with the Holley Terminator X Max software. Two things I have learned so far. First, you have to go through the setup wizard BEFORE the computer will send power to the fuel pump relay. Instructions to not mention this and we spent many hours chasing wires looking for a bad connection. Second, my pedal would not sync up with the throttle body. The instructions do not say you have to download the software and find to correct throttle body part number before syncing will take place. Lost count of the on hold hours waiting for a tech to get with me., you know because of Covid and all. You will also have to know the specific part number of your injectors and cam specs. But on a good note my TPS is synced!! Cranking is just around the corner.
 
Glad to hear can't wait to see it run.
 
It's ALIVE!!!! We had one wire wrong once we (ahem @BigHolley) found the correct wire it fired right up. Next order of business is to get a tune in this thing. It does not like the base program at all. You touch the pedal and there is a dead spot then revs smooth and then will die. Fires right up and idles wonderfully. Everything is green from the dash to the computer. We also need to find some wires to connect to the dash. Need to find the fuel level, left and right turn signals, and maybe the high beam indicator if I want to get fancy. Once that is done I can modify the dash layout and will be done! Hopefully the video will work.

 
It's ALIVE!!!! We had one wire wrong once we (ahem @BigHolley) found the correct wire it fired right up. Next order of business is to get a tune in this thing. It does not like the base program at all. You touch the pedal and there is a dead spot then revs smooth and then will die. Fires right up and idles wonderfully. Everything is green from the dash to the computer. We also need to find some wires to connect to the dash. Need to find the fuel level, left and right turn signals, and maybe the high beam indicator if I want to get fancy. Once that is done I can modify the dash layout and will be done! Hopefully the video will work.

Your word with the Holley stuff is giving me second thoughts on converting my old speed density Ford stuff over.
 
I’ve been very impressed with the Holley stuff thus far. The wire harnesses are very nice with very tight connections. The dash is basically a computer. I am amazed at how much you can do with it. We have located the fuel level wire and the turn signals. Still looking for the high beam. The cool thing with the dash is you can program virtual switches. I highly recommend their stuff at this point.
 
Thought I would share some things I learned about the Holley Terminator Max ECU I am using. As I noted earlier the engine fired right up and idled very well but when I would touch the gas pedal it would spit and putter and die. Over all it just was not happy and when I did get it to rev I was not impressed. In the back of my mind I was thinking where is all this famous LS power I've hear and seen so much about?? I had a friend who is very knowledgeable with turning come by Saturday to give it a look. After some head scratching and playing around we determined there was an issue with the MAP sensor. As he explained it to me the computer was thinking it was at WOT with 30 pounds of boost! He went home to find the correct MAP sensor part number. Later he called to inform me that we were idiots! We got the instructions confused, you only use the MAP sensor IF YOU ARE USING BOOST. There is a vacuum port on the ECU that we were thinking you use only that for boosted application.

So what we should have done (and did do) was disconnect the MAP sensor and run vacuum to the blue vacuum tube on the ECU. OMG what difference!!! I suddenly have found that fire breathing LS monster I've heard so much about. Throttle is instantaneous and when it revs it feels like it's trying to flip itself on it top. I was all smiles after that test. I actually had to be alone for a few minutes and smoke a cigarette (and I don't smoke). :smokin:

So just to review.... if you are naturally asperated do not connect the MAP sensor and run a vacuum line to the ECU.
 
We are in the home stretch on this one! We've been working on getting the dash back in and verifying things like dome, windows, locks, wipers, etc still work and the good news is the do! We deleted the original computer and dash wires so there was some concern we may have been over zealous in our wire removal but thus far we only had one wire we should have kept and was an easy fix. The engine runs great and the Holley tune makes me quite happy. The only issue with the engine is a nagging coolant leak that wont go away and to fix it will require draining the system. Not looking forward to that but it is what it is. That leaves me with three remaining things to tackle.

1. Wiring the high/low AC switches or going with a single trinary switch
2. Shifter relocator. This one has been in the works for a bit. For whatever reason the shifter lands in the upper left portion of the opening. I made a crude prototype that moved the shift handle over 1 inch and back three inches. Gave that to a friend who made it better through the wonderful world of CAD. Just looking for a CNC place to have time to cut it out. I got the idea from Lokar's website as they offer something similar.
3. Air box. I have a template made with measurments and angles but need to find a place to make it. Can anyone suggest a supporting vendor who can help me out or know of someone i can use?

Other than that some wiring cleanup and testing the new systems out. Holding my breath there are no leaks on the clutch. Starting first of August I will be doing a frame off on my brother's CJ5. Look for a build thread soon.
 
Man you guys don’t miss or forget nothing. You’d make someone a good wife! 😆 The CJ got move to the head of the list due to my brother driving here from south Texas to spend a week wrenching on it with me. The icing on the cake is he is bringing my 83 year old dad with him to help. Literally a once in a lifetime opportunity for me. Look forward to spend that week bonding with my dad and brother.
 
Shop time was cut short today due to company coming over. You know the saying happy wife happy life! We did make some good progress. Had to move some wires around the went to the console. Didn't like how they laid out so out with the old and in with the new. While Don was working on that I was working on getting the dash back in. Added a USB port to he dash that connects to the Pro Dash. So now I can plug a mouse dongle or laptop straight into the dash without having to fish for the connection. The interior is starting to look like a car again, getting excited to take that first drive. I know there will be some bugs to work out but excited to feel that power.

f50057ce0bc24ee88a9e7de7627b6f8c.jpeg


45bdf203e8f941d293ea4d7ed49f0391.jpeg


ef67b10d2d214c03aafa08cefa3db336.jpeg
 
Planning on putting a seal across the top once I determine the thickness. Was also planning on drilling holes in the "box" area to increase cool air flow.
 
I installed the finished air box today. Paint ended up being a few shades darker than the body but I'll survive.... maybe! I took the opportunity to install catch can that's been waiting on the air box completion. Very happy with the results. The last thing to resolve is the shifter location. Had some guys over who are helping me with this and are changing directions. Hope to post some pictures of the new and improved idea soon.

3cf343beb60e45cfb1d61ad613234a3a.jpeg


58b96e7a393347ab80dcefea0daa0103.jpeg
 
The clock spring finally came in and I was able to get that installed and all the surround put back on. The original steering wheel was in rough shape so I decided to try out the Grand Cherokee steering wheel swap. I found a decent one at the Greensboro LKQ. I am only interested in the horn working as the original computer no longer exists so no cruise luxury for me.... darn!

Steering column all back together again. Waiting to put the wheel back on until I am done re-programming a new dash layout.

d4acd6659d034f859ea4c1f1d2c2c69a.jpeg


ZJ and XJ wheels side-by-side

58dd96c651b64059b6041042c5cfe8ef.jpeg


Old...

ca017461752042adb84612750103b935.jpeg


New and improved

3f76b61fc50941c19f0fdb96c32ef05c.jpeg
 
I spent about an hour and a half clicking away in my Jeep this evening working on a new dash layout. Can't take credit for all of it, I started with a canned layout and modified it to my liking. Very happy with the results. It's amazing what you can learn when you read them there instruction manuals.

the results....

a741aa838214408399309a142e1646d5.jpeg
 
Since I was "done" with my new dash I decided it was time to get a steering wheel back on. In all my reading on the ZJ to XJ steering wheel conversion I never came across anything about the clock spring causing an issue. I saw where the wiring was a tad different and you would need to modify the connections. So imagine my surprise when the wheel wouldn't go on.

Notice the window below the steering shaft. The clock spring protrudes into this hole and allows the wheel to sit further in.

a6f896a9f9a14b2bb1a0c07a90489c14.jpeg


Notice the lack of a window on the new wheel.

845effa16bda43f493d59817f1232e4c.jpeg


Nothing that a sharp drill bit and a carbide bit couldn't fix.

366989e0772c48e2a696c717dbc220b7.jpeg


I had to cut the gap to allow for the large connector of the airbag. The horn works as expected!

08dffa8b3ca34232899e717a4fdb5a14.jpeg
 
Last edited:
We've been chasing some electrical gremlins for the past week. I was beginning to think I ripped out some necessary wires when I removed the computer and dash wiring. Fortunately we traced all the known issues back to the driver side door. Yesterday I bit the bullet and pulled the wires out of the door and found quite the mess! It is easy enough to fix just a pain. Hopefully this will be the end of the wiring troubles. I've thus far resisted the urge to power up the 1000 watt amp, subs, etc for a test run. I will need to find the appropriate flat bill to wear for the test. :lol:

1dd7754b01dd4a29accc86cf4bb4c7bc.jpeg
 
Last night we got the wiring harness pulled out and repaired. Added some additional protection to hopefully prevent any future issues. Was finally able to get the doors put back together and see functioning windows and door locks and speakers for that matter. It's the little things you come to appreciate! Up next is fitting the carpet on the passenger side. Once finished there it's on to installing the console for the last time. the last big thing hanging over my head is the clutch operation. I figured out the leaks and ordered parts. I had good pedal before but it would not depress the clutch far enough to put it in gear when running. We will have an answer in a few days. It can go really well or sideways in a really bad way.
 
I finally finished the shifter. It's amazing that something so simple can be such a pain in the ass. Of course my initial solution was to way over complicate things. Fortunately I have friends and contacts to reel me in and keep it simple..... sometimes! :lol:

You will notice that the shifter is in the upper left of the opening.

13007f07b6054f1fbe59722c0a1372fb.jpeg


Me over complicating things.

ca9efe98446b4a4f97005d85ceb47d05.jpeg


609b8f8320e84b52b321a28230d113fc.jpeg


Final product... thanks guys!

19f8bf868dc249188bf5b0996b4f52ec.jpeg


73b383e8fee143f88499acdf8dde59d9.jpeg


Nice and purdy with fresh powder coating and it works fantastic too!

d9c96c4268a5426493d11884d7df62a1.jpeg
 
I thought I would finally get around to giving you guys an update on my project. It is done and thus far I have about 300 miles on it. It drives great, tracks straight and the Fox 2.0 shocks produce a surprisingly very smooth ride. Steering is crisp and responsive. The power..... oh insane amounts of power in every gear. I giggle like a kid rowing through the gears and the exhaust note is music to my ears. With the gearing and tire size I am pulling 2,400 rpm at 65 MPH. First gear is almost unusable on the street but will be great for off roading. I chased several gremlins like water leaks and liked to never have gotten the air out of the internal slave cylinder. Still have an air leak to tend to for the ARB I knw where it is just have to line up some help to get it fixed. I need someone to hold the bulkhead fitting while I tighten the air lines. I have an appointment this Friday to have the computer tuned and that should be the last major thing on the list. Over all I am very happy with the project. I tallied the parts bill and while it was cheaper than a new car it wasn't budget friendly by any means. I can say I have a brand new XJ wrapped in an old XJ body. I will give an update after the tuning session and a few more miles of driving.
 
Back
Top