Sleeper / Camper update....

Yay!Gurrr

Better Faster Stronger
Moderator
Joined
Mar 17, 2005
Location
N. N. Raleigh, NC
I figured since i didn't go to the rock race at DPG, i needed to show some proof of my time well spent !!! :flipoff2:

Ken and John, has stopped over Thursday to use my plasma cutter and I just so happened to have some plywood waiting on the truck :) So we riped the pieces i needed to size..

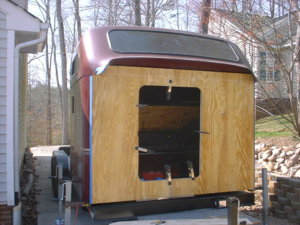
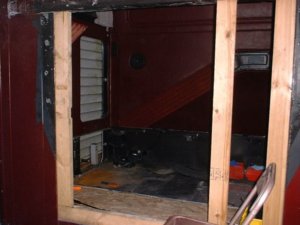
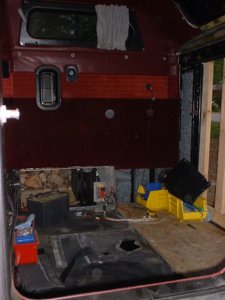
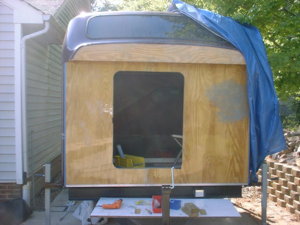
Last night I ground off some rivets and secured the 2x4 framing into the opening and caulked it also. I had to do some fitting on the plywood to fit the upper contours, and the flap disk works the bomb on plywood :)

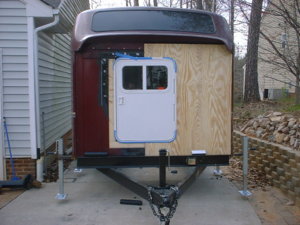
This AM I cut the door opening and got some hardware and aluminum strips to trimming the edges and prevent the screws and bolts from pulling into the wood.. I also got the trailer ready to set the camper on.. I decided to front load it.

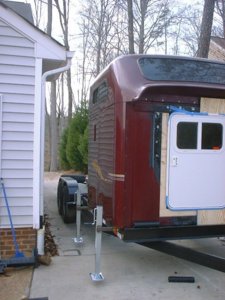
So ken and John showed up around 4 and we finished modifying the jacks and it was pretty easy to jack the box up and drag the trailer up under it.. Looks and fits nice..

I finished cutting the second piece and fitting it. And after some thought and pondering I got my game plan to finishing off the top/curved section.. More on that tomorrow..

I also need to work on some mounts to bolt it to the trailer...
anyway......
DSCF0044.JPG

DSCF0045.JPG

DSCF0046.JPG
 
I thought you sold that thing already?
 
todays progress

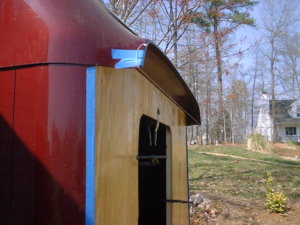
got the second piece up and got the first coat of epoxy on. When it hardens hopefully it will retain the few subtle bends near the top.. Then ill pull down the pieces and coat the edges and screw holes.

I also made a template for the upper piece, pic#2 the string shows where the 2 upper pieces will be to finish the top off... Thinking that area would be cool to add an outside/entry light eventually..

Oh ya got a new/used bedroom set, looks super nice !!!

DSCF0048.JPG

DSCF0049.JPG
 
nice, looks good!

looks like it was made to fit that trailer also.
 
Question Mike. Will those jacks, jack it high enough to clear the fenders, and are they wide enough to clear the tires, when you wanna unload it and pull out from under it?
 
Chip, they ust-a-could :) They 'were' wide enough to clear the fenders, but the jacks were very very wobbly and especially when they were up w/ 36" clearance under the sleeper.. Also I was very happy the jack went high enough on 1 stroke to not require them to be retracted and re-pinned, so a lot less cranking on the handles..

With 10" cut off the jacks side legs, the camper is 100% more stable now, the camper sub-frame isn't tweaking, and this can actually be a longterm solution... I can actually stand up inside on the jacks and its very stable..

AND with my driveway I wasn't able to get a long enough area to do a backup maneuver in a straight line. The front loading was 10x easier to do.. The trailer rolled easily on the concrete skidding on the front jack pad.. There is 8" clearance on each side to the trailer frame.. And with the tongue all the way down its only 24" (vs 36 to go over the tires)

AND its much easier to push the trailer forward 10' (5' camper + 5' tongue) vs backing it up 20' up over the wheel wells..

I might take off tomorrow to work some more on it... very motivating to see it start to take shape :)

Added - The other things that really makes this doable for me is I have the large dolly to set the camper onto when its down.. But at this point I can safely jack it up.. And should I decided I want to be able to drive out from under it, I can make a simple 'stand' that clears the wheels, possibly out of pressure treated lumber.. that can hold the camper for longer periods...
 
Is this thing going to have a bathroom? At the events I hate porta johns and usually need to take a dump. Now I know where to go. Cooooolll :huggy: :huggy:
 
Is this thing going to have a bathroom? At the events I hate porta johns and usually need to take a dump. Now I know where to go. Cooooolll :huggy: :huggy:


Let us know how this works out for ya :popcorn:
 
You going to fiberglass over the wood? You have a pretty good Idea there. A rv generator and mabe a propane powered beer frig. There is a place on line that buys wrecked RV's and parts them out, could be some neat ideas. Search it. I don't remember what the web site was. Good luck, can't wait to see this beast.
 
ill have some more pics this weekend, but i did glass the front, its now 1 large piece with a hole in it. I used some 6oz matte, i need to sand some more and do another skim coat then that will be ready to hang.. The top eve (arch) piece is glassed and epoxied to the camper top section (The top molded, lid section of the camper is fiberglass).

Not really going to put a ton of stuff inside really, mainly its purpose is to be a cool/warm dry place to sleep. It will have a Microwave and some other small convenience appliances for when there is 120v available (or gen)

But i've put a lot of thought into what I wanted it to be or not be, NOT an RV, its not a hotel, its not a soup kitchen, etc.
There will be NO running water, sinks etc. inside.

I have a list of future upgrade plans but id like to get it on the road first.. Soon..
 
I took pics last night, got side tracked to the NCZOO while my pops was in town over the weekend. But i did remove the bed frame stuff last night. So the floor is all empty. Ill post those when i get home..
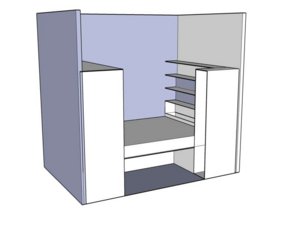
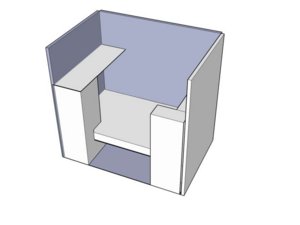
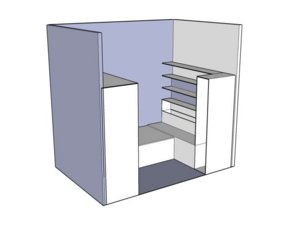
But heres a pic of what the new interior will look like..

Basically, i pushed the storage box back 6" and will be using a full size futon mattress to allow for bed and couch positions. The side storage will be integrated in.

I have to say Google Sketch up has been very cool, small learning curve, but it has helped me tremendously to see the space better. I took several pencil drawings and note and spent 4 hours last night. It was well worth the time spent, as i know exactly what pieces i need to cut out to build this the way I want it..

camper001.jpg

camper002.jpg

camper003.jpg
 
Space under the bed will that be wasted? It would be really cool to cut out the back under the bed and put in a wench and battery that you access from the outside. you could you the battery to run lights without the truck hooked up and the wench to pull wounded rigs on the trailer. A 3500 atv wench would work. Where did you get the sleeper? You drawing is awsome you have the gears in my head turning.
 
zero wasted space :) It will either be accessed via one of the side hatches or ill simply put a door/hatch on the front part..

winch (future) will be sunk down under, the rear part out of the way. Battery will be mounted down under the runner in a tray.

There is definitely a lot of storage space, but i made a list of general items that i bring and it fills up fast.. Tarps, chairs, lantern, stove, grill, tent (extra), bags, not counting extra tools etc...
 
Back
Top