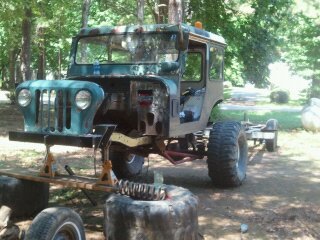
"Special Delivery" another postal build........

so ok heres some pics of progress...fixin to head up to memphis for the weekend so not much narration today
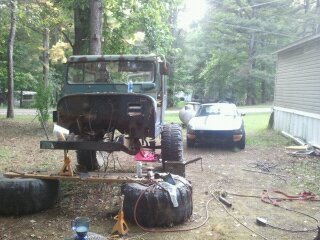
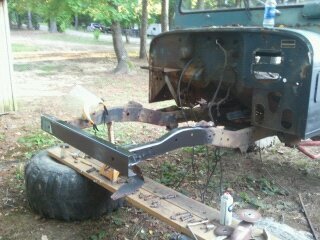
awww.supermotors.net_getfile_928767_fullsize_1339804146004.jpg

awww.supermotors.net_getfile_928768_fullsize_1339804168611.jpg

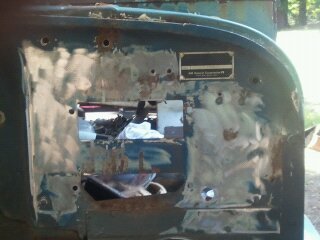
yes thats daylight coming thru at cowl to firewall seam...yikes
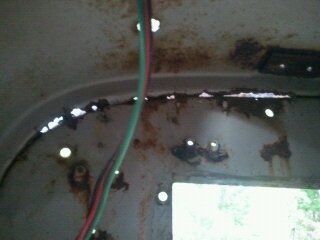
awww.supermotors.net_getfile_928769_fullsize_1339804187431.jpg

awww.supermotors.net_getfile_928770_fullsize_1340219795545.jpg

awww.supermotors.net_getfile_928771_fullsize_1340385051059.jpg
awww.supermotors.net_getfile_928772_fullsize_1340385059194.jpg

awww.supermotors.net_getfile_928772_fullsize_1340385059194.jpg

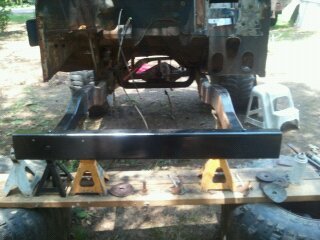
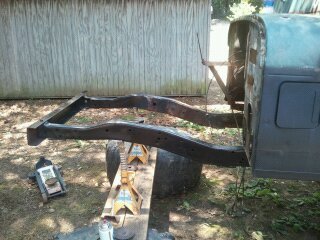
front half of subframe tacked up soon to be test fitted
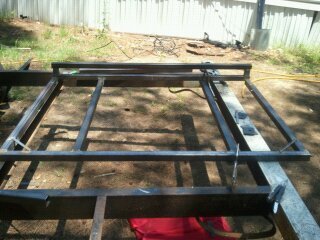
awww.supermotors.net_getfile_928773_fullsize_1340385082112.jpg

awww.supermotors.net_getfile_928774_fullsize_1340385092573.jpg

grill moved forward
awww.supermotors.net_getfile_928775_fullsize_1340468636783.jpg

awww.supermotors.net_getfile_928776_fullsize_1340468665875.jpg

had to notch bumper for clearance
awww.supermotors.net_getfile_928777_fullsize_1340468718360.jpg

well tahts it for now will be back on it on monday have a good weekend :beer:
 
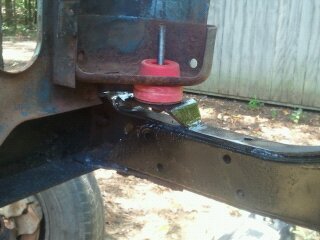
well got the front spring buckets finally tacked in and mostly fabbed...decided to go with a 3link wishbone in rear and change the front to 51" triangulated radius arms...will run procomp poly bushings at frnt axle and adj. johnny joints at frame...alll johnny joints in rear with adj. joints on frame connect on same side for max adj..this heat wave is murder...uuuggghhh
 
so like my wife bought a pool...ugghh done put it up and took it down twice still trying to get yard level...now the rain is here and cant work on pool or truck..front suspension is about 3hrs from being all tacked in if the rain will ever stop then front housing will get burned in and sent off to get "hot tanked"....then prepped for new guts
 
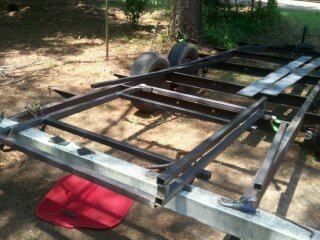
ok so like in the past no matter how many measurements i took front suspensions never came out tru and exact...so i decided to doo something different this time...i have a trailer from an old camper...so i leveled it off with jackstands and turned it into a frame jig...flipped frame on it upside down...then proceeded to build suspension...this worked out awesome...
 
Well just about finished with all the frame work..hoping to flip it tomorow and bolt up all.the suspension...i had forgotten what a PIA it is to clean up components that have been used offroad for years...uugghhhh
 
ok so heres a few pics of progress...

front d44 housing all clean
awww.supermotors.net_getfile_942540_fullsize_imag0011.jpg


rear d60 all clean
awww.supermotors.net_getfile_942541_fullsize_imag0013.jpg


frame ready to be assembled
awww.supermotors.net_getfile_942542_fullsize_imag0014.jpg


winch mount not yet completed
awww.supermotors.net_getfile_942543_fullsize_imag0018.jpg


front suspension
awww.supermotors.net_getfile_942544_fullsize_imag0025.jpg


rear suspension
awww.supermotors.net_getfile_942545_fullsize_imag0031.jpg


well thats about it for pics today will try and get some more in the next few days
 
Some nice progress!
 
Some nice progress!
Thanks..its been quite a lot of work...im new to my area and as pathetic as it sounds dont have any buds here yet to lend that helpinghand...ahh but soon as i can get to the local orv park..
Anyways got ball joints replaced and knucles painted and installed..threw on some spare spindles n rotors so now it rolls..oh an fabbed up tiebar so now it steers as well..forcast it saying its gonna rain all week so dont know how much ill get done but shall see
 
well heres more pics...
awww.supermotors.net_getfile_943107_fullsize_imag0040.jpg

awww.supermotors.net_getfile_943579_fullsize_imag0056.jpg

awww.supermotors.net_getfile_943576_fullsize_imag0050.jpg

awww.supermotors.net_getfile_943575_fullsize_imag0053.jpg

awww.supermotors.net_getfile_943458_fullsize_imag0044.jpg

woo hoo jeep swing
awww.supermotors.net_getfile_943457_fullsize_imag0043.jpg


well over the next couple days i hope to get the subframe finished up and welded in and possibly the drivetrain grafted in...however the neighbo down the street just put his 2wd xj up for sale for 1000$ i have 4wd auto and tcase just need the harness and good 4.0...hmmmmm decisions decisions...4.0 or 6.6...205 or 231...hmmmm....either way got to spend 219 on new aluminum radiator
 
ok so here is what really happened over the last 2 days...there was a lot of hacking...a bunch of measuring some clamping more measuring...here a tack there a tack everywhere a tack tack...measured some more...ooops those clamps slipped...cut it free rmeasure and clamp again..blah blah blah...ok so on to the pics...

top half of subframe
awww.supermotors.net_getfile_943901_fullsize_11dff6dc6f22811511280100.jpg

"A" pillar tubes
awww.supermotors.net_getfile_943902_fullsize_11dfe8c4ee11866741280100.jpg

floor cut out and pan supports in
awww.supermotors.net_getfile_943904_fullsize_11e1c7e41019914691280100.jpg

awww.supermotors.net_getfile_943905_fullsize_11e1d5fb9120198701280100.jpg

subframe riser to rear floor level
awww.supermotors.net_getfile_943906_fullsize_11e31a182818250791280100.jpg

rear floor tubes
awww.supermotors.net_getfile_943907_fullsize_11e0130b7115228701280100.jpg

first four of eight body mount tabs(1/4" thick plate w/ 5/8" holes
awww.supermotors.net_getfile_943908_fullsize_imag0083.jpg


sorry for the small pics not sure what happened
 
ok time for another pic filled update...lol

so heres the body going back on...notice all the extra folks around to help with this...lol...ha i did it in about 10min with 3 peices of pipe and 2 ratchet straps...
awww.supermotors.net_getfile_944593_fullsize_imag0095.jpg

and "POOF" its a jeep...lol....front clip held on with like 3 bolts just for s**ts and giggles
awww.supermotors.net_getfile_944594_fullsize_imag0110.jpg

forward body mount and their relation to link tabs..oh yeah not welded yet...lol
awww.supermotors.net_getfile_944595_fullsize_imag0111.jpg

subframe and lower door sill bracing
awww.supermotors.net_getfile_944596_fullsize_imag0112.jpg

some shots of interior sheetmetal and under dash/cowl..got a little surface rust here but nothing i cant fix...lol
awww.supermotors.net_getfile_944597_fullsize_imag0113.jpg

awww.supermotors.net_getfile_944599_fullsize_imag0114.jpg

awww.supermotors.net_getfile_944600_fullsize_imag0115.jpg

awww.supermotors.net_getfile_944601_fullsize_imag0116.jpg

couple more poser pics...lol
awww.supermotors.net_getfile_944602_fullsize_imag0117.jpg

awww.supermotors.net_getfile_944603_fullsize_imag0118.jpg
 
here are some pics of the carnage also known as make room for seating...
awww.supermotors.net_getfile_944623_fullsize_imag0123.jpg

awww.supermotors.net_getfile_944621_fullsize_imag0130.jpg

awww.supermotors.net_getfile_944622_fullsize_imag0131.jpg

awww.supermotors.net_getfile_944624_fullsize_imag0125.jpg

awww.supermotors.net_getfile_944625_fullsize_imag0133.jpg

i have yet to modify the passenger side yet
 
ok so time another for pic filled update...lol..so lets start off with something easy...like
Drip rails(lead edge of doors)...lol
as they originally were..granted this is the driver side but i had started cutting on passenger side before pics
awww.supermotors.net_getfile_945083_fullsize_imag0142.jpg

passenger side after first cut
awww.supermotors.net_getfile_945077_fullsize_imag0137.jpg

second cut and final modification...still have to finish weld and grind but you get the idea..now i rolled the factory lip down to the body edge so it looks like jeep did it
awww.supermotors.net_getfile_945084_fullsize_imag0144.jpg

awww.supermotors.net_getfile_945085_fullsize_imag0145.jpg

Passenger side sheet metal(body, dont forget its right hand drive...lol)
before...
awww.supermotors.net_getfile_944596_fullsize_imag0112.jpg

after..once again im concentrating on getting everything tacked in will finish weld later in week after rain goes away
awww.supermotors.net_getfile_945088_fullsize_110fb0765217886881280100.jpg

awww.supermotors.net_getfile_945074_fullsize_imag0138.jpg

the stupid little corner..uugghh small but a PIA none the less
awww.supermotors.net_getfile_945075_fullsize_imag0139.jpg

awww.supermotors.net_getfile_945076_fullsize_imag0140.jpg

after a coat of rust reformer even tho it wasnt rusted(knew rain was coming...lol)
awww.supermotors.net_getfile_945080_fullsize_imag0151.jpg

after rusty metal primer in the dark...lol
awww.supermotors.net_getfile_945078_fullsize_imag0162.jpg

Drivers side sheet metal(body)
cancer...YUCK
awww.supermotors.net_getfile_945086_fullsize_imag0147.jpg

there was cancer here but i cut it out
awww.supermotors.net_getfile_945087_fullsize_imag0149.jpg

first piece in...thought i had a better pic sorry
awww.supermotors.net_getfile_945089_fullsize_1112e1c98c15885481280100.jpg

from the inside
awww.supermotors.net_getfile_945082_fullsize_imag0153.jpg

more cancer oh no!!!
awww.supermotors.net_getfile_945090_fullsize_11131a279023093841280100.jpg

after some surgery..i coated the pillar with rest reformer before replacing sheet metal
awww.supermotors.net_getfile_945091_fullsize_111336569221353701280100.jpg

after tacking all metal in(the piece on the pillar has holes drilled and plug welded)
awww.supermotors.net_getfile_945092_fullsize_111352859422915831280100.jpg

awww.supermotors.net_getfile_945093_fullsize_1213446e1321213561280100.jpg

after coat of rust reformer
awww.supermotors.net_getfile_945094_fullsize_1213609d1513219491280100.jpg

well thats about it for today its posed to rain thru tomorrow...so wont be getting to much done..might try and clean up heater box components...and one of these days ill figure wtf is up with my phone and the random pic sizes...lol
 
you've been busy. it's looking good. all that sheetmetal work makes my head hurt.
 
^^^^^^^^^^^^^thanks mine too so heres some more for ya...lol^^^^^^^^^^^^

here once again its update time...lol....

this one focuses on more stupid cancer and in a yucky place too...i had been putting it off cuz i new it was gonna be a total pain but i guess it turned out ok not like anyones gonna see it anyway...lol
so here goes....
front clip removed again...lol
awww.supermotors.net_getfile_945643_fullsize_imag0163.jpg


some pics of the rusty cowl-to-firewall pinch seam/driprail..
awww.supermotors.net_getfile_945644_fullsize_imag0164.jpg

awww.supermotors.net_getfile_945645_fullsize_imag0165.jpg

awww.supermotors.net_getfile_945646_fullsize_imag0166.jpg


just some floorboard rust will get to it later...lol
awww.supermotors.net_getfile_945647_fullsize_imag0167.jpg


temporary backing plate to make sure nothing moved during cutting...this is held on with sheetmtal screws to both cowl and firewall, and by loosening the screws it allowed me to use backing plate as a clamp to get new pieces in tight
awww.supermotors.net_getfile_945648_fullsize_imag0172.jpg


after cutting rust away
awww.supermotors.net_getfile_945649_fullsize_imag0174.jpg

you can see the screws...lol
awww.supermotors.net_getfile_945650_fullsize_imag0175.jpg


first piece in ...i left it alittle long so i could get thee lip right
awww.supermotors.net_getfile_945651_fullsize_imag0176.jpg

awww.supermotors.net_getfile_945652_fullsize_imag0177.jpg


second piece going in...i spotted up all the little cuts...it wasnt any fun..this piece has 2 90deg bends as well as the swoop...uugghhh
awww.supermotors.net_getfile_945653_fullsize_imag0178.jpg

awww.supermotors.net_getfile_945654_fullsize_imag0179.jpg

awww.supermotors.net_getfile_945655_fullsize_imag0180.jpg


a shot from inside the cowl...you can see the welds penetrating thru...
awww.supermotors.net_getfile_945657_fullsize_imag0184.jpg


finished product...took 5 pieces and about 6 hrs to fix that area and i know its not pretty but a piece of mat and quick coat of glass and i could make it dissapear but why its a 41 year old service jeep thats finally gonna get its day in the woods it deserves its battle scars ...hehehehe
awww.supermotors.net_getfile_945658_fullsize_imag0186.jpg

awww.supermotors.net_getfile_945659_fullsize_imag0188.jpg

awww.supermotors.net_getfile_945660_fullsize_imag0192.jpg


a little more filling a little grinding and a quick swipe of seam sealer and we all good...lol.......

well stay tuned for the am update ill be adding more tube to the subframe to allocate for the trans tunnel and getting final position of cab on frame,,,cant rally call it a tub can i???...lol
 
ok so its like shortly after 2:30 in th morning where im at...lol....my dad used to be a musician and every night he'd come home sometime between 1:00 and 5:00 and i would have to help get all the gear inside...so even now 25 years later i still cant sleep thru the night so........blah blah blah...so well on to the point,,,pics...yay

body mounts tacked in final position
awww.supermotors.net_getfile_945785_fullsize_imag0196.jpg


trans tunnel work..lots more to come on this need more steel...lol
awww.supermotors.net_getfile_945786_fullsize_imag0195.jpg

awww.supermotors.net_getfile_945787_fullsize_imag0194.jpg

awww.supermotors.net_getfile_945788_fullsize_imag0198.jpg

awww.supermotors.net_getfile_945790_fullsize_imag0207.jpg

awww.supermotors.net_getfile_945791_fullsize_imag0210.jpg


all ground down before primer
awww.supermotors.net_getfile_945793_fullsize_imag0216.jpg


in this pic im just showing the little 45'd piece in between tubes a second one has been added
awww.supermotors.net_getfile_945789_fullsize_imag0199.jpg


just a little something to finish off the bottom of the tub/cab....(can anyone guess what im using for this....hint its an original piece of the jeep)
awww.supermotors.net_getfile_945794_fullsize_imag0217.jpg

awww.supermotors.net_getfile_945795_fullsize_imag0219.jpg


ok well once again we come to the end of a........ahh who am i kidding there is no end in sight...however did get one of the sliders made up today and tacked into place...will take pics as i build the second tomorrow and show you the finished "bottom of cab piece"...hope some one has paid enough attention to this build to figure out where the metal came from...lol...tomorrow hope to push/pull truck out to the pulling tree(about an acre away) and get the motor set in chassis....then back to behind the house where there is power
 
ok so here it is long awaited update time....i can tell you were all hanging on the edge of your seats...lol

some pics of finished interior mods to make room for seating...(umm comfortable seating that is...lol)
awww.supermotors.net_getfile_947311_fullsize_imag0254.jpg

awww.supermotors.net_getfile_947312_fullsize_imag0255.jpg

roof almost done
awww.supermotors.net_getfile_947313_fullsize_imag0258.jpg

finally got around to drivers side rear quarter sheet metal...if you look back you can see this used to be awful
awww.supermotors.net_getfile_947314_fullsize_imag0250.jpg

sliders...lol these are made out of 2x2 1/4 wall square tubing with round standoffs
awww.supermotors.net_getfile_947316_fullsize_1142e1d8f426927201280100.jpg

the notching
awww.supermotors.net_getfile_947317_fullsize_1142eff07520890871280100.jpg

awww.supermotors.net_getfile_947318_fullsize_1142fe07f618785001280100.jpg

ends clamped welded and adding tubes
awww.supermotors.net_getfile_947319_fullsize_11446c6b1025516341280100.jpg

awww.supermotors.net_getfile_947320_fullsize_1144a4c91429949121280100.jpg

finished slider prior to installation
awww.supermotors.net_getfile_947321_fullsize_11445e538f29538281280100.jpg

crappy pic of seat mount setup will post better pics of this later but you can get the idea
awww.supermotors.net_getfile_947322_fullsize_imag0261.jpg

now on to fun stuff..."Body Armor"...yee haa...this was made out of 1/8 inch thick diamond plate...all cutting was done with the plasma and grinder...every thing else should be self explanatory except the fact i chose to weld on instead of bolting...
awww.supermotors.net_getfile_947323_fullsize_imag0259.jpg

awww.supermotors.net_getfile_947325_fullsize_imag0264.jpg

awww.supermotors.net_getfile_947326_fullsize_imag0266.jpg

awww.supermotors.net_getfile_947327_fullsize_imag0269.jpg

awww.supermotors.net_getfile_947328_fullsize_imag0273.jpg

pretty much finished here but need to remove tire to stitch backside at fender opening
awww.supermotors.net_getfile_947329_fullsize_imag0274.jpg

awww.supermotors.net_getfile_947330_fullsize_imag0275.jpg

awww.supermotors.net_getfile_947331_fullsize_imag0276.jpg


ok so like thats all i got for now...just got the plate for the other side today and got most of the floor cut out of the scraps from first piece...so should have another pic filled update soon
 
ok so im not exactly sure why im even bothering to post this...apparently if marsfab isnt building it noone seems to care...not that i mean any ill will towards chris...his welding and fab skills are out of this world...well heres to hoping someone sees this and cares

ok so heres a quick pic update...lol...i decided to take a small break from fabbing and slap some paint on the hood....lol

after a quick sand
awww.supermotors.net_getfile_949170_fullsize_imag0305.jpg

awww.supermotors.net_getfile_949171_fullsize_imag0306.jpg

after fist coat of both colors...i like to overlap the colors before i mask off for edges...
awww.supermotors.net_getfile_949172_fullsize_imag0312.jpg

awww.supermotors.net_getfile_949173_fullsize_imag0313.jpg

after masking and final paint...
awww.supermotors.net_getfile_949174_fullsize_imag0326.jpg

awww.supermotors.net_getfile_949175_fullsize_imag0324.jpg


on to core support...lol

first heres the core...woo hoo
awww.supermotors.net_getfile_949176_fullsize_imag0319.jpg

and here the finished support
awww.supermotors.net_getfile_949177_fullsize_imag0318.jpg

some pics with panels bolted on for test fitting before final welding of support
awww.supermotors.net_getfile_949178_fullsize_imag0314.jpg

awww.supermotors.net_getfile_949179_fullsize_imag0315.jpg

awww.supermotors.net_getfile_949180_fullsize_imag0316.jpg

finished support with core
awww.supermotors.net_getfile_949181_fullsize_imag0334.jpg

awww.supermotors.net_getfile_949182_fullsize_imag0336.jpg

core support bolted temporarily for giggls
awww.supermotors.net_getfile_949185_fullsize_imag0337.jpg

awww.supermotors.net_getfile_949186_fullsize_imag0339.jpg

back up lights...lol
awww.supermotors.net_getfile_949183_fullsize_imag0330.jpg

here is a pic of the finished body armor with the 3/8 round added and seats in...lol
awww.supermotors.net_getfile_949184_fullsize_imag0332.jpg


the seats are from a 94 accord.....the core is a Be Cool from summit.....the core support is made with 1" 10 gauge square tube and 1/8"x1" flat drilled for tabs
i had originally thought aboout removing the dents from thee hood till i realized there were matching ones in the roof...after thinking about it im sure sooner or later the hood will contact the roof again prolly while im slipping around trying to gt it up while stuck...lol...well i will try and figure out what happened to the other pics concerning the 3/8 round and body armor
 
damn you've been busy. it's turning out great, especially the sheet metal work and body protection. you planning on running the tractor tires I spied in one of those pics?
 
I dig the checker plate. What are you going to do for harnesses?

Thanks...i am running a 400m ford with a c6 and np205 with gm 1 wire alt..and its off road only so blinkers arent an issue so wiring should be painless to say the least...i scavanged a fuse relay box out of the accord i got the brakes seats and console out of...not to mention i have 7 different 1000 ft rolls of 14ga. wire....right now ive just set the motor mount look like donkey poo but what can ya do...will address this later once i determine if i like the placement...its kinda in a cab-forward/mid mount situation
 
damn you've been busy. it's turning out great, especially the sheet metal work and body protection. you planning on running the tractor tires I spied in one of those pics?

Yes prolly at first but will still.switch up depending on where i ride...thanks btw...i set the motor yesterday...woohoo...seriously tight fit...specially since i dropped it as low as i could between frame rails....im glad it squatted once i had drivetrain in...now im down to 28.5" to bottom of frame...lol..btw those tractor tires measure out to 43.5" tall..lol
 
Seat belt plans?

Yes...even tho ill prolly only wear them during a "hey yall watch this"...i have a mixmatch set of 4 point harness i plan to install...i plan on posting a pic update here in just a bit...
 
Back
Top