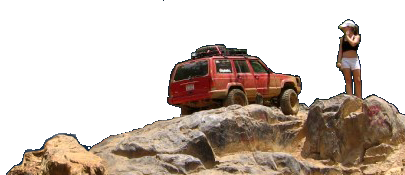
Captain America rebuild

I just remember you getting hung up on that rear bumper at one of our undisclosed wheeling locations ;)

A small-block Tacoma will be sweet!

I'm also gonna stop bitching about the ever-present layer of silt dust from our gravel driveway on the floor of the garage... you're hardcore, man..
 
So I have finally moved my truck into the same state that I live in and it is time to see what I can salvage to get it running again. At one point about ten years or so ago this truck was a mix of red, factory white and blue SR5 colors. It was parked in 2004 in the woods until about 3 or 4 months ago when I went back to Raleigh to pick it up. Good news is I am now able to work on it, bad news is the working conditions are very primitive. I am working in the back yard on uneven grass that floods everytime it rains, basically about one step above working on your vehicle on the trail.
Goals for this build are to fight the rust that has taken over, cut some weight and overall length of the truck, move the drivetrain back about 3-4", but most of all I will be following the K.I.S.S principle. Also going to keep it on a budget, with the way it is rusted I am only looking for this rebuild to give me about 3 or four years of trail riding before I will strip the good parts to use for a cheap 4x2 tacoma and scrap the rest.
Here is a pic (if I can relearn how to post) of how it sat for 4 plus years. And one of its new resting spot. Had to take down a section of the fence to get it into the yard. Nothing on this build is going to be easy!
ai406.photobucket.com_albums_pp147_stf0412_truck_20rebuild_0502230018.jpg

ai406.photobucket.com_albums_pp147_stf0412_truck_20rebuild_DSCN0490.jpg

We rode with you in Raleigh 4-6 years ago after a truck show. I won worst beater. Haha Nice truck
 
This is probably the first of many times I will revive this thread. Haven't had any time to work on it in the past month or two. Going to be gone this weekend also but I did have time to throw the windsheild back in. I used a tube of the 3M window weld urethane adhesive, how it works. I went heavy with it because of the rust damage to the window frame and the fact that I am not putting any trim pieces back on (i think they are responsible for holding the moisture in and helping it rust anyway).

Its dark, so no pics for now. Next on the agenda is to get the frame on jack stands, pull the axles and springs, and power wash the frame for some POR-15.
 
got some work done today, did take some pics today but I didn't stop too much to take them being that working by myself in the direct sun was fun enough in itself. So I hooked up the chain and comealong and rolled it forward a few feet. Then I started leveling the grass for the jackstands. Getting the truck on jackstands should take about 30 minutes.....but I had to do a combination of placing the stands, raising the truck and removing the axles all at once. So 2 hours later I had the truck lowered down on all 4 stands and the axles out. I left the wheels on so that I could use them to manuever the axles. It is a real PITA and I don't recomend it but it can be done by yourself.

So as it sits no I have the axles out, and the frame cleaned and pressure washed. I plan to work on replacing the rusted out horsecollar crossmember and possibly removing the factory rear crossmember next weekend. Still haven't decided whether to replace that with a 3"X3" box or just leave it. The last 10" or so of the frame will also be cut off next too. Decided to stay with the current wheelbase instead of shortening it.

leveling the uneven ground
ai406.photobucket.com_albums_pp147_stf0412_truck_20rebuild_DSCN0543.jpg


jackstands in place
ai406.photobucket.com_albums_pp147_stf0412_truck_20rebuild_DSCN0544.jpg

ai406.photobucket.com_albums_pp147_stf0412_truck_20rebuild_DSCN0546.jpg


removed the springs and shackles
ai406.photobucket.com_albums_pp147_stf0412_truck_20rebuild_DSCN0549.jpg


ai406.photobucket.com_albums_pp147_stf0412_truck_20rebuild_DSCN0548.jpg
 
I know after all this work cleaning the first time I take it out it will be covered again, I just hope the POR-15 lives up to its name and keeps away the rust.
ai406.photobucket.com_albums_pp147_stf0412_truck_20rebuild_DSCN0552.jpg


axles cleaned up
ai406.photobucket.com_albums_pp147_stf0412_truck_20rebuild_DSCN0547.jpg


rust
ai406.photobucket.com_albums_pp147_stf0412_truck_20rebuild_DSCN0551.jpg
 
looking good Scott, did you manage to get those huge medicine syringes? If not, I just seen this weekend that you can get them at Petco and tractor supply.
 
Makin progress...
 
looking good Scott, did you manage to get those huge medicine syringes? If not, I just seen this weekend that you can get them at Petco and tractor supply.

Not yet, I will look at Petco here later this week. I still have some more work to do before I get to painting.
 
Got some more work done. i am averaging about 2 days a month working on this thing. Got the back of the frame cut off. Even without shortening the wheelbase I was still able to take off 12", which leaves it right behind where the shackle hangers will go back on.
ai406.photobucket.com_albums_pp147_stf0412_truck_20rebuild_new012.jpg


ai406.photobucket.com_albums_pp147_stf0412_truck_20rebuild_new003.jpg


I got the rusted out cross member cut out, the shackle hangars, and spring hangars off, and lots of grinding that goes a long with that. Still got a good bit of grinding at the spring hangar area so that it will be ready to put the new ones on.
ai406.photobucket.com_albums_pp147_stf0412_truck_20rebuild_new005.jpg

ai406.photobucket.com_albums_pp147_stf0412_truck_20rebuild_new006.jpg


Started working on a replacement crossmember. I was hoping to be done with this today but didn't get very far on it.
ai406.photobucket.com_albums_pp147_stf0412_truck_20rebuild_new013.jpg


ai406.photobucket.com_albums_pp147_stf0412_truck_20rebuild_new014.jpg


I made up some plates out of 1/4" for the frame area to spread the load and also reinforce the rust damage.
ai406.photobucket.com_albums_pp147_stf0412_truck_20rebuild_new015.jpg
 
Got the plates welded in, but didn't get to putting in the tube or the gussets. The wind was blowing pretty good so I used the stick for most of it. That was fun, had to refresh my memory on that.


ai406.photobucket.com_albums_pp147_stf0412_truck_20rebuild_new017.jpg

Also made up some plates for the new location of the rear tow hooks to increase the thickness were they will bolt through the frame. Didn't get time to put these on though. Hopefully next time I will finish the crossmember, the grinding and get all the hangars on so that I can finally put the POR-15 on and stop looking at this rust frame.
 
Last edited:
Lookin good man. That paint is good stuff, I would definately do a coat or two of clear on it. I have to respray my truck one more time. Couldn't get the military CARC paint off with aircraft remover or 20 grit sandpaper. Didn't feel like stripping it for sandblasting so on with the rattle can lol.
 
I am having trouble finding rear toyota leafs at junkyards down here. Every where i have been they don't keep any 80's vehicles they just send them straight to the crusher. i found only one, an 86 but they said they wouldn't have it much longer. not sure if I will make it in time to get the springs. Oh and its a pull your own part place that won't allow you to jack up the vehicle, so getting the springs out maybe a little interesting.
 
Got to work this weekend, and first thing the mig starts feeding wrong. So I spent the rest of the weekend use the stick, so that slow down my progress chipping at slag all day. But atleast I never had to worry about the duty cycle. I got the rear spring hangars and shackle hangers on, put in the replacement crossmember and added plates for the rear tow hooks.
DSCN0570.jpg

DSCN0569.jpg


I also added some tabs to keep the spring bolts from rotating in the hangar and opening up the hole. I will do something similar on the shackles later.
DSCN0571.jpg


I had noticed that the factory motor mounts had a stress crack forming so I fixed that and cut some plates to reinforce them. I am using some bolt in mounts for the 350.
DSCN0575.jpg

ai406.photobucket.com_albums_pp147_stf0412_DSCN0579.jpg


Then it was time for paint..I have had the POR 15 sitting on the self for months now, finally got to use it. I did the frame some other random spots on the body and still had leftover so I started putting it on other random parts that I could find, the croossmember, the springs, some on the axles, etc.
ai406.photobucket.com_albums_pp147_stf0412_DSCN0583.jpg

ai406.photobucket.com_albums_pp147_stf0412_DSCN0582.jpg


I finished up alittle early so between scrubbing my skin off to get the POR off I opened up the mig to see what happened and found this
DSCN0573.jpg

Well it was an easy fix but there was a whole lot of wire jammed in there. I was hoping to use this a a good excuse to get a new welder. Maybe next time.
 
Last edited:
OK last update for awhile. Got the paint done. Wanted to spray it with a decent paint but given the situation and lack of a paint booth I went with rattle cans. I used 8.5 cans of rustoleum camo khaki color and gave it 3 coats. It gives it a nice desert tan look. I am concerned about how durable the paint is going to be though, I don't want to have to touch it up everytime some rubs the paint. Still deciding whether to add a clear coat to help protect it or just wetsand it to keep the flat color from holding stains.
Can anyone comment on their rattle can job and how it has held up?
Prep
ai406.photobucket.com_albums_pp147_stf0412_truck_20rebuild_DSCN0531.jpg

After
ai406.photobucket.com_albums_pp147_stf0412_truck_20rebuild_DSCN0535.jpg

ai406.photobucket.com_albums_pp147_stf0412_truck_20rebuild_DSCN0536.jpg

ai406.photobucket.com_albums_pp147_stf0412_truck_20rebuild_DSCN0537.jpg
I used Rustoleum's camos on mine, and for the most part it's held up well. There's a few places it's flaked off, mostly from the PLASTIC parts like the grill, but on metal it's still good.
aimg.photobucket.com_albums_v639_Trebissky_House_20and_20Vehicles_Jimmy_20Mods_CAMO_CAMO1_2.jpg

I'm happy with it, especially since it used to look like this:
aimg.photobucket.com_albums_v639_Trebissky_House_20and_20Vehic5dc90c95c659f19390b7fe2db390d7ad.jpg
 
I put on a light coat of black spray to protect the POR from the UV light, since it sits and bakes in the elements all the time. No I am waiting on parts in the mail and more time to work on it.
 
Captain America. :lol: The truck is lookin good! :beer:

Yea the name no longer fits the paint scheme.....but the tan has really grown on me.

Got some goodies in the mail. Now I should have everything I need for the anti-wrap bar and the steering. Also got all new bushings for all the springs. I was going to make a new mount for the transfer case using the old mount and some bushings, then when I was on Marlin Crawler's site I realized they had exactly what I was planning on doing. They wanted $85 for their "HD mount" but I went ahead a got it to save time. I will say it is definetely a quality piece.
ai406.photobucket.com_albums_pp147_stf0412_DSCN0586.jpg


I also got some work done on the interior. Found some more rust....not surprised. Anyway, took care of that and started putting the dash back in. I hate doing interior work, but the dash went in really fast since I ditched the heater core/fan and all ducting along with some other random accessories behind the dash. That made re-assembly faster than the disassembly, and I now hav tons of room to reach back there when it is time to finish up the wiring. Who needs heat right?
ai406.photobucket.com_albums_pp147_stf0412_DSCN0584.jpg

ai406.photobucket.com_albums_pp147_stf0412_DSCN0585.jpg

Also set the cage back in, will work on adjusting it and bolting it later.
ai406.photobucket.com_albums_pp147_stf0412_DSCN0587.jpg

ai406.photobucket.com_albums_pp147_stf0412_DSCN0588.jpg

ai406.photobucket.com_albums_pp147_stf0412_DSCN0589.jpg
 
Back
Top