Frankenstein Street Queen (a.k.a. SpeedBump)

ckruzer

Infidel
Joined
Jul 2, 2015
Location
asheville nc
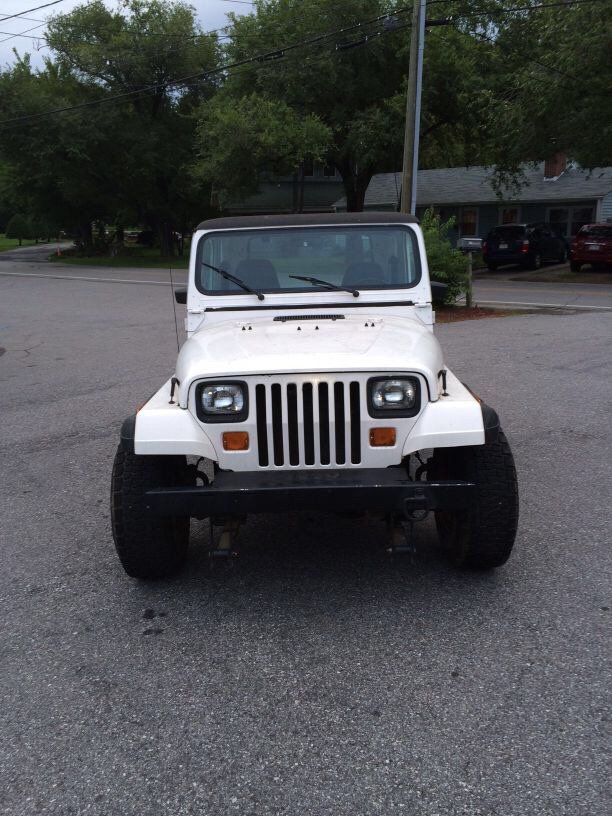
Goal is a mild off-road rig that can be also be used to kruze the highway to the beach, or enjoy mountain views from a secluded camping spot accessible only by OHV.

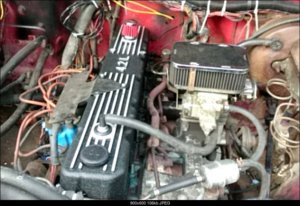
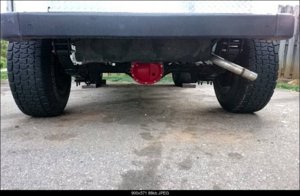
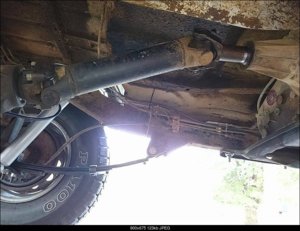
Phase 1: 79 F250 D44/D60, 4.88s, 37s, 5.3 sbc, xj Ax15, tj np231. Truetrac + Lunchbox.

Phase 2: Front Dana 60, Atlas, auto + overdrive. Bore d60 for 35 spline. Front 60. F/R e-Lockers. Tube fenders

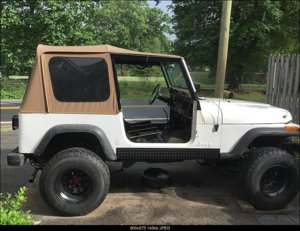
Phase 3: YJ8 Conversion with bulkhead and separate bed. Fuel cell. Stretch. Slight exo cage.

Phase 4: Hover and Flight
 
Last edited:
As purchased. Massive shackle lift, inverted leafs, and 31s.

055a6fa9099dfa841e68cf241ed05659.jpg


101b98ac4e94f7264fd9816060b3d26e.jpg
 
Last edited:
Got some half doors. Installed Smitty softtop and hardware. Gave hardtop and full doors to my little bro. (always wanted a soft top as a kid. I officially regret that desire. Looking into the frameless softtops and full doors for after i do the roll cage. )

71d551ad6a196ce755f04ab8b27e112b.jpg


84d519cea185696864440f1b7741e840.jpg


03bb4f270ac6dda9f040bf9f3fbbc35f.jpg


f7bb37f89a290998e395a99bd2949331.jpg


78cca049b6adb1bc6a1e6bdbfe3b0370.jpg


a4e661b80c9033f09e0158a30cb21504.jpg
 
Last edited:
Did the nutter bypass. It ran much better after that.

6a09094e6df6dc15343484e8d8971d69.jpg
 
Last edited:
Switching the ccv vent line for a breather filter revealed i got no. 6 blowby. small amount, but which led to also discovering a rms leak when tracking the leaks.

97a25511d058e49ce76fc582227d9fa5.jpg


0e14eb194e745a768721ef7bbcd4ac0e.jpg


e24fabf012dda2c1ec1eac70f965e112.jpg
 
Last edited:
While under there replacing the rms, i discovered what my valve tap was.

631225583aab8bbf2e870ba24c801cb0.jpg


5d96d62f5b0429e9a520dd69c3f1c348.jpg
 
Last edited:
So replaced timing chain and gears. At this point im pulling my hair out just wanting to start the frikin build already.
 

Attachments

  • ImageUploadedByTapatalk1442880384.381587.jpg
    ImageUploadedByTapatalk1442880384.381587.jpg
    168.4 KB · Views: 606
  • ImageUploadedByTapatalk1442880397.430250 (1).jpg
    ImageUploadedByTapatalk1442880397.430250 (1).jpg
    180.2 KB · Views: 558
  • ImageUploadedByTapatalk1442880397.430250.jpg
    ImageUploadedByTapatalk1442880397.430250.jpg
    180.2 KB · Views: 559
  • ImageUploadedByTapatalk1442880520.622918 (1).jpg
    ImageUploadedByTapatalk1442880520.622918 (1).jpg
    178.1 KB · Views: 553
  • ImageUploadedByTapatalk1442880532.809091.jpg
    ImageUploadedByTapatalk1442880532.809091.jpg
    183.1 KB · Views: 552
  • ImageUploadedByTapatalk1442880595.126069.jpg
    ImageUploadedByTapatalk1442880595.126069.jpg
    150.1 KB · Views: 601
Replaced the water pump while i was in there. Seem to have misplaced my images showing the new timing chain in place. oops. Lots of wear as you can see. Another unknown noise bites the dust. mwahahaha
 

Attachments

  • 10978696_1448291842078928_7551097784595117634_n.jpg
    10978696_1448291842078928_7551097784595117634_n.jpg
    83.9 KB · Views: 523
i just want to start the build. ugh. so the jeep offers its assistance by graciouslly blowing the steerbox seals. twice. so i just upgraded to the durango box like i wanted to anyways.
 

Attachments

  • dfdfsfs (1).JPG
    dfdfsfs (1).JPG
    148.7 KB · Views: 544
  • 11128144_1471084493132996_1620959624_n.jpg
    11128144_1471084493132996_1620959624_n.jpg
    151.6 KB · Views: 544
  • 11259723_1482466801994765_1189098616_o (1).jpg
    11259723_1482466801994765_1189098616_o (1).jpg
    80.8 KB · Views: 518
since i fixed the water pump, i decided i cant be a slacker. replaced the near see through oem radiator. went ahead and yanked the yellow bellied reservoir out too, and put in a nice aluminum one. and found out the previous owner is a knucklehead, and removed the thermostat to compensate for the failing radiator. well cooling system officially good to go.
 

Attachments

  • photo 3sdff (1).JPG
    photo 3sdff (1).JPG
    106.7 KB · Views: 601
  • photo 21.JPG
    photo 21.JPG
    101.2 KB · Views: 534
  • photo 19df (1).JPG
    photo 19df (1).JPG
    158.5 KB · Views: 587
  • photo 2dfds.JPG
    photo 2dfds.JPG
    137.9 KB · Views: 571
  • sdfsdf (1).JPG
    sdfsdf (1).JPG
    124.9 KB · Views: 520
  • sdfsdfsd.JPG
    sdfsdfsd.JPG
    124.3 KB · Views: 544
so when i went to go lower the windshield to begin removing the dash to install a flat dash i discovered the PO had welded the brackets. well they snapped and i barely caught the windshield in time. so had to order new brakets. and of course the windshield torx bolts wont remove, they strip. so i ahve to cut into the bottom of the windshield. fun fun fun.

the dash was very rotted and wasnt coming off peacefully so i just cut off the ends to access the nuts for the brackets. i post poned the flat dash so had to put it all back together. played around with some spare speaker parts and the cutoff dash ends.

made my own shifter knob. and put some rust inhibtor on where the brackets go for now.
 

Attachments

  • 11087050_1468170080091104_447653925_o.jpg
    11087050_1468170080091104_447653925_o.jpg
    104.9 KB · Views: 596
  • 11105828_1468170050091107_958911762_o.jpg
    11105828_1468170050091107_958911762_o.jpg
    125 KB · Views: 585
  • 11087843_1468172240090888_150533225_o.jpg
    11087843_1468172240090888_150533225_o.jpg
    126.1 KB · Views: 551
  • 11130022_1471064259801686_223893261_o.jpg
    11130022_1471064259801686_223893261_o.jpg
    111.8 KB · Views: 600
  • 11148138_1471047463136699_368225726_o.jpg
    11148138_1471047463136699_368225726_o.jpg
    83 KB · Views: 631
heres the barney fife speakers.
 

Attachments

  • 11066014_1470941826480596_2008848309_o.jpg
    11066014_1470941826480596_2008848309_o.jpg
    100.4 KB · Views: 546
  • 11086281_1471020636472715_1217216264_o.jpg
    11086281_1471020636472715_1217216264_o.jpg
    126.8 KB · Views: 566
  • 11128144_1471084493132996_1620959624_n (1).jpg
    11128144_1471084493132996_1620959624_n (1).jpg
    106.9 KB · Views: 563
  • 11132198_1471023703139075_1130663427_o.jpg
    11132198_1471023703139075_1130663427_o.jpg
    168.6 KB · Views: 482
  • 11137707_1471091883132257_1050565893_o.jpg
    11137707_1471091883132257_1050565893_o.jpg
    100.1 KB · Views: 518
you can only handle a crap suspension so long. Cut into the build budget again and got a cheap lift. If i was smart i would have just got the re 1.5 springs which i could have reused. ugh.
 

Attachments

  • 703194_1471176189790493_826193232_o.jpg
    703194_1471176189790493_826193232_o.jpg
    104.8 KB · Views: 490
more appealing door handles and oh-shit-handles
 

Attachments

  • 11078772_1471042296470549_1624787419_o.jpg
    11078772_1471042296470549_1624787419_o.jpg
    104.9 KB · Views: 621
  • 11130771_1471044566470322_366917127_o.jpg
    11130771_1471044566470322_366917127_o.jpg
    97.8 KB · Views: 486
  • 11141401_1471042666470512_963578522_o.jpg
    11141401_1471042666470512_963578522_o.jpg
    112.3 KB · Views: 507
Installed the front portion of the lift along with some 1.5 inch booms (yes i know they are on backwards lol). also painted the tires black. im not a chrome guy
 

Attachments

  • 11128758_1482466625328116_162262993_o.jpg
    11128758_1482466625328116_162262993_o.jpg
    76.2 KB · Views: 545
  • front leaf and new shackles.jpg
    front leaf and new shackles.jpg
    72.8 KB · Views: 525
  • painted wheels.jpg
    painted wheels.jpg
    71.5 KB · Views: 554
  • front leaf installed.jpg
    front leaf installed.jpg
    94.3 KB · Views: 543
installed the rear lift with the booms. put on a salt life sticker i brought back from key west.
 

Attachments

  • 11125214_1482180132023432_1414696797_n (1).jpg
    11125214_1482180132023432_1414696797_n (1).jpg
    184.2 KB · Views: 483
  • 11258675_1482180148690097_1596124965_n (1).jpg
    11258675_1482180148690097_1596124965_n (1).jpg
    177.2 KB · Views: 561
The stock brake lines were so worn. So replaced them with some custom SS blue lines from Mooris. I will be able to reuse these on the build, so win win. I cheaped out and didnt want to bend brake lines for the busted crap in the rear, so used some DOT approved 5k psi flex lines for the rear. sorry for the blurry images.
 

Attachments

  • 11208993_1482467741994671_197939746_n (1).jpg
    11208993_1482467741994671_197939746_n (1).jpg
    74.7 KB · Views: 484
  • 11272099_1482467671994678_1013042594_n (1).jpg
    11272099_1482467671994678_1013042594_n (1).jpg
    85.1 KB · Views: 481
  • 11123593_1482467748661337_1869007643_n (1).jpg
    11123593_1482467748661337_1869007643_n (1).jpg
    61.6 KB · Views: 514
  • 11121374_1482467751994670_2005581055_n (1).jpg
    11121374_1482467751994670_2005581055_n (1).jpg
    68.2 KB · Views: 592
oh. and pulling the old leafs? yeah had to cut every bolt off. replaced with grade 8.
 

Attachments

  • 11247596_1482467145328064_2113118136_o (1).jpg
    11247596_1482467145328064_2113118136_o (1).jpg
    62.5 KB · Views: 533
installed the aluminum valve cover, because the oem plastic one was leaking non stop.
 

Attachments

  • 11264408_1482466908661421_165524486_o (1).jpg
    11264408_1482466908661421_165524486_o (1).jpg
    106.5 KB · Views: 589
the rear diff was leaking pretty bad so replaced the fluid and painted the diff cover while i was at it.
 

Attachments

  • 11123593_1482467045328074_480962218_n (1).jpg
    11123593_1482467045328074_480962218_n (1).jpg
    94.2 KB · Views: 577
Last edited:
Lift gave me vibes, the bad kind. So had to put a whole bunch of washers together and drop the tcase an inch. Which led to breaking two of three nutserts on the driverside of the skid plate. Argh. Means now i gotta buy a new frame. right? lol
 

Attachments

  • 11120088_1482470625327716_1402365881_n (1).jpg
    11120088_1482470625327716_1402365881_n (1).jpg
    130.7 KB · Views: 511
Got rid of the camaro seats (regret) and put in some vinyl seats from corbeau moab. finished new brackets
 

Attachments

  • 11272291_1485411761700269_1651404732_n (1).jpg
    11272291_1485411761700269_1651404732_n (1).jpg
    98.9 KB · Views: 461
  • seats.jpg
    seats.jpg
    147.9 KB · Views: 538
Well. The seats finally got annoying and loose enough that i ended having to replace them. Will have to find someone in need when finished with the build as i will do harness. But over ordered and got three seat belts. So one is available. Well ended up having to break out the torch. The torx bolts stripped after breaking two sockets. Heat didnt help there either. So cut them out. and installed new ones with some grade 8 hardware and brackets.
 

Attachments

  • 11313193_1485812878326824_2073931523_n (1).jpg
    11313193_1485812878326824_2073931523_n (1).jpg
    92.2 KB · Views: 514
  • ForumRunner_20150705_154228.png
    ForumRunner_20150705_154228.png
    462.3 KB · Views: 588
  • ForumRunner_20150705_154220.png
    ForumRunner_20150705_154220.png
    434.5 KB · Views: 482
  • ForumRunner_20150705_154211.png
    ForumRunner_20150705_154211.png
    390 KB · Views: 569
Put a fresh coat of wax on. This latex paint or whatever the PO has on it really sucks in the dirt. A good half day of scubbing and some wax.
 

Attachments

  • image-1324286854.jpg
    image-1324286854.jpg
    537.8 KB · Views: 479
Back
Top