Getting the samurai to Harlan

A0C7BCA6-BEBB-4FB7-95DB-9E2994955768.jpeg

Welded out the bushing shell stand offs before tacking them to the frame. I made the front and rear the same and tried to keep them parallel on the frame so removal should be easy.
3F10B2A3-0C9C-4F95-9D3F-398FA9F69502.jpeg

I’m using most of the original passenger side bracket to keep the mounts close to the factory 3 point design.
 
E934414C-42D9-46FE-8E5C-FC3F4038B48B.jpeg

Got everything cut off the bottom of the frame ready for a skid plate all the way across
11554E26-1D33-4D5E-AAE1-1282215399C1.jpeg

To get the bottom perfectly flat half the transmission crossmember had to go. I replaced that section with a piece of tube. I left it a little long to support the middle of the skid.
 
9A7E7CAC-7EBC-4FCB-B6D6-6CB9919692FA.jpeg

Had to take a big notch out of the traction bar crossmember for clearance around the t case flange.
CD793DE7-8A46-4E92-99E9-97EFBAA5D2B9.jpeg

I took enough out of the crossmember I wanted to add some support after filling the notch with some plate. So I split a piece of tube and welded it to the top.
454B5E4C-5AA7-4AA1-B443-F4D4ED953078.jpeg

For the rear skid plate mount I trimmed some angle iron to sit flat against the frame. The skid runs past where the frame kicks up so this will support it. I plasma cut the frame and welded a nut in for the bolt to tread into.
 
76E4744D-42FA-4675-8A6D-8792A1B95EEF.jpeg

The front mount I tapped some threads into the lower control arm mount and welded a tab to the skid plate.
5BA3ED6C-6F94-400C-AA63-F4AC1F8AA775.jpeg

Finnaly got to see what it looks like with a flat belly skid. At some point I might extend the front but that is as big as I could go with the piece of plate I had.
 
D018F184-00AB-4AE3-9854-B2130C02E828.jpeg

Boxed in the drivers side mount when I pulled the transfer case

I got the hole in the transmission tunnel mostly filed in and went on a test run to uwharrie. My daughter wanted to come and then we got stuck in the pouring rain and my tarp was only big enough to keep her dry. But it was still fun.

ADD6D9AC-0CFB-4D38-8C54-FA8522CB13F7.jpeg
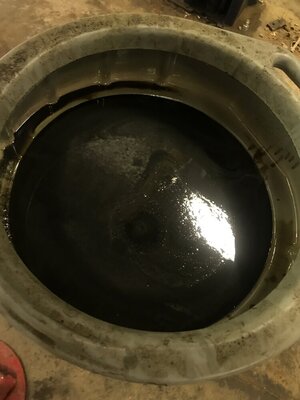
The noise from the transmission was worse this trip so I checked the fluid and it was dark gray and full of metal. This fluid is only a few months old and only been on a few uwharrie trips.


B27E512B-DCDF-4634-99EA-20F3F2551116.jpeg

I went ahead a pulled the transmission and found some bad bearings. I’ve ordered some new needle bearings for the main shaft. And a new ball bearing set for the rest.
 
393436C2-7B69-4A6D-A94A-974672FE51B8.jpeg

Got the new bearings in and put the trans back in
AE06AE76-BC40-4643-98CD-F25CBCC8DE61.jpeg

Filled in the holes in the trans tunnel to stop the hot air from coming out of them. It only clears by about a 1/16th but the passenger seat fit over the side panel with no mods. Nothing’s fully welded or painted but I needed to get it back wheeling.
E80AB5F4-17A2-436E-B148-09F6249A407E.jpeg

The little one gets so excited to roll under on the creeper with her little 1/4in wrench.
 
You do good clean work. Makes me wanna slow down and quit hacking stuff together. Keep it up.
Thanks.
The last couple of years I’ve been trying to figure out how to do what I want with much less tools now that Im working in my own garage.
 
I have wanted to improve the cage a bit and give it more strength. So I decided a harness bar would help and give me a chance to upgrade the seat belts.
34A27663-3330-486E-8AB8-8E41202EB3DD.jpeg

I borrowed some harness from my k10 so I could have them in for Harlan next weekend

also put some new u joints in the intermediate driveshaft.
 
Need another set of PRP harnesses? I'm swapping the brand new pair of PRP black harnesses in my buggy.
Thanks but for now I think I’m just going to buy one matching blue one and only have 2 in the k10. It’s a pain to put the kids car seat in with the harness. I have a regular lap belt to use on the car seat.

Why are you swapping them? I think the prps are pretty comfortable.
 
169665E0-6D25-4176-8AD4-52AA1901587F.jpeg

Spent 2 days riding around Harlan with the family.
B190FB5E-8168-465F-9844-AC58E04B4001.jpeg

My awesome wife pulled cable for me on lower profanity
677822AF-BA91-4136-BDA4-4FDE75E9D833.jpeg

The only pictures I take are when I’m stuck and get out lol. I got diffed out on whitetail.

We ran white tail crawl, lower rock garden, valve stem, some of middle rock garden, rail bed, killing time, some of fish fossil, and profanity

49B32D71-9175-4037-BD5F-295F37E4E1F6.jpeg

The little one loved walking around lower rock garden and she was sad we had to come home.

578F2AD9-8E92-48B5-AB5F-32EB3B1B9F3B.jpeg

I hit a deer in Tennessee on the way home. It really sucks it smashed the front end. I was pretty sure that my rear diff needed to be rebuilt before I left so that’s just another blow to the wallet
 
AFA7D88C-AFD9-4BE7-B8DF-F16989D5FEF7.jpeg

Finally got my tow rig back together. New carrier and bearings in the rear diff. And new front end parts with a brush guard to hopefully protect it.
92777167-5E69-4477-BF58-7C167764683A.jpeg

A while ago I bough this piece of UHMW pipe to try making my traction bar slide on the rocks easier.

The traction bar had a small bend in it, I think when I came down hard on it at Harlan and had the whole back end sitting on it.
EE6B9653-C216-44CF-BB9A-548EB2C464B4.jpeg

Got a little redneck with straightening it out. That big piece of square tube under the right side is a chunk of Rockwell axle tube that is super handy to have around.
0BB6A51A-7B01-40A2-9120-5C43FFA8FE92.jpeg

Got it pretty close to how it should be
27EE25FF-F7FB-4194-B0F2-EC749EF2AAEC.jpeg

I made a plate gusset to cut down the span of the lower tube.
 
View attachment 390279
Finally got my tow rig back together. New carrier and bearings in the rear diff. And new front end parts with a brush guard to hopefully protect it.
View attachment 390278
A while ago I bough this piece of UHMW pipe to try making my traction bar slide on the rocks easier.

The traction bar had a small bend in it, I think when I came down hard on it at Harlan and had the whole back end sitting on it.
View attachment 390280
Got a little redneck with straightening it out. That big piece of square tube under the right side is a chunk of Rockwell axle tube that is super handy to have around.
View attachment 390281
Got it pretty close to how it should be
View attachment 390282
I made a plate gusset to cut down the span of the lower tube.

Oh, quadrasteer. How many miles on it? Did you have to do any QS specific maintenance while in there?

I've had mine for about 1.5 years now and everything seems good, but haven't looked at anything as far as routine maintenance.
 
Oh, quadrasteer. How many miles on it? Did you have to do any QS specific maintenance while in there?

I've had mine for about 1.5 years now and everything seems good, but haven't looked at anything as far as routine maintenance.
the trucks got 176,000 on it. I have a lot of history on the truck, It’s been in the family since 05. The diff was rebuilt in 05 under warranty. Apparently it spun a carrier bearing. And the jack ass at the dealer just center punched the carrier bearing journals instead of replacing the carrier. So when I changed the fluid I saw all the metal in it and took it apart. The bearing was spinning on the carrier again. The correct carrier is discontinued and unavailable any where. So it has a regular Dana 60 carrier in it now and some spacers on the carrier bearings.

I changed my axle seals because they were leaking. Got those on rock auto. 2 years ago I changed my rear outer tie rods. Those were easy to find.

Check out good systems if you ever need the position sensor. They make new ones for half of what people are selling New old stock sensors.

83602D80-6B42-464A-9992-AA039DBBDB63.jpeg
 
5B6B0AE4-AEC0-4A7F-97C8-26445FE7B541.jpeg

Tigged in the traction bar gusset
82871E27-460F-43CF-AC96-C62C2DD8F5C7.jpeg

I split the UHMW pipe down the center with my circular saw and used the tube notcher to fit it around the bushings in the traction bar.
F44ECD02-45A5-4E01-9A42-D8EC929AB0B1.jpeg

Used a block of wood to hammer it on after getting it started. It went on and snapped into place.
7821FB21-7916-4CEC-B646-EF38476AF5DA.jpeg

I made an offset notch to go around the vertical tube and clear the weld.
 
Last edited:
09499171-DF4B-4111-82BF-1CE350CB21C9.jpeg

To secure the UHMW I welded a short piece of 2in .120 wall on the traction bar. The bevel should help keep it from snagging. I used a flap wheel to taper the plastic to the size of the 2in tube.
D21A8E4E-1B58-46F8-B5B2-CD7D47115A63.jpeg

I got some new to me seats and I’m finnally getting to start installing them. They have seat heaters too:rockon: the old stock seats were beat!
C58D72A0-B1A4-4BAA-9847-DE45457D6635.jpeg

Ordered some of these from McMaster to use for the seat mounts and make removal easy
 
4DBED998-DC69-4DC8-89F5-A2F37D059757.jpeg

The drivers side mounts are tied into the stock seat mount structure.
6947A283-AFE6-4EB4-B46D-A355D75B3EEF.jpeg

Lots of speed holes where I can
D0C1F8D7-50CE-4DF9-80F2-65420E4D28BE.jpeg

The passenger side mounts are way different. There isn’t any stock structure to tie into. The front mount is removable and bolts to the factory seat holes. The rear I mocked up the same way but didn’t like it. So those are just welded to the floor. I used square tube gussets to get as much surface area as I can.
B83D9B3A-957A-4FB4-8561-EDC28EC0644D.jpeg

I had to use bolts instead of the pins for now. I still need to add tabs so the pins will be in double shear
 
We have been wheeling the samurai some at uwharrie and the gulches. I broke the right rear shock mount off again last trip. I might have to add some limit straps for the rear suspension
7C684D5E-2BE6-452F-8E52-C862A0CFB03D.jpeg

Got some new to me tires! 35in roxxzilla sticky’s
BE9104B9-9EF7-4404-8C85-997419D9CED7.jpeg

These things are huge. I don’t want to raise the ride height so I will have to do some trimming for sure.

I need to accumlate the parts to go to 5.13 gears and swap in my new rear axle. I got a tj dana 44 rear that I think will hold up better than the rear Dana 30.
 
Had an awesome time at Ger, one of the best wheeling trips I’ve ever been on
IMG_0014.jpeg

IMG_0013.jpeg

IMG_0011.jpeg

Got stuck on can opener and had to winch. Had to winch on ice cream hill too. Ran all of Chadilac, the top of cripple creek, jig saw, Leo’s den, fox hole and some other stuff I don’t know the names. My wife drove jigsaw and the top of cripple creek too.

IMG_0007.jpeg

Watching the competition was cool too, lots of really awesome rigs everywhere.
 
IMG_0016.jpeg

I bent a lower link that’s 1 1/2 .250wall
IMG_0015.jpeg

And somehow the slider broke where I extended it when I stretched the wheelbase
 
Had an awesome time at Ger, one of the best wheeling trips I’ve ever been on
View attachment 398379
View attachment 398380
View attachment 398381
Got stuck on can opener and had to winch. Had to winch on ice cream hill too. Ran all of Chadilac, the top of cripple creek, jig saw, Leo’s den, fox hole and some other stuff I don’t know the names. My wife drove jigsaw and the top of cripple creek too.

View attachment 398382
Watching the competition was cool too, lots of really awesome rigs everywhere.
I thought I saw you there in the campground one time I was passing through.
 
Back
Top