
mbalbritton
#@$%!
- Joined
- Mar 22, 2005
- Location
- Orlando, FL



Situation normalLet’s do an engine build.
Ok, the trans needs a refresh while we’re at it.
Yuk! look at all this this residual oil, grease and dirt…
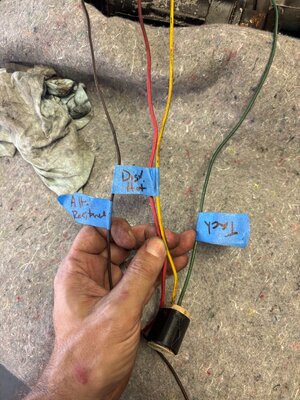
Geez, this wiring is terrible…
WTF! I can’t believe these brake lines haven’t popped yet…
When does it end and I can drive it again!!!
View attachment 455886View attachment 455887View attachment 455888


The carb/ hei is a great combo, easy to troubleshoot too and no points to maintainSooo, I haven’t really updated this thread in awhile. I’ve been dropping updates in the “what have you done o your rig thread instead”. Thought I’d give a little update here.
At this point, the engine and drive train are in. I’ve been working on fit and fitment, cleaning things up, figuring various aspects out and trying to wrap up the last few steps. You know… all those steps that take a lot of detail and attention.
After much back and forth, a lot of research, managing finances, against my preference at this time, I’m going with the 4.0 header, 258 intake, and MC2100 carb with an HEI ignition.
I have enough expense to finish out what I have now with that set up, to not worry about added expenses of a better intake or fuel jnj action at this time. Luckily, that all easy enough to revisit at a later date and not have to spend money on this set up for now.
So, what I ran into. With the automatic column actuated shift linkage, the header collector pointed right at the shift linkage bracket. I did find that I had my transmission mount in the wrong location, and that didn’t help. So I moved that the other day. This shifted the tail housing to drinker side and that helped, but not enough. Then yesterday I realized that I had the 4.0 motor mount brackets on instead of the 258 motor mount brackets. Swapped those today and that again shifted things again and centered and aligned the motor in the engine bay.
So with that, I still needed to modify the header and the shift linkage bracket. So, out came the ankle grinder.
View attachment 458908
View attachment 458909
View attachment 458911
Need to run over to my cousins house to weld this up, but it’s going to fit quite nice now.
Next is the intake. Had to grind down the alignment tabs on the bottom side to get the correct alignment with the head intake ports. That wasn’t too bad. Just need to fab up some custom washers to grip the intake flanges and bolt the intake down.
Note the motor mount bracket in this photo is the 4.0 version. Differentiated by the through hole location for the bolt. It’s lower and more inboard. You’ll see the difference in a later image.
View attachment 458910
So today, changed motor mount brackets, re routed electrical for fuel pump from firewall and took it through the interior instead of down the firewall and under the tub as it has been.
Played with cleaning up wiring and took a look at the loom wrap. Probably just procrastinating trying to figure out electrical as I just love it so much…
(Note motor mount bracket in this photo)
View attachment 458913
View attachment 458914
Learning loads in this process! So that’s cool.
Ya, I’m kinda leaning towards a Clifford or Offenhauser intake later. Supposed to flow SIGNIFICANTLY better than the stock 258 intake. But that’s later when employed/with income again.The carb/ her is a great combo, easy to troubleshoot too and no points to maintain
I rub rtv on both sides of gaskets to get a thin layer it doesn’t squeeze out as much that wayMOTHER FLETCHER!
Yesterday I dumped a gallon of ATF in transmission just to check for leaks and to have some in the pan because I’m hopefully getting close.
This morning I rolled underneath and found the rear of the pan wet. Tracing everything it’s the trans pan gasket. I wiped everything clean, checked torque on pan bolts, continued with other work, looked again and wet. FAWK! Gotta drop the pan and reseal.
What’s everyone theory on cork gaskets? I e heard nothing needed, bolt it and go, I’ve heard a thin coat of rtf for good measure.
I went with nothing. Going back with a little rtf at this point.
And WhyTF wouldn’t they put a drain plug on a pan? Seriously! There is a nice low point dimple! FAAAAWK!
I do that on trans pans but i just snug the bolts so the gasket doesn't squeeze out and let the rtv dry and then i tighten the bolts then.I rub etc on both sides of gaskets to get a thin layer it doesn’t squeeze out as much that way

Is there a 4” long bolt with NPT to go through the power steering bracket?I would suggest tapping the hole with whatever size npt tap and plugging the hole. Screw rtv.
Misread. Thought you just needed to plug the hole.Is there a 4” long bolt with NPT to go through the power steering bracket?
Maybe, but I’ve already done my mod.Looks like you could make a plate the bolted to both original holes on the intake and was tapped for both holes on the ps pump

 www.usastandardgear.com