Project MyCorona

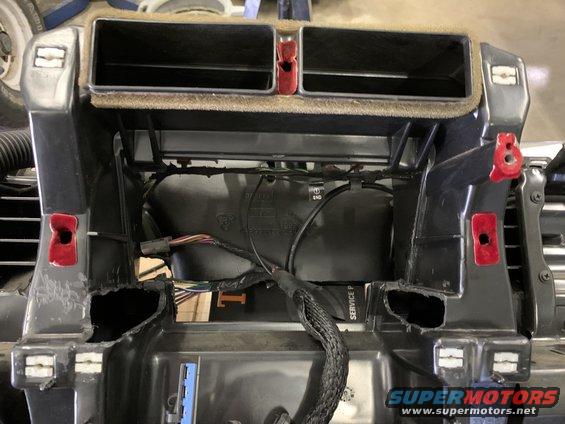
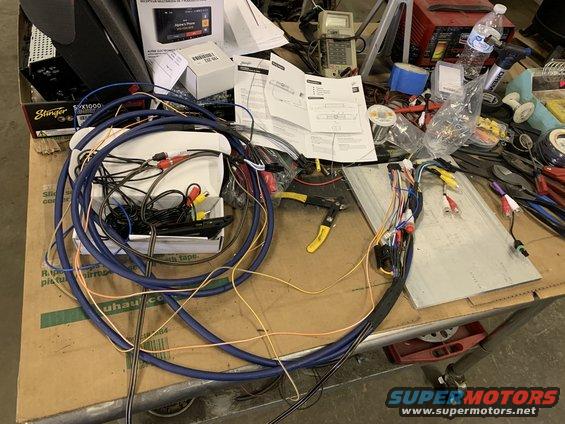
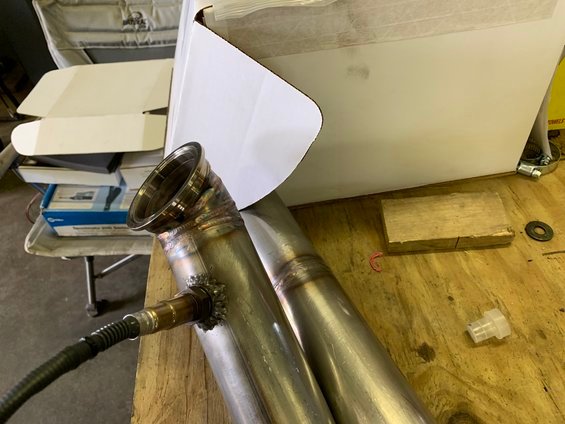
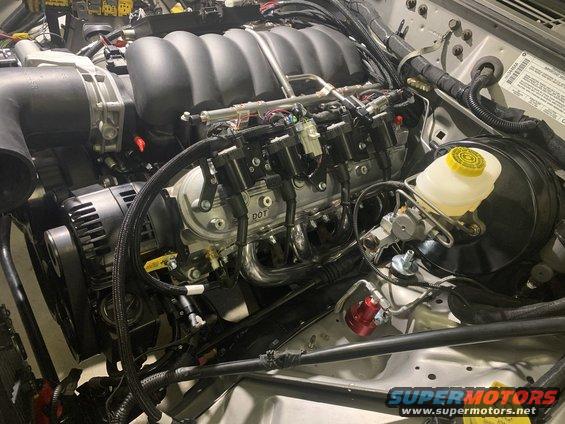
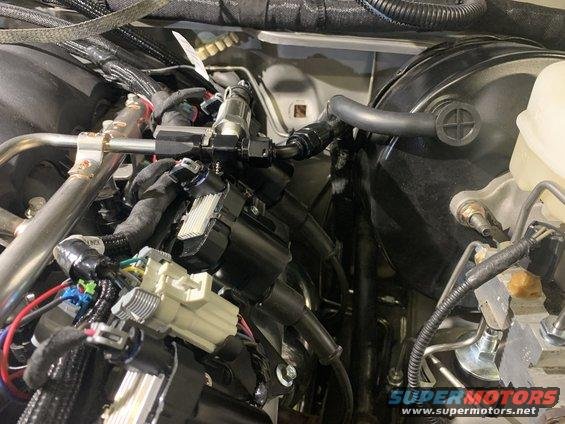
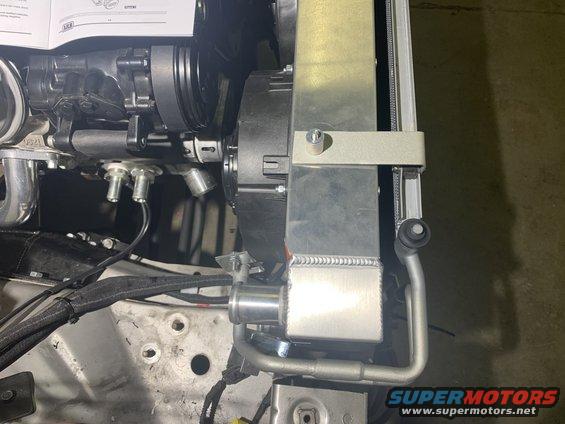
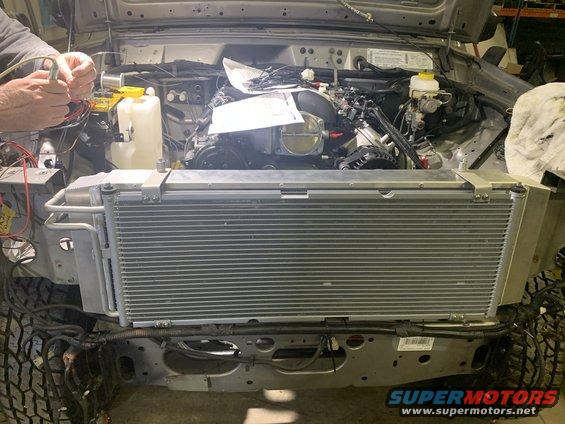
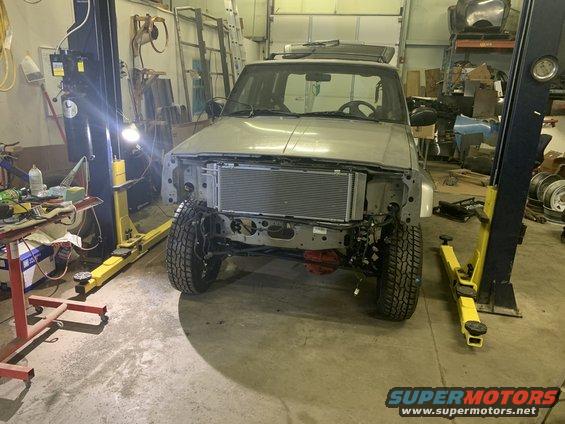
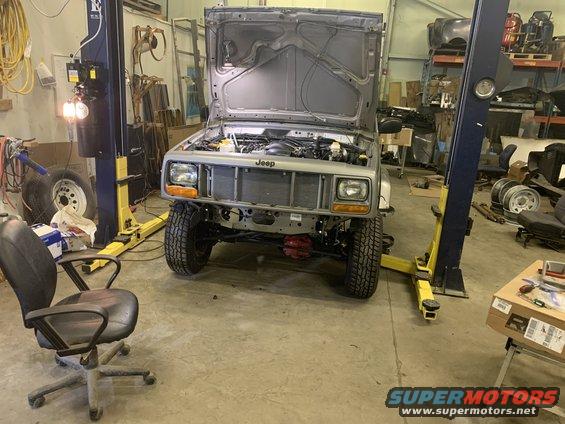
Things are moving along with the Jeep. We are neck deep in the wiring. When I say "we" I mean Don Holley, my shop partner. the man is a Rembrandt when it comes to wiring. give him a wring schematic and he's like a 17 year old with a Penthouse. Me.... I slowly begin losing consciousness. Wiring is truly my kryptonite! So while the wiring is happening I am tying up loose ends, making final connections for the fuel system, making parts lists, holding the soldering iron. :lol:

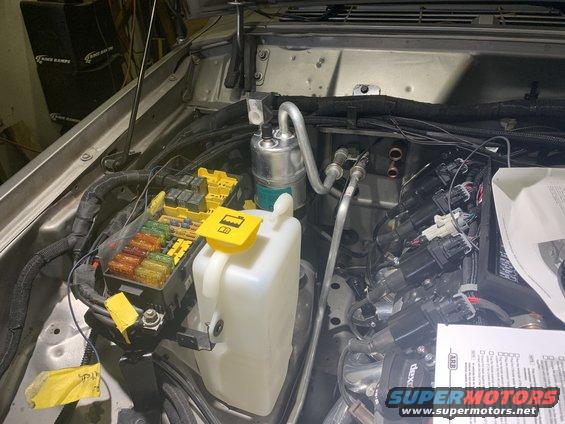
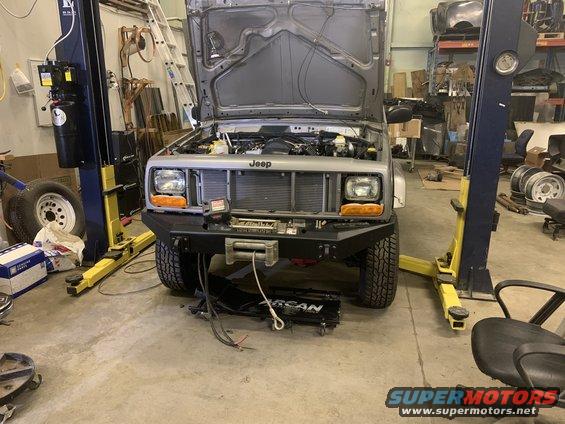
Wires, wires, and more wires....

ea8fb25683034cdc91f3503ecefba952.jpeg


ef17170fade449178e24486d557660b3.jpeg


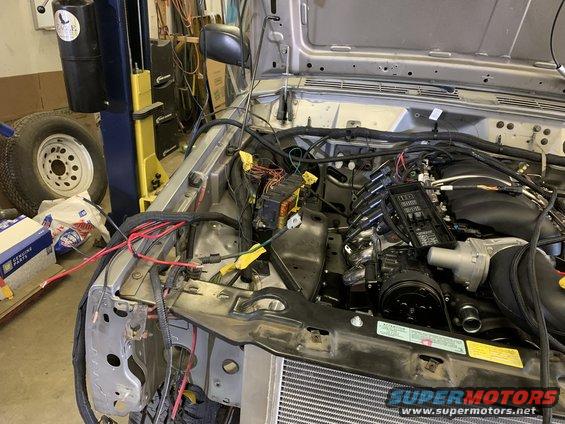
But the wires are slowly finding places to hide and it is really looking nice!

d8b0203d3d284ec7a75c7ae9ac38884f.jpeg


c9af528694eb4e8b9bbc1b14e90a55e0.jpeg


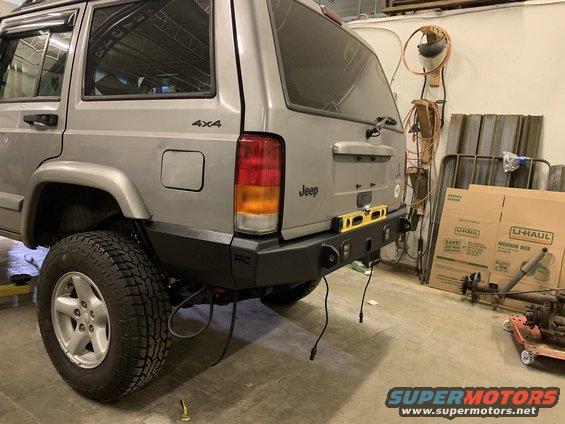
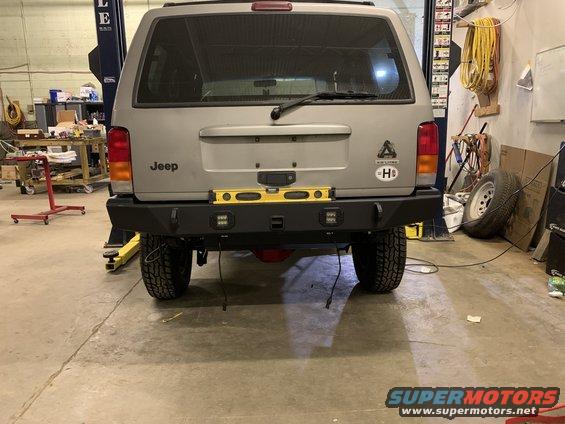
I installed a Rough Country rear bumper with the LED light upgrade ooooooo ahhhhhhh, also going to install some body armor on the rear lower quarters
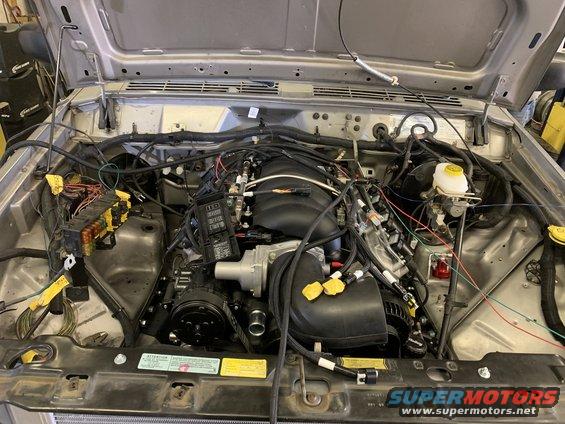
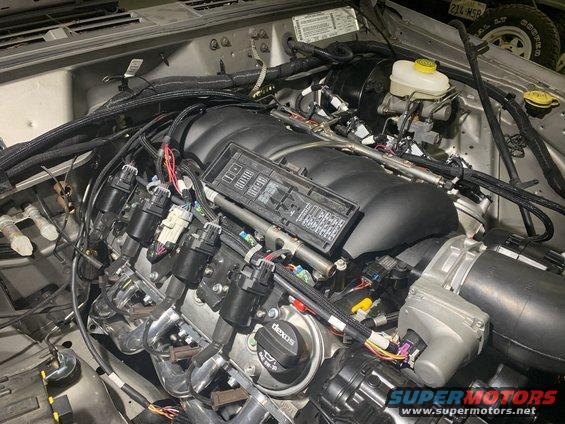
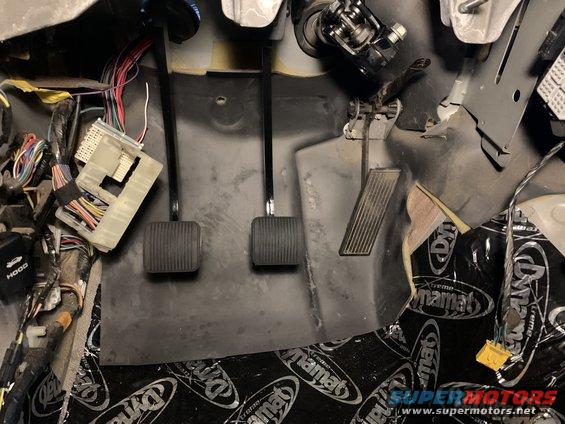
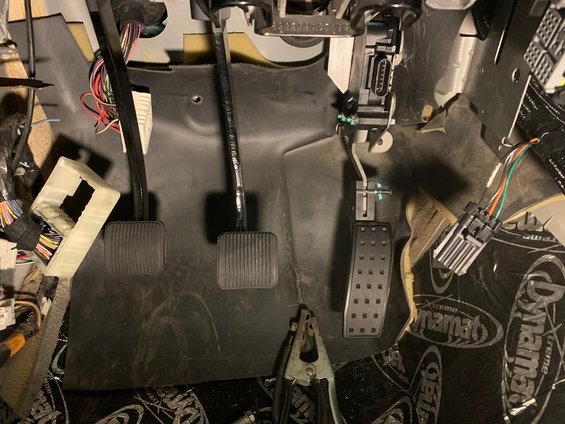
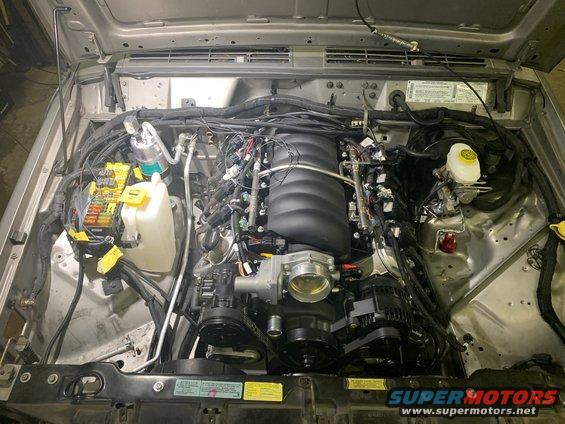
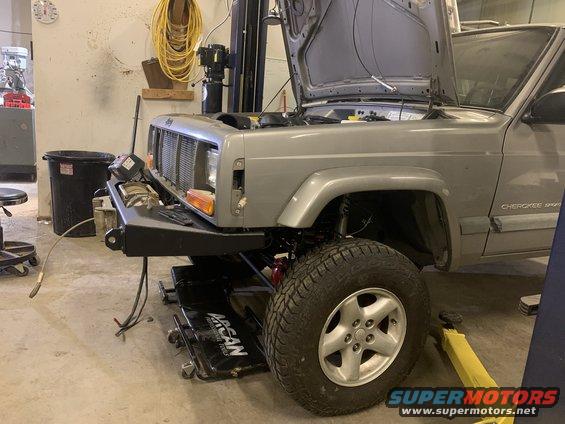
b3013fada9f8403e8c87b0a4f08b2411.jpeg


cf661f6a67d241e4abb79ebe7e6920cd.jpeg
 
Things are moving along with the project. Don is knocking the wiring out. While that is going on I'm wrapping up lose ends with the fab stuff. Got the Novak fuel system installed and permanently mounted and the fuel line made up to the intake. I also got the drive by wire pedal mount made.

This mounted to the frame rail better than expected. I did have to ditch the stock fuel line

1d12dd8fd88146629de69f05fc728a3b.jpeg


Connections at the fuel rail

a91a91cb1ee44c638d3d025e9e8323f7.jpeg


Old and new pedals. Really happy with how this turned out. I just combined to GM bracket with the original Jeep pedal bracket added some angel iron and some bent flat bar and tada!

old..

fbf427fd58a640fbbd12f3594c39d922.jpeg


new and improved..

a45ba23594fe4638a7ac8461c7777e3c.jpeg
 
It's been a bot since I've been able to update our progress. The under hood wiring is almost complete. The only wires left are the AC switches and the starter. I took my AC condenser to Alamance hose and they extended my lines perfectly and it looks great! I spent about an hour at O'Reilly's picking out hoses that I could cutup and piece together to make my upper and lower hoses. All that is complete. The only thing I have left to create are the two AC lines to the compressor.

I had @Will Carter modify my remote filler neck by combining it with a billet reducer. The radiator outlets are 1.5 but the Holley water pump outlet is 1.25.

330c85e8b5064820ae5ed58f5a99fe4c.jpeg


11ca344cad9d45a8966eb8891e44f8c1.jpeg


Upper and lower hoses complete

3f8ea21aa30947bcaa705b2a40538280.jpeg


e45b490863cb491da42c889ecd940041.jpeg


Will also suggested a mini ARB air pump due to limited space. Turned out to be a great suggestion. I mounted it under the back seat with room to spare (allegedly).

83688acb32ce437f95562461f971ad6d.jpeg


32aff0695132434d8c1d7da2ce78ed66.jpeg
 
I got the radiator and AC condenser installed tonight and started plumbing in the AC system I need to get the two hoses to the compressor made and that will wrap up the engine install. The guys at Alliance Hose and Tube Works did a wonderful job on the condenser, it connected to the hard line with only minimal "convincing". Both the upper and lower radiator hoses clear the lines by the slightest of margins.

It's amazing how much head scratching and figuring it took just to get the condenser to fit. So glad to be tipped off about Alliance!

6f2abe9685cd4a1681034f5418781006.jpeg


d5ea30540e7a420f8d3483b0dbf1715b.jpeg


Hardline and accumulator installed. Only minor convincing needed to get everything to line up. Will use the original Jeep compressor lines to make the new lines.

e338da4e9eba4b9d9031aabcc18d9a83.jpeg


Really like the "stock" look....

ca737b89ed5b495ba4c0bf99569c483b.jpeg


And it all fits under the stock hood!

6cbfed6abb304aeda353248cfad3c5b0.jpeg
 
My todo list is getting shorter and shorter. I got the front header panel on last night. I had to take a carbide bit and make a slot on the passenger side to allow room for the lower hard line for the condenser. I was sweating if it was going to fit but after some creative convincing, aka man handling and bending the lines forward, it all fit!

It is starting to look like a Jeep again! I bought a Rough Country front winch bumper and it should be here today. We have a 8K Warn winch on the shelf from our ECORS days that only has one good pull on it. :lol: And what a pull it was. LOL

a71afb7fa37b49efb3bebf3f03b6339e.jpeg


Now that all the big items are coming to a close I am now turning my attention to the creature comforts of the project. I went by my favorite stereo shop to figure out power requirements and such and walked out with a hand full of goodies. Wasn't panning on buying but was told to get them while they had it in stock as when it is gone it will be about 6 months to get more. I was shocked to find out I could install a double din radio in the Jeep. They have a company that provides a new dash plate that looks stock. Sooooo now I will be having full touch screen, backup camera, the works! That and a 1K watt amp, my son tells me I am 2 subs away from being a menace at the local Sonic. :laughing:

8dca761b49ac4f5d9e98a2dca0eac288.jpeg


32d83add568d4cf59e249ec2c68cee95.jpeg
 
The front bumper came in yesterday. Got it all installed, dug out the old dirty winch that still has Tennessee mud on it and have it loosely in place. Will need to get a new bracket to mount the solenoid. Looks pretty good. Was surprised how far the bumper sticks out but it gives plenty of room for the winch. I will say they spared no expense on the hardware. the winch plate is held on with 8 1/2 inch grade 8 bolts and the bumper attaches with 14 1/2 grade 8 bolts and that doesn't include the bolts attaching the plate to the frame. It did get interesting since I have frame plates and the bumper doesn't take that into consideration. Normally the frame plates go to the inside of the bumper mount. I had to loosen the frame plates and slide the bumper inside the plates. Everything tightened up nicely and leveled out well.

8002d0636018498db7950334dc128aab.jpeg


05e9338480734e998194292123f32759.jpeg
 
I've turned my attentions now to some sort of dash/gauge setup for my Jeep. The old computer is long gone as is the old wiring harness, I decided to go with the Holley digital dash setup. It interfaces with the Terminator X computer and uploads all the readings making it super simple. The biggest issue is how to mount it. I wanted the 12.3 inch version but it was just too big for the dash. :( 
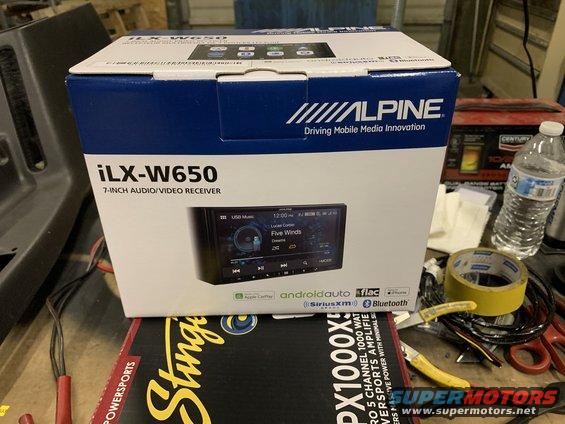
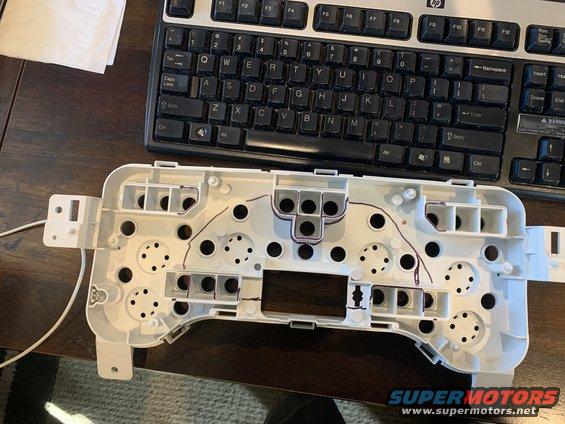
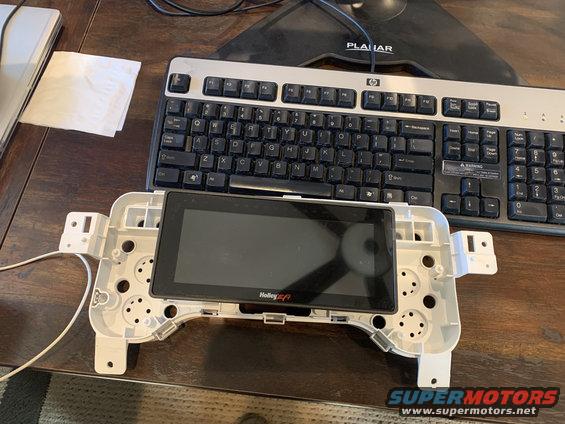
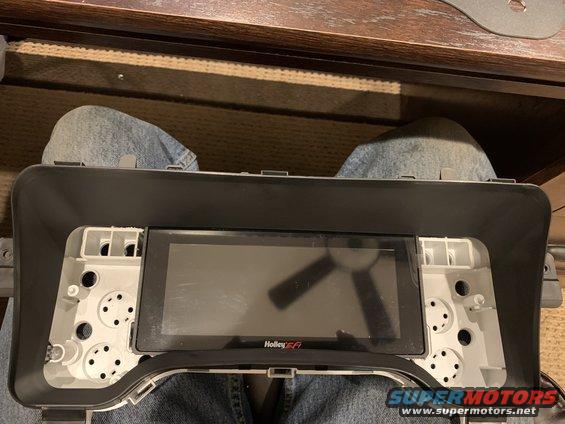
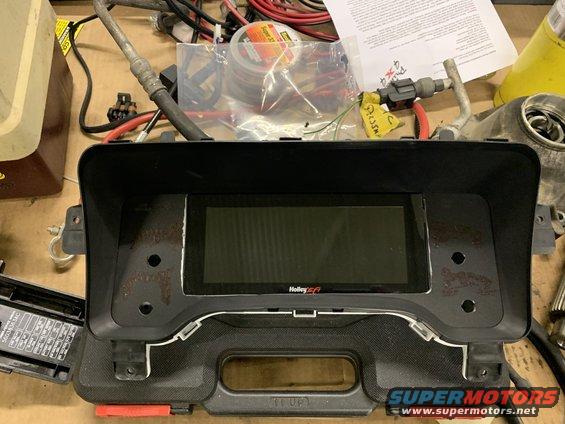
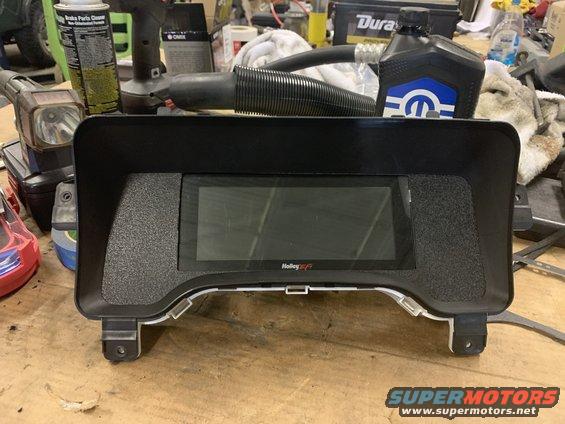
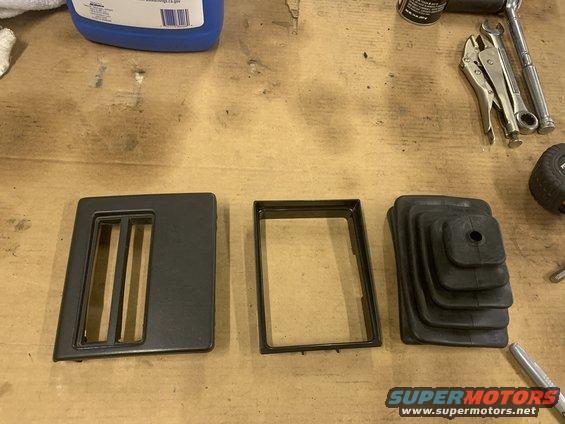
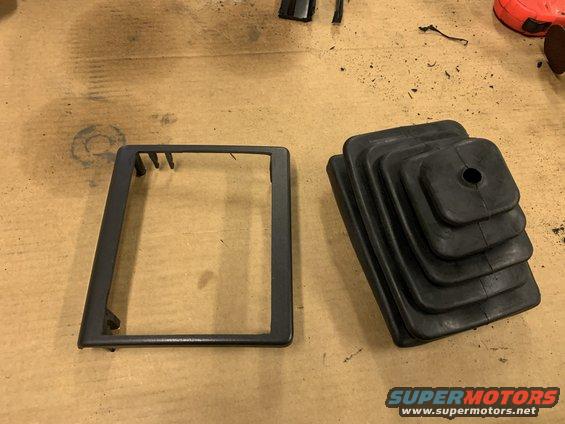
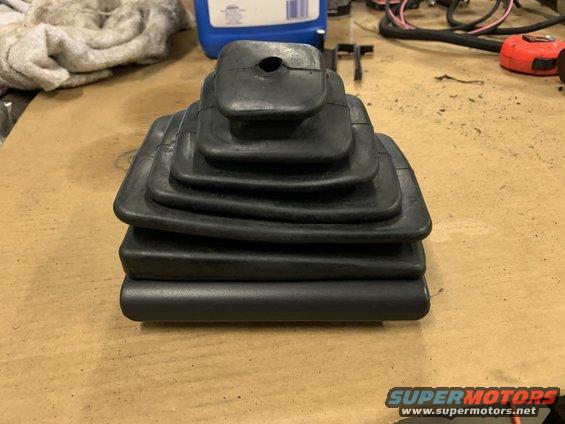
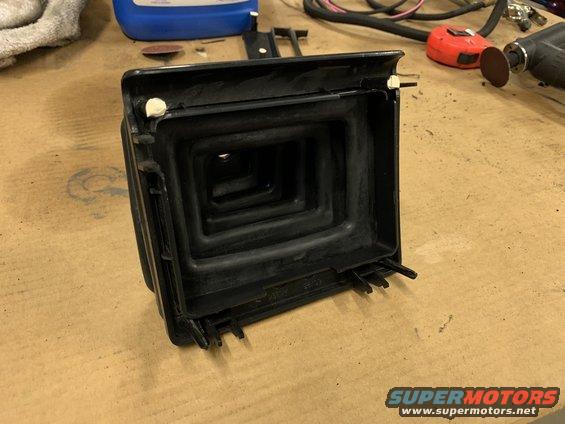
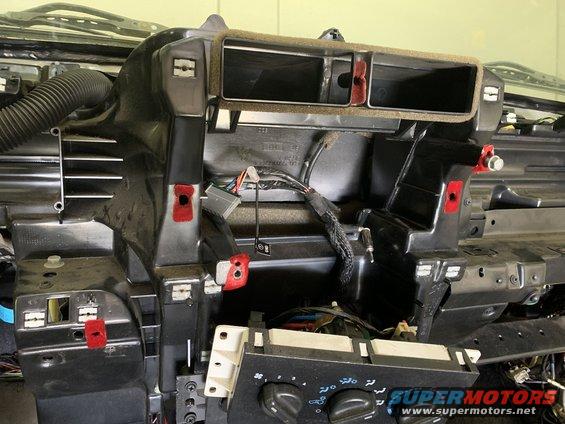
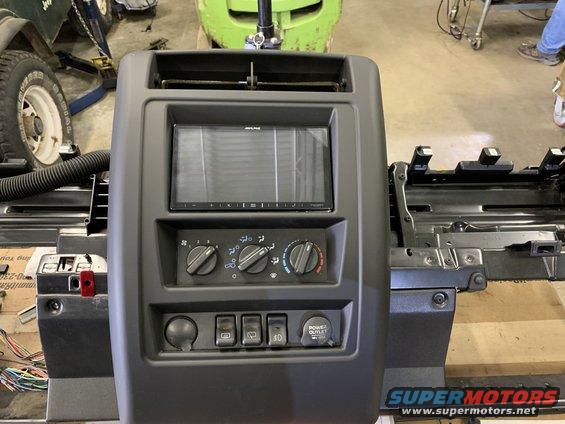
I went with the 7" version and it is going to fit nicely in the stock location. I spent a few quality hours with air saws, grinders, and hand sanding to get things to fit right. I cut up the old dash plate to make a template for when my textured plastic comes in. I thinks it's going to have a nice look when done.

494a1957149849848fed14fe9f6bb173.jpeg


fa8cefa830cc495eb6eac884c887ab4b.jpeg


4cd7ff5be8d2461fb4148e6d520863a4.jpeg


8b68919b6eb441dabb409396105d06f1.jpeg
 
Today's project was to try and make a shifter boot that looked factory. I searched high and low for one but those things are made of the purest form of unobtainium as I've ever seen. I haven't even successful in finding a art number or even one in a parts diagram. I did find some in a random foreign country whose language I no speak. I do, however, know a fellow board member who has a factory original five speed and was kind enough to share pictures. I used them to come up with an idea to make my own. The next pictures rate right up there with a bigfoot sighting.

9fe30b35a2c4424a83a1c08af49d7a92.jpeg


6f655805a3ca43209102273eec905897.jpeg


So I bought a TJ trim ring, the matching shift boot and started hacking on the original auto trim ring.

0918464d20b34acdac9f57558ef30d19.jpeg


Sneaking up on it. Not a lot of trim ring left.

68c124b377b943babba5ba487ca61450.jpeg


Finally got it all to match up and look nice. In theory it should just snap in place. We shall see....

e48d706630874c7b8a5932e7b098437e.jpeg


85b7a8937a074ad4bffc68e480adfea2.jpeg
 
Don is still working on the wiring. We've moved to the inside now so we can work out our power needs while the dash is out. I worked on getting the dash modified for the double din radio and it turned out very nice. Don got the wiring harnesses made for the radio and amp.

This is the dash before any modifications.

d8f4b191531c48288d4aa7681bd480f5.jpeg


Here's the in progress picture. The instructions that came with the new dash trim was pretty detailed on how much of the dash to take out.

87c2f1f640cb40eea7d99ea17d7a5969.jpeg


The final product. The dash kit comes with mount plates for the side of the radio. It uses the upper radio bolt and two upper screw holes of the AC controls. You drill a 1/8 inch hole for the upper left screw and you are done. Overall it is a very well made kit and the dash piece fits as well as the factory one.

430aa5b79efe4f03b583194f3d1fdbe3.jpeg


Who knew car radios were so wirey!

5980f1063ded4b10bcccffb71cf86e9b.jpeg
very nice. I wish they made one for ZJs.
 
I picked up my shiny new drive shafts from Oliver's yesterday. Those guys always treat me right!

New and Improved!

0655b148b8434b3c90a420e262908647.jpeg


annnnd snagged some swag!

fffd1cce027f46efb5609c6fcf42ce08.jpeg


Still working on the wiring, The only connection(s) left under the hood is the high and low AC switches. Had to make a wire harnes from the transmission to the radio so it would activate the backup camera. Spoiled I know, I like to see things before backing over them. We also took this opportunity to use this wiring exercise to make the backup lights work. Lights are highly over rated! Finally decided on how I am going to build the exhaust and started ordering parts. This will be my first attempt to build an exhaust so wish me luck. But as long as I have a grinder I am a welding god! :lol: I was in serious information overload for a while. I am going with a 2.5 inch exhaust pipes as that is about the max I can use. Will be going with a 2 in 2 out style muffler with a built in X pipe in it. To help with drone I will be placing resonators in front of the muffler. Parts are supposed to start arriving today so look for some pictures soon!
 
Some of my exhaust parts came in yesterday and I couldn't wait to get to the shop today. My disclaimer is this is my first exhaust so be kind. I do not have a TIG welder so everything was done with the MIG welder and .030 stainless wire. The guys at the welding store said I could get away with 75% Argon/25 % CO2 in stead of the Helium/Argon/CO2 mix. I figured this was not a show car so I went with what I had. My plan is to have V band clamps before and after the muffler/resonator assembly and at the headers. My hope is everything can be disassembled fairly easily should I need it. The 2 in 2 out muffler is by MagnaFlow and has an X pipe built inside it. They recommended Vibrant performance resonators so I went with those. I also placed an H pipe in front of the muffler/resonators. The painful part comes when I have to uninstall my headers and cut off the collectors and weld on the V bands.

MagnaFlow 2 in 2 out muffler. My exhaust is limited to 2.5 inch pipe.

9db0b55f085a40fc82bf301ce9d6f962.jpeg


Vibrant Performance resonators, I didn't realize how purdy these things were when I bought them. :smokin:

157fc27369474e33888e7caa40b17657.jpeg


Mocking things up. It was about now that we noticed the pipes coming out of the muffler were not parallel but that worked out nice as it pushed one pipe towards the driver side which will make connecting that pipe easier. It also makes it that I do not have to weld straps to the resonators to prevent rattling.

c845c65eb1e24aeeaf285d384c500c54.jpeg


Test fitting the muffler assembly. I am liking how it is turning out.

8838f38ff2424493b67ed86ed9b1096d.jpeg


2855eca37dd245b39204ba53238f0d78.jpeg


Welding on the Evil Energy V band ends. Very nice quality

b55653ce004644ca8cdb01fbc91f4e2f.jpeg
 
I really wasn't liking how the welds were looking. I know I said it was an exhaust system and nobody would see it but dammit it was ugly and it bugged me. I was getting good penetration but the welds sat on top like a cold weld. The wife was tired of my bit.... er um whining about it so she went and bought me a cylinder of tri gas. Wife of the year right there! I am amazed at the difference the gas made. The mix is 90% helium/7.5% Argon/2.5% CO2 and causes the welding to make a louder sizzling noise. The weld lays down much better, produces less splatter, and overall doesn't heat the piece up as much. I have some adjustments to make as I am still learning it but over all much nicer looking welds. Don't get me wrong this will never look as good as a TIG but I don't have one and can't afford one. Maybe I should start bitc.... I mean whining about that..... :laughing:
 
Got the pipe made to connect the engine to the mufflers. Need to get some more of the pie cut pieces to help complete the exhaust out the back. I know how I want to run it but need a few more pieces to finish. I am quite please on how it is turning out.

It's close to the oil filter but there is some decent room. I had to make sure the exhaust and front drive shaft didn't occupy the same space. Thanks to "that guy" @Will Carter for helping me with that.

53710a9a767840d59b295cb21a6aa85e.jpeg


I had t tough time jogging the pipes back to the left but I Don and I pulled it off!

84c22f92401249f8b779aeacdc91a820.jpeg


I have good clearances around the flex pipe. It lays in there really nice, about an inch of clearance all the way around.

974079519cd74459999823ca7e741b7c.jpeg


The passenger side is tight. Had to massage the floor to give the band clamp some more room.

733b529b28214a3584ab3bb4d9102c03.jpeg


Here is a good shot of how it turned out. The pipes almost touch so I welded them together and followed that with some 1/8 inch flat bar for support

4ba9874676534faf906929bc9a097ea1.jpeg


On the bench for welding the big stuff. Mr Carter is going to TIG weld the areas that need to not have a heavy weld.

2d1367099b2f402ea5a191850b242160.jpeg
 
Progress has come to a crawl due to having shoulder surgery. I had apparently completely torn my rotator cuff in my right shoulder and have been dealing with it until I couldn’t stand it no more. Took them 2 hours to put me back together. So I am in need of some TIG help. Any suggestions of who could do the finish welding on my exhaust? Willing to bribe with favorite beer or spirits or steaks then there is cash.
 
Time for an update. Still recovering from the shoulder surgery, very weak in my right arm so progress is still slow. We have made some progress though. @WARRIORWELDING hooked me up and welded my exhaust ends up. Much appreciation for that, great guy who went above and beyond for me.

497774b433b6455d89b93df75da70c5d.jpeg


47169f853e5c480cb6f47dc189a0879a.jpeg


I decided to do bulkhead fittings for where I passed the air lines through the body and it worked out great. Here is a shot of where it comes through the body. A lot going on here! Break lines, fuel lines, and air lines kind of converge on this one spot.

66ba9e85cf1545a6b354a7c67f8f8801.jpeg


I am slowly tying up the small stuff that takes for ever. Drive shafts are in, airlines are in, on the good side of the wiring, need to try and remember how to put the dash back in. I need to get this wrapped up by the end of July and I will be starting a new build thread for my brothers CJ5 Jeep. My dad and brother will be driving out first of August to spend time in the shop working on it together. Will be once in a lifetime thing for me and I am excited. If I remember correctly it is a 79 CJ5 with the 304 V8 and only 53K original miles and practically no rust.
 
Back
Top