Project Piggy Bank - 83 FJ60 Landcruiser

Fenders.

The last pic is on each side of the fuel cell. You can put two ammo cans on each side. There are locations to tie em down too.
2012-03-11_18-15-56_58.jpg
2012-03-11_18-16-11_966.jpg
2012-03-24_12-41-06_477.jpg
 
2012-04-06_21-30-46_978.jpg
2012-04-25_20-56-15_614.jpg
2012-04-25_21-00-06_735.jpg
2012-04-26_21-42-44_961.jpg
2012-04-28_10-50-40_915.jpg
Bent the fawk out of my steering in Harlan partially due to no power steering. One of the pully chewed the drag link up pretty bad. Sleeved everything with some 1 1/2" .120 tube. Got it fixed and ready to wheel again. Trying to determine the cheapest way to get this turd some more belly clearance. May use bastard packs and keep it sprung under. May go through with spring over. Also tempted to link the rear. Can't decide. I am poor and the wife keeps nagging about stuff around the house. Oh well, got a tag and can piss off tourists until I can sneak in some more wrench time.
 
You still have this my buddy is doing something very similar with a beat up fzj80 he just got.


Sent from my mobile Toyota base using Tapatalk
 
Yeah man still rusting in the yard. I have made some changes and need to update a few things.

I bent up my main leaves up front at the Flats. Ordered up some shackle hangers from Barnes and got some Cruiser rears up front with an add a leaf. This moved my axle forward at least one inch. Have some 5.29s in the thirds. Rewelded my rear after it came unglued and new pins in the Lock Rite up front.

Planning on a new belly skid and a Harlan trip in April.
 
driver view.jpg
front view.jpg
Finally drove around some. I need to bleed the brakes more, they barely work. I took off the old skid plate and it looked like a beer can that had been run over with a lawn mower. That's next on the list with maybe some of Mud's bead locks.

I like how the front springs turned out but I do need to rework my bumps. The rear springs are inverted slightly in the pic and it looks like the passenger front may invert slightly if I reach the bump.

I need to change the whole rear up and get something that flexes a little more than the stock stuff. Maybe some Chevys but they are more narrow. Its always something...
driver view.jpg
 
Go with some flipped fords and a traction bar.


Sent from my mobile Toyota base using Tapatalk
 
Crawled around on some rocks at a buddy's house and really digging the gears
2013-03-23_16-15-23_898.jpg
. I got snagged on my rear spring hanger. Time to build a belly skid that makes that flat or at least ramped better.
 
Small overdue update. I finally made a switch panel for my lights and got some good toggles to replace the rats nest of crap I had. Desmogged the engine bay and installed a Weber 38 :driver:. Dang thing runs great on its side or pointed up or down. Probably the best I have ever had a carbed trail rig operate. I made a new skid plate for the belly and hacked back the exhaust to keep it off the rocks. Skid is about 1" below the frame rails and is skinned with some HDPE plastic. I also learned the hard way about reverse mount rims and tried to make a set of beadlocks (fairly epic fail :mad:). I went to Harlan and managed to only get one pic. Late night run up Fish Fossil claimed yet another set of springs up front. I straightened it out with the winch and have wheeled several times since. I have also managed to bash both sides of the front part of the cage at the stinger.
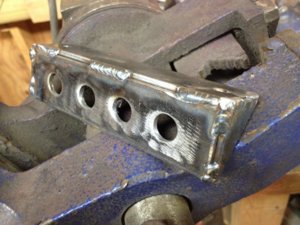
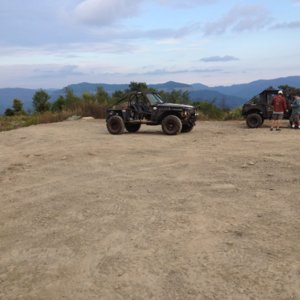
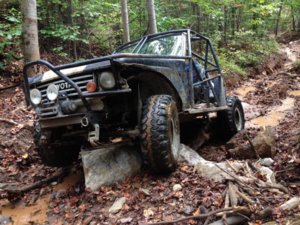

photo 1.JPGphoto 3.JPGphoto 4.JPG .

All in all very pleased with the Cruiser. I can't believe how dang tough Toyota made these things.

Going to wheel it as is several more times. My son will be born early February so I plan to modify some stuff since I will have to be home a lot. Plans are to fix the smashed up cage with a dove nose. Recess the winch into the grill. Install a York for some OBA. Spring over and shackle reversal is going down FINALLY! Still on the fence, but leaning toward leaf spring sliders. I will also be tossing out the current spare tire set up and making room for a CJ back seat. Hope to be ready to wheel in the spring with my daughter riding in the back!
 
I just found your thread. Nice work! You plan on being at the Flats this January?
 
Thanks Mike!

My son is due the first of February so I am going to have to see how that one plays out. Probably will not make the open invite, but I will be there the club Christmas ride. I am holding out till the last minute to chop up the suspension so I can still wheel a little on that mangled spring. :driver:
 
Well I got a little work done over the weekend. Finished installing the back seat in the 34 degree rain yesterday. I spent a lot of time staring a the back brainstorming on how to extend the cage to protect the back seat passengers. Feeling good about it, but as always I will probably change it all again when the tube hits the bender...

Before

cruiser back seat prep photo.JPG


After (phone took black and white for some reason)

cruiser back seat photo 1 (1).JPG
cruiser back seat photo 2.JPG

cruiser back seat photo 3.JPG


Going to chop up the front for the dove nose over Christmas vacation if I can have some me time.
 
I have considered a simple idea and a more complicated multi-bend halo. With the halo I think I would probably end up ruining a couple of sticks of tube trying to get it right before getting pissed off and going with the simple idea. So yeah, I will try and catch ya soon to do some bench racing.

I am finally ordering a high steer kit today from Marlin (via Georg at Valley Hybrids in Stockton) with the nice billet arms! :D Only need a few other parts for the SOA now!

Anybody ever done a cut and turn on a Yota axle?
 
Last edited:
Georg is good people. Have done a few CnT myself, what ya got for question ?
 
Numbers. I know different folks offer a CnT service and they have set numbers. I mean they don't have the truck so there is nothing to go on! Any input on that? It would be easier to toss the axle on a table in a vise and got to town. Also what is your preferred method to cut? I have access to a big pipe cutter but it seems like an angle grinder would be easier.

I feel like I have a plan to do it, but any extra knowledge is greatly appreciated!
 
I do it under the truck myself.I know places like Slee have ones already done for a decent price. Too many variables for me to do it off the truck. I use an angle grinder myself. If you want you can just tack it under the truck then full weld it on the bench. But to get the correct angle it is best to do that under the truck. If you just slap the clean axle back under the truck with the u bolts tight and set the weight of the truck back on the axle with jack stands holding it then you can get the best idea of all your angle you want for both pinion and outer ends. At the same time you can burn in your spring perches how you want them for the proper pinion angle.
 
That was pretty much my plan of attack anyway. Just hoping for a shortcut if it made sense.

I wheeled it Saturday at the Flats until it slung the ac belt and it wrapped around the crank pulley. Upon fixing that I had an awful whine/whistle noise that would kinda go away under throttle. Considering all of the fluids that blew out of it under red line assualts on several rocky climbs I took it home with fingers crossed that it was a belt or pulley bearing. Again I can't believe nothing major broke on it. I was trying!

Sunday afternoon I pulled the ps belt = still awful noise. Pulled the alternator belt = still awful noise. I then sprayed a ton of silicone spray all around the base of the carb where all of the Weber adapter plates are = still awful noise. Next I ran my finger around the carb base and "rubbed" the spray in a little and let it sit. The noise went away thankfully!

About to cut off the front part of the cage and start on the dove nose. High steer kit arrived. I got some perches for Christmas. Let the fun begin. I need to source a few more parts (Durango PS pump, steering ram, F150 rear springs, shocks for the rear, probably 3 tubes of pipe, misc tabs and such), but I can get started. I will try to keep up with the photos.
 
Nice Mike! That thing is pretty bad ass for piggy bank project.
 
Byron, it seems the piggy bank has been broken! Although it has been small amounts spent periodically it has added up. I enjoy the vehicle and the fact that I have built it.

Time is closing in on the birth of my son and I am spending most of my time with Mama and my daughter. I got some time on Saturday to do a little "work" and it felt good to cut stuff up and pitch unwanted stuff into a pile.

Cruiser Chopping (2).JPG


Removed the front portion of the cage

Cruiser Chopping (3).JPG
Cruiser Chopping (5).JPG


I got all of this done in about 2 hrs while my girls were napping.
 
And then on Sunday I got some help from my friend Frank (aka greenbeasty) while the little one was sleeping
total removal of front.jpg
.

We pulled the rest of it apart.

Now its time to work on fitting the gigantic York compressor so I can have my OBA. Need to find a Saginaw pump off of a Durango (they have metric fittings) to push a hydro assist ram. Looks like lots of cardboard templates, welding and drilling will be in my future. I am anticipating making the brackets several times before being satisfied.

Before the day was done I got the tools put up and my neighbor and I ran some big spot lights and pulled some wire for an exterior 220 plug for the welder. Next weekend I want to finish the exterior welder plug and put in two GFCI 110 outlets.

EDIT:
I just found a great site for leaf spring info while doing some research...
http://www.stengelbros.net
 
Last edited:
You've done a great job with this thing! I've been following this thread since day 1!
 
Back
Top