
"Right" and "Done" are subjective. It could be one, or both, or neither of those things at any given time, depending on who you ask.With that attitude, you'll never get it done!

You are using an out of date browser. It may not display this or other websites correctly.
You should upgrade or use an alternative browser.
You should upgrade or use an alternative browser.
Project Saving Silverman
- Thread starter Kickdeez
- Start date

StretchASU
Playing country music til Troy's ears bleed.
- Joined
- Oct 17, 2006
- Location
- Claudville, VA
21 Spline should hold up fine if you don’t drive it like the buggy  . I made stock 21spl duals last for a while doing dumb shit. Just made sure any time it got western to push the clutch in before any kind of traction caught.
. I made stock 21spl duals last for a while doing dumb shit. Just made sure any time it got western to push the clutch in before any kind of traction caught.This is where I’ve landed with it too. I was willing to spend a few hundred dollars to upgrade to 23 splines for extra peace of mind, especially since I was pulling it apart anyway for a full reseal. But it’s gonna cost more to upgrade it than I have into the whole setup, including the crossmember and driveshaft parts that came with it. Pass. For now.21 Spline should hold up fine if you don’t drive it like the buggy


PeepinPossum69
New Member
- Joined
- Jan 25, 2026
- Location
- Charlotte, NC
I’m peepin!!!!!!!!This is not a build update. I will put together a post with an actual update on progress when time and energy allows. But for now, I just needed a motivation booster, and figured I’d give “you people” a sneak peek
View attachment 455849


brokeass4runner
Well-Known Member
- Joined
- Dec 16, 2005
- Location
- Charlotte
So…..full exo? 
Looking good KV
Looking good KV
After consuming copious amounts of silver bullets in the shop while working on this thing over the past year, I finally understand the context behind this comment…Colorado’s finest beverage container compliments the color scheme of this rig perfectly! @StretchASU you, sir, are a visionary with a well-trained eye and highly refined taste for vehicles and cold snacks.Needs a giant Coors light sticker on the hood.

Guess I need to paint my jeep natty light colorsAfter consuming copious amounts of silver bullets in the shop while working on this thing over the past year, I finally understand the context behind this comment…Colorado’s finest beverage container compliments the color scheme of this rig perfectly! @StretchASU you, sir, are a visionary with a well-trained eye and highly refined taste for vehicles and cold snacks.
View attachment 455852
You ain’t real…Guess I need to paint my jeep natty light colors
Meant to tag our resident tire shiner in that last post bc:
@CasterTroy Is this more better??
I'm already disappointed
It's like you didn't even TRY to make an effort with the tires
View attachment 438409

@CasterTroy Is this more better??

Shreddinlettuce
Well-Known Member
- Joined
- Nov 20, 2016
- Location
- Hickory
You could fit a whole 24 ouncer in that wheel gap!After consuming copious amounts of silver bullets in the shop while working on this thing over the past year, I finally understand the context behind this comment…Colorado’s finest beverage container compliments the color scheme of this rig perfectly! @StretchASU you, sir, are a visionary with a well-trained eye and highly refined taste for vehicles and cold snacks.
View attachment 455852
Shreddinlettuce
Well-Known Member
- Joined
- Nov 20, 2016
- Location
- Hickory
Ain’t no shame in partaking in a few Financial LightsGuess I need to paint my jeep natty light colors

gslander
Well-Known Member
- Joined
- Aug 13, 2021
- Location
- Hickory, NC
Looking good!!
It's going to sit a few inches taller. It is currently on jack stands a few inches lower than the centerline of the wheels. I'd love for the final ride height to be where it is. The reality is that it can be challenging to get these things to sit that low on leaf springs, ride halfway decent and keep from cutting up the fenders. It's doable...just extra time and effort that I'm not willing to put forth right now. I know that the suspension will work great and ride plenty smooth (for what it is) the way I've set it up. And I think it will still look good at final ride height.You could fit a whole 24 ouncer in that wheel gap!

YJJPWrangler
Well-Known Member
- Joined
- Jul 19, 2005
- Location
- Charlotte
I'm gonna have to come over and supervise the cold snack distribution system.
Let’s raid his fridge lolI'm gonna have to come over and supervise the cold snack distribution system.

skyhighZJ
Gov retirement < needs to live
- Joined
- May 31, 2012
- Location
- Aberdeen, NC.
As long as it ain’t banquet you should aightLet’s raid his fridge lol
Bring yourselves over. The shop fridge stays stocked with silver bullets and yingers. @PeepinPossum69 usually keeps an assortment shirt beers in there too. There might even be a jar or 2 of shine leftover from the last ranch trip.
easleycrawler
Well-Known Member
- Joined
- Oct 16, 2011
- Location
- easley, south carolina
Gonna be a sweet ride.Here it is sitting on wheels and tires. It has a very slight sag in the rear. But a 1” lift block should put it very close to dead level front to rear, and put the castor pretty close to right at what I was shooting for.
View attachment 455905
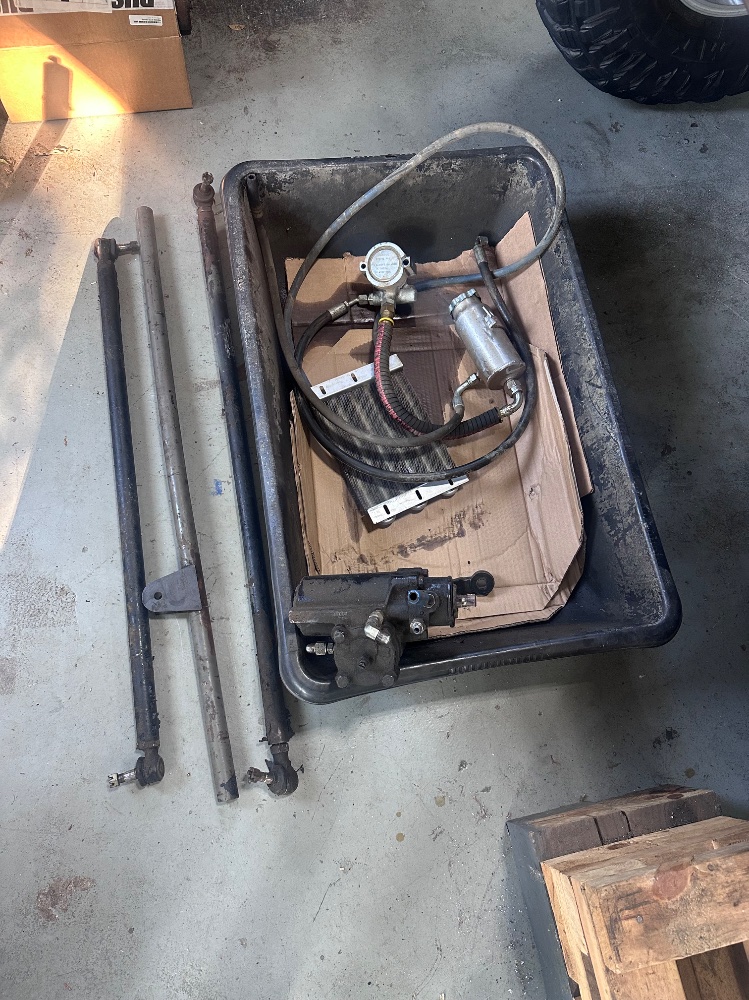
Good parts haul today. Made the trip out to black mountain and @frankenyoter hooked it up with 90% of what I need to get the steering finished out. Still slowly chipping away at this thing.

frankenyoter
No Rain, No Rainbow
- Joined
- Mar 17, 2009
- Location
- DARK CITY
Hell yeah man! Happy to see my parts go towards a badass ride!!!Good parts haul today. Made the trip out to black mountain and @frankenyoter hooked it up with 90% of what I need to get the steering finished out. Still slowly chipping away at this thing.
View attachment 456844
Thanks brotherHell yeah man! Happy to see my parts go towards a badass ride!!!

I've been very unmotivated to update this build thread with actual build updates. I have been pretty motivated in the shop lately, though. Not much readily apparent progress since the last pic. But, a lot has gone into getting it to where it is. Still a long way to go, but progress is progress.
The front axle and suspension are 99% buttoned up. Still need to make brake lines and bump stops, and bolt up the shocks. But the front is ready enough for me to work my way towards wrapping up the rear.
I have a new dual case crossmember on the way, somewhere between Nevada and NC at the moment. The one I snagged with the dual cases "fits" my 4Runner, but not quite right. I *believe* it is actually for a 1st gen pickup. Instead of doing a bunch of figuring and fabbing, I decided to just pay that man his money and order the correct crossmember for this truck. Once the new crossmember is in, my drivetrain should be situated in the correct-er spot. That will then allow me to re-set my rear pinion angle, tack the perches on, mock up and tack in the shock mounts, and then pull the rear axle for welding out the axle and frame mounts. Then I'll get the rear axle cleaned, painted, permanently installed, and fully assembled, along with a kinda trick custom rear brake setup (more to come on this soon-ish).
That should about wrap up the suspension/axle portion of this build. Then I can move onto other things. I spent a little time working on the front bumper while I've been waiting on the crossmember. It's ready to be cleaned up, painted and permanently installed. Below is the remaining to-do list (big ticket items) floating around in my head:
New motor - Buy fresh long block, install, new accessories, repair wiring as needed
Driveshafts - Measure and send off existing driveshafts to be re-tubed, then install
New fuel tank/cell - Haven't figured out what direction I'm gonna go here yet. Had to remove the factory tank due to passenger offset rear diff. I would really like to keep fuel outside of the cab, preferably tucked up under the rear where the spare tire carrier was. For this reason I have been considering a F-150 tank swap. But, from what the innernet says, there are some challenges associated with this swap, including routing the filler tube and getting the sending unit to read properly on the factory gauge cluster. The other (easier) option is to do a fuel cell in the rear cargo area. More thinking and figuring to do here before I'm ready to go one way or the other.
Rear bumper and sliders - Buy and install: 1st Gen 4runner Rear Bumper and Sliders
Interior - Install new carpet and reinstall seats, belts, etc. Probably modify the existing center console or figure out a new center console.
Electrical - New interior and exterior LED lighting. New radio and speakers throughout. Most likely going to be installing a pair of 12's that have been sitting in my shop since I took them out of my 3rd gen 4runner 15ish years ago bc
That's all the energy I have for now. I'll post some progress pics at some point.
The front axle and suspension are 99% buttoned up. Still need to make brake lines and bump stops, and bolt up the shocks. But the front is ready enough for me to work my way towards wrapping up the rear.
I have a new dual case crossmember on the way, somewhere between Nevada and NC at the moment. The one I snagged with the dual cases "fits" my 4Runner, but not quite right. I *believe* it is actually for a 1st gen pickup. Instead of doing a bunch of figuring and fabbing, I decided to just pay that man his money and order the correct crossmember for this truck. Once the new crossmember is in, my drivetrain should be situated in the correct-er spot. That will then allow me to re-set my rear pinion angle, tack the perches on, mock up and tack in the shock mounts, and then pull the rear axle for welding out the axle and frame mounts. Then I'll get the rear axle cleaned, painted, permanently installed, and fully assembled, along with a kinda trick custom rear brake setup (more to come on this soon-ish).
That should about wrap up the suspension/axle portion of this build. Then I can move onto other things. I spent a little time working on the front bumper while I've been waiting on the crossmember. It's ready to be cleaned up, painted and permanently installed. Below is the remaining to-do list (big ticket items) floating around in my head:
New motor - Buy fresh long block, install, new accessories, repair wiring as needed
Driveshafts - Measure and send off existing driveshafts to be re-tubed, then install
New fuel tank/cell - Haven't figured out what direction I'm gonna go here yet. Had to remove the factory tank due to passenger offset rear diff. I would really like to keep fuel outside of the cab, preferably tucked up under the rear where the spare tire carrier was. For this reason I have been considering a F-150 tank swap. But, from what the innernet says, there are some challenges associated with this swap, including routing the filler tube and getting the sending unit to read properly on the factory gauge cluster. The other (easier) option is to do a fuel cell in the rear cargo area. More thinking and figuring to do here before I'm ready to go one way or the other.
Rear bumper and sliders - Buy and install: 1st Gen 4runner Rear Bumper and Sliders
Interior - Install new carpet and reinstall seats, belts, etc. Probably modify the existing center console or figure out a new center console.
Electrical - New interior and exterior LED lighting. New radio and speakers throughout. Most likely going to be installing a pair of 12's that have been sitting in my shop since I took them out of my 3rd gen 4runner 15ish years ago bc
That's all the energy I have for now. I'll post some progress pics at some point.