Red YJ Build

I’ll grind down the stops on the knuckles

Not sure this is a problem, but have you rotated the axle shafts at those extreme angles? The steeper the steering angle the more likely you are to bind and break internals. Those stops might be better left alone. Just my $.02
 
Agreed, gotta be careful getting the tires turned that much. I actually have so much angle my shafts ears are rubbing at full lock. It’s about all my Super Joints can take.

However, after letting you drive it up Crawford’s Cry and the beat down you gave it, it obviously holds lol
 
Not sure this is a problem, but have you rotated the axle shafts at those extreme angles? The steeper the steering angle the more likely you are to bind and break internals. Those stops might be better left alone. Just my $.02

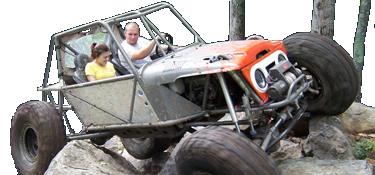
Only stops on the the front of the knuckle, easy way to test is unhook the drivers tie rod and send the ram to full lock passenger and see if the passenger u joint is happy or about to break like @77GreenMachine 9 inch parts.

for the amount I’d grind off, there’s more than enough clearance in the Ujoint. When setting up the axle and front links, I set the tires turned as far as they could before binding the ujoints and made my links clear. Now that I’m clearing by a good 2”, I know I still have useable ujoint travel.
 
Agreed, gotta be careful getting the tires turned that much. I actually have so much angle my shafts ears are rubbing at full lock. It’s about all my Super Joints can take.

However, after letting you drive it up Crawford’s Cry and the beat down you gave it, it obviously holds lol

the 44 under my XJ was that way. Just had to make sure it didn’t live on the stops during a hard throttle
 
Mounted the 39.5s on the front and check clearances. Cut the steering stops back so there’s less than 1/16” between the stop and the C at full ram lock. Tires clear the links just fine and not even close to any ujoint binding.

077ED136-CB59-4DE0-B200-7FF0BC14B4D1.jpeg
7502564B-D8C1-4B27-A8CF-E080CC58A17F.jpeg
78648DB9-5EDC-4A74-BACA-7BAED3016825.jpeg
75438A51-E71C-476B-90A2-2BAE2B7349CC.jpeg
 
Made a little more progress this week. Got the ebrake cables hooked up and adjusted. Mounted the orbital and made the steering shaft. Mounted the reservoir and measured for lines. Hoping to get to Alliance Hose tomorrow and get the lines made. Then it’s just mounting the cooler and running lines and it’s ready to be bled.

also got the exhaust ordered and it should be here next week some time.

A40B14B2-C3E6-4E18-8165-7ED0DA9FEDAA.jpeg
F1FCBA0C-D4E8-4E5A-A90A-F039BCA74F58.jpeg
 
Don’t forget the condenser line when you go to Alliance
 
Well the steering is complete and bled. Did a little test drive around the house and flexed it a little to verify nothing is binding or rubbing. All looks good. The dual rate stops could be adjusted some as its still about an inch from full bump when flexed but it’ll stay the way it is for now.

next steps are exhaust, driveshafts, and rear shocks.

3327337F-B387-40F5-A506-E4A0EE4E3F1A.jpeg
FCE50DD6-38CB-4FCE-A582-A01ACBCE733F.jpeg
3C0F9B31-4E56-4A19-AE11-AA702CD92839.jpeg
 
Tonight I knocked out some little odds and ends just to have some progress made. Some of the exhaust pieces showed up so I got those in place and cut/welded to fit. Then jumped to the steering where I rerouted the return line to the resi. I didnt like the way I ran it to start with so I found a better path. Then I jumped on the rear shocks. I got one fully burned in. The other side will have to wait until I get another shock tower in since the other one I have is cut too short. I finished up with adding 1/2” spacers to each side on the rear to pull the tires out a touch to get closer to the front. Oh, and I got a new AC line made up so I can move the dryer to a better location. I still need to make a mount for it so it’s secure.

0ACD39C8-CBA4-45DF-A4D5-F388B34667DD.jpeg
8774A8F8-C7F0-447E-A5D7-B655156FB5D1.jpeg
861E846C-8B90-4E6A-B12E-F4232BB33AAB.jpeg
3AC16A0C-F9A8-4D1F-A9B6-56C24901FA4E.jpeg
5D35E1D6-9675-42C4-93CA-61D390E23D56.jpeg
 
Last night I finished the exhaust and got the driver rear shock mount burned in. Also took the Jeep for a little spin down the dirt road next to my house. All went well but I didn't go above 25 or so since the rear driveshaft is just in there to help move it in and out of the garage and is in no way correct. I'm happy so far. I did notice the steering is twitchy but it could be attributed to the fact that this is my first full hydro rig and I'm not used to that light of a steering wheel. I could have easily been turning too much.

IMG_3242[1].JPG
IMG_3243[1].JPG
IMG_3244[1].JPG
IMG_3245[1].JPG
 
Knocked out the rear gears this weekend and then took it for a quick spin down the road next to my house. All seems well. Next is to replace the cooling system. Radiator, water pump, and tstat are here and ready to go in. Then I’ll make the front driveshaft and it’s off to the races for a small shake down/putt around at Uwharrie.

7AB48B59-A3F4-4E17-9E25-838D9D9D9C7B.jpeg
EA094F7D-2B50-4799-85FD-DC622E251D0E.jpeg
 
Well it’s inching closer to making a run to Uwharrie Saturday for the Web Wheelers event. I’m planning to putt around on some trails since there’s still a ton to be done. This week I knocked out the cooling system replacement and mounted the resi, made some temporary driveshafts from spares laying around, threw together an intake, and clearanced the skid plate for the front driveshaft. Tomorrow night I’ll nut and bolt everything. I’ve got some bolts I need to replace since I used grade 5 for set up but I have grade 8 waiting on my work bench.

E7F41FA8-0692-4778-BD6D-9846B7626670.jpeg
85141ED3-D6D6-4843-A93D-38EACFDE56BD.jpeg
3574E16E-D5FE-41B3-894C-E0619A3FAC55.jpeg
 
Back
Top