Reptar Build

JWebbie2

Well-Known Member
Joined
Feb 29, 2012
Location
Yadkin County
Hello all! First, I want to think all of you for checking out my build thread of my 2012 Jeep Wrangler 2 door.

Now for a little background on my Jeep. Its a 2012 Wrangler Sport with a 6 speed manual and was completely stock when I bought it. I bought it from an older couple with 10k miles on it and not a single scratch on it! The guy bought it for his wife (who couldn't drive a stick) but she loved the color so they bought that one over the white automatic sitting right next to it at the dealership. Long story short, she hated driving a stick and its all mine now. This Jeep was a virgin when I bought it; the doors had never been taken off, the top had came off just 3 times and had never been off-road. The original owner put it in 4 low once just to see how slow it would crawl and thats it. When I looked the Jeep over before the test drive there wasn't one single scratch on any of the skid plates. I feel like I stole it from them lol. But here's a few pictures of it when I first picked it up.
20140831_154436.jpg
20140831_154426.jpg


As soon as I got home, I decided to finally take it off road like it should have before.
20140913_175256.jpg
20140913_175313.jpg


Now on to the fun stuff. The list of mods I have in mind.

1. Genright front stubby bumper.
2. EVO rear D-rings with rear bumper fascia.
3. N-Fab rock sliders.
4. Black plastidip front grille.
5. Cobra CB radio.
6. EVO 3" plush ride coils.
7. Bilstein 5100 shocks on all 4 corners.
8. EVO 3" bump stops front and rear.
9. EVO drag link flip kit.
10. Currie brake line kit.
11. Artec rear track bar bracket.
12. WARN winch.
13. 37 inch Cooper Discoverer STTs, BFG KM2 MTs, or Nitto Trail Grapplers (Can't decide lol).
14. Method beadlocks or Raceline beadlocks.
15. Dana 60 front out of a Ford F-350, Artec truss, ARB locker, 4.88 gears, and chromoly shafts.
16. Sterling 10.5 rear out of a Ford F-350, Artec truss, ARB or Detroit locker, 4.88 gears, and chromoly shafts.
17. 1350 drive shafts front and rear.
18. Take out carpet and Line-X the tub.
19. Replace the crappy speakers from the factory.
20. Upgraded roll cage, either custom or RockHard Sport cage.
21. EVO oil pan skid.
22. Remove the stock muffler and replace resenator with a Magnaflow muffler.
23. Airaid intake.
24. Engine programmer of some kind, probably SuperChips.
 
Well one of the first things I did to my Jeep was head up to Rubitrux in Boone to get a set of 2015 Rubicon wheels and tires to put on the Jeep and get rid of those little highway tires. I actually managed to get all 5 tires in my Jeep at one time. I did have to take the back seat out though.
20141025_172938.jpg
20141025_172812.jpg

Decided to take the Jeep out after I got the tires mounted and test them out. To say the least, the tires passed the test!
20141011_133603.jpg
 
Well after my first time out wheeling, I knew that my next mod would have to be a CB radio. So I picked up a small Cobra 19 CB and a 4' Firestik and got to work.
I decided instead of mounting the CB up above the rear view mirror, I would put it under my seat since I don't really like having the cord smack me in the face while on the trail.
Cb radio.jpg

The Firestik came with its own mount with a spring. So I broke out the drill and made a few holes in my stock tire carrier and mounted the bracket up to it.
Antenna mount1.jpg
Antenna mount2.jpg
Antenna.jpg

After that, I got out the wire that runs from the Firestik to the CB and routed it. I know some guys run this wire through the soft top but I decided to break out my box knife and cut a little slit in the grommet where the 3rd break light comes out of the tailgate at and ran the wire through it.
Tailgate plug.jpg

Then I just ran it along the lip on the inside and under the carpet.
Rear wire.jpg
Tailgate wire.jpg
 
After this I still had to hook the wire up to the CB to turn it on. So I ran the wire from the CB under my seat, through the firewall (which was a pain in the ass), and run it to the fuse box so that when I turn my key to the 'on' position, the CB will turn on and off with my key. Instead of having it to where I have to physically turn it off and on and forget and then the battery goes dead.

First I took off this side panel on the dash to get me to the firewall.
Side panel.jpg

Now here was the tricky part. Just about everyone with a JK will run wires through the firewall through a certain hole, which I couldn't use because I drive a 6 speed. Everyone with the autos would use the hole where the clutch pedal would be, so I had to find a different route, which took me awhile. But I did finally find a place to run the wires.
Firewall wire.jpg
Here's a shot of the wires running to the fuse box.
Fuse box.jpg

This is the only place you can really see the wires, which isn't too bad. But it was kind of a pain to try and get that side piece off and back on. There is little metal snaps that are on the back of that panel and they were a bitch to try and line back up when putting it back on.
Beside seat wire.jpg
 
So I had a got a really good deal on a 50" LED light bar around Thanksgiving and decided to grab it. I was able to pick up a light bar from tough-lights.com that came with a lifetime warranty and wiring kit for about half the price as they regularly are. I placed my order and waited and also ordered a light bar mount for the Jeep from Rough Country.
20150110_113024.jpg
 
So since my Jeep comes with pretty good stock skid plates, I decided I didn't need to replace any of them with aftermarket ones. The only real venerable spot under my Jeep that doesn't have a skid plate is the oil pan. So I got on Northridge4x4.com and ordered the Off Road Evolution ProTek oil pan skid. The instructions recommend that you install the skid plate when you do your next oil change so that the oil pan doesn't drop down and the gasket come apart, and since it was time for an oil change, I headed to the hardware store and picked up a few quarts of Royal Purple motor oil and a Fram filter.
Royal purple.jpg

Here's the package from Off Road Evolution.
20150331_163644.jpg

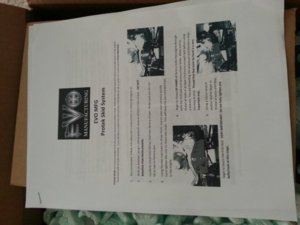
Here is the skid plate and instructions. This thing is stout! Made from 3/16 steel.
Skid plate and inst.jpg

Here's before.
No skid.jpg

And after.
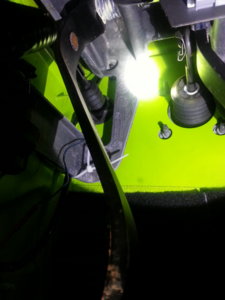
Oik skid.jpg

And like an idiot, when I was draining the oil I accidentally dropped the drain plug in the oil catch pan. So I had the fun of task of fishing it out of hot oil.
Oil nut.jpg

One of the big things with the install of this skid plate is that it uses the stock hardware that holds the oil pan to the engine. Now the bad thing about this is you don't want to over torq the bolts because they can strip pretty damn easy and since I didn't have a torq wrench that was small enough in lbs., I went to Lowes and picked me up a new torq wrench, like I needed an excuse to get more tools lol
Torq.jpg
 

Attachments

  • 1427836202528.jpg
    1427836202528.jpg
    95.2 KB · Views: 485
So since my Jeep comes with pretty good stock skid plates, I decided I didn't need to replace any of them with aftermarket ones. The only real venerable spot under my Jeep that doesn't have a skid plate is the oil pan. So I got on Northridge4x4.com and ordered the Off Road Evolution ProTek oil pan skid. The instructions recommend that you install the skid plate when you do your next oil change so that the oil pan doesn't drop down and the gasket come apart, and since it was time for an oil change, I headed to the hardware store and picked up a few quarts of Royal Purple motor oil and a Fram filter.
View attachment 205153
Here's the package from Off Road Evolution.
View attachment 205150
Here is the skid plate and instructions. This thing is stout! Made from 3/16 steel.
View attachment 205155
Here's before.
View attachment 205152
And after.
View attachment 205154
And like an idiot, when I was draining the oil I accidentally dropped the drain plug in the oil catch pan. So I had the fun of task of fishing it out of hot oil.
View attachment 205156
One of the big things with the install of this skid plate is that it uses the stock hardware that holds the oil pan to the engine. Now the bad thing about this is you don't want to over torq the bolts because they can strip pretty damn easy and since I didn't have a torq wrench that was small enough in lbs., I went to Lowes and picked me up a new torq wrench, like I needed an excuse to get more tools lol
View attachment 205157
Can't believe you spent the money on royal purple and then used a fram filter.

I'd also suggest a tennis ball on your antenna. It'll beat the crap out of your top with that spring.
 
Can't believe you spent the money on royal purple and then used a fram filter.

I'd also suggest a tennis ball on your antenna. It'll beat the crap out of your top with that spring.

What's wrong with Fram filters?
And the spring is pretty stiff, the antenna never moves and I don't ever have it on unless I am going off road
 
Just curious on who you are going to have fab up those axles, going to be some serious work to get them to work on your Jk, as in the abs sensors and all new bracketry.
You might want to address your control arms as well, if your going to ton axles a rear stretch is in order. Great lookin Jk
 
Last edited:
Just curious on who you are going to have fab up those axles, going to be some serious work to get them to work on your Jk, as in the abs sensors and all new bracketry.
You might want to address your control arms as well, if your going to ton axles a rear stretch is in order. Great lookin Jk

Artec makes a kit that makes it easy to swap the axles in. I need 05+ axles because they have the hook ups and stuff for the ABS and crap. This build thread is kinda old even though I just started it, my Jeep is already lifted so I've addressed the control arm issue. Just keep a look out and you'll finally see what my Jeep looks like today.
 
Well since my rear bumper is a big and made out of plastic, I ordered up an actual bumper...well sorta. I wanted something nice, not too big, not stupid expensive and something made of metal! After looking around for a while, I finally decided to pick up the Off Road Evolution rear D-ring mounts with rear fascia. For the price and the look, I couldn't resist it. It was more than half the cost of others I was looking at and it was simple and most of all, it gave me the most rear departure angle than all the others.

Here's a pic of the boxes I picked up. I somehow got them in my Jeep lol.
1430251763925.jpg


First things first, get rid of the stock plastic bumper.
1430493460802.jpg


Now it's time to clean it up a little before the install.
1430493490973.jpg


Everything is really stout and super easy to install...sorta. There's a wing nut that goes inside the rear part of the frame, which isn't hard to get in there since the frame has a nice sized hole to get it in to and makes it easy to hold so that you can thread it with the bolt from the outside of the frame. The part that made it stupid hard was that the rear fascia covered up a majority of that hole, making next to impossible to hold on to so that you can thread the bolt. All I have to say is thank God I had a magnet pen (a pen that extends with a small magnet on the end, it's literally a life saver) because it helped me get that wing nut back out and in place after I kept dropping it inside the frame.
20150502_130023.jpg


The D-ring mounts fit inside the frame and use part of the stock hardware to hold in place. The D-ring mount doesn't sit flush with the outside of the frame, so I broke out the cutting tools and grinder and got it down for a better finish. Here's a side and frontal view.
20150502_130049.jpg

20150502_130033.jpg

Above you can see how small of a hole I had to get that wing nut in and try to hold it.

Now to just order a couple shackles and I'll be set.
 
After being out wheeling a few times I decided that I don't like being stock. So I started looking online at lift kits and reading up on other forums about lifts made just for a JK. After a lot of looking and researching some lift kits, I didn't really find any lift kits that I liked that had everything that I wanted in it. So instead of ordering a lift I wouldn't be happy with, I decided to piece together my own lift.
The parts I order are:
Off Road Evolution 3" plush ride coils
Off Road Evolution 3" bump stops front and rear
Off Road Evolution drag link flip kit
Currie brake line brackets
Teraflex front sway bar quick disconnects
Bilstein 5100 shocks on all 4 courners
Rubicon Express 3" rear sway bar end links
Clayton Offroad all 8 adjustable control arms

I know a lot of people have told me that I don't need to replace all 8 control arms but I have bigger plans for it in the future to where I would need those control arms.

Here's a picture of all the parts. Please excuse the messy room, I've been keeping all the parts in the spare bedroom since it takes up a nice chunk of space.
20150521_160344.jpg


I also forgot to post but I had order a set of N-Fab rock sliders.
20150619_181142.jpg
 
Are you planning on going bigger than 37s?
 
You planning on traveling to wheel this thing? What's your belly height and wheel base going to be? Any reason why you want 40s or just because kinda thing?
 
You planning on traveling to wheel this thing? What's your belly height and wheel base going to be? Any reason why you want 40s or just because kinda thing?

I daily drive this thing. I've took it to Windrock, Gulches and Uwharrie multlple times. And I haven't mesaured the belly height, its still at stock wheel base.
 
I daily drive this thing. I've took it to Windrock, Gulches and Uwharrie multlple times. And I haven't mesaured the belly height, its still at stock wheel base.

I run 37s and have done a few things to fix the JKs short comings and 37s have taken me almost anywhere I've wanted to go. I'm still on a stock wheelbase now but eventually I hope to have it around 102. Belly height will be around 21-22" then when it's at 19 3/4" now. Don't build it too big to be enjoyable is what I'm getting at or you'll be buying a tow rig and trailer. I'm at that point now where it makes more sense to buy a tow rig and a trailer.
 
I run 37s and have done a few things to fix the JKs short comings and 37s have taken me almost anywhere I've wanted to go. I'm still on a stock wheelbase now but eventually I hope to have it around 102. Belly height will be around 21-22" then when it's at 19 3/4" now. Don't build it too big to be enjoyable is what I'm getting at or you'll be buying a tow rig and trailer. I'm at that point now where it makes more sense to buy a tow rig and a trailer.

Oh I know what you mean bud. The build thread is actually about 6 months behind. I'm on 37s right now. But I plan on doing an axle swap pretty soon with lockers and the whole 9 yards. I'll run 37s for awhile unless I feel like 40s are needed, which I doubt they every will.
 
Back
Top