The Base Camp - Super Duty Ambulance Conversion

Use a trowel and spread liquid nail type glue 100% coverage. Then cut a few 2x4s to go across ceiling in several spots. Curt a few more 2x4s to use as Jack's.
20190207_185952.jpg
I glued and screwed mine. Smash it up and let it sit for a couple days.
 
Frp.. that plastic board that's used for shower panels but you have to glue it to a backing like 1/4" utility board..
That shower board that's up there now is the same as that utility board. I don't think I'll gain any dimensional stability. To keep with this stuff I'd need to figure out how to mount it in a floating configuration so that the differential expansion doesn't mess with it.
Use a trowel and spread liquid nail type glue 100% coverage. Then cut a few 2x4s to go across ceiling in several spots. Curt a few more 2x4s to use as Jack's. View attachment 287671 I glued and screwed mine. Smash it up and let it sit for a couple days.
Problem is I don't have a flat surface to glue to. Reference this pic:
44b14735d14bd80969186dcd7dc0ca72.jpg


And if it was I still need to keep access to the wires up there.
 
Doing a few random things while I ponder the ceiling...

Yesterday I took the newly built cabinets out to final weld them, then cut the blanks for the counter. These will eventually get metal skins for mobile workbenchability.
6a7a578063e75284542437faa58ef7a8.jpg


Today I fabbed up the bunk platform. Rather than a traditional futon I opted for a couch that turned into two bunks as I travel with friends.

Still need to get the mattress cut to the correct width and make a proper support rod.

6908f50a1e57fc8beceecfb7a3dac9b5.jpg
7346f8b7e5a95ae746295b0b1de013dd.jpg
31547be10e4b02d9a3b023d614fef548.jpg
 
Google rv cieling fabrics.

It could be as simple as cutting some 3/8 plywood into panel sections. Then just cover each panel with fabric and screw them to the rafters. Easily removed to access wires.
 
Alright, ceiling 2.0 is in - A.K.A stop reinventing wheels.

Headliners are fabric covered foam, so that's what I did. Utilized some drop ceiling bracketry and 1/2 inch aluminum skinned insulation. The fabric is PVC backed and washable. It's also going to be used for matress covers and some of the walls.

This iteration weighs less, is still removable, has all the fasteners hidden, and added R3.2 of insulation. Good enough.

I also changed the light wiring while I had the panels down. All the lights used to come on automatically when you opened any door. I figured that might be annoying so they're now on individual switches for the bed and counter sides.

84bca8cad6aa0548cd6b6038ab596a42.jpg

ae19eabacf7fce3816093c97d58c97f2.jpg
 
That's a good looking ceiling. Dont forget, I have some lvp flooring you can have.
We should work out a time to meet up again soon, I should be onto the floor in no time.


Trying to get the "millwork" done this weekend, or at least ready to upholster. The perimeter of the ceiling is boxed out to allow space for the existing wires to route and to make it easier to run new wires in the future if need be.
30eadbafe042895b8a0f1e9c9f905104.jpg

756d3c3ef11a9340612191f2f871aa27.jpg

Not decided yet whether they will get the same fabric as the ceiling, or an accent color of the same stuff.

And I framed out the section to cover the back side of the electrical box.

849699c97cbcc7aafbf7a6acc6ce2dca.jpg


And somehow while jibbering with the wires I've made the HVAC go kaput, so I'm trying to figure that out now.
 
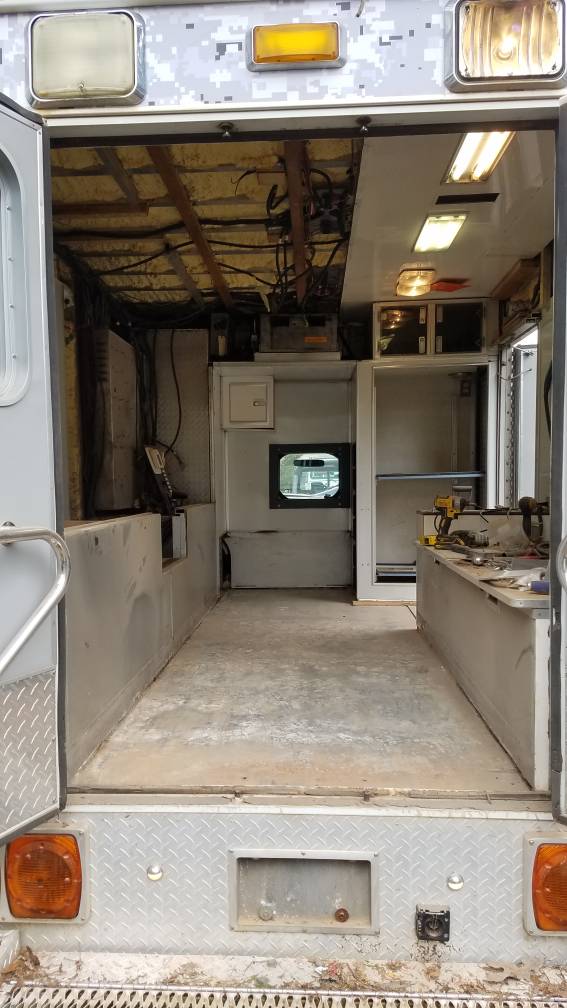
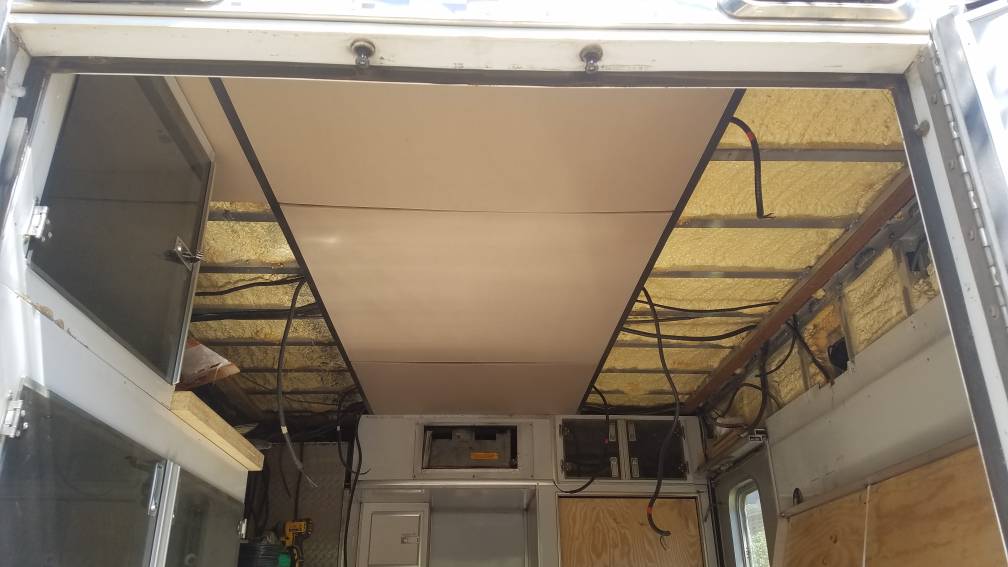
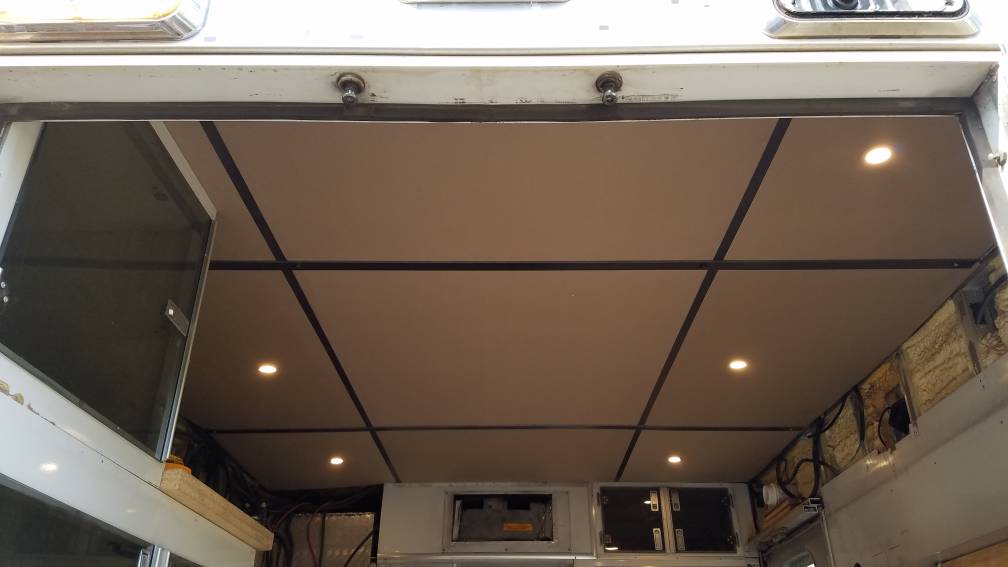
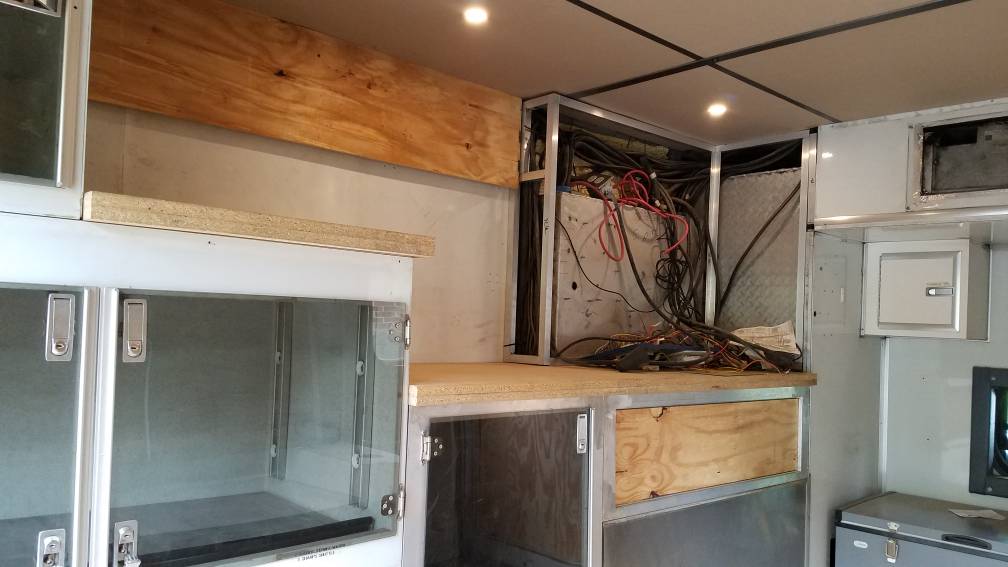
Been making progress, but mostly on boring things that don't make good pictures, unlike completely banana peeling your RV. Lots of wiring getting done.

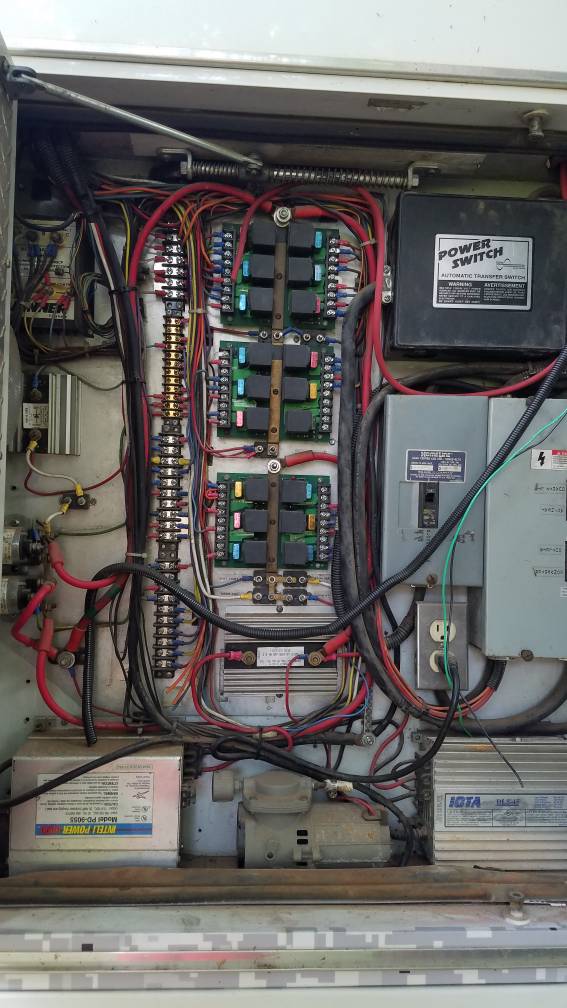
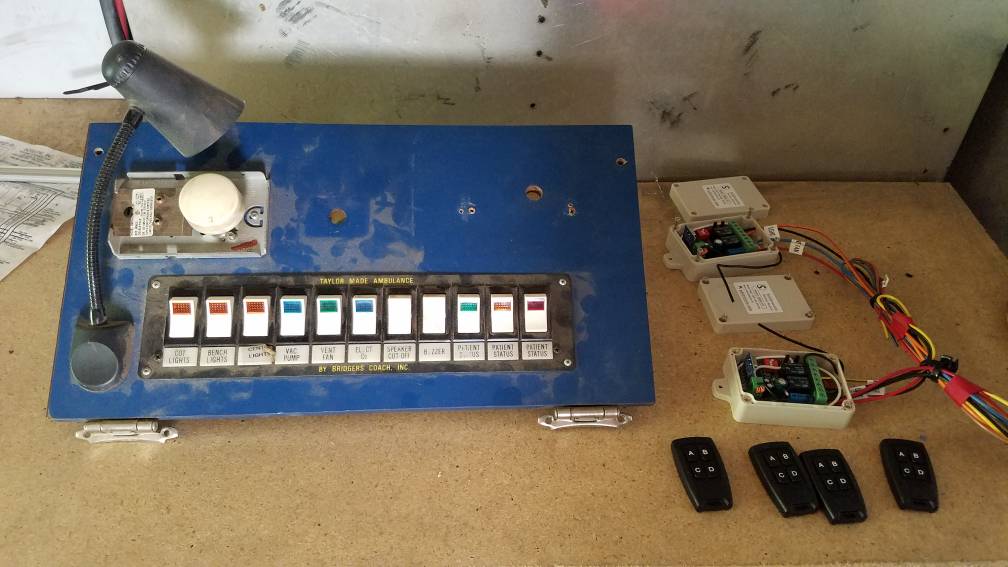
Here's the distribution box. Easy to work on and plenty of room for all my circuits.
0d995a52ed4f26772b02bacc433615ca.jpg


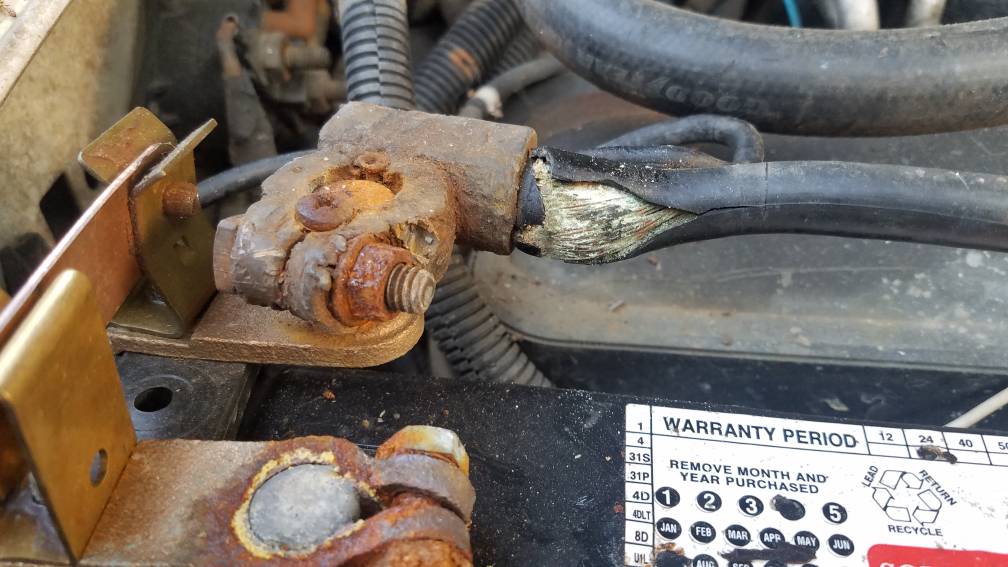
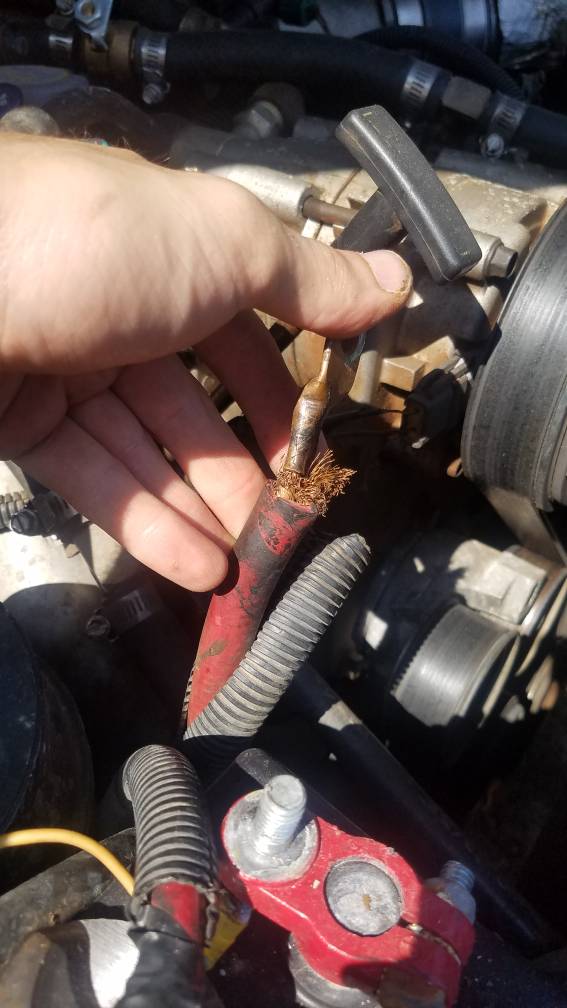
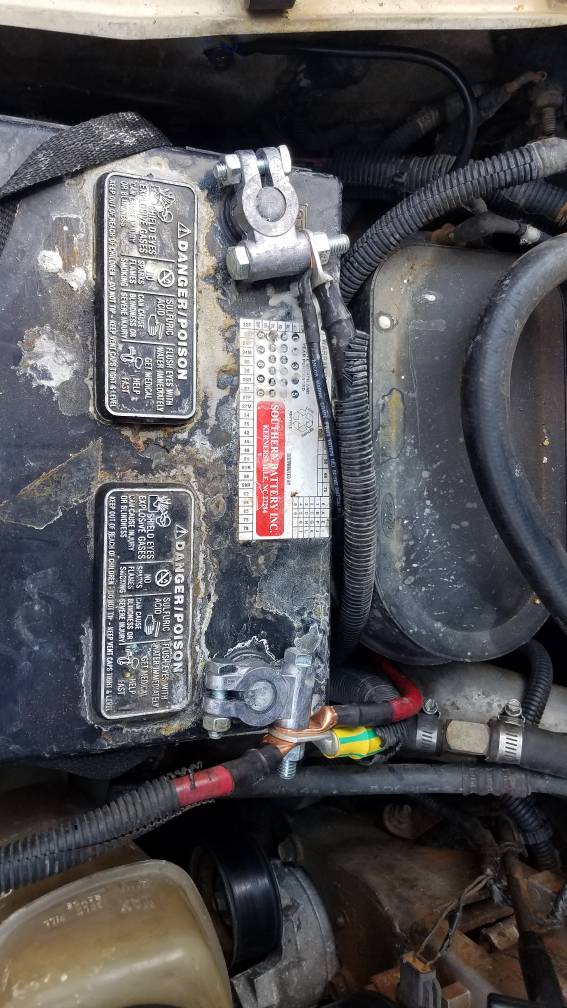
I guess one interesting thing was the battery cables. Form what I read, it seems to be common for this vintage of truck... the cables corroded from the inside out at 2 of the ends.

25a4c1e895b13b0161a67b497ff08c50.jpg


I was getting a large voltage drop to the engine when the glow plug relay closed, making it hard to start without plugging in. It seems like this may have happened on other cables previously and somebody quarter-asked the replacement.

befd7c1250a96cd6a134947ea25ae7fc.jpg


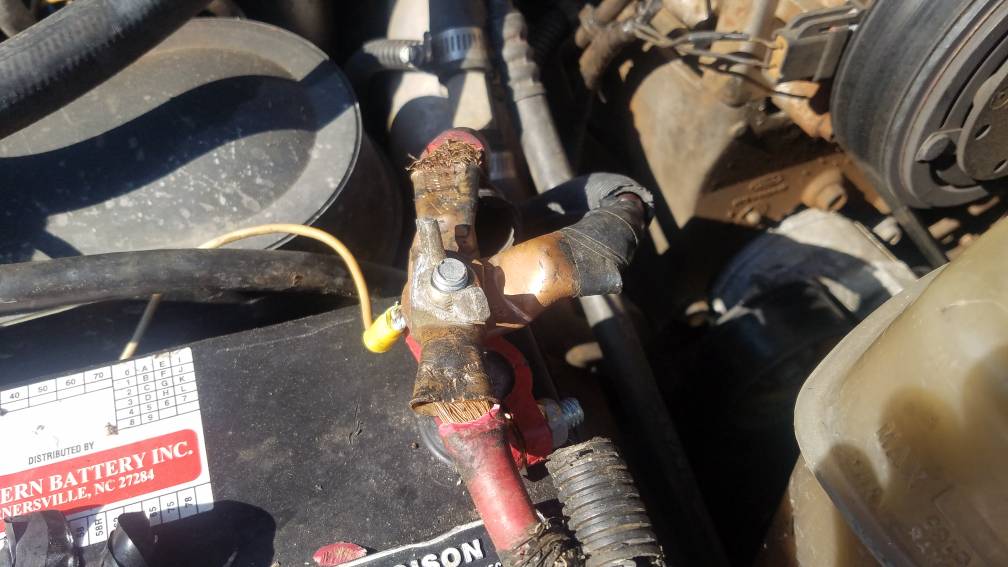
The cables are a mix of 1AWG, 1/0AWG, and 3/0AWG, but they used 4/0 terminals for every wire. On top of that, they only got about half of the conductor into the terminal on the 3/0 wire:
0c467fbb376a19e7c3486a7f7d06c242.jpg


Proper terminals, heat shrink, and new posts has it all fixed up.
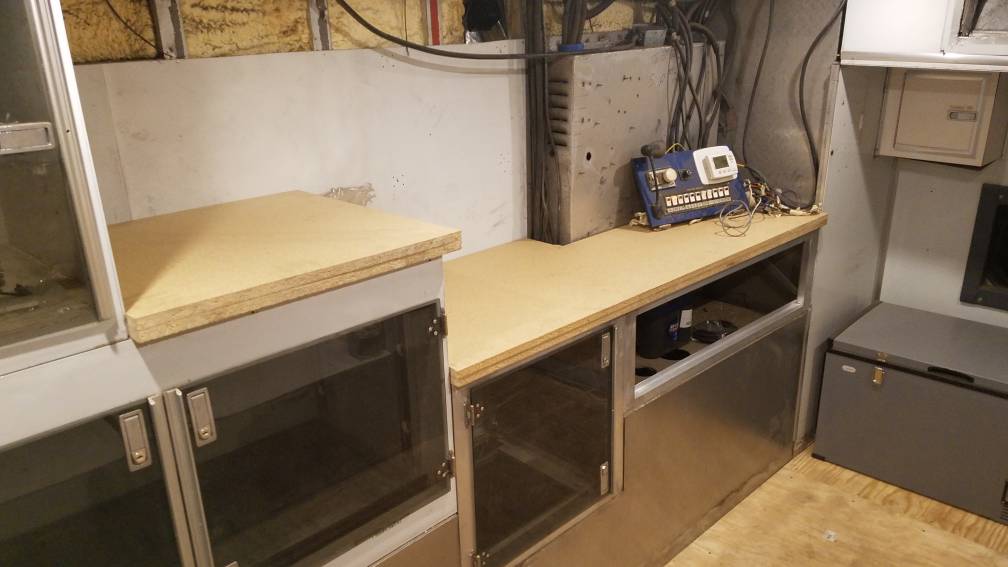
a6534becdd6bda806891069ffc3899e3.jpg
 
For the internal 12v switched circuits I decided to go remote. Despite having a ton of switches originally, I really only needed to retain 4 circuit switches in the box.

2x El-cheapo Amazon RF relay boxes and remotes covers the lights and the vent fan.
0ac8435b51c515aa32d1b6f8d1c7b052.jpg


The multiple remotes will allow me to have switches located at both doors and bunks. I'll eventually 3D print some mountable housings to bolt them down
 
No banana peeling, but you're gonna 3d print some thingies. Cool factor goes way up!

I still have flooring If/when ya need it. Just holla.
 
I bet it'll spin over way faster now!

Idk what it is with Dodge and Ford, but they've never been very good at making decent battery cables or terminals. Weird...
 
I bet it'll spin over way faster now!

Idk what it is with Dodge and Ford, but they've never been very good at making decent battery cables or terminals. Weird...

I don't think it's brand specific. In a former life as a battery tech, I used to see the same failure on just about any vehicle after they hit about their 10th birthday. I vaguely remember some 90s vintage of Cadillac sidepost cables that were a frequent encounter.
 
I was referring to trucks as that's all I usually deal with, but I've never had any issues with any GM trucks....not to say that I wouldn't, but the Dodges and Fords always had crappy terminals and cables for some reason. The Dodges always corroded really bad too. I've been very lucky that I haven't had any electrical problems with my Duramax.
 
Good thing they don't make LS motors anymore :D
 
Just because I am a geek... :D

Corrosion on the terminals is due to hydrogen gas being released from the acid in the battery. The acidic gas mixes with other things in the atmosphere under the hood and produces the corrosion you see on the terminals. Generally, if the corrosion is occurring on the negative terminal, your system is might be undercharging. If on the positive side, it is possibly overcharging. Most often it will be seen on the negative side because the battery is usually in an undercharged situation due to the battery degradation or degradation of the charging system components (e.g., cables, grounds, connections, etc.). The hydrogen gas associated with acidic gas mixture can also attack the copper in the cables. A solution is to use marine grade battery cables where the individual wires are tinned. The tinning of the copper greatly reduces the degradation of the copper cable.

Just my $0.015 worth
 
Couldn't hurt....as long as they don't get overcharged. They'll still off gas.
 
Back
Top