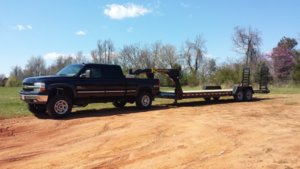
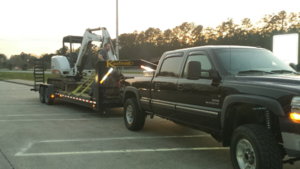
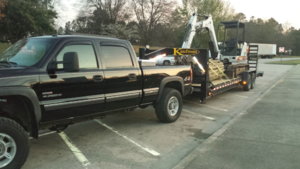
2002 2500HD - Solid Axle Tow Rig

I've been looking at different sound deadeners on Amazon. I found one called FatMat that I like and it's pretty inexpensive compared to others. I'll probably get 100-150 sq ft of it and do the doors, all of the floor in the cab, and more than likely double layer some areas near the firewall.

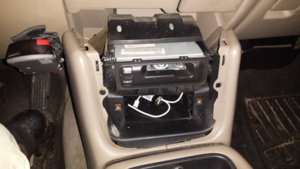
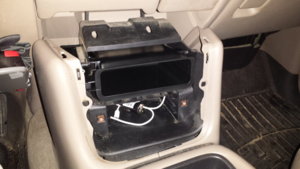
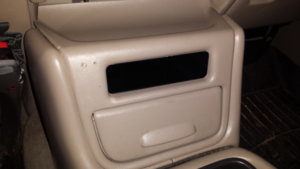
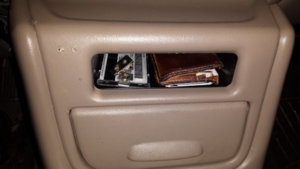
Got home from work tonight and pulled the old tape player out and replaced it with the little storage bin thing. You just flip the lid up, take out two screws, the whole face plate comes off, you slide the tape deck out, put the compartment in, and reassemble. Pretty easy!
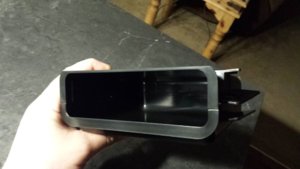
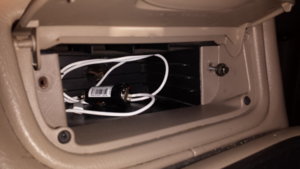
20180313_005719.jpg

20180313_011436.jpg

20180313_011531.jpg

20180313_011958.jpg

20180313_012231.jpg

20180313_012339.jpg
 
Handheld tape player and an Aux cord :D
 
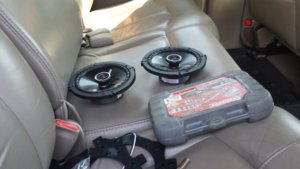
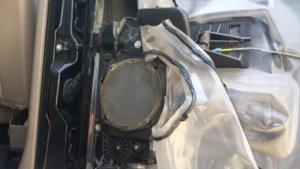
Totally forgot that I put some new speakers in this rig. You never realize how terrible the stock speakers are until you replace them. Of course, these were originals from 2002.

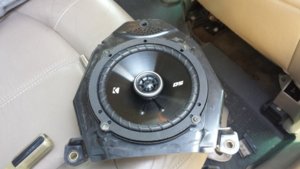
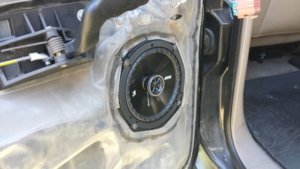
Only have pictures of the back doors. The fronts are stupid easy. They sell adapters that snap in place of the stock speakers and the wiring adapters polish it off. The rear speakers just barely fit in the stock door mounts and can even use the factory screws and holes with a little persuasion.

Kicker DS5 6.5" 2-ways. 63 a pair, I think, from Crutchfield. Great place to deal with.

Best 130 bucks I've spent lately!

20180315_140246.jpg

20180315_140237.jpg

20180315_140808.jpg

20180315_142314.jpg
 
The day has finally come...the tow rig part of this is about to happen. My new trailer is done, I'm headed out to pick it up Friday, and more than likely turning right around Saturday morning for Georgia with the new trailer in tow. Pictures to come!
 
The trip to get the trailer was uneventful and half of the ride back was too. I load up at Kaufman and pull to the end of their parking lot and give the trailer a once over. I kick the tires, bend the tabs in the 7 way to give them a better connection, and even check the torque on the lug nuts. We're all clear!

I head out to get tags and then stop over to BBQ Joe's, as suggested by the salesman. It was awesome!

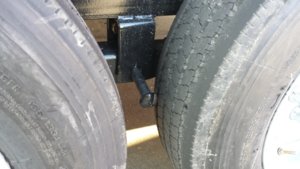
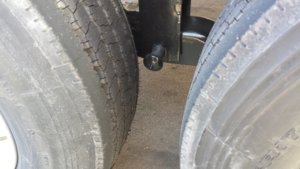
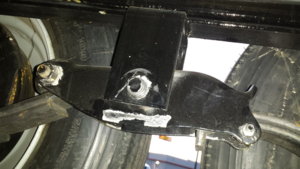
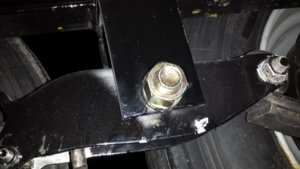
85 and 40 are rough as hell, especially with an empty trailer. I finally get on 70 and after a little while I need fuel. I swing in a gas station in Wilson's Mills and while pumping, I give the trailer a walk around, check the lights, tires, feel if the hubs are hot...and check the equalizer bolts. BOTH sides are hanging half way out.

Luckily, I'm only 4 or 5 miles from Smithfield. Duh...there's a Tractor Supply! This all initiates around 6pm. I think I pulled out of Tractor Supply at about 8:50.

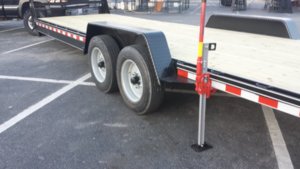
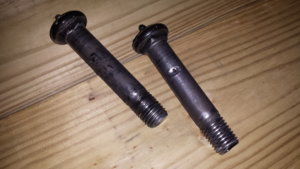
I went inside and bought a "hi-lift" style jack, went outside, and jacked the trailer up. I took out the equalizer bolt to take inside and get a nut and lock washer. The threads are about fubar and I can't even hammer the nut on with my impact. Back inside I go to get new bolts and luckily they had 7/8" bolts. Outside again only to realize the largest socket in my bag is 1.25". I go back in to buy the proper socket...half way out the door I notice it's 3/4 drive. Over to the tool aisle...again...to get an adapter.

Finally, it's all put back together and sitting on the ground again. I round everything up and take it back inside to return it. The girl working there was awesome and didn't give me shit about anything at all! On my way out for the last time I made a 180 after I remembered I wanted some 1/4" stainless bolts for the license plate! It was a helluva evening.

I made it home just after 10:30 pm. I left my house this morning (well, yesterday morning) at 7am. I left the saleman a voice mail at work and then sent him a Facebook message. A warranty claim only 4 hours after becoming the owner of my brand new trailer wasn't what I had in mind, but it could have been worse!

20180323_143522.jpg

20180323_181856.jpg

20180323_181926.jpg

20180323_191652.jpg

20180323_193415.jpg

20180323_200030.jpg

20180323_201003.jpg
 
Oh...and I thought about keeping the jack. However, the handle was a pain in the ass and you'd have to force it up and over the catch. It popped my index finger a few times and bruised the shit out of my finger nail bed. I decided I'd return it instead of throwing it in the woods after it smashed my fingers the next time I needed it and was already aggravated.

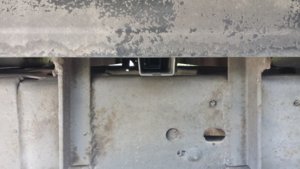
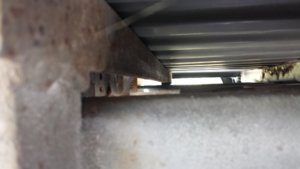
Also, Kaufman does paint the bottom of their trailers. I gave it a look-see while I was under it in the TSC parking lot :D
 
Sounds like one hell of a ride home. Unfortunately, this is the kind of stuff my salesman at ECT warned me about when he was selling me on why PJ’s cost more. Nevertheless, you seem like the kind of guy that’ll crawl all over that trailer, nose to tail, and make it better than Kaufman ever could. Definitely looks nice.
 
I don't exactly blame Kaufman for it. Those roads suck ass and I was running 70-75 unloaded. It could have happened to any trailer and since I didn't check it before I left their yard, I can't say for sure if it was something they did or didn't do.

I'm just glad that doing walk arounds is a habit!

I WOULD think they'd use a lock nut, castle nut with a cotter pin, or something like that though. However, I have no idea what was on it because I've never seen it :D
You are giving them way too much credit. It's a bolt that holds the rolling part to the not rolling part. It should not come loose in the first 20k miles, much less on the initial trip. And if both of them did it, then it's clearly a common flaw. Trailers are pretty darn simple. I would be pissed and questioning everything else they bolted on.
 
I know it's likely in the tilt vs Flat thread, but what did this trailer end up costing you?

6600 bucks, I believe. Then 350 to put a tag on it...that kinda hurt. Gotta pay the state.

@jeepinmatt I said "don't exactly...". It's absolutely their fault and I expect them to make it right. How? Not sure yet, but I'll see what they offer. It took me two and a half hours and about 100 bucks worth of shit from Tractor Supply to fix it. Everything else on the trailer that was checked got a paint mark...those didn't. We'll see on Monday.


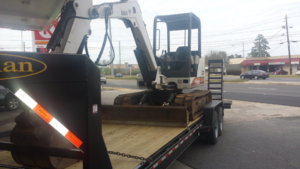
It did damn good today though. Nobody can say I'm not using it! Less than 36 hours old and it has a little over 1000 miles on it and a helluva load.

20180324_164620.jpg

It started with picking that jewel up in Waynesboro/Keysville, GA and then making a little detour over to Barnwell, SC to pick up a bundle of fence posts for a buddy of mine.

20180324_194631.jpg

20180324_194651.jpg


That's all the pictures I took...I was ready to get home. I left my house at 6, stopped and picked up a buddy of mine, drove the whole way, half way back was in the rain, and just got home about 1:15 am. I didn't have any problems with nodding off at the wheel, but damn I was ready to get home!

Truck - 7300 plus 200 lbs of gear, my buddy is 200 and I'm 235.
Trailer - certificate of origin from Kaufman says 4000 lbs (I'll weigh it one day to be sure)
Bobcat - 11,300 operating weight
Fence posts - a few hundred lbs

24k tags and I was using every bit of it!


Also, 17.5s kick ass. Absolutely shickled titless that I opted for them!
 
Last edited:
No more problems out of it on the ride yesterday.
 
looked at my bolts and they are spot welded to the center as well as the end mounts to the springs.Don't know if the nuts are as well but it did feel like there was a spot welded on them.
 
Once mine get replaced with greaseable bolts, the nuts will be tack welded on for sure. I know how loose fitting the threads usually are on those for some reason.
 
So, I determined that nuts were never installed when the trailer was built. There was no hex shaped place that was void of paint, no scratched up paint, and there was paint on them the full length of the threads.

So, they sent me some new bolts. The nuts are the pinched lock style, no way they'd ever back off. These bolts also have cotter pin holes drilled in them as they should.

After talking with the warranty department manager, we agreed on the new nuts and bolts, obviously, and enough cash to get me a spare tire and rim.
 
Well, much to my dismay, the 30% over Exergy injectors I put in only 31,000 miles ago are smoking already. So it looks like I'll be pulling the top end back apart and changing over to some 45% over SAC nozzles vs the factory VCO style. Luckily, just changing the nozzles doesn't cost nearly as much as an entire set of injectors, but there's just as much labor and disassembly involved. These things have 3 micron and then 2 micron absolute fuel filters feeding them very clean fuel...it sucks that they're crapping out again. Live and learn!

Probably around the same time I do that, I'll be replacing the front cover as well. I've been having an oil leak and I believe the cover is cracked from when I wrecked it. I'll be really glad not to have oil covering that fresh front axle all the time.

I could really go for about a 200k scratch-off winner right about now...
 
Made some major progress today....the horn quit working a few weeks ago and I popped the air bag off, scuffed up the spring loaded connector and popped it back in there. Good as new :D

Oh...the fancy, new B&W hitch will be here tomorrow afternoon! Probably going to start cutting the old crap off tomorrow before work and see if my buddy over at the body shop can get me a patch piece for the bed. Whoever made this booty fab gooseneck hitch mounted it about 3" too far back and cut right through one of the bed crossmembers, for lack of a better word. So I'll get a piece to fix all that, weld it up, shoot some spray paint on it, and then drill holes just big enough for the hitch to fit through. It'll look much more better.

I'll probably start the tear down for injectors next weekend.
Go ahead and peel the paint off that B&W hitch and rattle can it. It will look better in 2 years if you do.
 
It's that new time release paint...takes it a while to start flaking off :D
 
I don't get it...they have a massive facility in Kansas, it's made in America, and they specifically say they use only American made steel that comes out of Illinois....but they can't sandblast their shit before they paint it or deburr the machined parts. The deburring is a particular peeve of mine, being a machinist and what not.

Updates to follow soon with pictures. I'm getting there!
 
I'll go ahead and post some pics. I'll probably get it finished up on Friday.


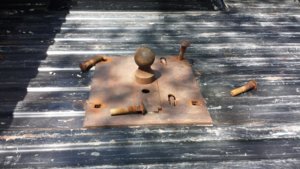
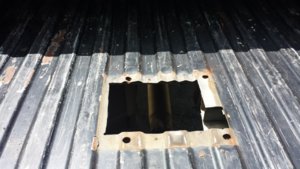
Check out this piece of shit! They mounted it directly over the center line of the axle like a dumbass and cut right through that bed crossmember. That rear piece of angle is also bent. Sweet, right?
20180416_133540.jpg

20180416_133534.jpg


Now you can see that they sandwiched the corrugated bed floor between the hitch frame and ball plate. You could feel the hitch sway/buck back and forth when it was loaded heavy.

20180416_133551.jpg

20180416_135422.jpg


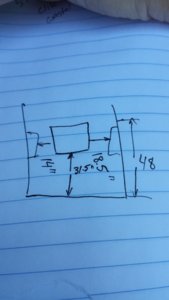
Here's some measurement I took to cover that ginormous hole that was unnecessarily hack in to my poor truck bed. I cut it far enough forward so the 4" hole I have to cut wouldn't be through a weld seam.

20180417_124802.jpg

20180417_132940.jpg

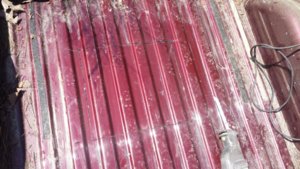
My buddy over at the body shop had a GM short bed out back and let me cut a chunk of floor out for free fifty free. Free 99. Free dollars and free cents. It didn't cost anything. Get it? :D

Next, gotta cut all that old frame work off, grind it smooth, patch the bed floor, cut the heat sheild under the bed, and mount the new hitch. A lot of stuff to do!
 
Back
Top