Accidentally building an LJ

A rear shaft from Oliver’s made its way between the Atlas and the 14 bolt around this point. 1350 on both ends with a cv on the t-case side And their heavy tube option. Once the brakes were bled and the rear of the body wiring harness was back in place, the fuel tank and skid went in and a gas can got poured in. It fired right up and everything seemed good to go.

It successfully made it to the gas station down the road to get filled up. I drove back past the house and through town to get a few miles on it.

As I turned around to head home (I’m only 4ish miles away), the engine stumbled and starting running super rough. Then it acted like it ran out of fuel. No pressure at all on the fuel rail and I couldn’t hear the pump over the sound of traffic going by.

After deciding I wasn’t gonna be fixing it on the side of the road, it ended up on a roll back to get home. And I got a nice $70 tow bill.

Once I had it back in the driveway, I could hear the pump cycle but still had no pressure on the rail so I dropped the very full fuel tank and the 1/4” thick fuel skid. Popped the top Off it the sending unit to find a huge hole in the line between the pump and the regulator on top of the tank. All it was doing was swirling fuel inside the tank. One cheap Advance Auto sending unit later and it was back up and going.
IMG_6145.jpeg
IMG_6146.jpeg
IMG_6147.jpeg
IMG_6148.jpeg
 
After it got the fuel pump replaced, it’s mostly just been getting driven again. Even with an empty front housing and 3” of uptravel up front, it goes down the road pretty nicely. My daughters both love riding in it and my wife tolerates it so I’ll call that a win. It hauls mountain bikes around pretty well too.

I had a leak from my pinion seal and found out that Yukon makes an adapter to use the newer seal in the old housing. So far so good on that one. I’ve also got the newer style hub seals on this axle which are a direct swap and much better than the old style.

With my wife and kids out of school for the summer and since we are still living in the big 5th wheel, we hit the road for the summer break. We went to Holden Beach with my wife’s family and then headed for Texas. We ended up flying to California to go to Disney and then back to Texas. After grabbing the truck and camper, we dropped the hammer towards Colorado. We spent a couple weeks in and around Montrose and about a week and a half near Colorado Springs. Super fun time and we’re planning on going back with either the LJ or my wife’s Bronco to explore some places my Ram 3500 wouldn’t fit.
IMG_6153.jpeg
IMG_6172.jpeg
IMG_6177.jpeg
70560308136__5C0F2B77-03C5-44F0-AF44-B0F7FB47C530.jpeg
IMG_6434.jpeg
IMG_6436.jpeg
IMG_6502.jpeg
IMG_6514.jpeg
IMG_6532.jpeg
IMG_6525.jpeg
IMG_6571.jpeg
 
After getting back to NC, it was time to get the break-in oil out of the 14 bolt and swap one of the hub seals (I had done one that was leaking in the TJ but not the other). New style seal on the hub and 4 quarts of Redline Heavy Shockproof gear oil and it was back in business.

At that point, it pretty much just got driven again. I bought a spiderweb shade and a rain cover and left the top/doors off for the rest of the summer and into the beginning of fall. I also threw on a Brennan’s Garage radiused fairlead at some point. Very nice piece.

I got sick of the turndown off of the flowmaster underneath the jeep so I bought a magnaflow muffler and some stainless tubing and v bands. The muffler went on in pretty much the stock location and after some swoopiness underneath, the fancy piecut tip landed in generally the stock spot beside the fuel tank skid. It’s WAY nicer to drive now. Especially with the 5.38 gear and no overdrive.

I also finally painted the hood and cowl to get it closer to all being one color. It’s just rattlecanned but I spent some time cleaning and prepping so it didn’t turn out too bad. The hood could stand to be wet sanded from a few runs but that’ll also take care of all the scratches from my in-law‘s stupid chickens jumping on it and sliding off.

IMG_6586.jpeg
IMG_6587.jpeg
IMG_6588.jpeg
IMG_6599.jpeg
IMG_6603.jpeg
IMG_6681.jpeg
IMG_6682.jpeg
IMG_6702.jpeg
IMG_6703.jpeg
 
This is awesome! Love the jeep! LJ is on my short list of wants.
 
Did the stock TJ tailpipe fit perfectly over the LJ/4-link uppers? :smokin: if so.... lol
 
Since I’m always looking for a good deal on parts for this thing, I jumped on the huge Nitro sale that happened over the summer. I bought 4 of the 300m super joints for the front 60 through Summit right after the sale started and a bunch of maintenance parts from Just Differentials a little later. I guess I got lucky on what I ordered because all of it actually showed up.

I installed all of the parts to make the A/C work except for a new evaporator under the dash. And then found a leak in the evaporator. The ‘98 TJ already had the compressor bracket on the engine and the plugs in the harness so it was pretty simple to get all the parts in.

About this same time, my multiple times a day marketplace searching delivered a win. I found a full carpet set for an LJ for $100. It looks brand new and knocked a good bit of noise and heat out of the interior. It may or may not stay long term as I‘m sure it’ll get wrecked and nasty once this thing is usable and on a trail. It’ll stay for now though.

I had welded out the Motobilt cage stanchions at some point and installed them to start figuring out how I wanted to lay out the roll cage. I’m glad I did as I don’t care for them sticking Into the door opening. They’re back out of the Jeep and I’ll shoot the a-pillar down tubes through the corners of the dash the way they should be.

IMG_6628.jpeg
IMG_6629.jpeg
IMG_6955.jpeg
IMG_6954.jpeg
IMG_6933.jpeg
 
Did the stock TJ tailpipe fit perfectly over the LJ/4-link uppers? :smokin: if so.... lol
I wish. The TJ had what was probably an over the axle dump at one point. With the work that it had in the back it was more of an “aimed at the rear truss” style exhaust. I pretty much built a cat back exhaust out of a bunch of summit and Amazon pieces. I did manage to route it under the factory heat shielding on the LJ tub though.
 
Finally!! Seriously, I'm really glad you posted this I'll definitely be using it for inspiration if I can ever really get started on mine.

Bad ass man thanks for sharing!

This is awesome! Love the jeep! LJ is on my short list of wants.

Well Done 👊

Dude. Amazing work.
The details are remarkable. Cheers!

Thanks ya’ll. Im super happy with how it’s been turning out. I don’t have too much more to post before it’s caught up to the present. Next thing on the list for it is fixing the front suspension/steering. Links should be good but some stuff needs to be moved around to be able to use the uptravel that the ORI’s are set up for. I’ve got some ideas that aren’t the most common way to do things up there that’ll hopefully work out. Biggest one being I’m gonna attempt to use a forward swinging steering box mounted between the grille and shock tower so I can push the front axle out a bit more than it currently is. Picking up a couple boxes tomorrow to start figuring that out.
 
Couple of random pics and I’ll jump back into build stuff.

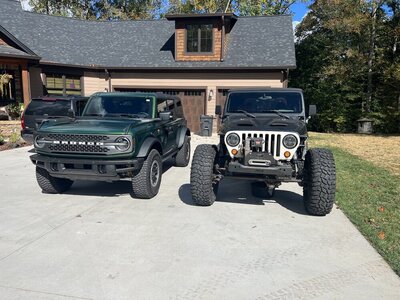
I’m pretty happy with the ride height. I have no clue how much ”lift“ it has but it sits about as low as it can and still be functional. On 40” tires and the full top on it’s only a few inches taller than my wife’s Bronco with 315’s.
IMG_6977.jpeg

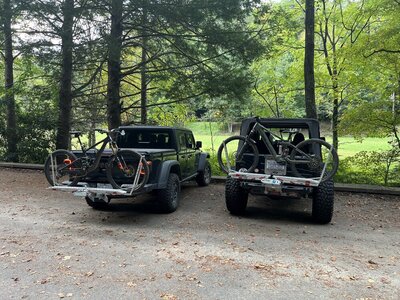
It’s been doing well at bike hauling duty within a few hours of the house. I’m pretty sure this pic is at the bottom of Kitsuma in Old Fort. The old Swag Offroad hitch bumper is pretty nice.IMG_6895.jpeg

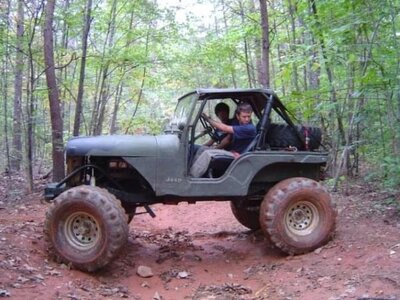
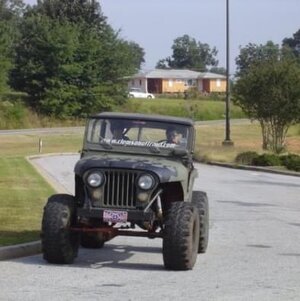
My old CJ5 that was my first car. 360/T18/D20/D44’s/38”TSL’s. It was a pile of junk but it worked pretty well in the woods. It was my only vehicle and DD for a few years.
IMG_6798.jpegIMG_6797.jpeg
 
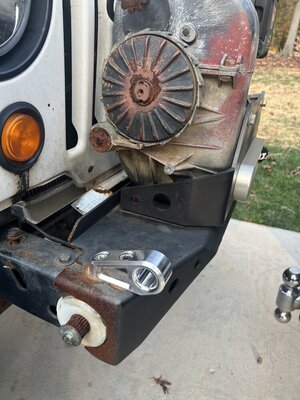
Got some super cool machined tow points from a dude in Utah. They bolt on to the factory spots on a TJ and are nicely radiused for using soft shackles.
IMG_7001.jpeg

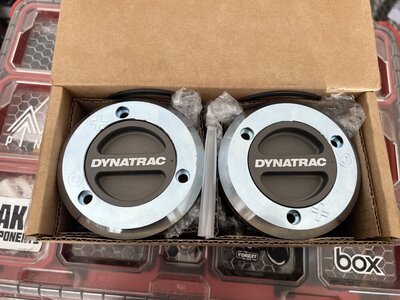
Snagged a set of Dynatrac hubs off of eBay for the front end. The only thing I should be missing for the front axle now is inner shafts and maybe some seals. I‘ve been waiting to order the shafts until I can actually measure for them. The front end is a Currie Rockjock hi-pinion 60 that is supposed to be 78/79 Ford width for the inner shafts. Its got some flavor of aftermarket C’s on it and Chevy knuckle/outers. I want to confirm the shaft lengths before I spend the money on them. My plan is to go with Dutchman inners to go along with the outers I already bought. I’ll most likely order 2 of each to have a full set of matching spares ready to go.
IMG_7007.jpeg

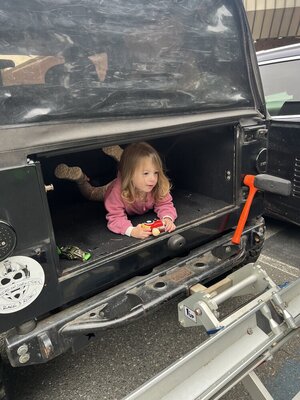
The rear cargo area makes for a good parade watching spot if you’re 3 as well. This kid gets mad at me if we drive my truck to go somewhere instead of the Jeep.
IMG_7015.jpeg
 
’ll shoot the a-pillar down tubes through the corners of the dash the way they should be
This. There's room behind the A/C ductwork for a tube, and you can go straight down to the floor from there. Little kick-out bend at the bottom doesn't hurt, but maybe not necessary. You can even add some plates to tie in at the dash/tub interface (the 3 bolts each side at the door jamb) if you want. It looks better, and you can pull the dash without having to remove the cage.
 
This. There's room behind the A/C ductwork for a tube, and you can go straight down to the floor from there. Little kick-out bend at the bottom doesn't hurt, but maybe not necessary. You can even add some plates to tie in at the dash/tub interface (the 3 bolts each side at the door jamb) if you want. It looks better, and you can pull the dash without having to remove the cage.
Exactly. The cage in the TJ body was done that way but they shot the tube through the wrong spot and used dryer ducting to hook the vents back up. I’d have been pretty pissed at myself if I had built a cage with the stanchions before discovering the leak in the A/C evaporator. Replacing that is probably going to happen at the same time the cage bars go in. You wouldn’t think that losing 1.5” or so in the front edge of the door opening is a big deal but I caught my feet on it every single time I got out.
 
I can push the front axle out a bit more than it currently is.
Not sure what you're working with right now, but if you put the track bar up tight to the stock pitman arm, you can move the axle forward about 4" (maybe more??) from the stock location. I've seen people notch the passenger side frame rail to get more uptravel, but the biggest interference issue with the 4.0 is the axle tube/diff and the crank pulley.
 
Engaged hover mode to rotate the tires and took some pics while they were off. The Fox bumps are in place at this point instead of the blown up swayaway’s. You can see a little more of the exhaust in one of these too. Everything is TIGHT around the rear axle with coils, shocks, and bump stops all tucked behind an h2 wheel. I’ve got a TK1 sway bar to cram in there too before too long.
IMG_7033.jpeg
IMG_7032.jpeg
IMG_7031.jpeg
IMG_7030.jpeg
 
Not sure what you're working with right now, but if you put the track bar up tight to the stock pitman arm, you can move the axle forward about 4" (maybe more??) from the stock location. I've seen people notch the passenger side frame rail to get more uptravel, but the biggest interference issue with the 4.0 is the axle tube/diff and the crank pulley.
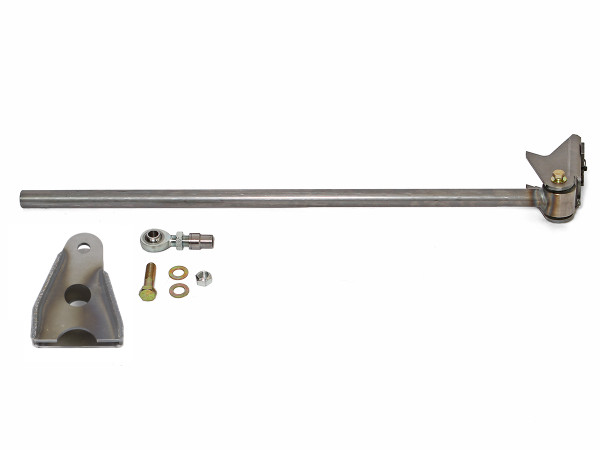
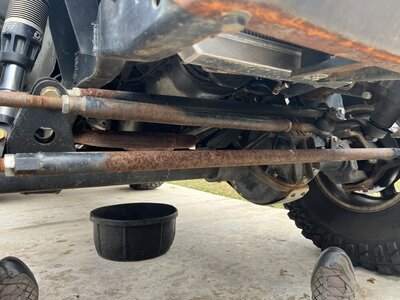
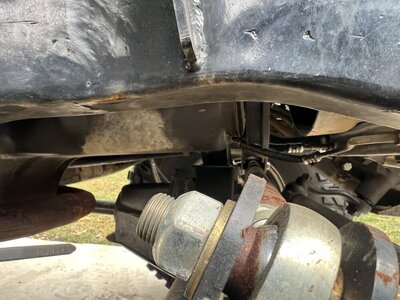
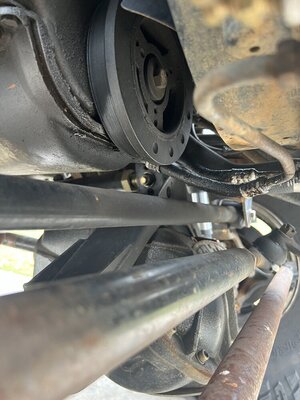
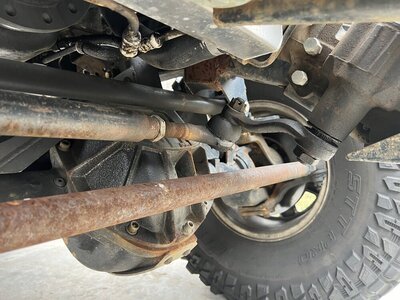
Biggest thing that’s messing with it right now is the track bar. I’m pretty sure whoever stuck the front together used a Genright universal kit like this more or less as it came out of the box.

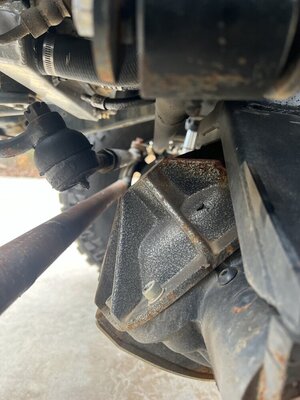
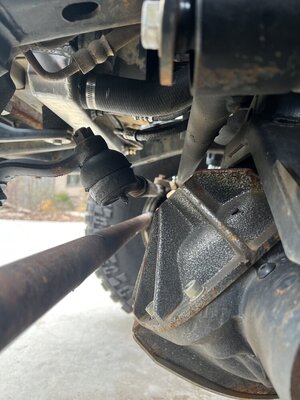
I know Genright makes it work but their stuff seems to sit roughly 4” taller than mine does. The axle side bracket is like 8” tall off the tube and the frame side one smashes into the upper link truss on the axle. The bar itself doesn’t get into the balancer (it’s close though) but that’s mostly because everything else hits first 😂.

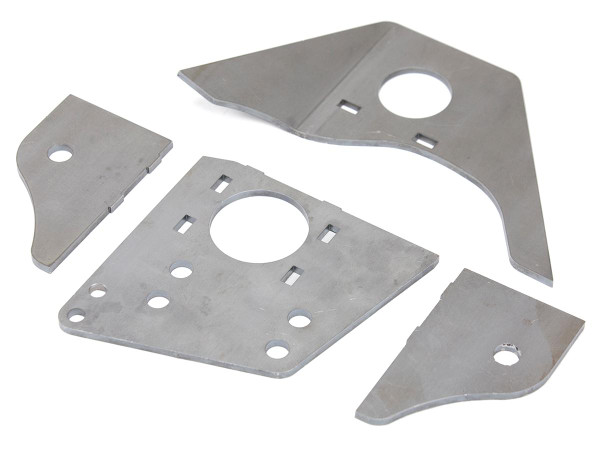
The shape of the Rockjock chunk makes everything interesting too. Because of the “laid back” cover, there’s stuff in places that it wouldn’t normally be. It’s also a pain to work on because the truss that’s on it now has to come off in order to pull the diff cover. And the upper link has to come off to take the truss off. The nice Genright link mount I bought for it will open up a ton of room around the sides of the chunk but is partially mounted to the cover so the upper link still has to come off to get inside the housing. Hopefully I won’t need to get in there very often.


Genright does make some super nice stuff. I just wish they weren’t quite so proud of it.
 
Since I currently don’t have a great place to work on this thing (FIL rearranged the garage to “work on his Camaro” that hasn’t been touched in 3 or 4 years), I’ve shifted to smaller projects on this pile.

I didn’t really want to rattlecan the doors since I would like to eventually repaint this thing a different color, I decided I’d try to vinyl wrap them. A couple of YouTube videos and an Amazon order later, I went for it. I’m super happy with how it turned out and that when the Jeep body is clean it matches really well. I bought enough vinyl to do 3 doors in case I messed it up so now I’m going to use what’s left to attempt to wrap the grille too. I just need to get motivated to pull the grille off the Jeep and get it inside.
IMG_7041.jpeg
IMG_7039.jpeg
IMG_7040.jpeg
IMG_7042.jpeg
 
Next up I decided it needed some inner fender wells in the front to keep some of the spray out and let me bolt down the fuse box/pdm instead of having it zip tied to the grille support rod. I dug the smashed up front fenders from the LJ out of my pile of random Jeep sheet metal, pounded them straightish with a sledge, and then attacked them with a sawzall and an air body saw. They’re notched around the big front shock towers and pretty much all of the “fender“ is cut off Leaving the rear corner piece and the inner. They’re a little rough but they’ll work until I can do something cleaner up there.
IMG_7056.jpeg
IMG_7180.jpeg
 
This more or less brings it up to its current state. I added an Auxbeam switch panel to run a couple lights (windshield corners and an amber fog bar that are visible in the last post).

The Swag bumper with its hitch works great for my deer hoist. That’s my brother in law cleaning his in the pic.
IMG_7176.jpeg


I‘ve got a TK1 Racing “rock crawler” sway bar to fit in the rear since the new 4-link is way more active than the one in the TJ. Between the soft, flexy rear and the locker in the back, it rolls around a ton in slow corners. I’m pretty sure it’s using all the shock travel in the back turning left from a stop. I‘m running out of room in the back so I need to put a bend in the arms to squeeze them between the coils and the tires. I’ve talked to Tony at TK1 about how to bend these beefy arms and now just need to lay them out and do it.
IMG_7153.jpeg

IMG_7152.jpeg
 
I‘ve also got a set of Motobilt blank corner armor for the back. I’ve messed with it a few times to try to figure out a wheel opening shape I like but haven’t settled on one yet.

Remember the cheap Advance Auto fuel pump I put in after the first unsuccessful test drive? The check valve in the regulator failed so I get to drop the tank and replace the fuel pump. Again. At least this time it runs if you cycle the key to build up fuel pressure. Fuel light turned on the last time I drove it so there’s probably only 3-4 gallons in the tank right now. I ordered a new fuel pump today and confirmed I can return the bad one. New one is supposed to show up Tuesday so I’ll probably drop the tank in the next few days.
 
I know Genright makes it work but their stuff seems to sit roughly 4” taller than mine does. The axle side bracket is like 8” tall off the tube and the frame side one smashes into the upper link truss on the axle. The bar itself doesn’t get into the balancer (it’s close though) but that’s mostly because everything else hits first 😂.

Not sure how legible this is, but the track bar is well ahead of the balancer pulley. The centerline of the axle tube is pretty much right under it. D44, so different... but maybe helpful.

1705606073436.png
 
Not sure how legible this is, but the track bar is well ahead of the balancer pulley. The centerline of the axle tube is pretty much right under it. D44, so different... but maybe helpful.

View attachment 410898
It’s a hard spot to get a pic of. I tried for the same angle so you can get a decent comparison. It looks like there’s a ton more room around your 44.
IMG_7217.jpegIMG_7218.jpegIMG_7219.jpegIMG_7220.jpeg
IMG_7221.jpeg
IMG_7222.jpeg
 
Back
Top