Budget YJ Build

Dawnpatrol

Jesse Higgins
Joined
Apr 25, 2016
Location
Raleigh
I figured since I had some down time this weekend I would start a build thread. That way it can help me remember what all modifications I make, as well as help others learn from any of my mistakes. This little YJ has been a ton of fun, and has all been on a pretty reasonable budget for what it is. I'll start off below with the highlight reel of when I got the jeep to where it is today. Then go over winter changes I have planed.

20160302_131857.jpg


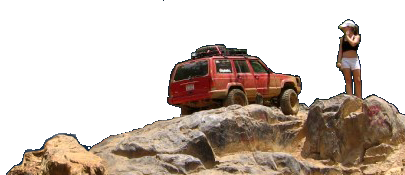
This 95 YJ was my first 4wd purchase back in 2016. I was looking for a vehicle to have as a backup and a fun weekend driver. The YJ had the 4.0, AX15, 33" duratracs and a cheap RC lift. The previous owner did swap in a 8.8 from ECGS with 4.10 gears, however it was open open. That first fall, I proceeded to add a Aussie lunchbox locker up front and a grizzly auto locker in the rear, as well as a SYE and rocker gaurds. As the picture from Uwharrie shows, it has just a little more flex than a shopping cart.

DSC_0805.jpg


After wheeling it a Gulches and putting a pin hole leak in the 33's that first winter, I decided it was time for 35's and a better suspension. I had started collecting waggy springs to get a better ride and flex. I would typically buy the whole front D44 axle with springs and then resale the axle to get the springs at no cost. The waggy spring swap required the gas tank dimple modification as well as doing some body work to clear the tires for the stretch. At the time, I also added onto the front of the factory cage, and went to a flat belly (flat at first, then had to drop it an inch).

MVIMG_20180202_155722.jpg


I wheeled it like this for a couple years and was always impressed by what a YJ on 35's would do. I wheeled it like this at all the typcial parks: Gulches, Windrock, Harlan, Rausch Creek, The Flats, ect, and never had any major problems with it. The worst break at the time was when the front factory shackle mount wanted to let go at Rausch Creek. Luckily @Buddy Holly was there to glue it back together, and we kept on wheeling the rest of the weekend.

MVIMG_20180601_130402.jpg
 
Last edited:
The next major change to the YJ came in 2020 when I tried to take it up the waterfall at Harlan. I got about halfway up, and then got the cage wrapped around the tree on the left.

20200717_164145.jpg


IMG_20200718_210650.jpg


This basically destroyed the factory cage and tweaked the body a little. Lesson learned here was that the cage definitely needs to be tied to the frame if you want to use it more than once. So I brought it home and started collecting DOM and more parts.

I figured since I was going spend some down time to fabricate a new cage, I would make some other changes that i wanted. With 4.10's and 35's I always struggled with stalling in the rock gardens. Instead of spending money on gears, I decided to upgrade my transfer case gearing instead. The thought behind this was that I could always find a junkyard D30 with factory 4.10 for cheap, and one day I might get rid of the D30 all together. So I got a smokin deal on a bronco D20 (thanks @WARRIORWELDING), upgraded the outputs, and put a NFW eco-box in front of it. So now I have a 1:1, 1:2.34, 1:2.73, and 1:6.39. I call it my budget 3 and a half speed case. And it only changed my driveline lengths by about an inch. I swapped out the dash to a flat aluminum dash for better visibility with the cage, and added a third center mount seat that my son's car seat will attached to.

PXL_20210120_113628205.jpg


PXL_20210301_110543799.jpg


PXL_20210527_221824685.jpg
 
Last edited:
I mainly wheeled it like this at Uwharrie, and only a handful of out of state trips due to my son and daughter coming along over the past few years. When my son was 2 I started taking him to Uwharrie with me and he as loved wheeling.

20220430_092913.jpg


This past summer I took the jeep to GER and had a blast. I made it up cripple creek with only having to winch a couple times, however my leaf springs did not fair so well by the end of the trail. We were able to re-invert the shackle and use a large ratchet strap to keep the spring compressed. I actually wheeled it another day with the ratchet strap on, and it didn't do too bad.

20220812_154039.jpg


So that brings me to my winter plans. I'm tired of replacing the waggy springs. On average I bend about 1 a year. I know that part of this is due to my long shackles and the fact that I can't get the spring clamps to stay in one place to save my life. So my plan is to swap out to XJ springs since they will be easier and cheaper to source. I plan to do a shackle reversal in the front to help with hanging up the front shackle. Even with the longer XJ springs, and the shackle reversal, I plan to keep my wheelbase and ride height close to what it is now. I still need to figure out how to do that, but I have ordered some leaf spring suspension mounts, and figured I would build my own bumper to mount the leaf springs to and move the mounts were I needed them to get the final placement I want. I have a set of stock XJ springs, and some unknown lift Rusty's springs to work with. Teardown starts next week and I'll try and document what I come up with.
 
Last edited:
I started to do a simple cad model model of the front suspension to get an idea of different options that I could do. The front spring hanger exact sizing will likely change once I get the base part in from Barnes. But here are the different options I am playing around with. The options shown are with the springs in a flat (compressed) position

Option 1: Stock XJ leafspring with long side to the front. This is with a simple 4x2 front bumper to hang the leaf bracket from.
1669998275287.png


Option 2: Unknown Rusty's leaf springs with the long side to the front. Also with a 4x2 front bumper. Note that the smaller eye geometry is different than stock springs which may cause clearance with the bumper.
1669998439585.png


Option 3: Stock XJ leafspring with short side to the front. This is with the 4x2 front bumper "flush" with the end of the frame rails in order to push the axle back.
1669998592753.png


Option 4: Rusty's leaf springs with short side to the front. This is with the 4x2 front bumper "flush" with the end of the frame rails in order to push the axle back.

1669998750519.png


Here is an iso view of the last one to get an idea of the bumper idea.

1669998787875.png


I think I like having the axle pushed forward with the short side of the spring out front (option ). This will allow me to keep it as low as possible based on the front hanger positioning. The only downside is figuring out steering (pitman arm forward possibly) and lengthening the driveshaft (would likely have to do anyways).
 
You are going to have a HUGE increase in caster with that spring orientation
 
You are going to have a HUGE increase in caster with that spring orientation
^^ this, your pinion u joint is gonna hate life.
I didn't think about caster and pinion angle yet. Since I am burning in new spring perches, I would imagine that pinion angle would be more of a concern than the amount of change in caster as the suspension cycles. Would your suggestion be to drop the front hanger down in order to make the spring more parallel to the ground at ride height? I'll mess around in the model some more to see what I come up with.
 
You could French the rear hangers in the frame and mount the sliders in the front. That would make the spring flatter to the ground by raising the rear mount and lowering the front.
 
I'm interested in which plan you go with too.

I'm running 7 leaf waggy packs on the front of my CJ7 with two leaves removed. Cut all the factory hangers off and outboarded the springs for a full width d60 and did a 2x4 bumper and random Barnes stuff for shackles still on the front. Overall pushed the axle forward as far as possible with the stock steering box location and those wonderful offset rod ends from Barnes to get the draglink, diff, and tierod to all play nice.

I run 42's with a locker. Did one run to the ranch with this setup and quickly learned those waggy packs weren't going to live a long life. So I glued in an antiwrap bar for the front and it just flat works. Thought about a shackle reversal but don't have the room for the axle to move rearward when the suspension compresses.

Depending on axles it's going to be tough to rotate perches for a caster fix since the one by the diff is integrated into the casting. Could always rotate the knuckles, but that's beyond my tolerance for precision work and podunk flux core fab skills.

I can send you more pics of the CJ if your interested, most of them are in my build thread too though. Front antiwrap for the win with leaves.
 
Would your suggestion be to drop the front hanger down in order to make the spring more parallel to the ground at ride height? I'll mess around in the model some more to see what I come up with.
Yes, but It might work ok as you have modeled it if you are correcting the caster with the perches on the axle.
 
I'm interested in which plan you go with too.

I'm running 7 leaf waggy packs on the front of my CJ7 with two leaves removed. Cut all the factory hangers off and outboarded the springs for a full width d60 and did a 2x4 bumper and random Barnes stuff for shackles still on the front. Overall pushed the axle forward as far as possible with the stock steering box location and those wonderful offset rod ends from Barnes to get the draglink, diff, and tierod to all play nice.

I run 42's with a locker. Did one run to the ranch with this setup and quickly learned those waggy packs weren't going to live a long life. So I glued in an antiwrap bar for the front and it just flat works. Thought about a shackle reversal but don't have the room for the axle to move rearward when the suspension compresses.

Depending on axles it's going to be tough to rotate perches for a caster fix since the one by the diff is integrated into the casting. Could always rotate the knuckles, but that's beyond my tolerance for precision work and podunk flux core fab skills.

I can send you more pics of the CJ if your interested, most of them are in my build thread too though. Front antiwrap for the win with leaves.
I guess my situation is a little different since I'm still running the simple HP30 (I'm only on 35's). With the HP30, the spring perches are not integral to the pumpkin, therefore I can change the caster pretty easily. I just hope that I don't have issues with the pinion angle if the caster is set back. I'll keep the antiwrap bar in mind if I start to run into problems in the future.

I'm not super familiar the Chevy dana 60, but I wonder if it would be possible for you to grind down the spring perch in order to weld on a large diameter spring perch? Kinda like Barnes has for the SD60 05 and Up Super Duty Dana 60 Leaf Spring Conversion Kit
 
I'm still waiting on some parts and brackets from Barnes. I also need to find some 4x2 tubing. So in the meantime I decided to play around with the CAD some more. I know that this model is only an approximation and that the real world stack up of everything will likely be different, however its fun and I figured it would get me in the ballpark.

Since I have a HP30, I'm able to correct the caster angle with the weld on spring perches. I got a rough measurement of the relation of pinon angle to caster by measuring off the front of the pumpkin, where the flats are at the edge, and the top of the ball joint. I figured this was close enough for an approximation.

This shows the Rusty's XJ springs at an estimated ride height (4in from flat which is just a guess) with 6 degrees of caster. The pinion is point up at 7 degrees. And it has a 5" shackle.

1670292063942.png


Just for fun, this is the same setup with the spring flat (i.e. 4" of up travel). Caster is 2.5 degrees, and pinion is pointing up at 10.5 degrees.

1670292215703.png


For fun I also have the same setups with stock xj springs, and combinations of 4" shackle lenghts.
 
Small update on the build. I got parts in from Barnes as well as some metal to start mocking up the front suspension. Got the front bumper partially welded in and the front leaf hanger tacked into place.

As a few recommended, I'm going to give leaf spring sliders a try. More to come on that after this weekend.

20221221_213634.jpg
 
I couldn't swallow the price tag of the liquid iron slider boxes. I'm sure that they are quality products, but I wanted to give some DIY ones a try. I picked up some 1/4" plate, 3/8" thick UWHM plastic, 3/8" square rod, and had some bolts and sleeves lying around.

20221228_121627.jpg


20221229_140930.jpg


20221231_095402.jpg


20221231_095621.jpg


20221231_135027.jpg


I designed the plates to sort of key together. The inside spacing between thw two side plates is right around 3.050". Im hoping that will be plenty of clearance. The plan is to french it into the frame.
 
I couldn't swallow the price tag of the liquid iron slider boxes. I'm sure that they are quality products, but I wanted to give some DIY ones a try. I picked up some 1/4" plate, 3/8" thick UWHM plastic, 3/8" square rod, and had some bolts and sleeves lying around.

View attachment 388496

View attachment 388497

View attachment 388498

View attachment 388499

View attachment 388500

I designed the plates to sort of key together. The inside spacing between thw two side plates is right around 3.050". Im hoping that will be plenty of clearance. The plan is to french it into the frame.
Those look great!
 
I couldn't swallow the price tag of the liquid iron slider boxes. I'm sure that they are quality products, but I wanted to give some DIY ones a try. I picked up some 1/4" plate, 3/8" thick UWHM plastic, 3/8" square rod, and had some bolts and sleeves lying around.

View attachment 388496

View attachment 388497

View attachment 388498

View attachment 388499

View attachment 388500

I designed the plates to sort of key together. The inside spacing between thw two side plates is right around 3.050". Im hoping that will be plenty of clearance. The plan is to french it into the frame.


Really watching to see how these come out. It looks like you’ve done a good job so far and I may steal some ideas if that’s alright with you.
 
Glad I could help. Can't wait to see them installed
Thanks again. That cnc plasma is pretty awesome. They really offer a ton of potential for the garage fabricator.
Really watching to see how these come out. It looks like you’ve done a good job so far and I may steal some ideas if that’s alright with you.
No problem, hopefully they come out good. If not you can at least learn from my mistakes.
 
Thanks again. That cnc plasma is pretty awesome. They really offer a ton of potential for the garage fabricator.

No problem, hopefully they come out good. If not you can at least learn from my mistakes.

Always down to learn something. Please share what you like/dislike about them once everything is up and running. Would love to hear some first hand opinions of slider boxes.
 
Finally getting back on this project after taking care of some house projects. The sliders are built, and I learned a few things through the process. The side slots in the metal needed more clearance than I expected to ensure that the weight bearing of the vehicle was on the plastic pucks. I also learned that even though you try and make a drilled hole as centered as possible, there will be variation from piece to piece. Therefore the placement of the side rails needed to account for that variation so that the pucks did not bind.

Mocking it up on the frame rail, I'm thinking that I'm going to French it into the frame about 1.25".

20230125_205801.jpg


20230125_205649.jpg
 
Back
Top