Legends Class 4800 Build - “Tinkerita”

Ok, the biggest update to date!

As noted, there is a lot going on with the car right now. When we got back to NC, there was no rush on getting the car unloaded; we knew there was a lot of work to be done in order to get it ready again. Knowing we weren't going to race Nationals, all of our focus has been on improvements, fixing the knowns, and preparing for KOH24. We've had a couple of work weekends with the car now and have solutions for each.

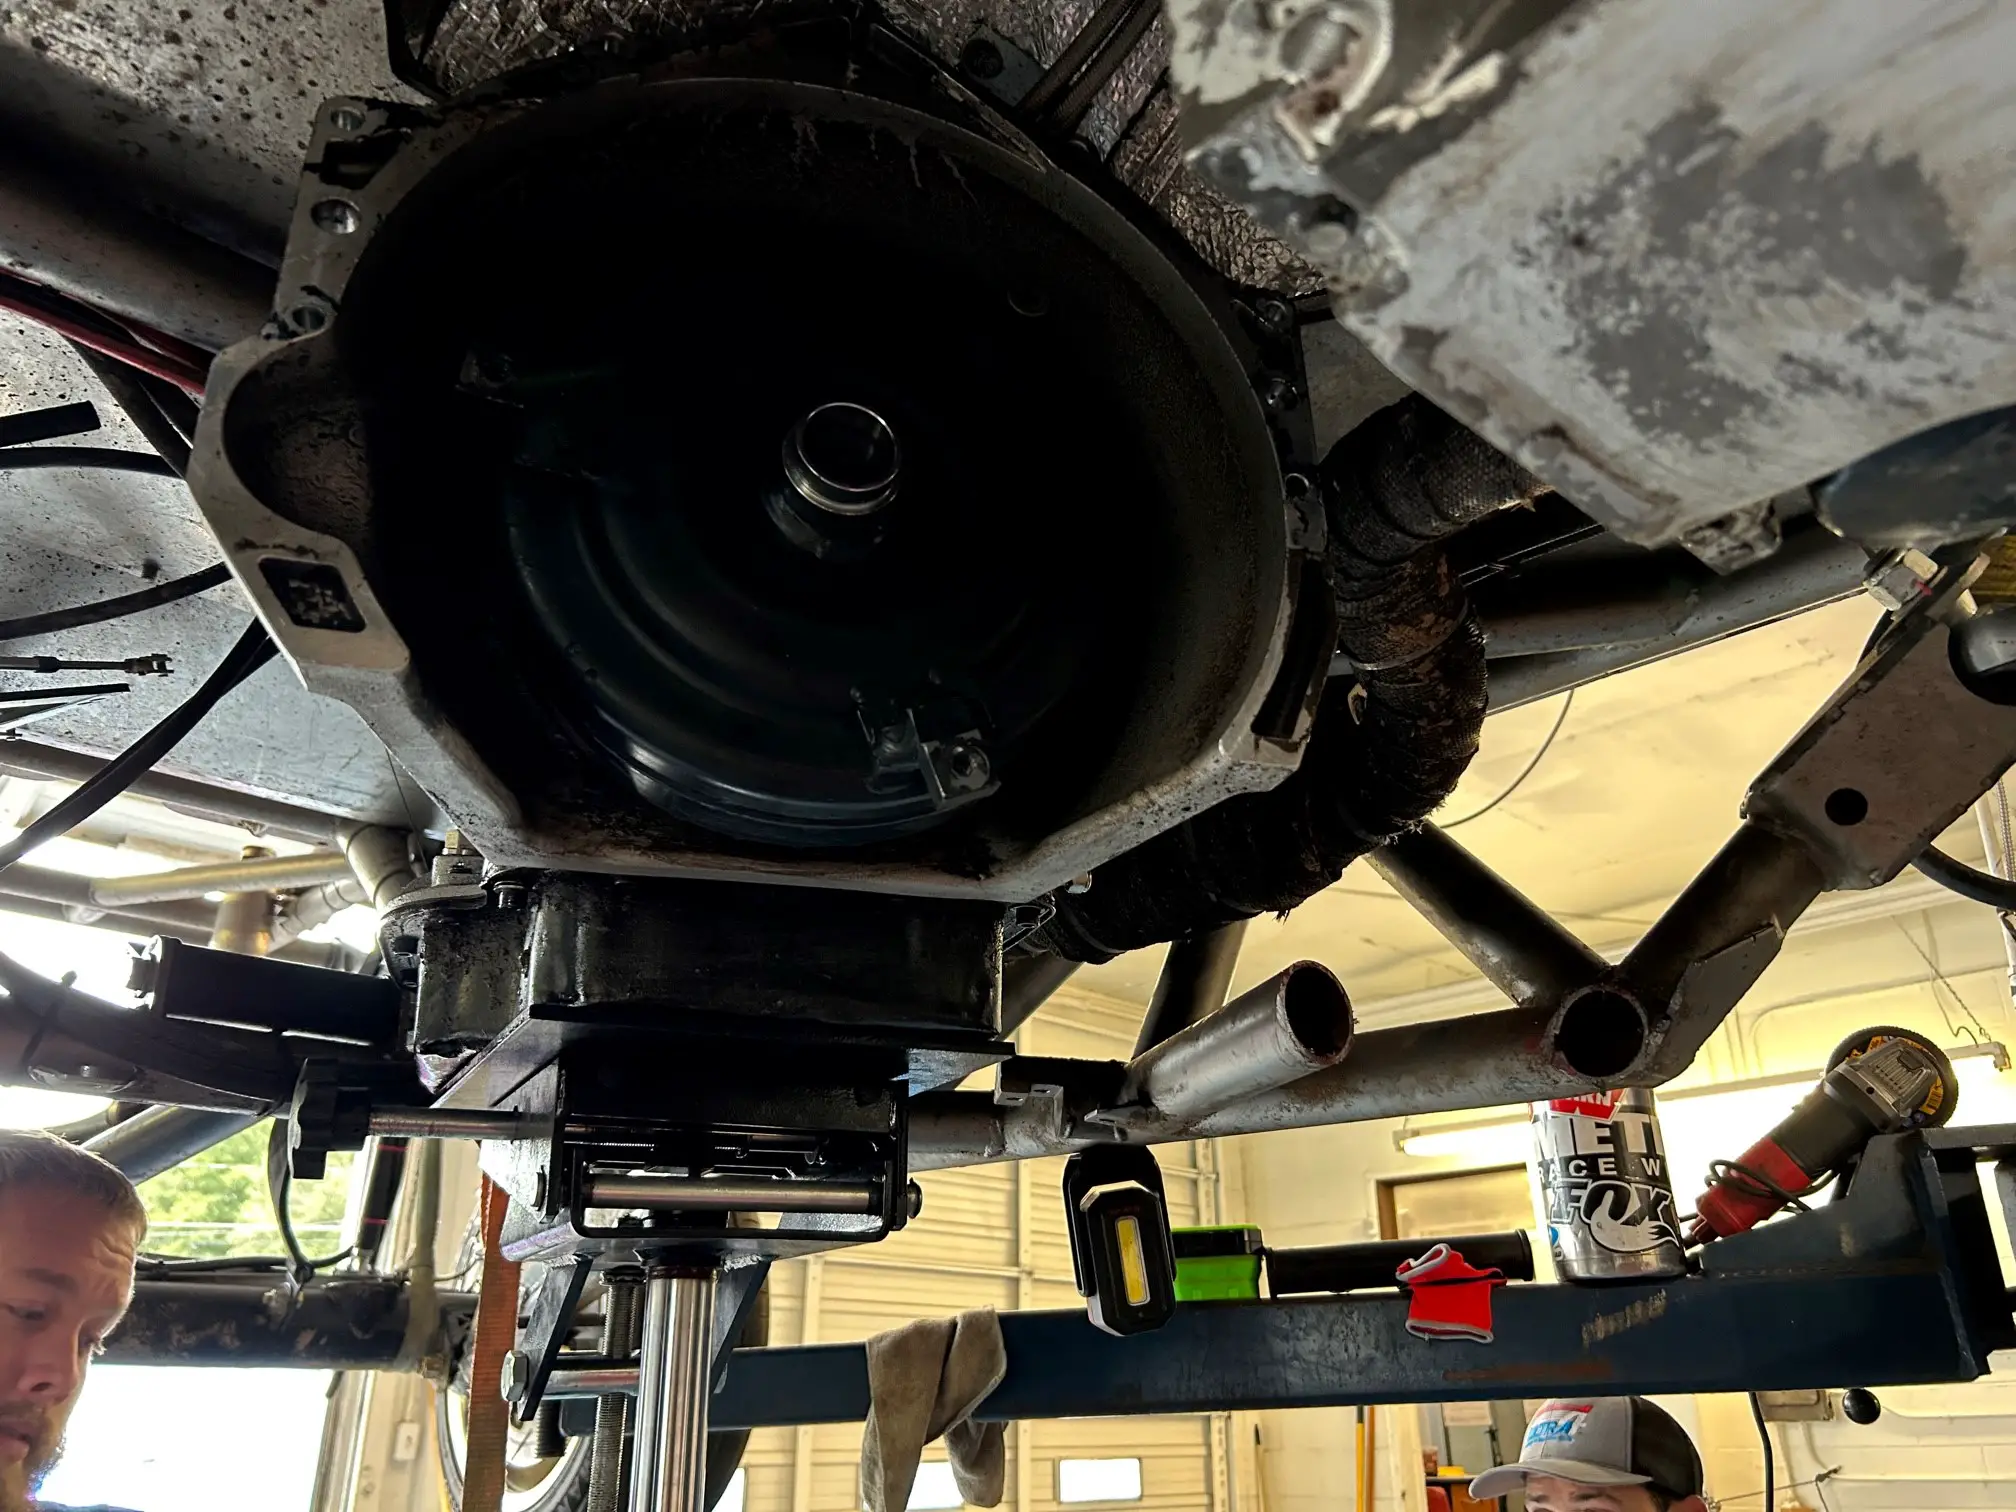
First things first, we needed to go over the car and see what all was damaged and inspect everything closely. Thankfully we had a few guys come help with this, which made disassembly of the car much easier.
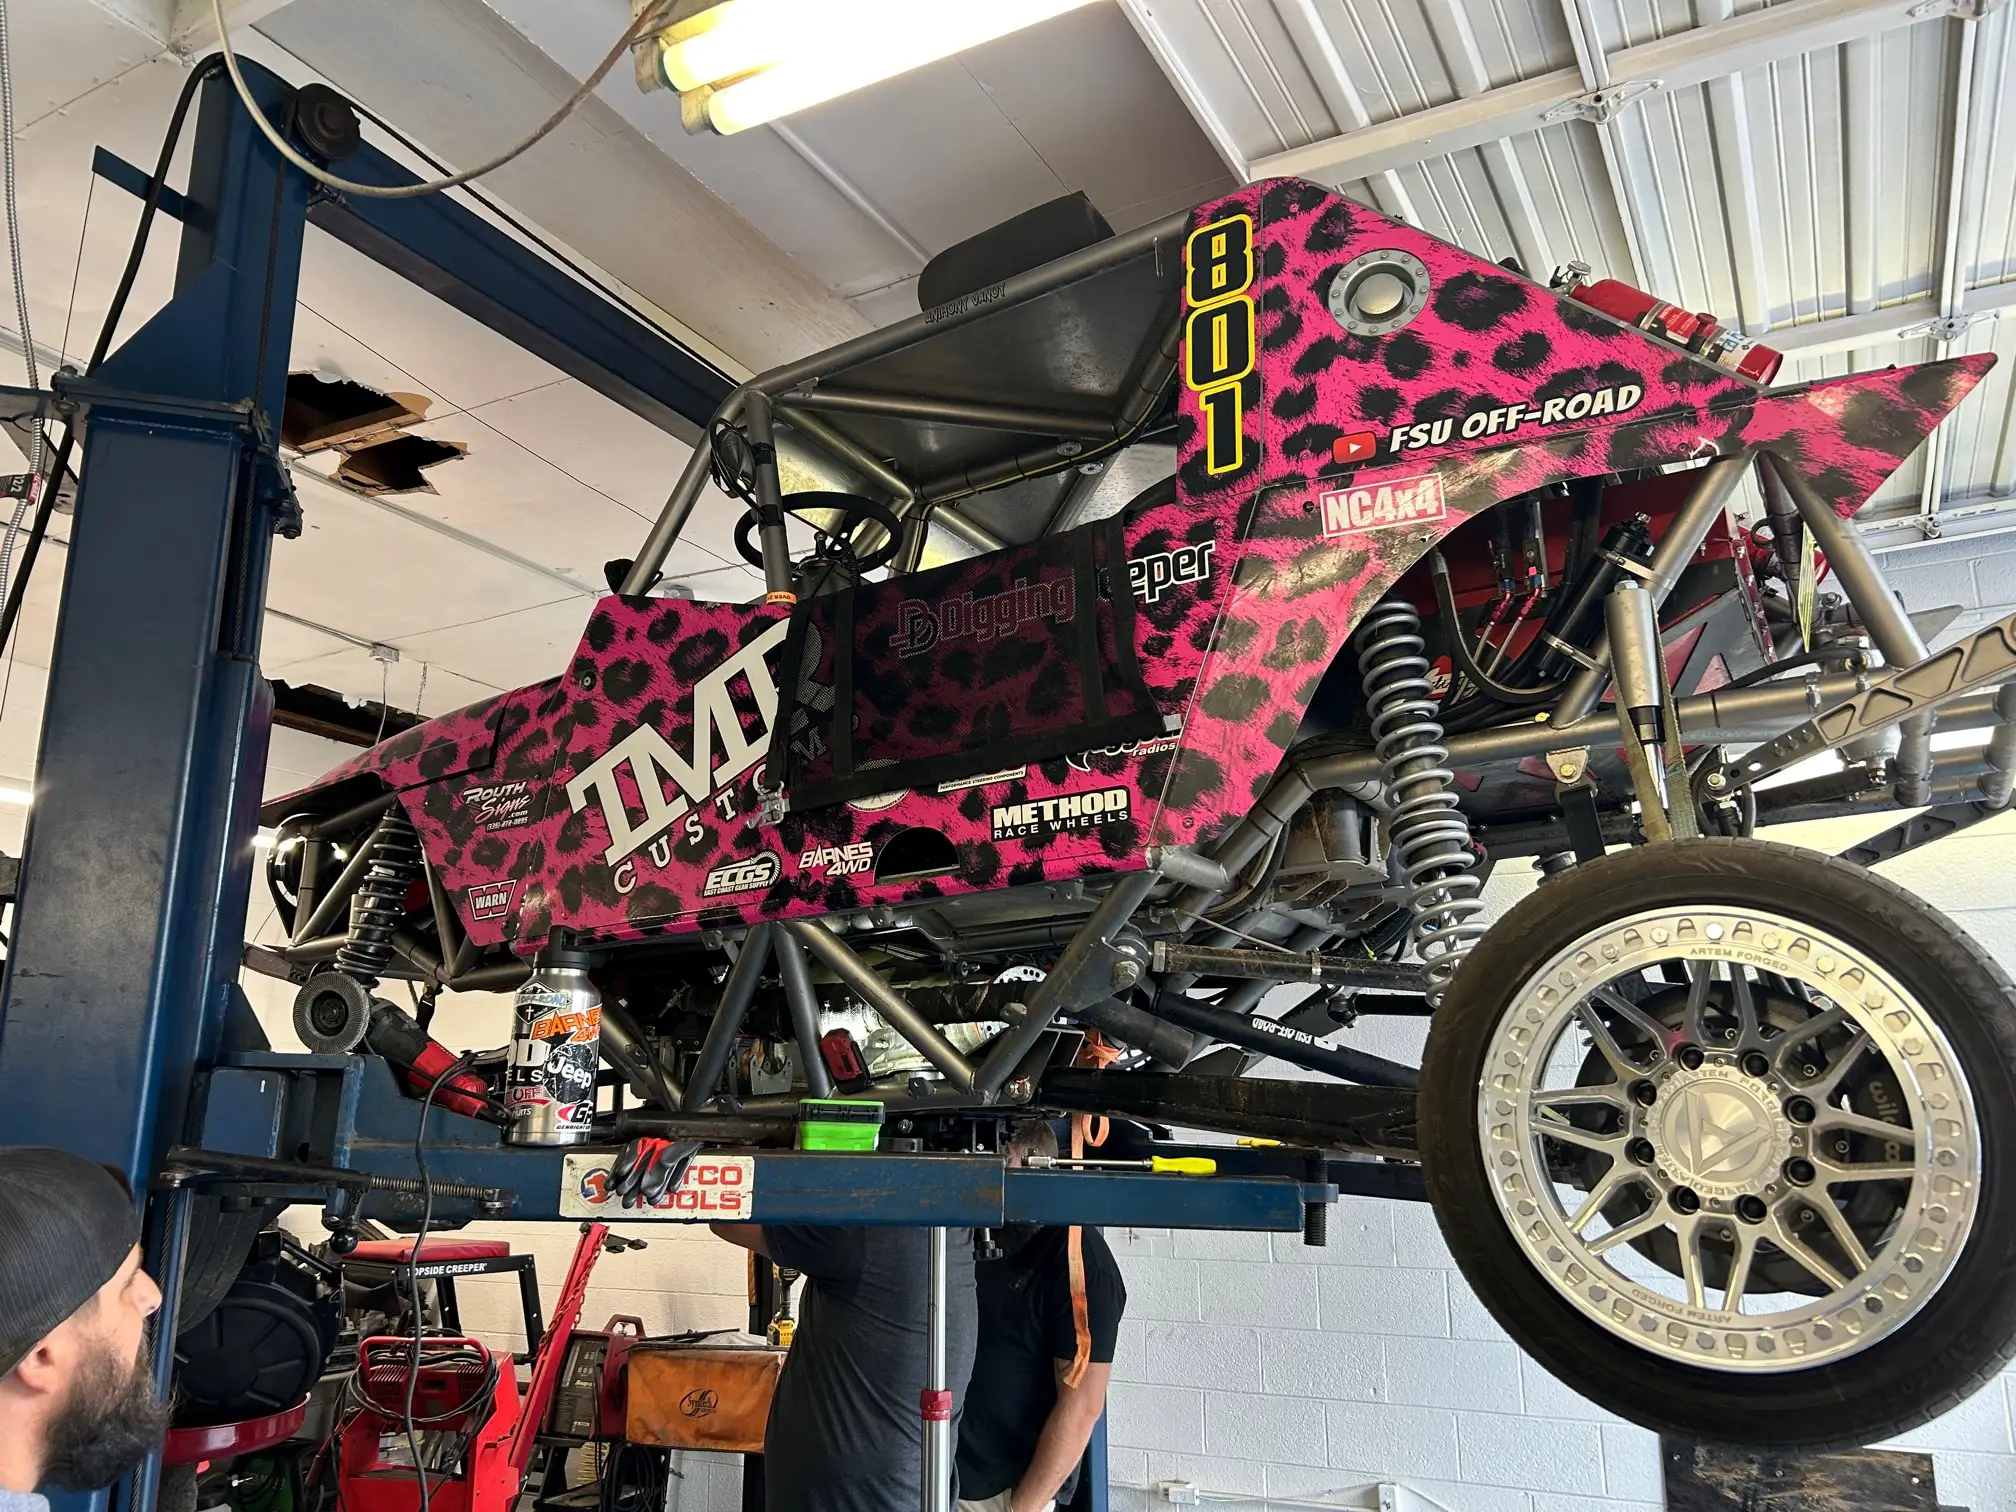
Post Race Inspection.jpg


Post Race Disassembly.jpg


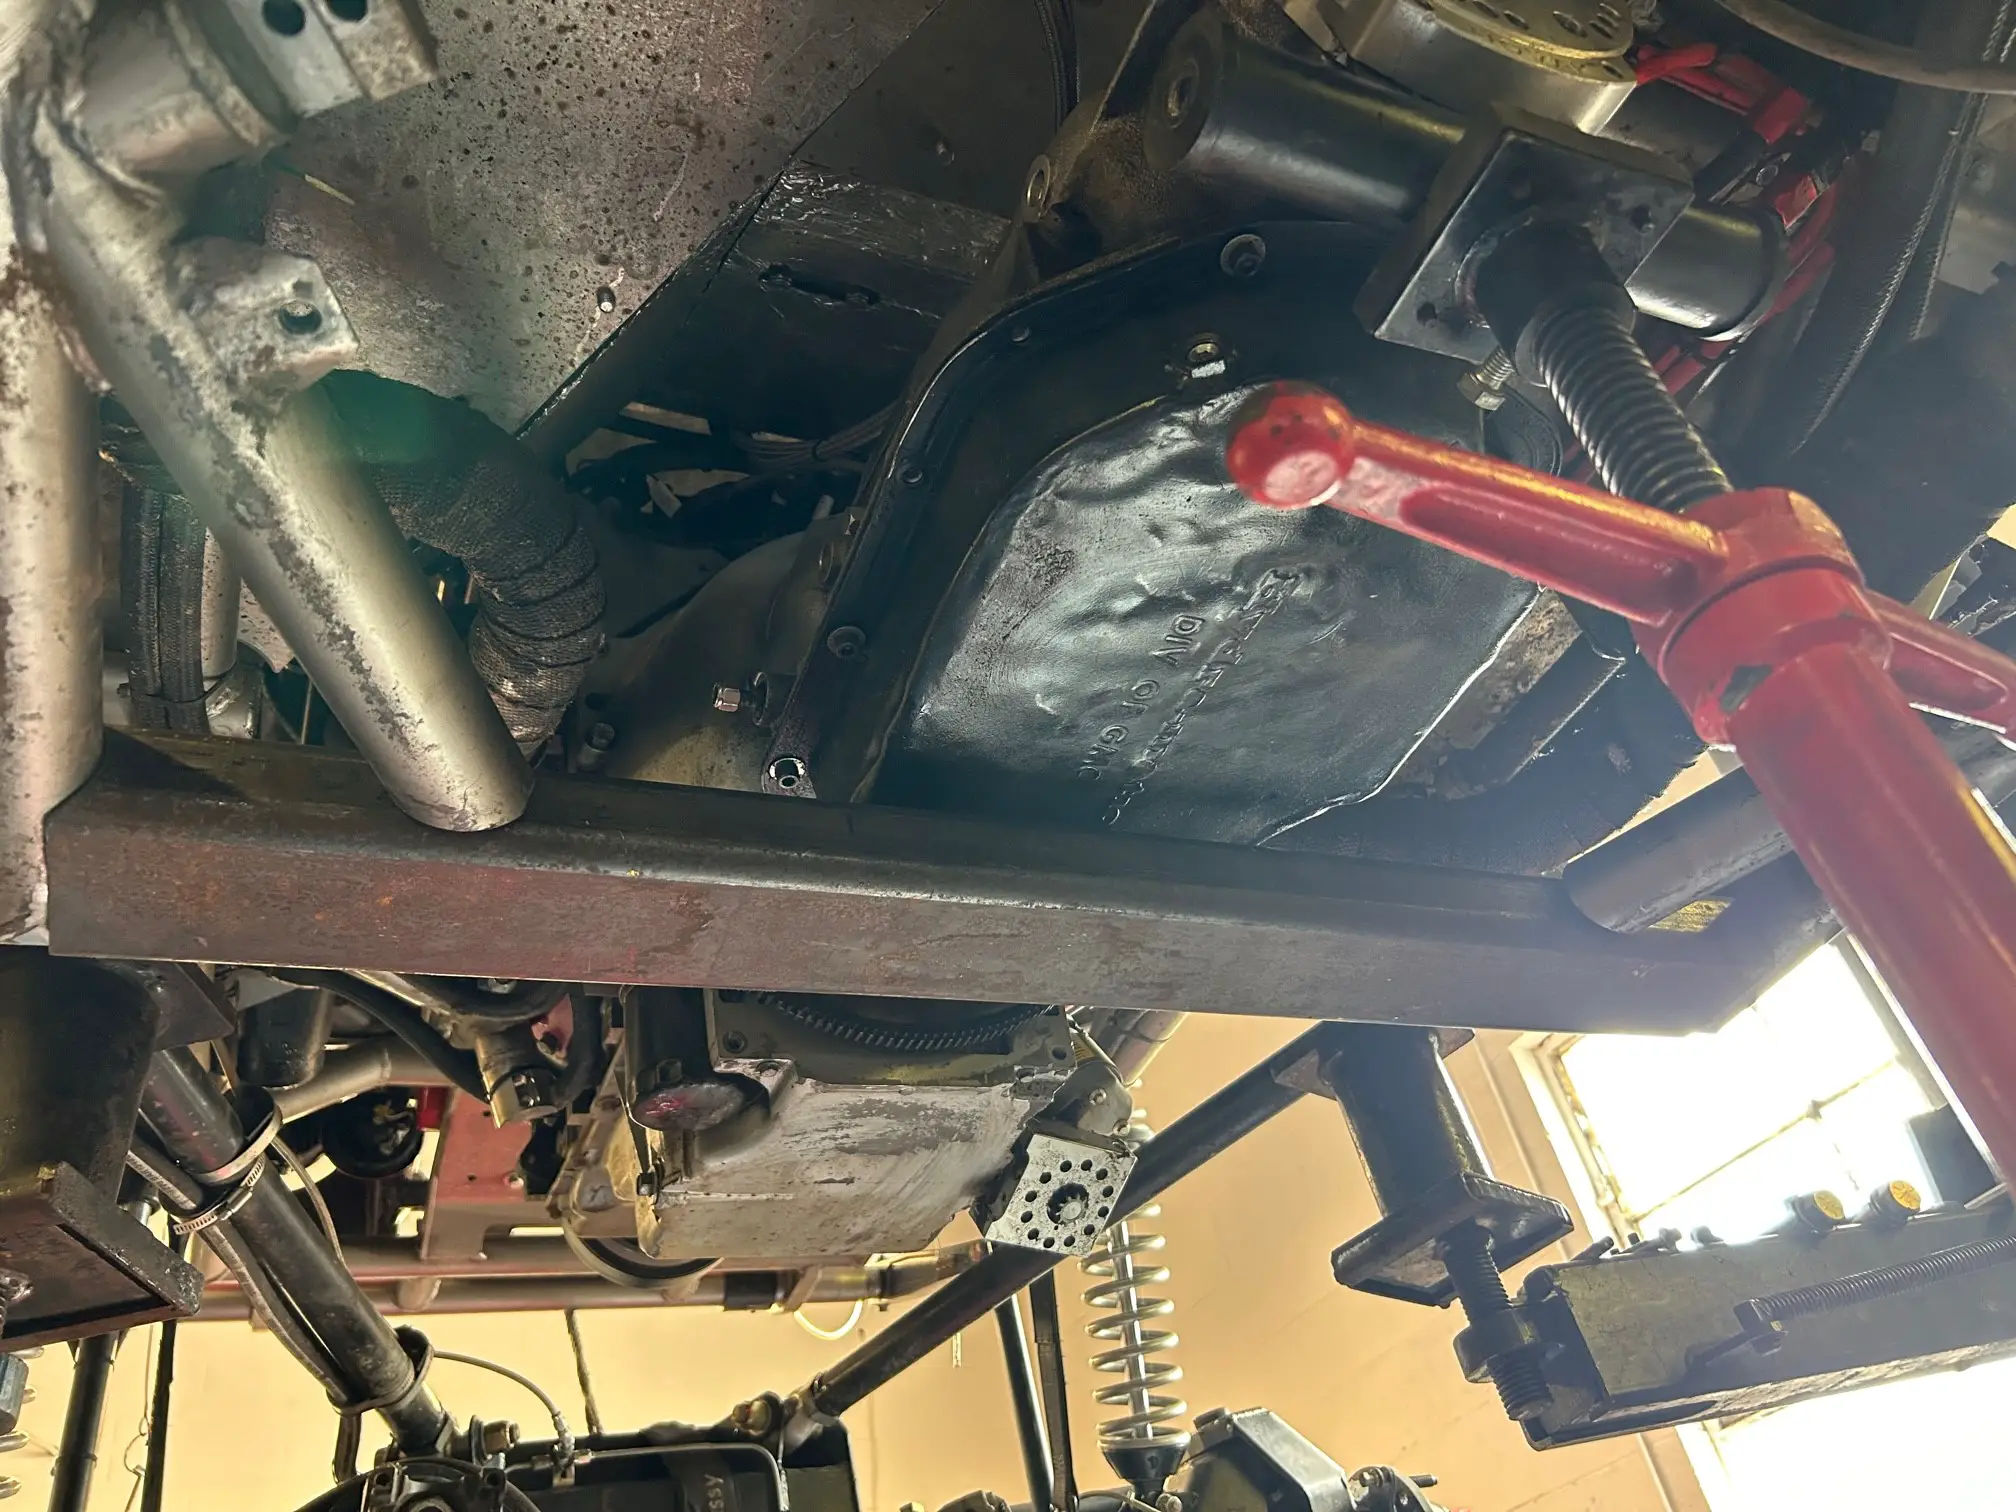
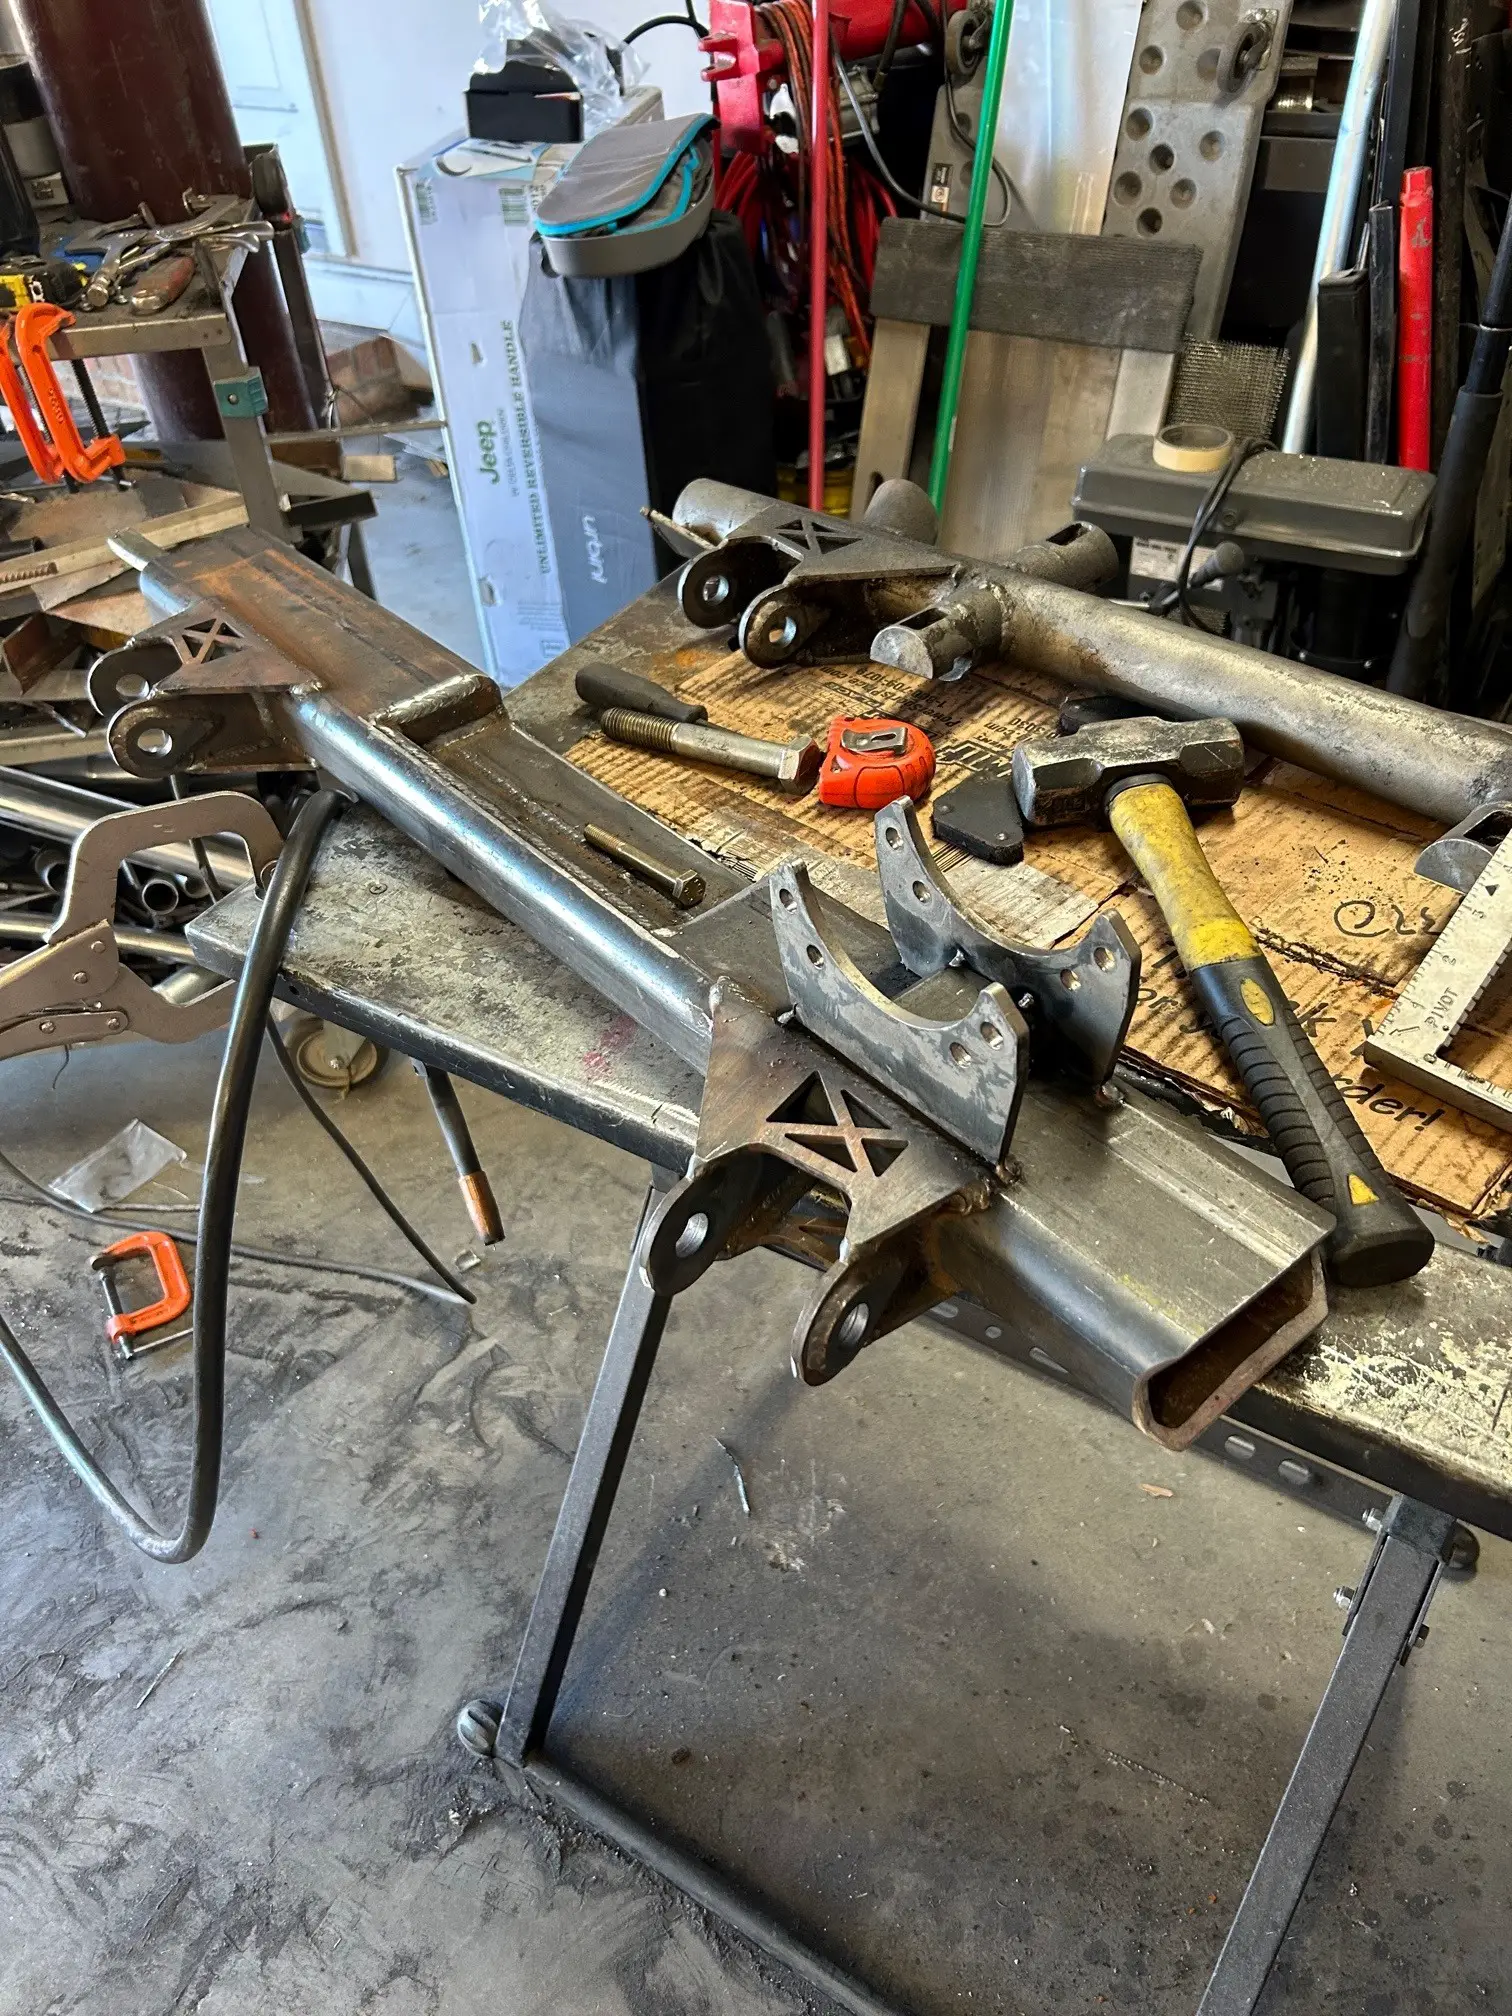
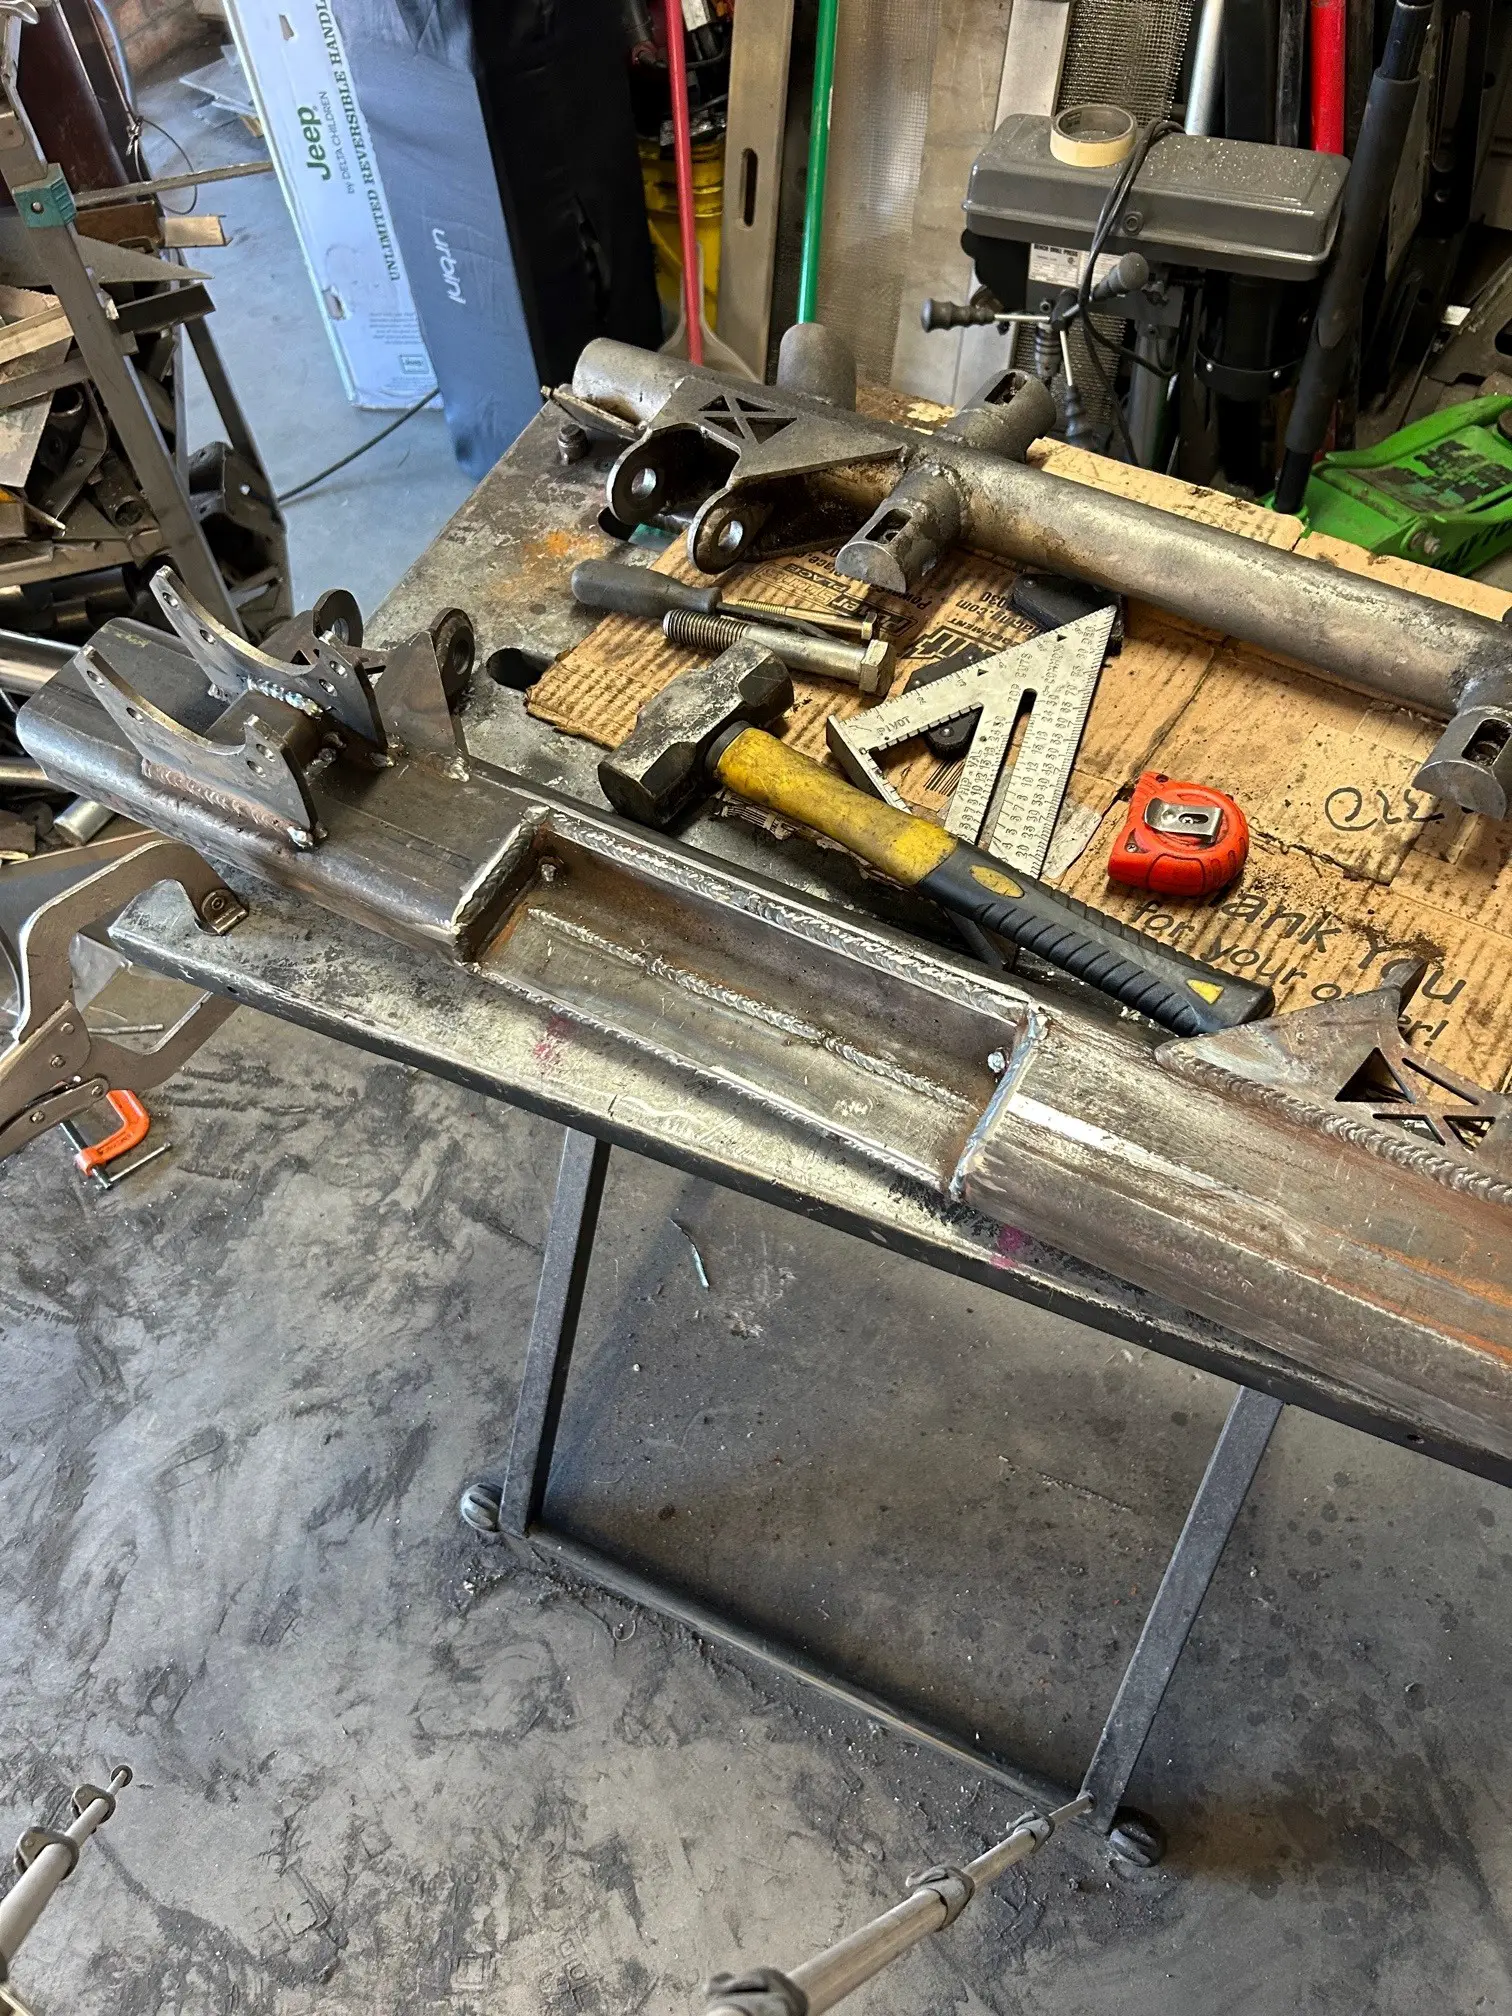
As you may have noticed, while disassembling the powertrain, we went ahead and cut out the mangled crossover tube. Made for an easier disassembly. We already knew this was going to be something we did as we needed to beef this crossover tube up for the future. The goal is to utilize 1/4" rectangle tubing in its place to add strength and protect everything in the future. You can see the overall idea below and to make sure everything would fit, we went ahead and put the transmission back in to verify.
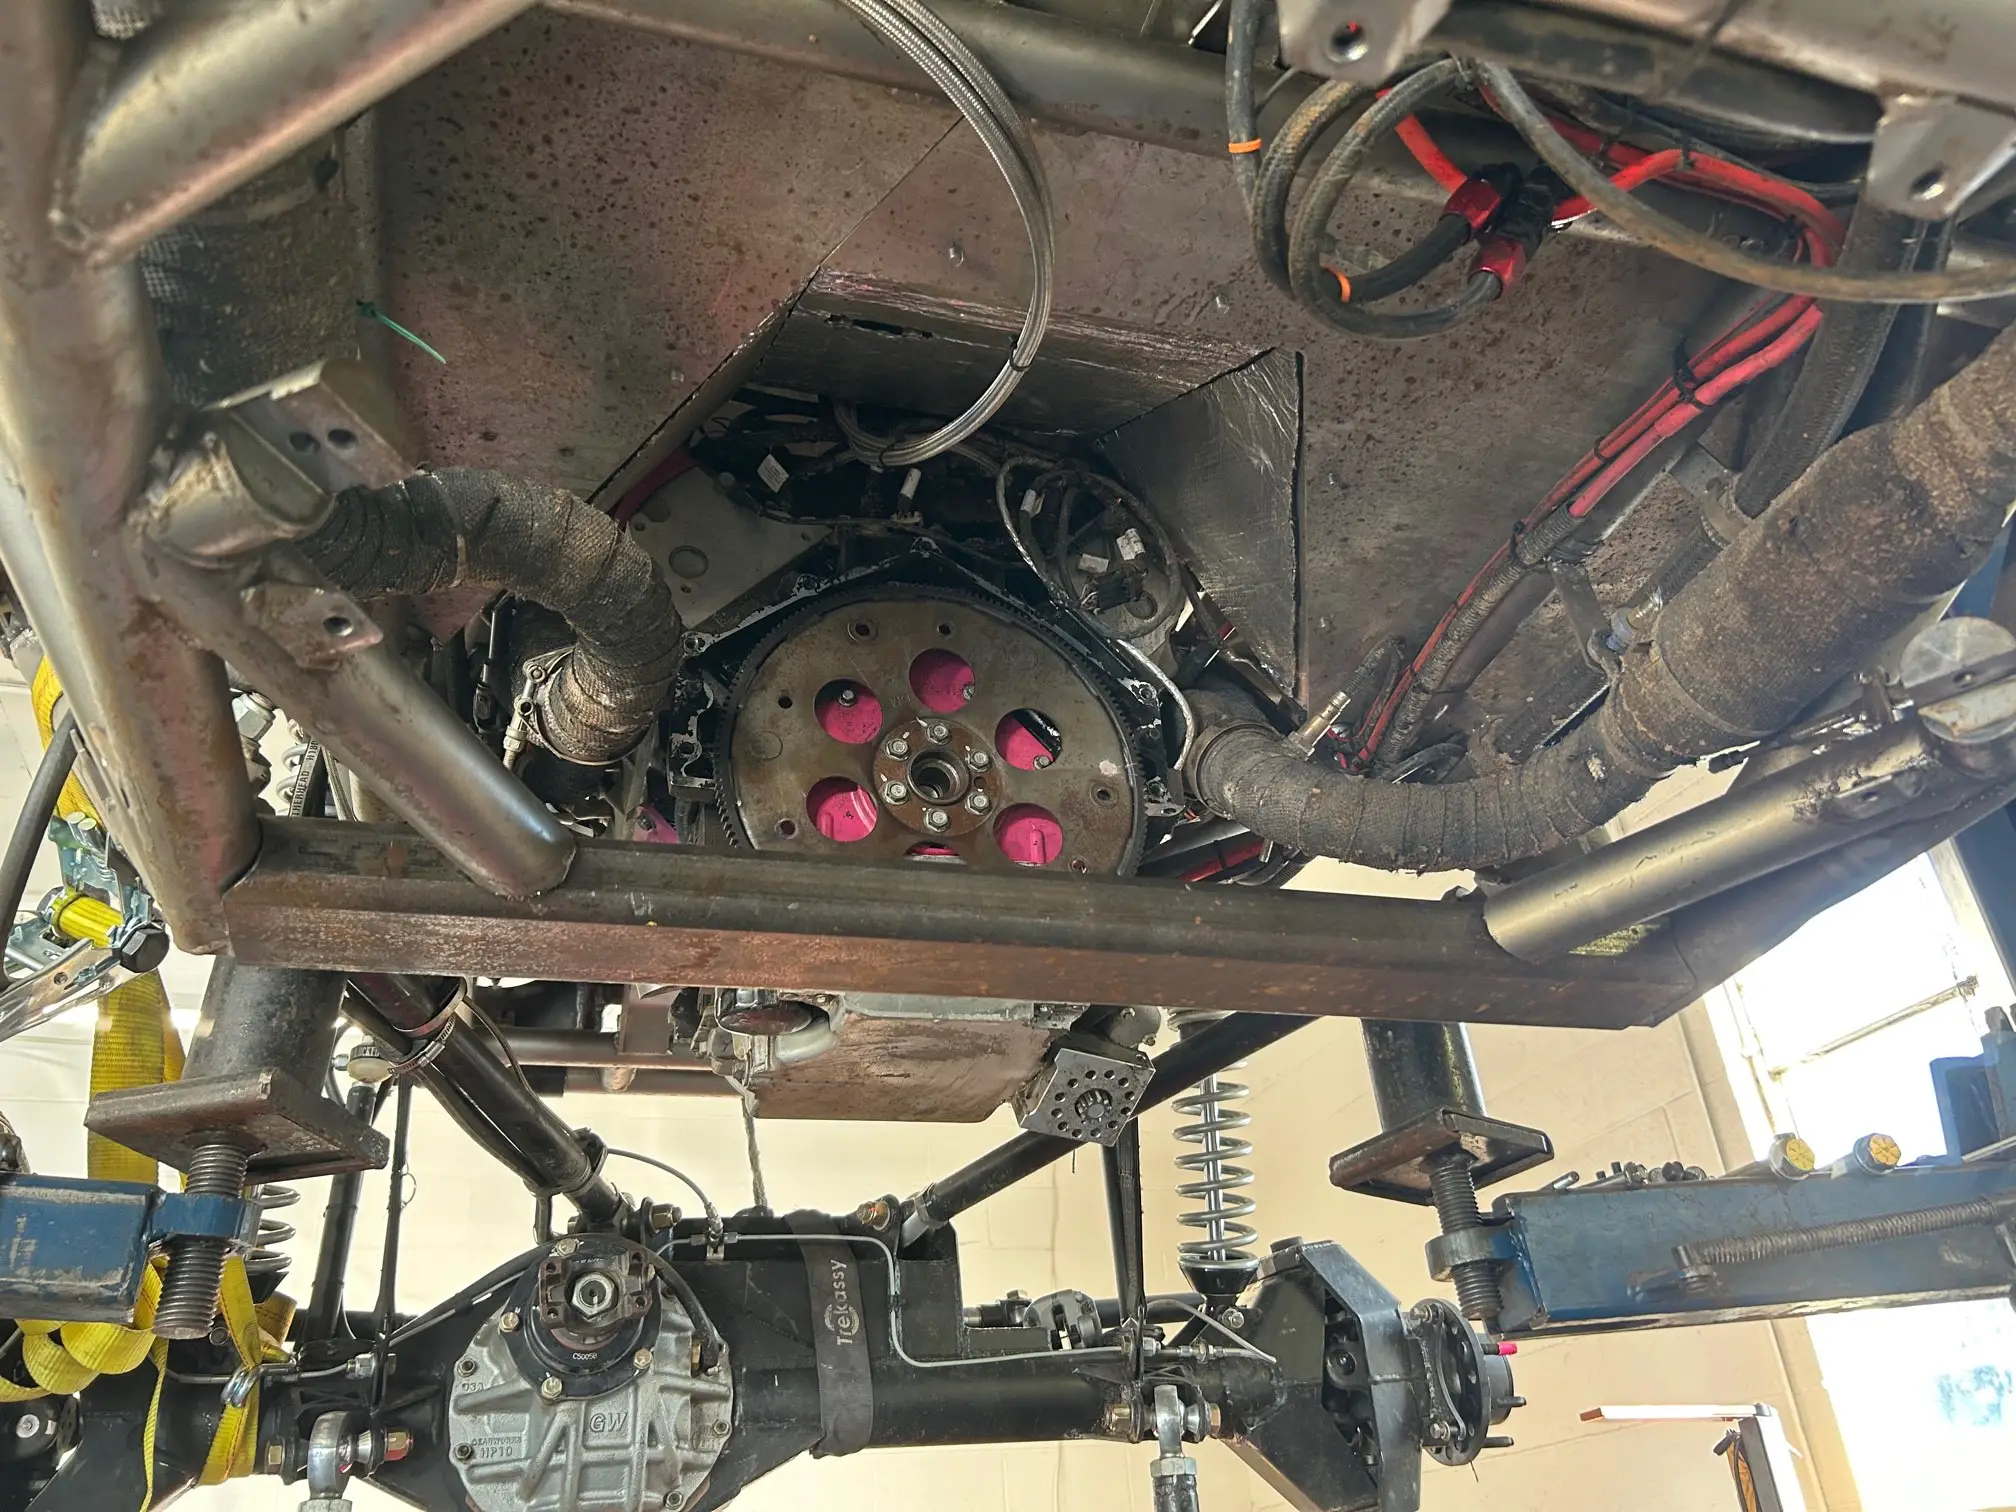
Post Race Crossover.jpg


New Crossover w Trans.jpg


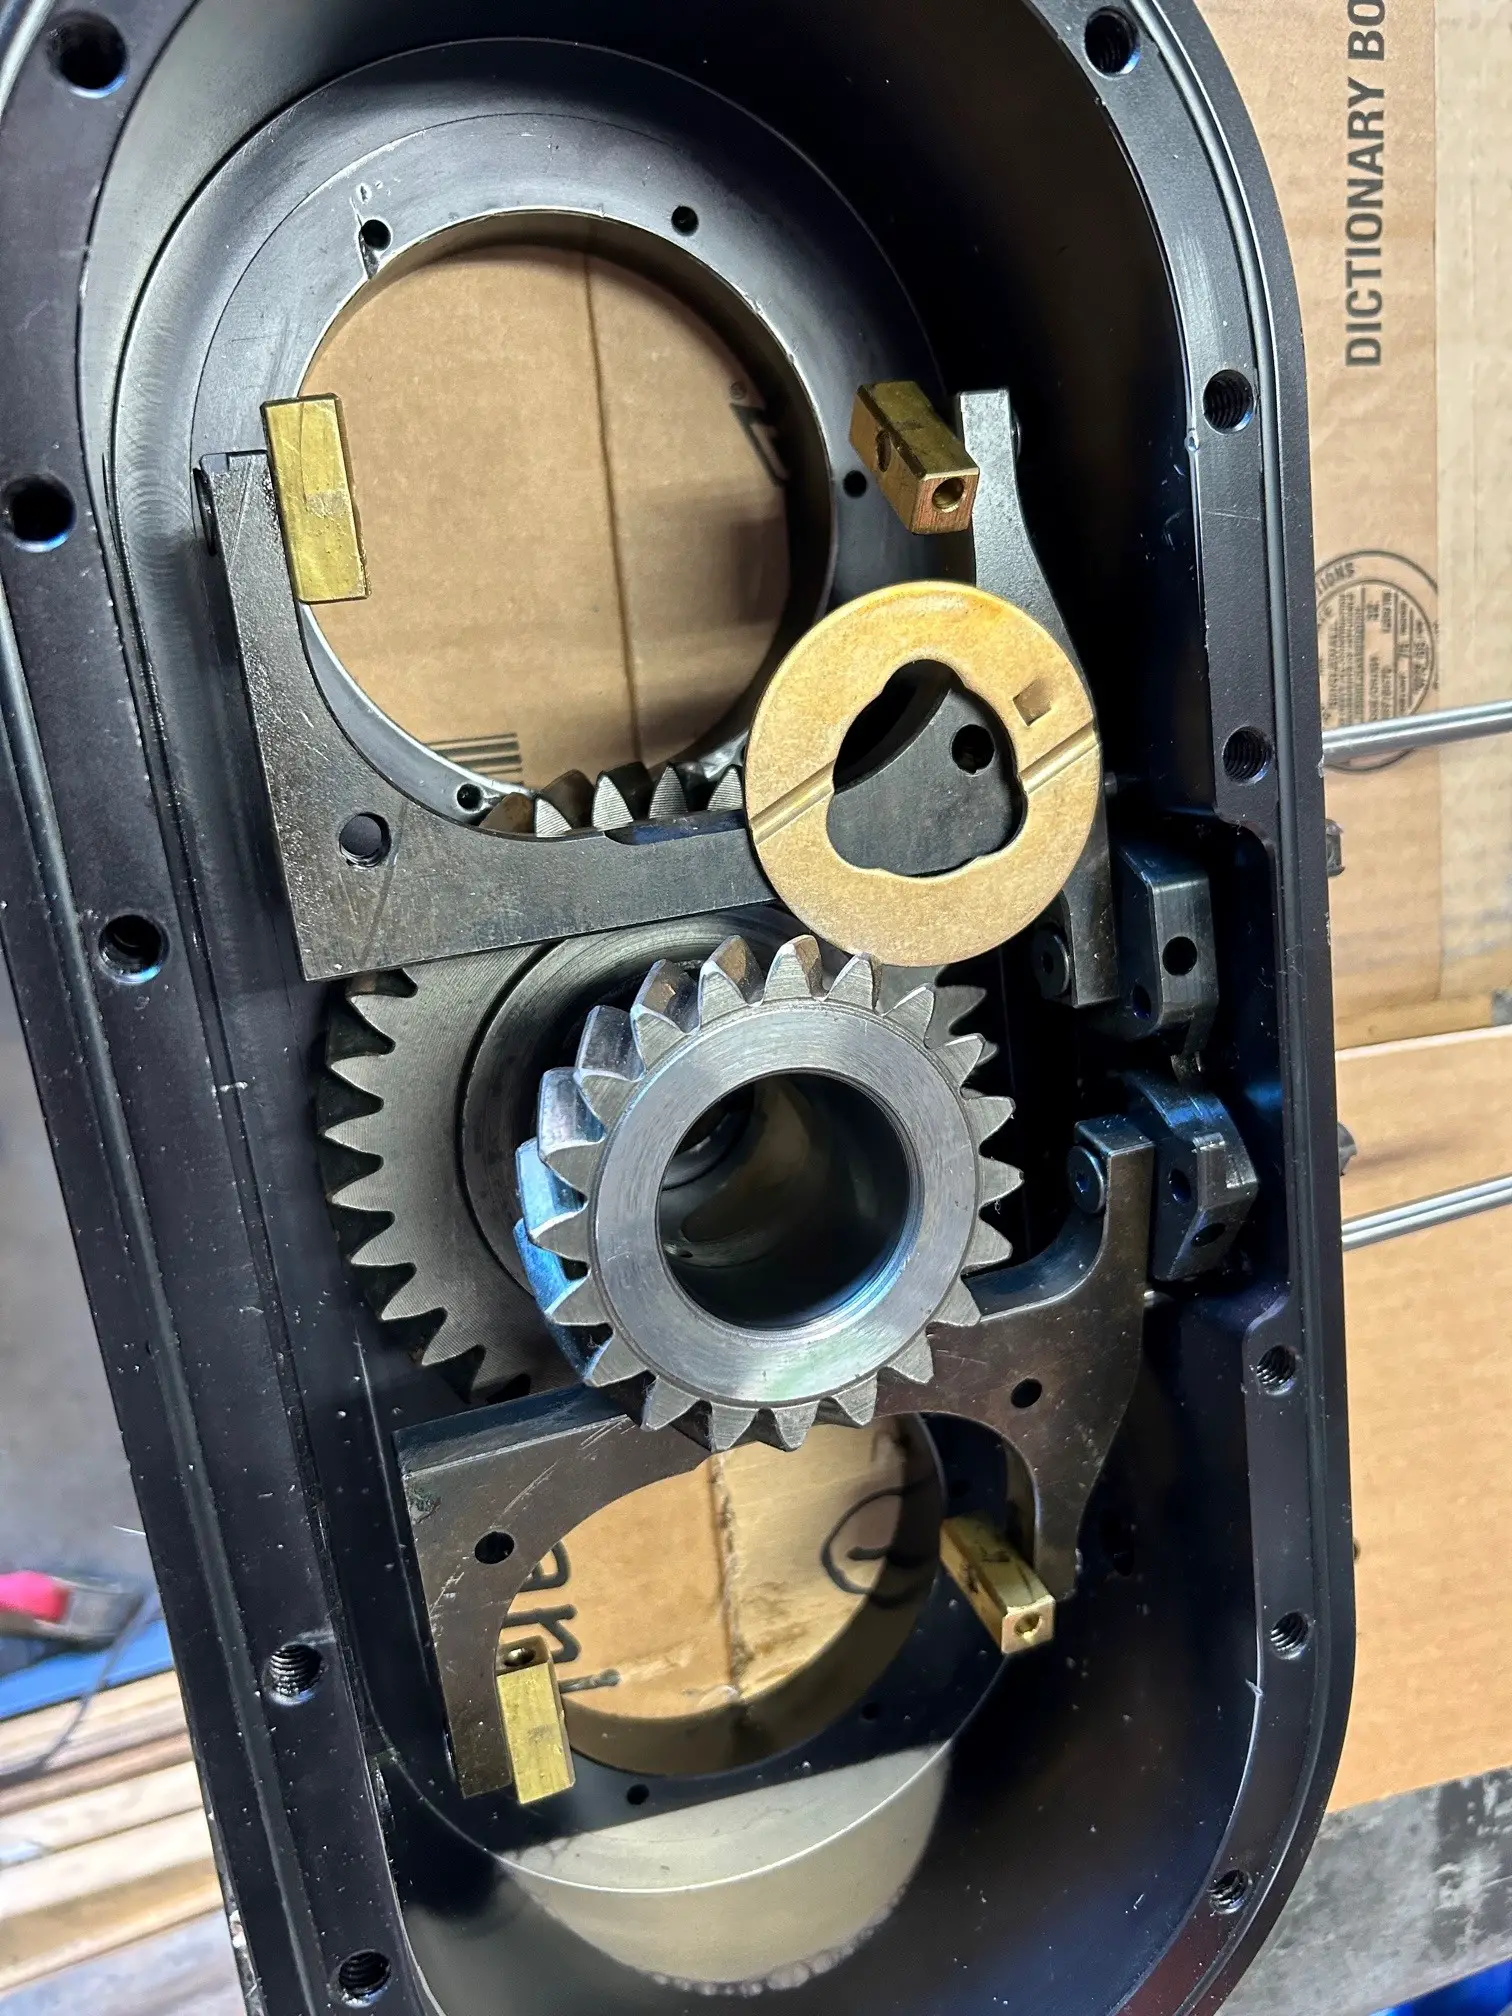
Again, it's close to the pan, just as the original tube was, however I had some ideas to make this work better for us. With a solution to fix the crossover tube, we disassembled the Colossus case to see what went wrong. Didn't take long to see that the D300 gears didn't hold up to the abuse from Crandon. All of the front gears were broken, leaving us with only 2wd. So, I searched the good old marketplace for some spares. Luckily, I was able to find a replacement D300 with a spare set of gears and rebuilt the case after a good cleaning and thorough inspection.
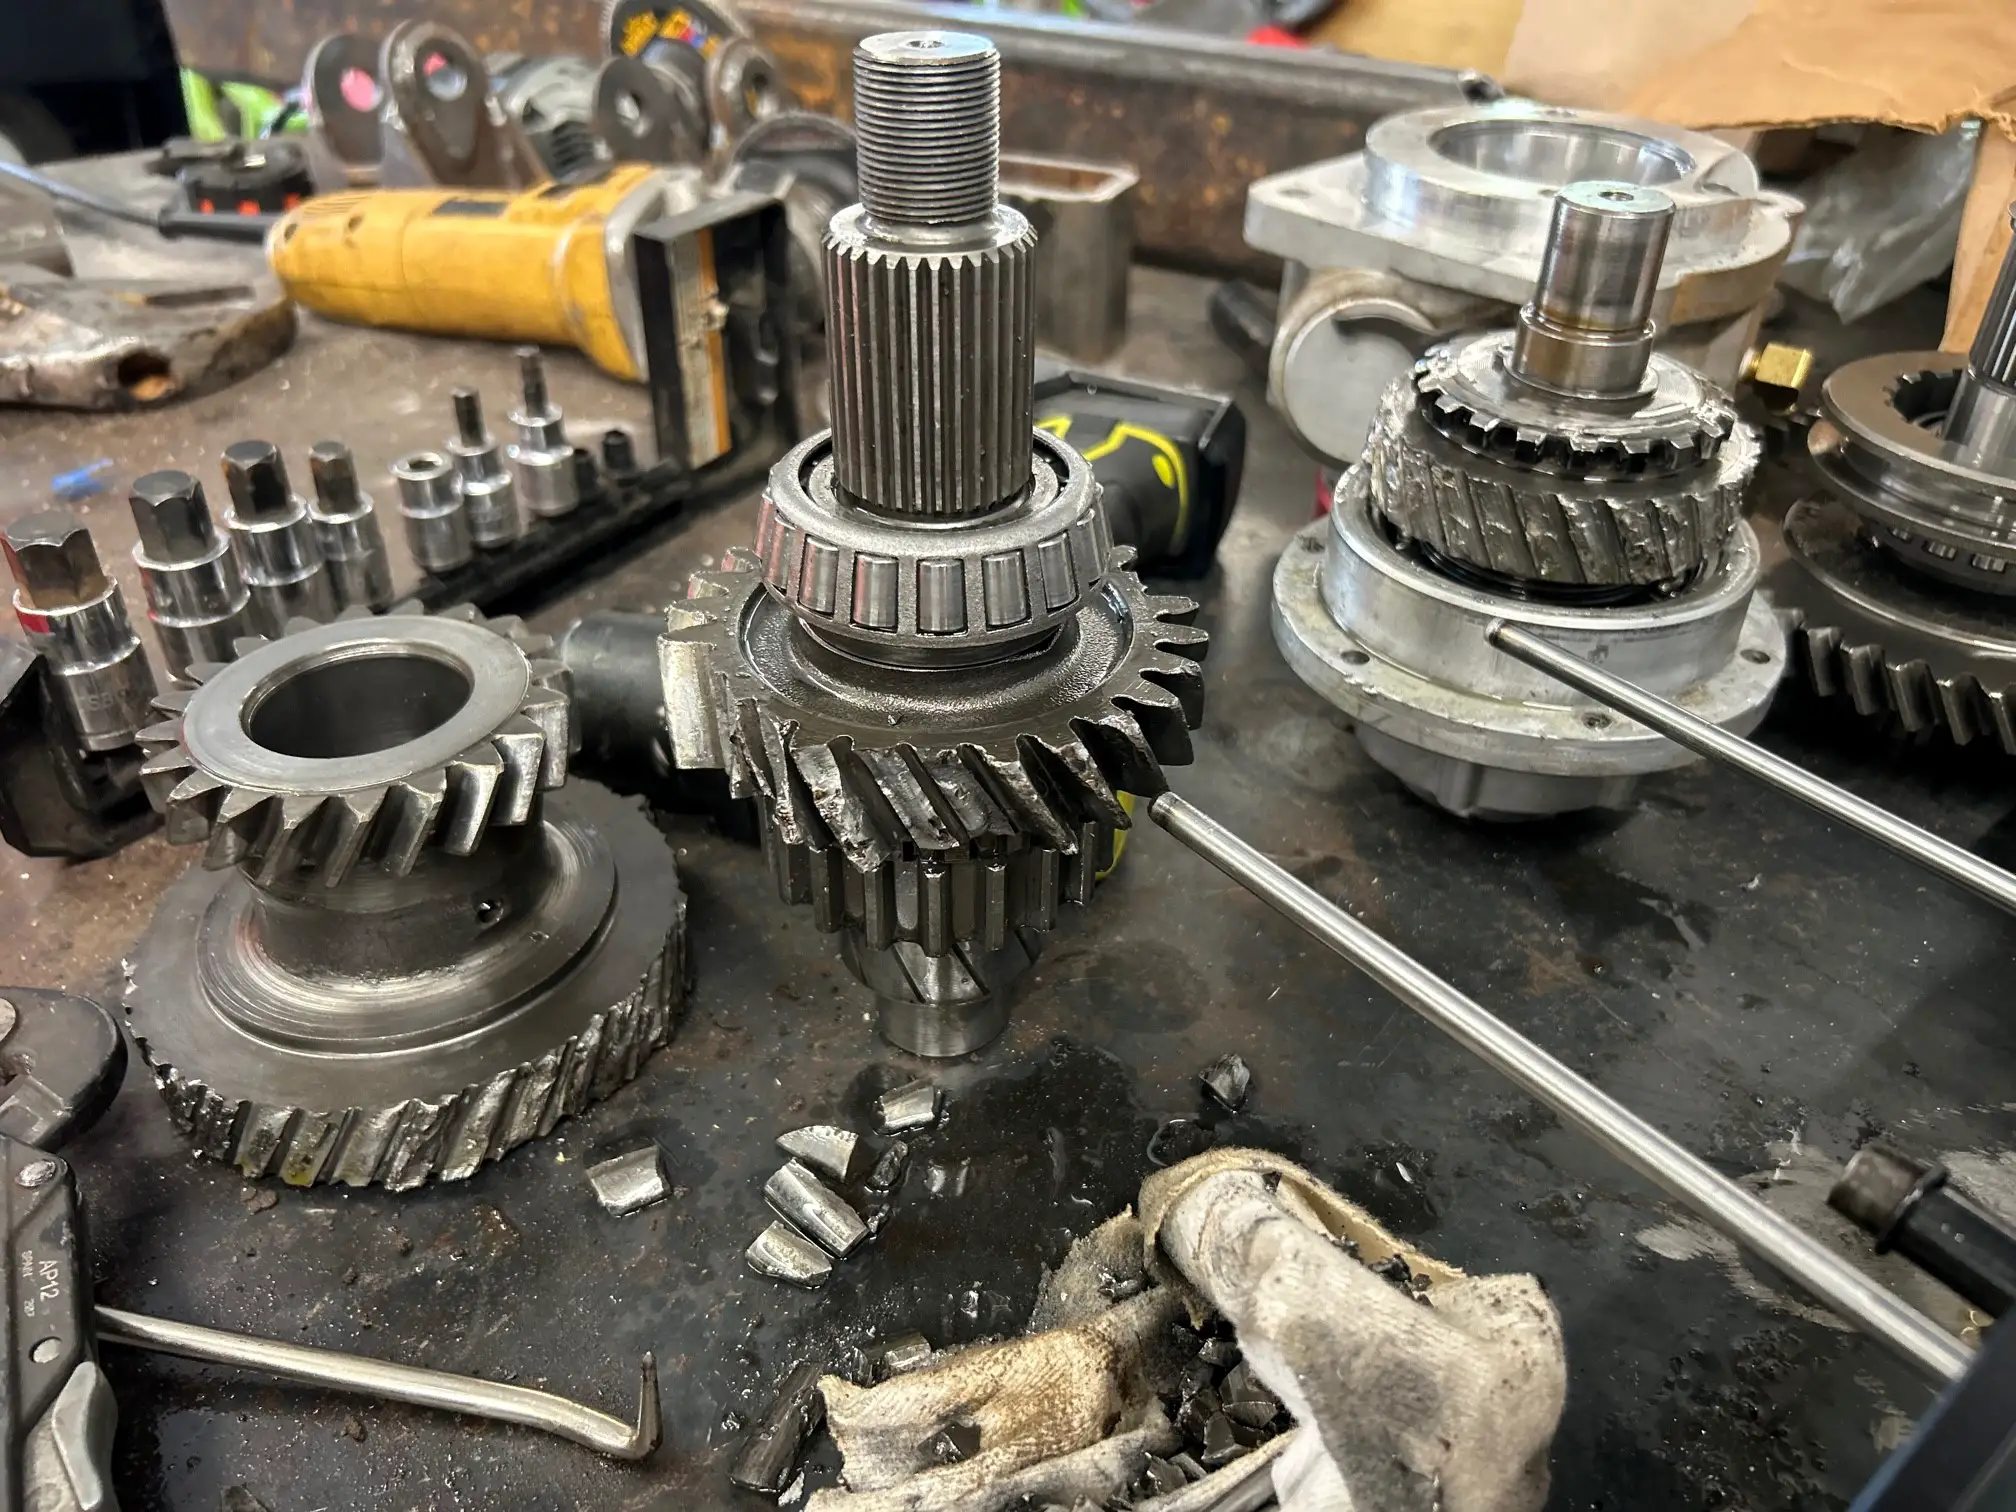
Post Race D300.jpg


D300 Rebuild.jpg


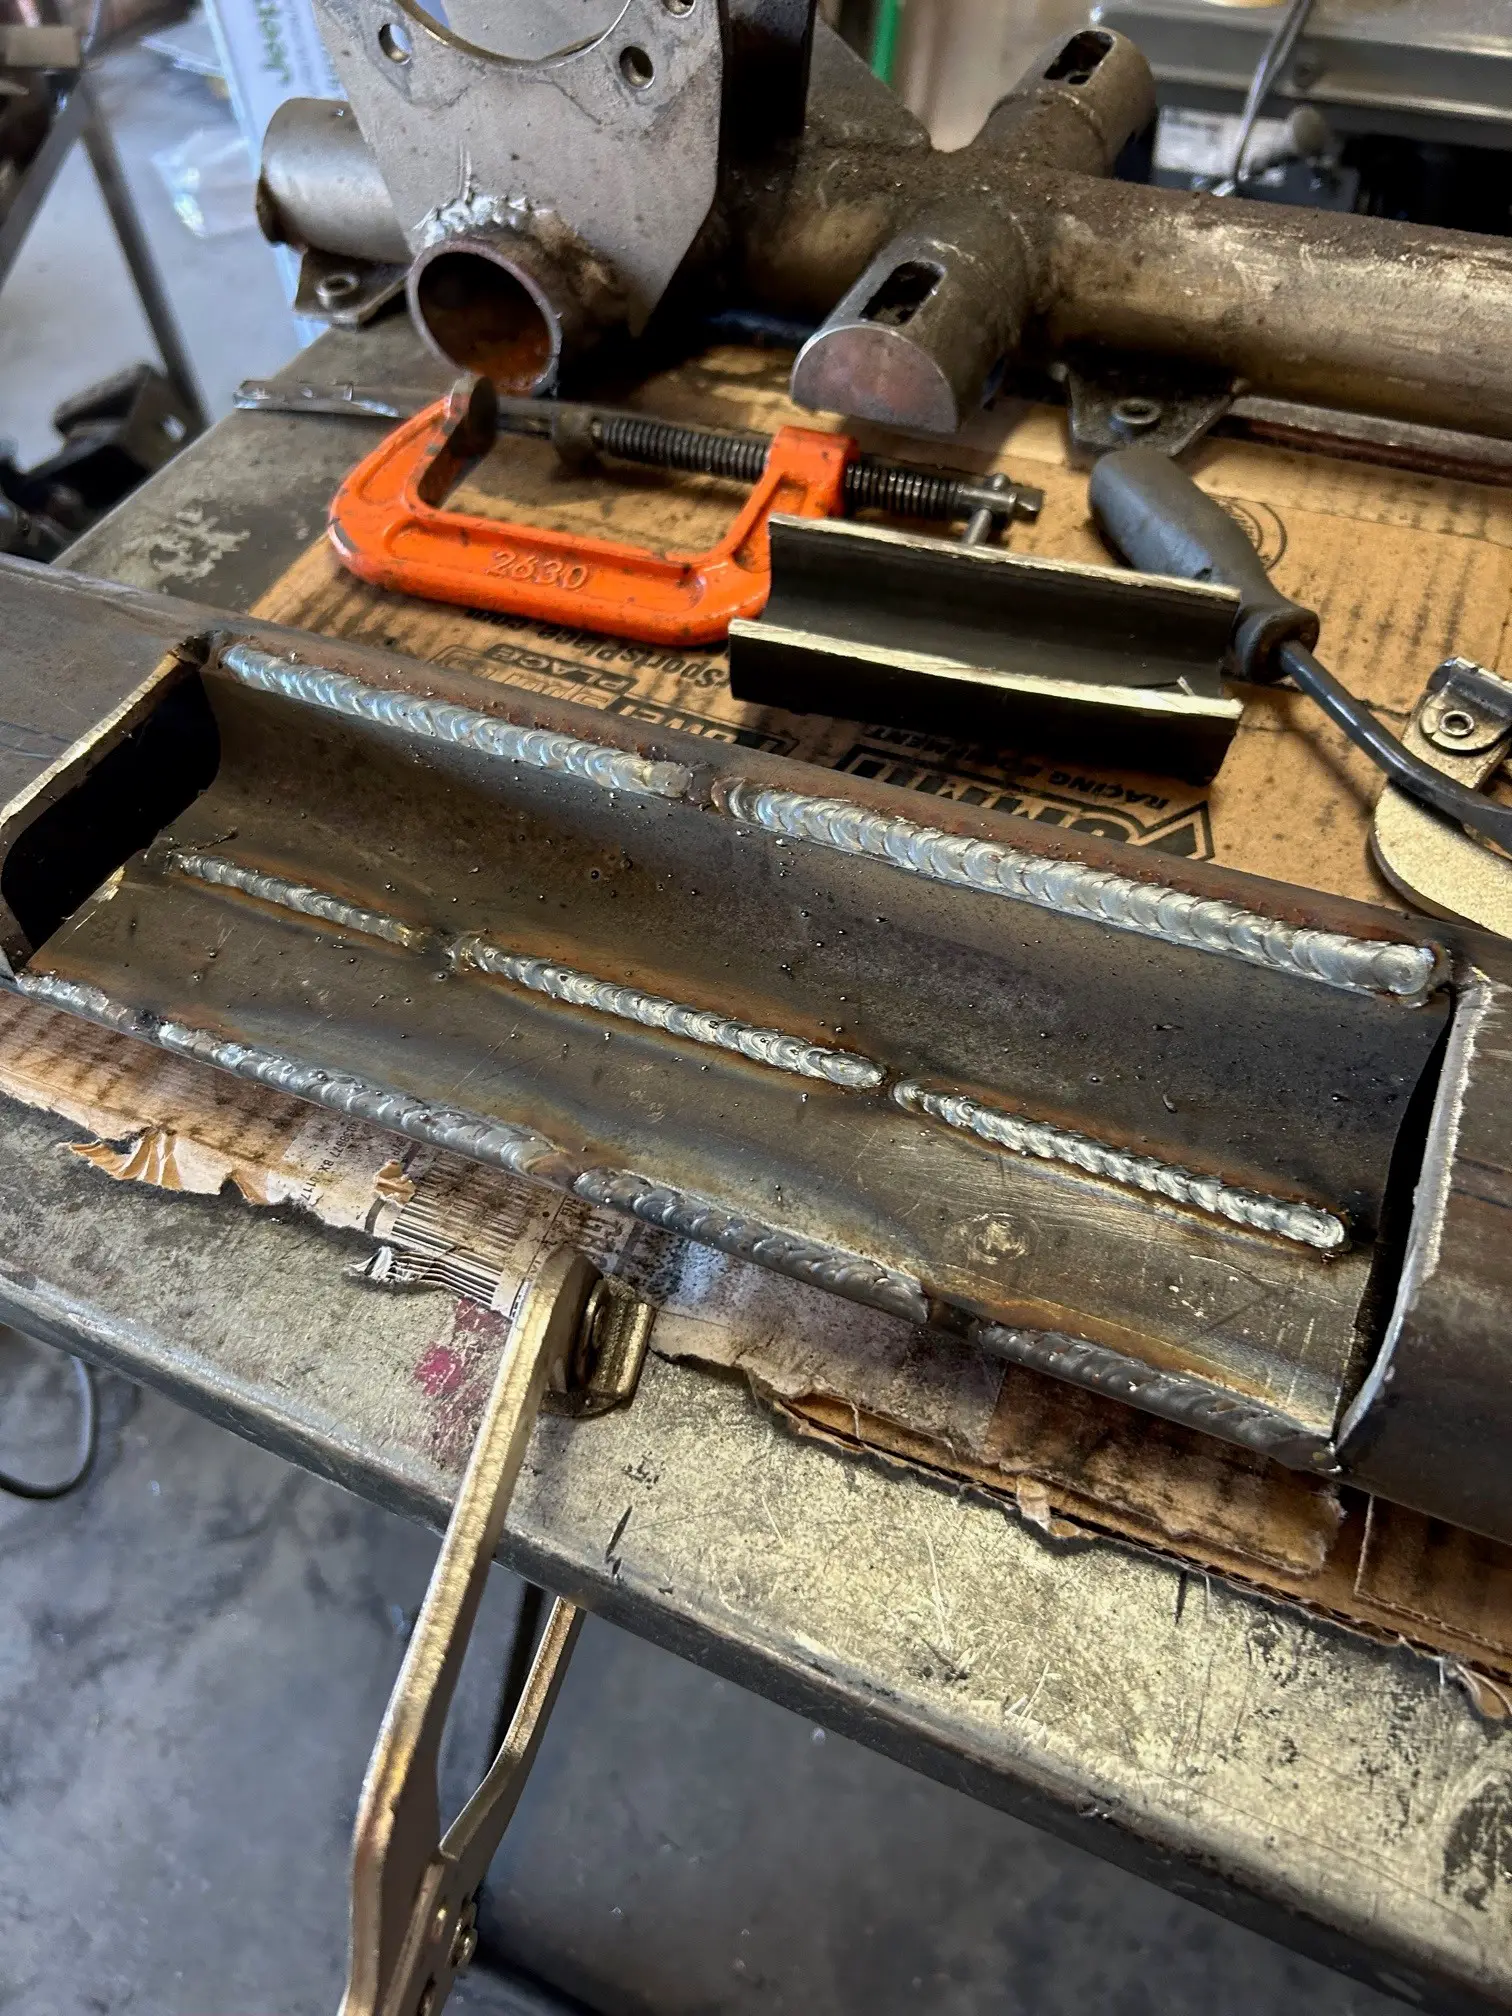
After the rebuild, I focused on the crossover tube again. In order to create a little space, I notched the rectangular tube for the trans pan. This will allow us some extra space for removing the pan if needed in the future as well as running into the same clearance issue. Not only did the notch help with clearance, but I was also able to internally gusset this area as well making for a stronger center section. With a couple of scrap pieces, I was able to close it all back up and get it ready for the link mounts and carrier bearing mount. I reused some old link mounts for the front, grinding away a little material for them to set flush on the rectangular tube versus round tube. As for the carrier bearing mount, the original design was based off two separate round tubes, with the rectangular tube, I was able to put both mounts on this crossover tube. This allowed me to have a better gusset in between making this mount much stronger to any loads. The only thing I need to add are the tube clamps for the skid plates.
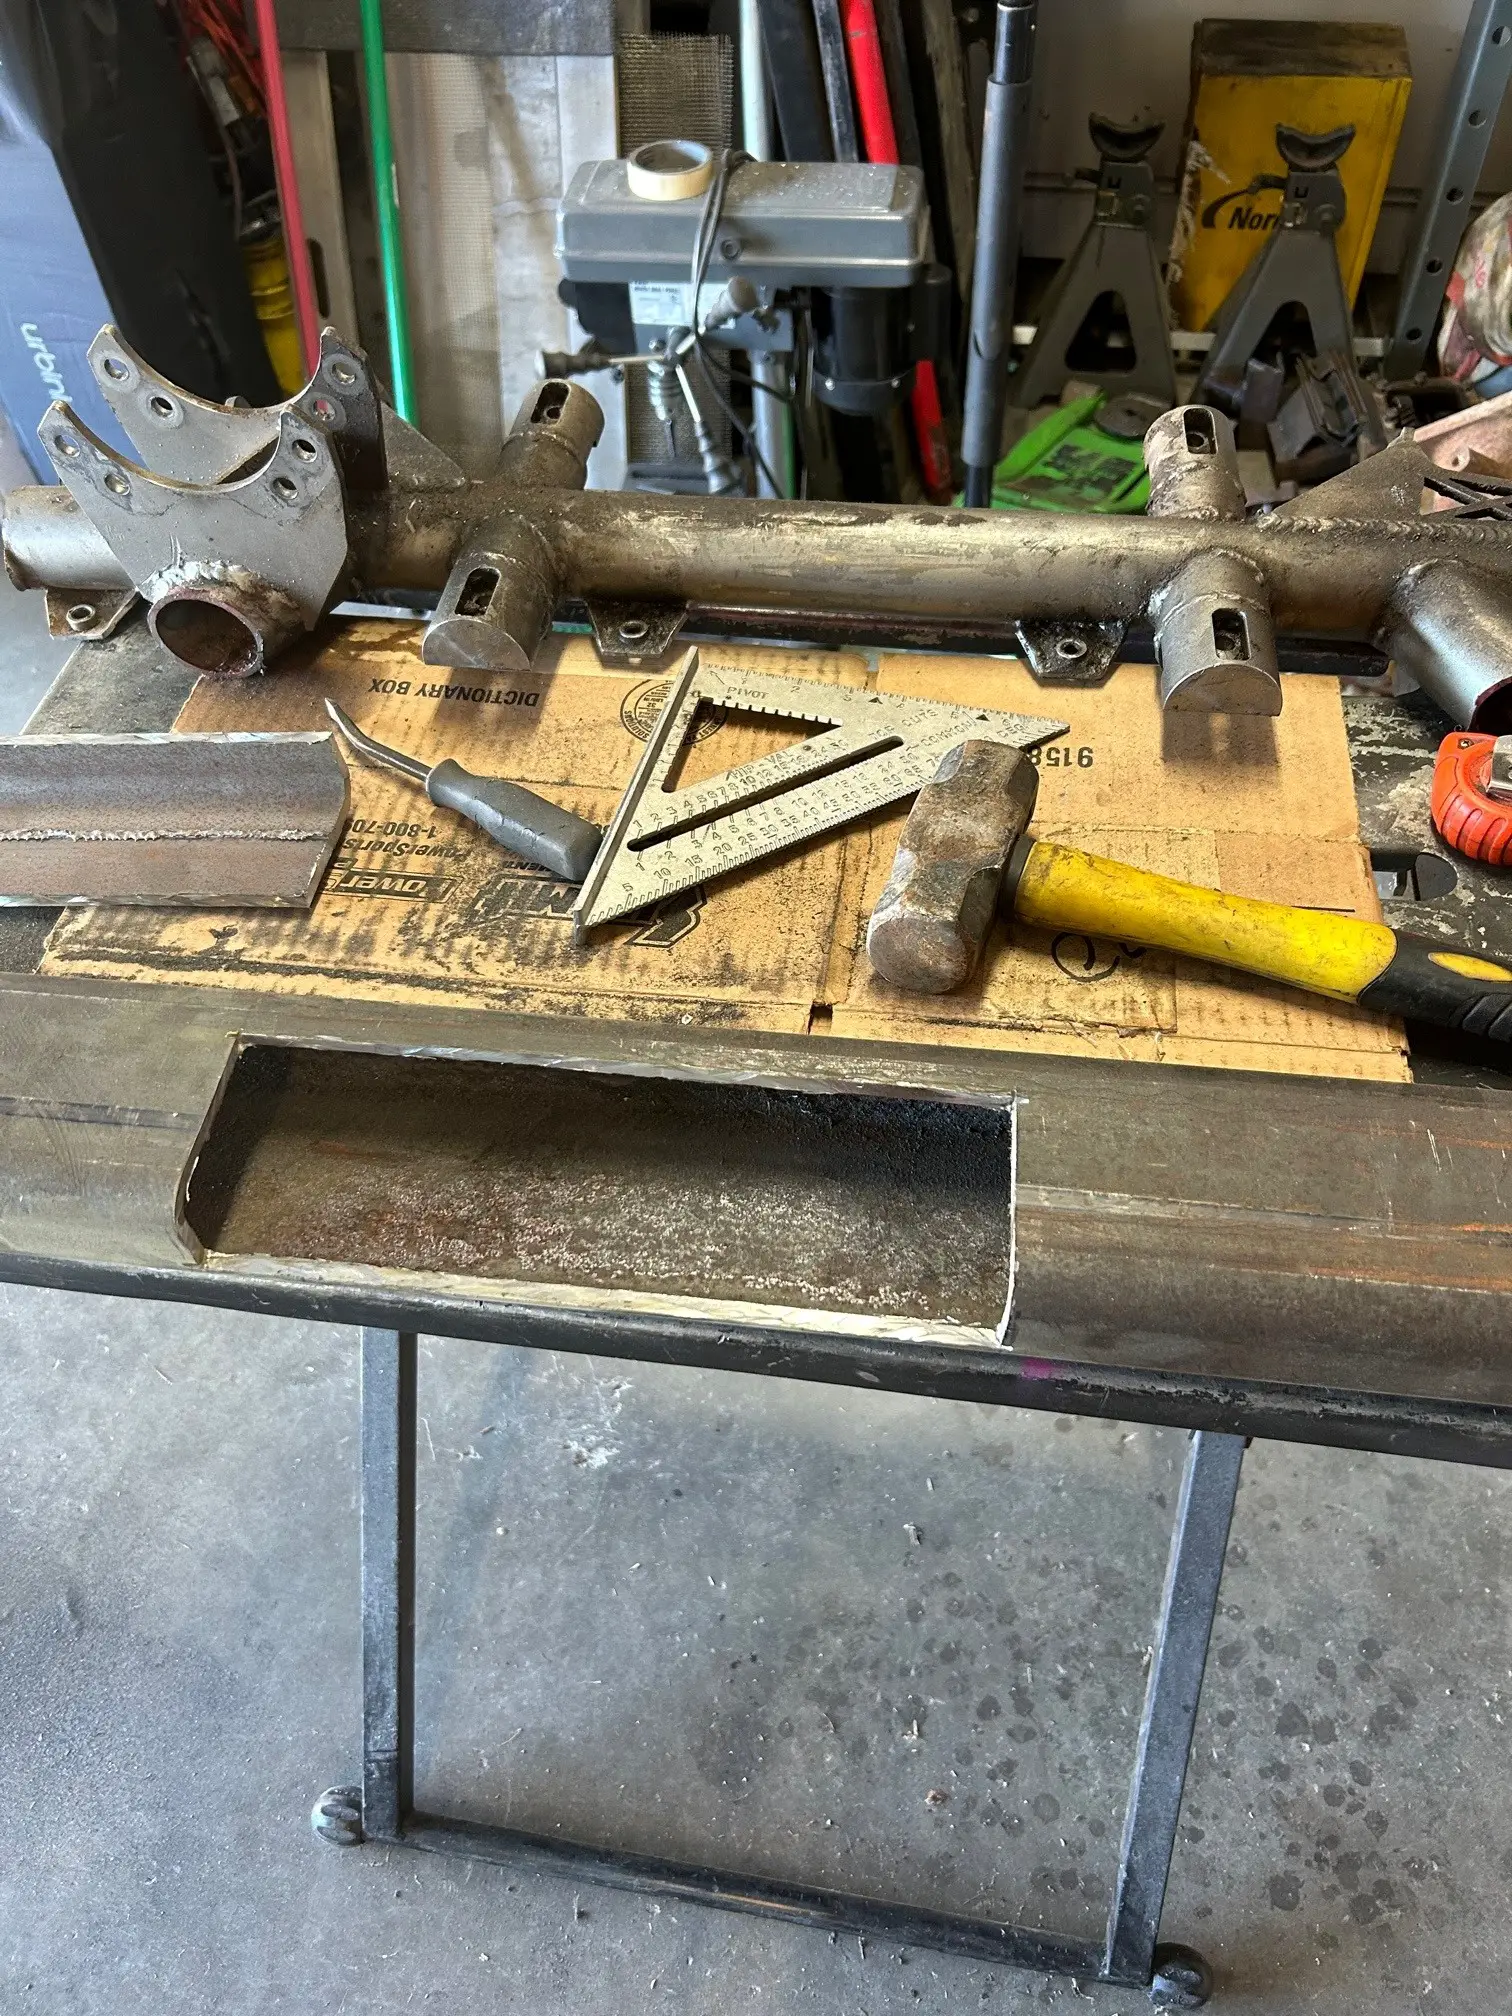
New Crossover trans notch.jpg


New Crossover weld.jpg


New Crossover mounts.jpg


New Crossover fully welded.jpg


All we have to do now is install the crossover tube and get it welded in place and we'll be good to go! Nope, not even close lol.

Now as for the other knowns and issues, we have the following that we are addressing and will need to take care of before KOH!
1. Transmission pan: With the old beaten and bent steel pan (leaked like crazy), we do have a new pan to install. However, we need to re-tap a few bolt holes in order to install the new pan. This was an issue when we installed the pan at Crandon. Simple fix, but still pressing.
2. Belly Pan Height: Unfortunately, this falls on me as I designed the ride height with 40's not 37's. Therefore, the belly sits a little lower than we want. Worked well for Crandon and the short course, however we want to add a couple of inches for the other races. This will also help us with a couple of other issues with max up-travel. Killing two birds I suppose but is going to take some time to redo the suspension.
3. Colossus D300 Case: Although we upgraded everything internally with 32 splines shafts, the gears themselves are not going to hold up. We could convert the gears to JB Conversions 4:1, however we do not need that gearing. Therefore, the D300 is out! We are now going with the Colossus NP205 (I've created a good relationship with Behemoth, and JB Conversions). We will be utilizing the new 3:1 from JB Conversions within the 205 case. All will be here December for install. Until then, we'll put the D300 back in for mobility purposes.
4. Coilovers: As you all are aware, our 2.5" coilovers are not exactly the "go to" when it comes to racing applications with single shocks per corner. They do have adjusters and worked well (I still recommend), but for the longer races and high speeds we would benefit from IBP's more. With that said, I was able to source some 3" IBP's from Fox. With the larger diameter springs, we are going to run into some clearance issues on the chassis I believe. I assume we'll be doing some more tube notching for the 3" IBP's to fit. With that said, they are a little longer than our 2.5", so we're hoping we will be able to utilize the existing mounts without any drastic changes to the mount locations giving us our additional belly height. Fingers crossed. But we will still have to change bump locations and limit strap lengths regardless.
5. Links: With the 2" lowers bananad after one race, I can only image what more races would do. In order to save the chassis alignments, I reached out to Tim at TMR Customs for their new aluminum links. Other than the rear trailing arms, we now have a full set of aluminum links on the way for both the front and the rear.
6. Spare tire carrier: As some of you pointed out, the small material on the tire carrier didn't hold up. Not a problem moving forward. We are now designing a new tire carrier that will not swivel down; however, it will be removable by utilizing tube clamps. It will be more structurally sound and allow us to build a few areas for spares and tools, which is our next big hurdle.
7. With all that KOH brings to the table, spare parts, tools, a jack, etc. are essential! To date, we don't have any of this stuff addressed. We have some good ideas on spares and a tool bag, but we need some more time to figure it all out. This is something we will be working on after we address the other issues.
8. Misc things: There are a few additional things we need to add and fix before KOH. Rock lights, a few Holley adjustments, transmission temp sensor fixed, things like that. Not super pressing, but things we do need for KOH.

YES, I know... it's a lot to address in a little timeframe. Don't remind me! But I assure you, we'll knock it out! KOH 2024 here we come!

Cheers!
 
With the long list of things to do, I've been doing my best to gather the needed parts to get Tinkerita ready for KOH24. After a few last-minute buys, I was able to get everything loaded up and took everything to the shop to start getting this thing put back together. To say the least, the truck was full both inside and out.
Upgraded Parts.jpg


With limited time, our team has put together a timeline of everything to do to get it ready. First on the list was get the new crossover tube installed so we can start assembling things. Prior to burning it in completely, we triple checked everything to make sure it would all align. With a few minor adjustments, we were able to get it completely welded in as well as all of our tube clamps for the supports and skid plates. After we let it cool down, we got it all painted and ready for everything else to be installed.
New Crossover Weld Install.jpg


New Crossover Painted.jpg


New Crossover Top Painted.jpg


During the process of welding, cooling, cleaning and painting, our team also worked on getting the transmission all cleaned up to install the new pan. During the frantic rush at Crandon, we did have some issues with our hardware on the trans pan, so while everything was a part, we also took the time to chase all the treads and get new bolts. Unfortunately, the pan gasket went missing during the late night, so we have to get another one prior to installing the transmission. This will take place this week.
TH400 Pan Upgrade.jpg


While working on the TH400, we were also working on our new NP205 upgrade. As some of you are aware, Midnight Metalworks tanked, and Behemoth Drivetrain has taken most of that business. Therefore, lead times have been a little longer, however Dylan at Behemoth worked directly with me on getting me a case in time. I'm very grateful for this and was able to do a shop tour. If you are ever in the market for a D300 or NP205 case, I highly recommend them. Everything is 100% manufactured in KY and they have future plans to expand their portfolio. I won't go into great detail; however, they are working on more economic cases, manufacturing USA made gears, and more!!! With that said, we started our disassembly of our donor case in order to get us our Colossus NP205 case built. I also partnered with JB Conversions on the 3:1 gearing as well for additional options in the future and SPARES! I'm looking forward to getting this installed, it's a beefy case and I highly doubt we'll have any further issues.
NP205 Upgrade.jpg


Once we get the new NP205 case together, we sourced a new mount from TMR Customs to replace the D300 mount. Once we get the t-case all assembled and installed, we'll be able to make short work of the mount. Then our goal is to make it a roller again and move it that way we can start on the suspension while establishing the new belly pan height. Lots of work to do still, but small progress is better than no progress. Thankfully I have a great support system and team that is helping get this thing ready without me having to be there. Luckily, I'll have some time off to be able to focus on dialing everything in before the New Years!
 
I hope everyone had a wonderful Christmas. While most were celebrating, I utilized most of my time off to tackle some of our "to do" list. Since the car isn't at the house, I'm having to do what I can to get parts ready to install, for when I do go to the shop. I decided to work on the new Behemoth Colossus NP05 case and get it ready to install. I'm still waiting on my JB Conversions parts to arrive (Saturday), however I put the case together as best as I could. When I install the new parts, I'll put on the new retainers as well. Just a side note, the gear differences between the D300 and NP205 are massive. I suspect zero failures with the transfer case now!
NP205 Build.jpg


NP205 Build 3.jpg


While I was away, some of the guys got the transmission all done and installed. The new pan is nice and beefy and with the new crossover tube, we should eliminate any transmission pan issues.
TH400 Install.jpg


When I was at the shop, we ran into an issue with the NP205. Luckily, we have some good partners that have helped us get what we need. With the short 32 spline input, we don't have enough seal engagement with the Novak adapter. After a pathway forward, we went ahead and installed the new case for driveline measuremenst and verification. The last thing we still need to knock out is the mount. But I have an idea for that.
NP205 Adapter issue.jpg


NP205 Installed.jpg


With progress finally moving forward, we wanted to move Tinkerita off the lift and into another bay to work on the suspension. In order to move it, we needed to install the lower links. We finally got to install something new and shiny without having to remove it again in the future. Unfortunately, we didn't get to install the uppers just yet. That'll come soon enough.
Aluminum Links.jpg


The last thing we got to work on was the new 3" IBP's. These things are massive and causing some fitment issues with the chassis. We've decided to notch out the front to get them to fit, double up the upper brackets, and build new brackets for the rear. By doing this, we should be able to add 2" to our belly height and keep everything relatively close. We're really looking forward to having these installed and feeling the difference.
Front IBP Mockup.jpg


Rear IBP Mockup.jpg


Rear IBP Mockup Side.jpg


Stay tuned, we officially leave in 4 weeks. There's so much left to do, but one bite at a time.
 
Happy New Years Everyone!

While most were recovering yesterday, I spent the day in the shop trying to make some progress on the race Jeep. It was a rollercoaster of a day to say the least. We moved Tinkerita in the upper room to set our new desired ride height and go from there. Once we got it moved and established, the fun began...
New Ride Height.jpg


Once we came up with some ideas, we started getting some preliminary mounts in place for testing on the front IBP's. It was early on that I noticed we had rotated the upper coilover mount on the driver side. Even with the support, it wasn't enough to stop the rotation of the tube. I'm thankful we saw this as it allows us to strengthen this in the future. However, for now, I cut it on the back to rotate it down again.
Front Mount Fix.jpg


After fixing the upper mount, we worked on mocking up lower mounts onto the axle. After spitting some ideas around, we had a solution to plate and double plate some stuff with what we had laying around. Unfortunately, the 3" IBP's are a bit larger than the 2.5" and we ran into all kinds of clearance issues. To say the least, in my frustrations I decided to leave it for now and come back to it with a clear mindset.
Front IBP Mount.jpg


Front IBP Mockup 2.jpg


Front IBP Flex.jpg


Front IBP Clearance.jpg


Instead of wasting time on the front, I decided to double check the rear. I was able to utilize the old mount, just on the outside. After a few measurements, flex test, and more measurements, I was happy with there the rear was sitting. In our crunch for KOH, this is going to have to do for now. I'll plate all of this in for support and we should be good to go on the rear IBP's.
Rear IBP Bracket.jpg


Rear IBP Flex.jpg


After a long and hard-fought day at the shop, I knew I had to bring this thing home so I can have more time to work on it. We spent the next couple of hours getting this and all the parts loaded so I could head back home. It was a bittersweet day as we made some progress, just not enough to give me the warm and fuzzies.
Loaded Up.jpg


This week I plan on finishing the rear mounts so I can completely finish the rear suspension setup. This includes the bumps and limits. After that, it's just one thing at a time. As I look over the car, try to plan ahead, and order what parts are needed, it feels as if the list is growing.

Will definitely be a down to the wire KOH prep for sure.
 
As time permits, I'll do my best to keep things up to date. As you all know, Last week I loaded up the Jeep and brought it back to its beginnings... my little house garage. I was in high spirits to get this thing unloaded and knocked out, however unloading everything I tweaked my back leaving me in a lot of discomfort... making the next few days' progression slow. As if we aren't already on a crunch, it's these things that we all neglect to think about that cause more delays. Regardless, this past weekend I worked both day and night to push through KOH prep to get TInkerita ready. After establishing our new belly height at the house on Friday night, I went right back to the rear to finish it up on Saturday. Unfortunately, after a few additional measurements, there were some changes that needed to happen to get our travel numbers. The original 2.5 coilovers were 16" in length, therefore we lost 2" in stroke with the new IBP's. With a few moved mounting locations, we were left with the same travel as before. With the increased belly height, I also had to add some bump extensions. After a quick spray of paint and bolt install, I completed the rear suspension.
Home Prep.jpg


Rear IBP Measurements.jpg


Rear IBP Trailing Arm.jpg


Rear IBP New Measurement.jpg


Rear Bump.jpg


Rear IBP Complete.jpg


Although a long Saturday, I spent most of Sunday afternoon and night working on a new tire carrier. Most people would work on the front suspension but I'm still working on some final details on the front. To eliminate any delays, the tire carrier is second on the importance list to finish. I liked the overall appearance of the last carrier, it just wasn't supported enough. With that said, I kept a similar appearance on the chassis just changing the lengths up and mounting locations to add rigidity. Also, while working on the carrier, I proactively configured the spare drive shaft location, jack, tool/spare parts box, etc. All of which will be contained in the rear for weight distribution. Should work out well.
Tire Carrier 2.0.jpg


Tire Carrier Design.jpg


Tire Carrier Mounts.jpg


My plan is to finish the last few supporting tubes tonight, rear tire bar, and install the strap tie downs for the y-strap. After the tire carrier is all finished up (tonight/tomorrow), I'll focus on getting everything ready for the front suspension. My goal is to have the suspension completed this weekend and finalize the NP-205 output mount, leaving me with 1 final week to finish the small insignificant items on the list. Regardless, we're making progress!
 
Well, it's been a couple of weeks since I updated the progress on Tinkerita. To say the least, it's been a long two weeks with many late nights and absolutely no sleep it feels. Last I left off, I was finishing up the tire carrier as I awaited some brackets and miscellaneous other parts. Once I had the overall design, I knew I wanted to add a retainer bar on the back to support the tire since I was removing the unit bearing design, but I did however utilize some of the tubes from the old carrier. Also added hook points for the y-strap, a pivot mount for the jack, and custom brackets to hold the spare driveshaft. Was able to finish that up last week before the weekend hit.
Tire Carrier Retainer.jpg


Tire Carrier Rear View.jpg


... now to last weekend. Luckily, I have some great friends that will sacrifice just as much time as I do for race prep. Last weekend was no different as I was going to attempt to tackle the front suspension yet again. After I ran into clearance issues with the original design, I knew I had to cut off the chassis mounts and the bump mounts. Since I had already cut the axle mounts off, I knew there really wasn't any going back to the 2.5" coilovers. However, I do appreciate the input and concerns with time restraints (I was concerned too). Since we decided there was no going back, I didn't have a choice but to figure out a way for them to work. After many hours of mocking up, flexing, cutting, and fitting brackets in different configurations, we were able to squeeze new 3" IBP's onto the front. With literally no room to spare, they FIT! Got everything burned in, then had to figure out the bump location.
Front IBP Bump Removal.jpg

Front IBP Full Droop.jpg


Front IBP Full Bump.jpg


Front IBP Clearance Fix.jpg


Unfortunately, we had to notch the chassis to get the bumps to fit with the new coilover package. Not a big deal but took a lot of extra time. Due to the tight packaging, we also had to add bump pad extensions. At 2am after burning in the new can location and gussets for support, extensions, we were able to install the springs and get Tinkerita under her own weight again.
Front IBP Bump Notch.jpg


Front IBP Complete.jpg


With over 30 hours invested last weekend, I was able to go to sleep knowing it was at least under its own suspension. We'll have to set ride height and mount the reservoirs, etc. but we're one step closer. There was a ton left to do, but thankfully the list was manageable at this point.
Suspension Complete.jpg
 
Now for the final countdown... This past week I had to travel to Texas for a couple of days, keeping my progress minimal. With a long list of things to do, I focused my time on the most important things first for this past weekend. First things first, get the NP205 all done. Huge thanks to Behemoth Drivetrain, JB Conversions, Novak, and NWF for all the parts to make this happen. Originally, we installed the stock gear set with the old bearings, seals, etc. After a complete disassembly, we were able to reassemble everything with the brand new 3:1 gear set (massive gears), new bearings, seals, and retainers. As for the input, I was able to utilize Novak's insert in my TH400 mount and Behemoths low profile retainer to have enough seal engagement on the input shaft. Due to the D300 mount, to keep everything simple, I utilized NWF output retainer and their output mount. Was able to make quick work of this mount and got everything installed.
NP205 3-1.jpg


NP205 WNF Rear Retainer.jpg


NP205 NWF Mount.jpg


With the suspension buttoned up (for the most part anyways), and the drivetrain all installed, it was time to focus on other important KOH related things like storage. I was able to source an aluminum box to practically fit under the tire carrier, by design of course. After a couple of brackets, I was able to get the storage box installed. Should be plenty of storage for parts and tools. Also knocked out a few tabs and small items as well.
Tire Carrier Storage.jpg


Tire Carrier Complete.jpg


As for yesterday, Sunday, it was my deadline to get the car loaded up and back to the race shop for tuning. Yesterday was frantic as I was pushing to get every little last-minute thing buttoned up and parts loaded. Took way too long to get loaded up and packed up, but at the end of the day, after fluid, battery charging, panel installs, I was able to load up Tinkerita for KOH24!
Tinkerita KOH 24.jpg


Tinkerita KOH Prep.jpg


Tinkerita KOH Bound.jpg


There are still a few things to go over and button up, but she's as ready as I could get her in the time that I had. Got her to the shop late last night and she's now off my hands for a week.

We still have to mount the new Atturo Tires, install the skid plates, take care of a few small items, and install a few electrical plugs and wires, but she's KOH bound as far as I'm concerned. I'll mark it as a victory!
 
Well, well, well, I don't really know where to begin. It's been a week since we took to the starting line at KOH 2024. To say it was a difficult undertaking would be an understatement. Just getting out to the lakebed from North Carolina was a difficult task as our guys lost a trailer tire (not a big deal) in Texas and trailer leaf spring in Arizona! Unfortunately, this costed some time which set our whole team and plans behind. Hindsight I guess was a good thing as the lakebed was a muddy mess!

Once we arrived at the lakebed, it was a rush to get the car prepped and ready for tech the next morning. We all worked on many different things to finalize everything we needed for tech. Regardless, it's just a different world on the west coast.
KOH Arrival.jpg


Tech Upgrades.jpg


The goal was to tech the chassis, get it banded, and head out for some pre-running. Unfortunately, the small inconveniences costed us some precious time as we had to button up a few issues with the firewall that was overlooked during our original tech inspection. Luckily, we had some aluminum tape and cardboard to make a temporary solution allowing us to get a band. What felt like forever, we finally got into the desert with the car. As we went, we were making adjustments to the IBP's but were only able to hit a few course trails before we heard a loud bang under the car. With much disappointment, our brand-new Fox IBP blew apart. So our quick pre-run was over.
Tech Inspection.jpg


Pre Running.jpg


IBP Explodes.jpg


Thankfully Fox was on the lakebed and took care of the IBP's for us. They even went through the other rear to make sure there were no other issues. Speculation is that there was too much oil. Regardless, we lost the whole afternoon and didn't utilize qualifying pre-run. Which leads us into Tuesday morning. After getting the IBP's back, we had to rush to get them installed, get suited, and hit the qualifying course. Thankfully we had zero pre-running so of course we went into qualifying blind and way too hot. This costed us a rear driver tire early into our run which slowed us way down. In the end, we made it back and didn't qualify last.
Post Qualifying.jpg


After a quick tire change, we wanted to do some additional shock tuning. We all loaded up and found a good section to run and test out the suspension. After getting more comfortable in the whoops, we were able to carry some speed as we continued to work on the IBP's. In the end we had a top speed of 72 mph in some moderate whoops with the given area with more in the tank. However, this costed us a rear main seal. Once we got back to camp, the car wasn't happy, puking oil from the underside. So, instead of going back out and pre-running more of the course, we were stuck at camp yet again working on the car.
Post Pre Run.jpg


Rear Main Seal.jpg


Instead of getting the opportunity to hit some rock trails Wednesday or pre-run some more desert, we were stuck in the trailer trying to get the car back together. I'm glad we had the trailer, as it made working on the car easier. Luckily, it allowed us to find some other issues later in the day. The front third member didn't feel good, so we knew we had to inspect the carrier once the car was out of the trailer. We also took advantage of getting the IBP's off for some internal shimming. In the end, we got the car back together, pulled back into our pits, and spent the rest of the night working on the front axle.
Front Third Bearing.jpg


If you're keeping up with days, it's now Thursday which is our tech and contingency and we didn't have the parts we needed to get the frontend back together. As most of you know, the racing community is pretty awesome within Ultra 4, and I was able to source the bearing we needed from @JR4X and their team. If it wasn't for them, our plan was to go through tech without the front 3rd installed until we got the bearing we needed. But that wasn't the case, and we were able to make it.
Tech & Contingency.jpg


Since we had zero time on the newly tuned IBP's, after tech, we hit some more areas to dial in the suspension one last time before race day. We made quick work of this as they felt much better than before. With the starting line in sight, we went back to camp to prep the car for race day.
 
Now race day...
It was a beautiful morning, absolutely PERFECT for racing. With all the setbacks behind us, I was eager and ready to take to the course. Our plan was to take it easy, "save the car", and just have fun.
Race Morning.jpg


As we lined up prior to the race to start, we were able to just relax and have some good conversations with other racers near us. Small world, we were set to start off with Diezel from NC. He helped us out back in AOP in 21'. Again, just cool people to be affiliated with.
In Line.jpg


Once the green flag waved, it was all focus as we took the hole shot from him. Learning from our qualifying, we took it much easier in the big whoops and avoided the gotcha rock that kept killing everyone's driver side tires. Very quickly into the race, we were already passing other racers before Turkey Claw. With this speed, the car felt great, not really pushing at all. Once we got into TC, everyone was in a line leaving the middle open. I decided to take the middle lane and pass quite a few other racers in the rocks. Unfortunately, this led me turtled at the pinch rock. Once my co-dawg got out to winch, we realized we didn't have reverse. Immediately this killed the mood, and I knew my day wasn't going to be as fun as I hoped. Once we got through, we ripped a hole in a side wall killing our rear tire. In hopes to make quick work of our tire change, we found out that our impact wasn't on the car. Instead of driving 27 miles to remote pit 1, I decided to run back to main pit. Although not fun, I made it back and we changed the tire only to make it 50 yards killing another tire. At this point we had no choice to continue on at a slower speed. Shortly into our race, now by ourselves, we kept pulling over to broken down cars to see if they had a spare to loan. Much to our Suprise, we were able to get one and carry on with our race.
Break Down.jpg


This is where this story ends tragically. Right around race mile 19, we hit a large gout at 65 sending us up and over, endoing the car. With a couple of flips the car stopped and thankfully both my co-driver and I were able to walk away with no issues. The car however did not have the same luck, but it saved our lives and for that I'm truly grateful.
Rollover.jpg


Rollover Top.jpg


Wasn't very long afterwards that race recovery showed up checking on us and helping us flip the car back over. Those guys were the real heroes as they dragged the car to powerline road allowing us the opportunity to get it back.
Rollover Upright.jpg


Rollover Rear.jpg


After a few phone calls to the loved ones and our team, we worked on the car. Assessing damage and evaluating our options, we decided to try and limp it back as best we could with all the damage it endured. Thankfully we were able to make our tire strap work to help support the rear and drive slowly back to the main road.
Rollover Damage.jpg


On the way back our guys came with more straps and a spare tire. Further down, we ran into another racer recovering his car. After a few laughs, he offered up his truck and trailer to us. He felt we needed it more than he did. Without hesitation, we loaded up the car and headed back to hammertown.
Trailer.jpg


Without Ryan and his team, I think we would still be driving at 5mph to get the car back. In the end, we got the beat-up car back to camp and our KOH experience was over.
Camp.jpg


Now the teardown process will begin to make sure the chassis is ok and fix the broken undercarriage.

Regardless, I just want to thank all of our sponsors, supporters, friends, family members, and everyone else that have helped along in this journey. Although broke, we're not broken, and we'll be back at the next one.
 
man it stinks to hear about the roll. you did an awesome build with the car and hope to see you fix it and continue on
 
man it stinks to hear about the roll. you did an awesome build with the car and hope to see you fix it and continue on
You know better than any, that's just what we do. Race it/wheel it, break it, rebuild it back better, and keep on with this vicious cycle. Yes it does stink, but we walked away and the chassis can be fixed. That's exactly what I plan to do, that way I can go wheeling with that Unicorn of yours!
 
Well, a lot of time has passed since I posted, my apologies! There have been a lot of life changes and just minimal updates on Tinkerita. However, with that said... I'm back at it.

Shortly after coming home from KOH, my grandmother passed. This was a real bummer as my mother took it pretty badly. Not that it took my time away from the garage, but we all just needed time to be together, especially since we have a newborn now. Life changing events. He has 100% changed my priorities and now that he is getting mobile, we've been able to do small tasks on the jeep. Add those two things with a new job traveling 2-3 weeks a month, my time is limited. Seems like after returning from Hammers, my life hit the fast forward button and went into pure chaos. Honestly it was the break I needed though as the constant grind was getting old. My time away has given me new light though and I'm ready to get ready for Crandon 2024. As a family, we're all excited about racing.
Orson.jpg


As mentioned, I've been able to spend some time going through/over the chassis from my break away and there is a lot of work to do. A LOT OF WORK. Basically, everything but the main chassis has been either bent, twisted, or broken to sum it up quickly. From front to back, we're going to have to rebuild this whole thing.

My list is long... front bumper (stinger) bent, front sway bar twisted downward, sub chassis broken, mounts bent, tire carrier destroyed, rear axle housing bent, rear sway bar and arms bent, skid plate bent, transfer case shifting issues, transmission no reverse, busted Holley dash, broken antenna mount, battery power issues, busted bumps, exhaust hangers, and many more.
mount damage.jpg


broken tubes.jpg


axle damage.jpg


To maximize my rebuild efforts, I just started disassembling everything from the rear. If I had more room, I would have stripped it down to a bare chassis, but we'll start with the problem areas first. I was hopeful of the rebuild until the rear axle housing was bent. Passenger side, the side we rolled on, is bent over 2" off center, literally pulled apart the rear truss seam. Also had 3/4" bolts bent into U shapes so I wasn't able to remove hiems on the passenger side either. To speed things up, I strategically cut some of the lower tubes out.
chassis cut.jpg


With tubes cut out, it was easy for me to remove the transfer case and transmission.
case removal.jpg


th400 removal.jpg


To date, I have ordered 90% of everything needed to start the rebuild, tubing, brackets, rear housing, bolts, etc. The transmission has been sent out, and everything else is piled up under the jeep. I have spent a lot of time researching and thinking about my options/ideas before I start the rebuild, but I'm not 100% just yet on what I want to do. A large part of me wants to cut out the whole lower portion out, lower front section (miter cuts), and lower rear section to build back for better shock packaging. I mean I have to cut some of these tubes out anyways. Regardless, lots of time yet to invest before we're moving again.

Hopefully knock out some more disassembly over the 4th and can come up with a decision. Happy 4th fellas.
 
Hope you all had a great 4th! :usa::beer:

More updates... was able to escape into the garage over the weekend, basically a lot more cutting and removal of bent/broken parts. Got most of the interior stripped which helped me find bent battery trays. With the "rebuild" I plan on relocating these, so it was the prime opportunity to cut them out to start fresh.
floor removal.jpg


floor removal 2.jpg


battery removal.jpg


After that I started working on the rear. I figured I'd just work from the back to the front to help minimize the overlook of something. I removed the oil coolers, spare box and brackets, cut out a bent tube holding the sway bar, all the fun things. After inspecting everything else, I figured it was time to see how I was going to relocate things and see what all would be needed. In order to relocate a battery to the rear, I'd have to move the spares box over a bit. Laid it out, should also have enough room for a 4-quart fluid holder as well.
cooler removal.jpg


sway bar removal.jpg


spares and battery location.jpg


My goal is to sleeve the sway bar through the intersection point, giving it strength. Will probably add small gussets on the outside to help minimize this from happening again. Also have to come up with a good mounting solution for the battery tray. After straightening the better of the two, I will more than likely just add a support on the bottom to keep them from bending. Then just reuse my brackets for the spares box. But before I burn in any refurbished parts, I needed to make sure everything would clear with the spare tire carrier. HAHA amusingly I put it back on the chassis to see what if anything could be salvaged. Luckily all the damage was on the rearmost portion, so I chopped it all off in order to rebuild. For the first time in months, I actually made progress on putting something back together.
tire carrier fitment.jpg


tire carrier chop.jpg


tire carrier rebuild.jpg


Once I get the tire carrier back together, I'll finish up with the battery tray and spares box. Hope to have some more time this week/weekend to get more done before I travel next week. Guess the countdown is on!
 
I didn't get a lot of time this weekend to work on the Jeep, but I did make some progress. Thankfully, my wife is always helping where she can and showed me a cheap bender a few weeks ago. Was able to land an Affordable Bender with 7 different dies for super cheap. Figured I'd be using it sooner than later and this weekend was it when I broke it out for the first time.
bender.jpg


Although I misplaced the lower pin, I was able to make it work with some scrap tube. Used the cheap bender to bend the last tube on the tire carrier. Not perfect by any means, but it'll hold the tire in its place. Let's be honest, it'll probably get banged up and bent as we continue to race anyways, so not perfect was perfect for me. Also received the TG fluid container from the 4th sales. It fit perfectly in its place.
tire carrier & container.jpg


Last little bit to finish the tire carrier was the small gussets and strap anchors. To minimize fabrication, I cut off the gussets from the old one and reused them. Only had to make one new one. Did the same with the TMR anchors. Got everything tacked in place and ready for final welding. Before knocking out all the welding, I want to triple check everything on the underside. Should have all this done this week.
tire carrier gussets top.jpg


tire carrier ancors.jpg


Unfortunately, I have to travel this week so progress will be slow. Glad I was able to get the rear mostly put back together and re-worked. I will have more time this weekend to knock out some more tube work in the rear and work my way forward. My goal is to start getting this thing back to normal on the bottom side so I can get the axle under it.
 
Congratulations on the offspring homie 🤘

Glad to see you back after it!
 
Back
Top