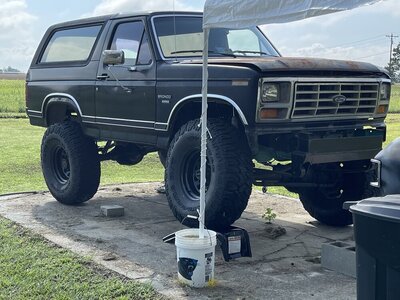
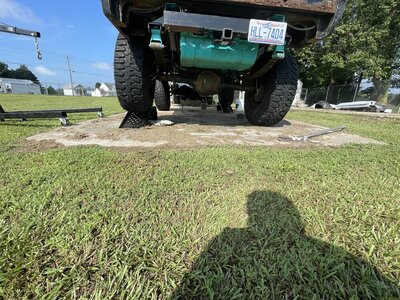
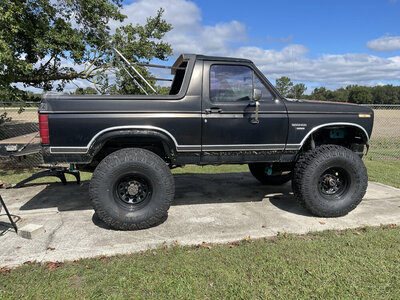
I’ve been tinkering with my el Camino while waiting for my exhaust guy/tuner to free up some time and for some extra funds to free up around planning a wedding. The bronco still needs a front driveshaft, 4wd shifter, and I have to chase out an electrical gremlin. Eventually it will need a regear. The 4l80e on 40s with 3.73 isn’t extremely happy. But I’m hoping we can tune in some better shift points in the meantime. I just pulled it in the back to finally bite the bullet and cut the fenders for tire clearance.


You are using an out of date browser. It may not display this or other websites correctly.
You should upgrade or use an alternative browser.
You should upgrade or use an alternative browser.
On to the next one: Bronco build
- Thread starter YJKrawlin
- Start date
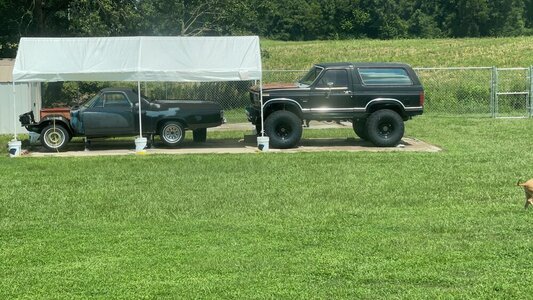
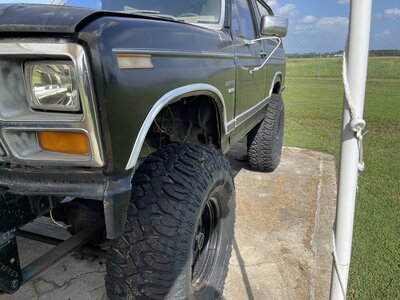
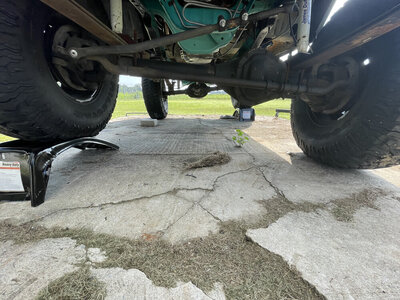
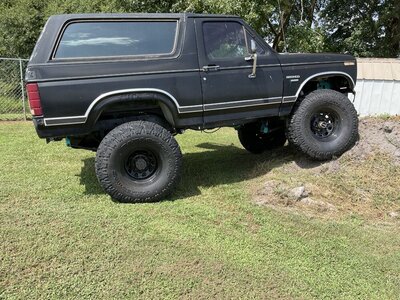
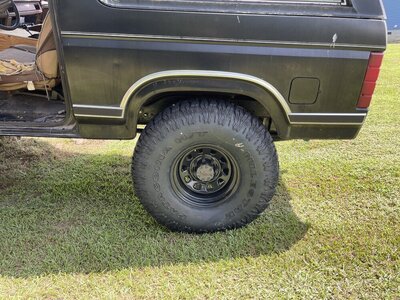
Trimmed the fenders. Still need to touch them up and get some edging on it to keep from cutting myself but I’m happy with it. Pulled the bronco on some ramps to check clearance after the first cut. Not the best example. But it’s what I could do with only 2wd right now. Hoping to get it regeared after exhaust and our wedding so I can put some miles on it. I will definitely need a steering stabilizer. It steers insanely quick and the suspension is surprisingly soft causing it to get jerky on bumps. One day at a time though.
Attachments
-
 7AA0B380-CAA3-4BAE-B843-DAAE1EC73DCB.jpeg181.7 KB · Views: 341
 -
 5DAF102B-2C86-4A76-B457-6A2F81BCE156.jpeg202.2 KB · Views: 369
 -
 9490CCD5-DD5F-446D-9551-4FDB921DA478.jpeg226.6 KB · Views: 356
 -
 960384C2-8CC2-4994-8D66-ABF475D93885.jpeg189.1 KB · Views: 359
 -
 51203EFA-8A4B-43FB-A728-12F1E9F19DCD.jpeg230.3 KB · Views: 372
 -
 7DF019DB-4558-433E-AE61-DD978E444789.jpeg229.9 KB · Views: 379
 -
 3459833A-38F5-4B42-AFF0-A4B216CA7711.jpeg349.8 KB · Views: 374
 -
 920F66CE-F09C-41E7-9F4D-BF4DC6EB4C03.jpeg316.2 KB · Views: 326
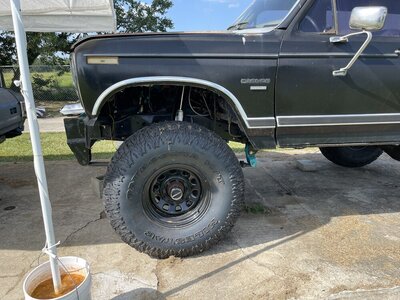
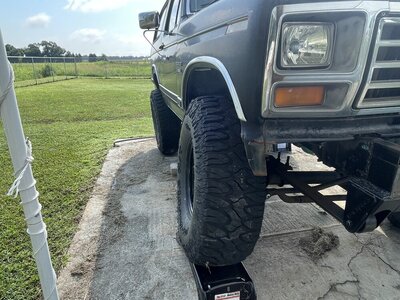
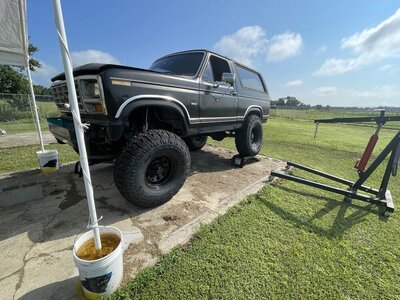
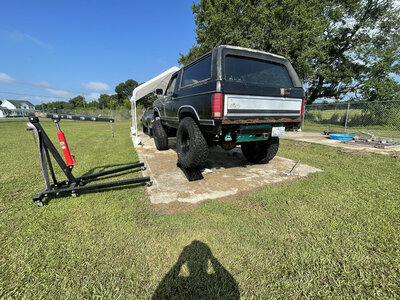
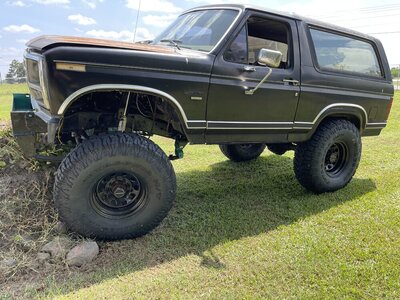
Messed around and put the bronco on 2 low to try to get the suspension flexing a little more and get a better feeling for the limitations. Also looked at the steering and am going to try a drop pitman arm to see if it will help the steering feel better.
Attachments
-
 8DCB0AFB-0A47-4C89-900A-D1238D0BEDEF.jpeg303.5 KB · Views: 382
 -
 B0764833-2BAF-4E61-BF6F-1B7C0946682F.jpeg260.6 KB · Views: 354
 -
 121F7D88-9157-470E-9E5C-FEA6FA44B2D0.jpeg240 KB · Views: 364
 -
 4BF6524C-9412-49D3-A5B9-39FF3EBC4613.jpeg260.9 KB · Views: 347
 -
 101A90D1-DB2D-4BBA-B7E9-CBAABB9B9624.jpeg217.9 KB · Views: 356
 -
 29E28D70-5FFE-4DE4-97FA-A3C86828F5D7.jpeg211.2 KB · Views: 355
XJsavage
CounterCulture
- Joined
- Aug 15, 2009
- Location
- Lyle's Ford SC
Man this one cool ride!!
Thanks. Just looking forward to driving it now. Starting to work out the kinks and then make it comfortable inside.Man this one cool ride!!
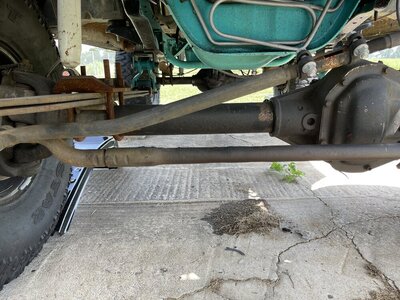
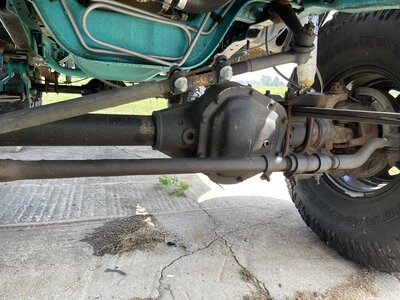
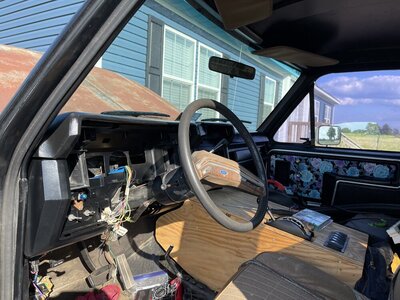
Budget is drying up as our wedding date closes in; so to "save" some money I've made my projects smaller and tore all of the interior plastic out to paint it all black instead of the tan that came in the truck originally. Using some of the Dupli color Fabric and Vinyl spray, actually came out pretty good all things considered. Cleaned the panels with some comet and wiped them down with some wax and grease remover. I'm running the wiring for the rear speakers and door speaker while I have the panels out, hoping that I can maybe have some tunes for my trips to the trash site while I wait for funds to open up again for a driveshaft and exhaust. We are also redoing the "fancy" fabric section in the XLT door panels to something that matches the teal frame colors to help my fiancée accept the recent expenses  . Now that the panels are nice and clean though, it's making me want to go ahead and get the heat shielding and carpet. One expense becomes another I suppose. I'll try to get some photos of the panels when I get home tomorrow. Also replacing all of the brittle push snaps that hold the panels in because they were all destroyed coming apart after 35+ years. I welded on a small nut and bolt to act as a steering stop to keep me from hitting the springs when backing into my back yard. It bent immediately but it's doing its job so I can't complain
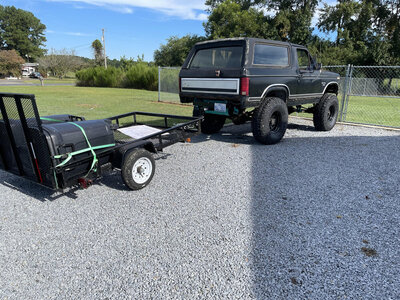
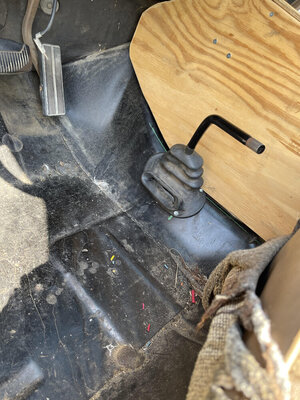
  . I plan to remove the knuckle at some point to drill in a real steering stop. Started taking the bronco on trips to haul off trash. The bumper I built seems to handle it ok, but I definitely need to reinforce or buy a legit hitch for it. Modified the factory shifter, some leftover shifter pieces from the C6 and used a piece of 3x5 1/4" angle to put together a shifter for the NP241. It's not pretty but it will work for now until I can get a cable shifter for it. Small projects for the next couple months until we recover from our wedding.
. Now that the panels are nice and clean though, it's making me want to go ahead and get the heat shielding and carpet. One expense becomes another I suppose. I'll try to get some photos of the panels when I get home tomorrow. Also replacing all of the brittle push snaps that hold the panels in because they were all destroyed coming apart after 35+ years. I welded on a small nut and bolt to act as a steering stop to keep me from hitting the springs when backing into my back yard. It bent immediately but it's doing its job so I can't complain . I plan to remove the knuckle at some point to drill in a real steering stop. Started taking the bronco on trips to haul off trash. The bumper I built seems to handle it ok, but I definitely need to reinforce or buy a legit hitch for it. Modified the factory shifter, some leftover shifter pieces from the C6 and used a piece of 3x5 1/4" angle to put together a shifter for the NP241. It's not pretty but it will work for now until I can get a cable shifter for it. Small projects for the next couple months until we recover from our wedding.Attachments

Last edited:
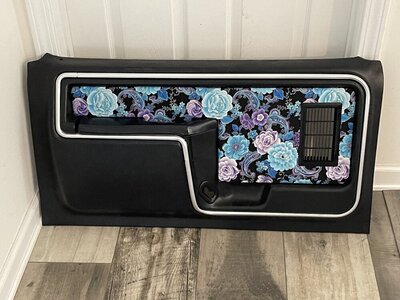
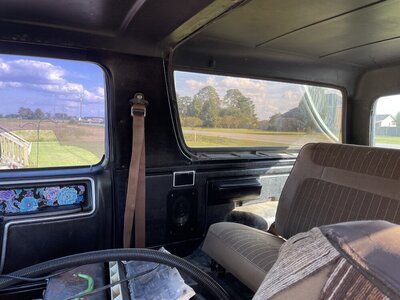
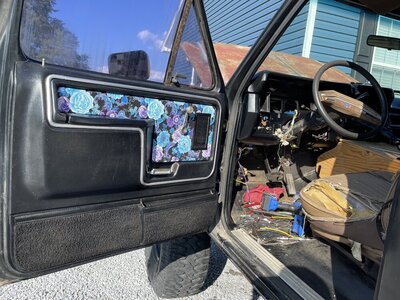
Got one of the door panels finished completely and all of the other interior pieces finished, other than the dash and the metal bars that clamp the headliner in. We went with a fabric that had all the colors of the truck in it and the color I'm hoping to paint the outside. (Teal, Black and Grey for the exterior and seat accent). It's a bit funky looking but I like it and I think it turned out great! I didn't worry about getting the panels perfect because I'm certain it will end up dirty but It's something we can at least enjoy and be happy with.
Attachments
ghost
Well-Known Member
- Joined
- May 25, 2006
- Location
- Hartsville/Camden,SC
Wow Purple paisley that's so 80's.
I thought it fit the era well enough. Haha. It was this or trying to find something similar to what came in the high trim early Broncos. They had a funky plaid pattern on the door cards that I always thought looked cool.Wow Purple paisley that's so 80's.
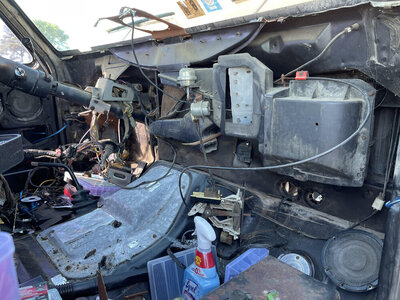
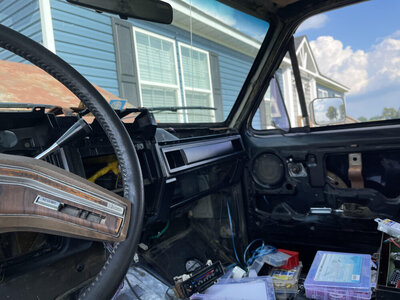
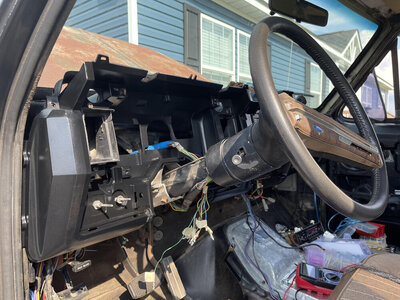
I can't leave well enough alone. I pulled the dash to get it painted and thought "why not thin the wire-harness out while it's out?" Since I deleted everything from the truck except, the dash, lights, heat/ac, horn and rear window more or less. Went through and any connector that wasn't plugged in got removed, rewired the door switches so they worked without that annoying buzzer. Put it all back together, and now the LS won't start.  Somehow, the wire used for 12V keyed that I was using from the Bronco fuse panel (aux fuel tank slot), which was originally 12V keyed in all positions (acc/run/start) is now only 12V keyed in acc and run which won't allow the LS to start since it cuts power to the coils during start now. I have no idea how that would even change honestly. It's 1 wire in the fuse panel. I didn't relocate it, but somehow it's changed. I can get the truck to run by switching the piggyback fuse I have for the LS harness over to a constant on, but then it doesn't shut off with the key. I'm going to check again tomorrow for another fused source but man this became frustrating. On the other hand, the dash looks amazing! I was planning to put a Ron Francis wiring harness in the truck anyways. Just looks like it might be sooner rather than later now. Truck still runs and drives. Hoping the wires I thinned out might have chased out the battery leech I was having. Time will tell. I've also been researching "squaredrop" camper trailers. Would love to have something to take with us once we get back into the swing of things again. Been a long time since we've been camping.
Somehow, the wire used for 12V keyed that I was using from the Bronco fuse panel (aux fuel tank slot), which was originally 12V keyed in all positions (acc/run/start) is now only 12V keyed in acc and run which won't allow the LS to start since it cuts power to the coils during start now. I have no idea how that would even change honestly. It's 1 wire in the fuse panel. I didn't relocate it, but somehow it's changed. I can get the truck to run by switching the piggyback fuse I have for the LS harness over to a constant on, but then it doesn't shut off with the key. I'm going to check again tomorrow for another fused source but man this became frustrating. On the other hand, the dash looks amazing! I was planning to put a Ron Francis wiring harness in the truck anyways. Just looks like it might be sooner rather than later now. Truck still runs and drives. Hoping the wires I thinned out might have chased out the battery leech I was having. Time will tell. I've also been researching "squaredrop" camper trailers. Would love to have something to take with us once we get back into the swing of things again. Been a long time since we've been camping.Attachments
paradisePWoffrd
Recovering Project Junkie
- Joined
- Nov 5, 2005
- Location
- Newton, NC
The circuit might have been backfeeding off another, and when disconnected the other that stopped?I can't leave well enough alone. I pulled the dash to get it painted and thought "why not thin the wire-harness out while it's out?" Since I deleted everything from the truck except, the dash, lights, heat/ac, horn and rear window more or less. Went through and any connector that wasn't plugged in got removed, rewired the door switches so they worked without that annoying buzzer. Put it all back together, and now the LS won't start.
Possibly. I checked at the ignition switch and there is no wire that does what the ls needs anymore so it will end up getting a new harness eventually. The LS harness will be switched over to a toggle switch in the meantime.The circuit might have been backfeeding off another, and when disconnected the other that stopped?
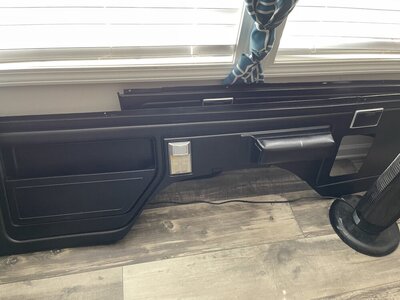
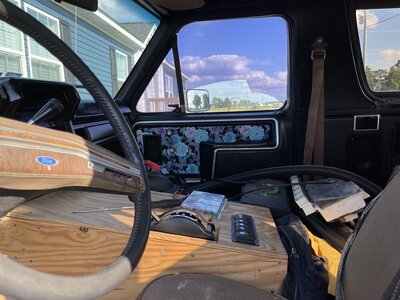
I got most of the interior back in today. It’s looking good so far! New window seals made a huge difference on the windows going up and down. And I may have found the draw on the wiring because the rear window now moves much smoother. Still not great but it’s getting better.
Attachments
- Joined
- Mar 10, 2005
- Location
- Hooterville (24171)
+1000 for choice of "contact paper"! (to cover what I suspect was very haggard looking "wood grain plastic"?)
The fabric replaced a tan suede type of fabric that came in the XLT package trucks. But i think it looks alot better this way haha.+1000 for choice of "contact paper"! (to cover what I suspect was very haggard looking "wood grain plastic"?)
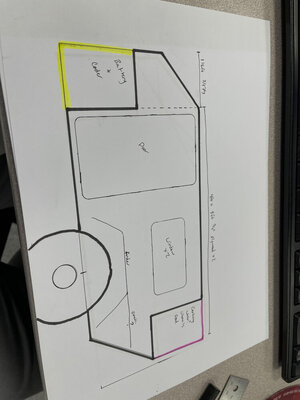
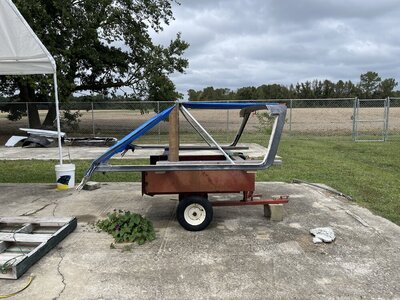
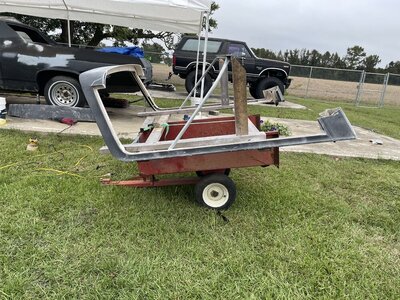
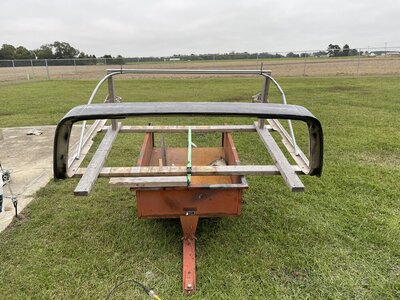
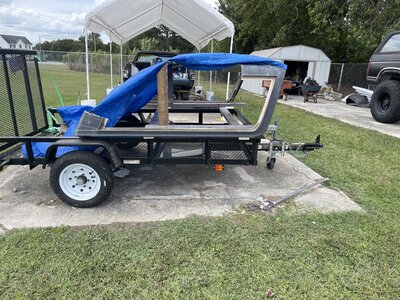
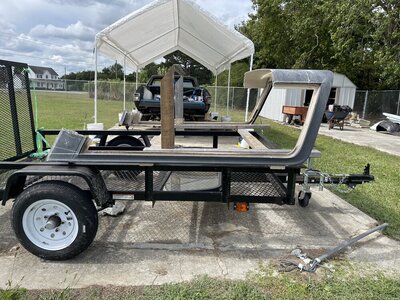
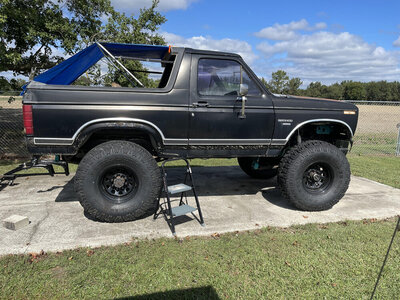
I've spent this week rewiring some of the bronco after I thinned out the harness. The LS ignition is now wired to a toggle switch until I install a new harness. After getting all that wired (still hunting down why the indicator lights don't work but they didn't work with the paper circuit board either. Might be a solution that also waits for a new harness) I decided to start working on a custom "fastback" soft top. I like the softtopper brand tops but they are too expensive for me right now and the fastback style ones leave no room for passengers so I decided to make something in between after looking at multiple threads for inspiration. Picked up a hardtop with a busted window for $50 and am going to use it as the base/frame for the soft top. It will be fastened to it with velcro and push snaps. I setup a jig to hold the hard top square and give me a measurement to get my bow roughly placed. After that I test fit a tarp to make sure the back window would be where I wanted it. I got my bow bent up out of some conduit (not the prettiest but close enough and ought to work until I can have a better one bent (didn't want to buy a $60 bender for 2 bends on a $200 project) and cut down my tarp to give myself a rough pattern to have cut. Coming together. the hardware for the bow will be here tomorrow and then I am just waiting for my fiancee to finish the first section of fabric, mock it up and measure for the rest.
Attachments
ghost
Well-Known Member
- Joined
- May 25, 2006
- Location
- Hartsville/Camden,SC
What material will the top be made from?
- Joined
- Mar 10, 2005
- Location
- Hooterville (24171)
The fabric replaced a tan suede type of fabric that came in the XLT package trucks.

A sunbrella outdoor awning material. with UV resistant thread.What material will the top be made from?
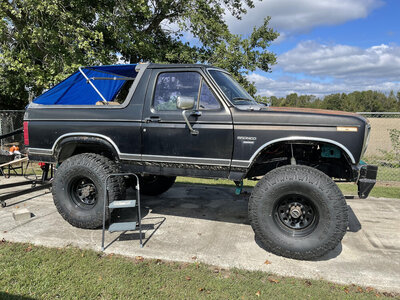
Got the hard top off and slipped the new top on to test fit and measure. Still need to have the fabric cut for it but I wanted to see it on the truck to take any last minute measurements. I also replaced all the C-clips with nut-serts while I had the tops off. Looking better every day.
Attachments
- Joined
- Oct 8, 2020
- Location
- Florida
The update of this build looks amazing. I am excited to see the outcome, a classic Bronco will always be a great project.
Thank you! it's been a long 2 years and still plenty more to go but i'm looking forward to being able to drive it around reliably and enjoy it!The update of this build looks amazing. I am excited to see the outcome, a classic Bronco will always be a great project.
Got a quote for my exhaust so hopefully that will be done soon so I can drive it in town without being ticketed. After driving on the road, I started wondering how accurate my original assumption was on gearing. Based on RPM and a GPS speedometer my gearing seems closer to 4.11-4.56 (2100ish RPM at 55 in 3rd gear (1:1) but giving some leway for fluctuating RPM and the jittery GPS speedo). I bought the axles third-hand off someone in suffolk who was going to put them in his LJ and honestly never checked the gears, just assumed they were 3.73 which is factory SRW super duty gearing. I assume it's possible the original owner may have regeared them. I will need to reseal the rear diff soon so I suppose I will need to check that out while i'm in there.
- Joined
- Mar 10, 2005
- Location
- Hooterville (24171)
I believe 4.10/4.30 were pretty common for 5.4L/6.8L(V10) equipped SD's...
I did not know that! If so then that’s a much better ratio than I thought. I definitely need to check before I get my exhaust and tune finished so they can tune my transmission for the proper gearing and tire.I believe 4.10/4.30 were pretty common for 5.4L/6.8L(V10) equipped SD's...
Well the diff is definitely 3.73 as verified by the "373" stamped on the ring gear. I didn't have an extra hand and was getting irritated with gear oil blowing around in my face so I didn't get to count the teeth like I planned to. I'm assuming my high rpm is just transmission slippage from the 4l80e then? Hoping that doesn't come back to bite me later. I'll be slowing down again as we try to plan to put a shop on our property. Working on the truck and cars in 30 degree weather isn't what it used to be haha.