

You are using an out of date browser. It may not display this or other websites correctly.
You should upgrade or use an alternative browser.
You should upgrade or use an alternative browser.
What have you done to your rig today?
- Thread starter broncosbybart
- Start date
I was told you would of had a heart attack if you had seen. Clearly you heard about it.
*anything said in response to this will likely offend SOMEONE*
That's gonna look so funny as the SOLE clean component under that dirty Jeep
I'm actually quite impressed that Josh got the paint to stick to that many layers of crust [emoji38]
Sent from my SM-G960U using Tapatalk
CasterTroy
Faster'N You
- Joined
- Mar 21, 2005
- Location
- Wallburg
I've seen the underside on the trailer when you've pulled up to a rideClearly you heard about it.


obullfish
Carolina Trail Blazers
- Joined
- Nov 21, 2011
- Location
- Candler N.C.
Casey,s meat is huge, probably sweeter than phillips also .

SDIVER2006
Well-Known Member
- Joined
- Oct 30, 2013
- Location
- FAYETTEVILLE
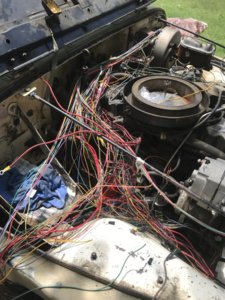
Just getting things prepared for this weekends wiring fest
Hope it’s as painless as the name implies
Hope it’s as painless as the name implies
Lankford
Well-Known Member
- Joined
- Nov 29, 2010
- Location
- Sophia, NC
I've seen the underside on the trailer when you've pulled up to a ride
You're not supposed to wash underneath unless you're getting ready to work on it.
How do you know what to do when you're told to keep the dirty side down?
Went to put the doors on for the first time since the last wheeling trip a couple weeks ago... the passenger door isnt shutting like it should, uh oh.
Sent from my SM-G965U using Tapatalk

Chris_Keziah
Joe Dirt @ Rev Limit Fab
- Joined
- Dec 1, 2010
- Location
- Winston-Salem
Well got a little further tonight. @adamk got the ring gear on the carrier. While I cut the old brackets off the other side. Found out the drivers side tube had been replaced at one point. Passenger tube is 1/2" wall while the driver is 3/8" Also found out the pinion races had spun, bores look to be ok but definitely gonna need a little green lock tite.

SDIVER2006
Well-Known Member
- Joined
- Oct 30, 2013
- Location
- FAYETTEVILLE
Guess if it works (prior owner)Just getting things prepared for this weekends wiring fest
Hope it’s as painless as the name implies
Chris_Keziah
Joe Dirt @ Rev Limit Fab
- Joined
- Dec 1, 2010
- Location
- Winston-Salem
@Joe J. came over last night and we got a lot accomplished. Gears are set up, covers on, brackets tacked in place and lowers tacked together, plus we killed a lot of Corona.


Picked up some new knuckles today from @amcjeepman Should get the ram mount fabricated in the next couple of days. Hoping the track bar and upper link will clear everything in their way.
Picked up some new knuckles today from @amcjeepman Should get the ram mount fabricated in the next couple of days. Hoping the track bar and upper link will clear everything in their way.
rodney eppes
Well-Known Member
- Joined
- Feb 3, 2010
- Location
- Mt.Holly NC 28120
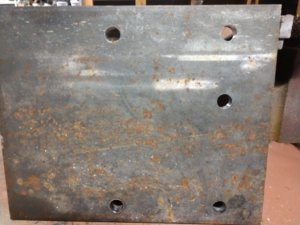
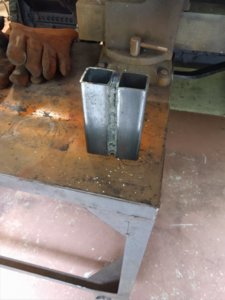
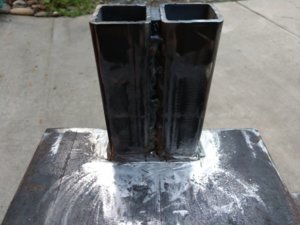
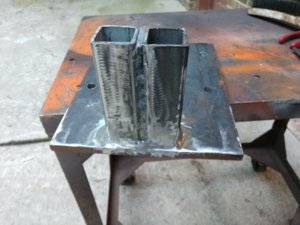
O No! He's at it again. First you take your 1/2 plate, that's laying around, mark & drill 5 9/16" holes. Started with a small hole & worked my way up. Took a lot of damn Batteries! Now I need a bracket, which necessitated a spacer between 2 1&1/2"sq. tubes. Hey, use what you got! Broke out the Hobart 175, this time. Don't worry, this will be lightly loaded, when used, & it's Not for the Edger!
Attachments
SDIVER2006
Well-Known Member
- Joined
- Oct 30, 2013
- Location
- FAYETTEVILLE
Hoodw!nk
Well-Known Member
- Joined
- Jan 23, 2014
- Location
- Clemmons, NC
Last edited:
RubiconBear
Well-Known Member
- Joined
- May 31, 2012
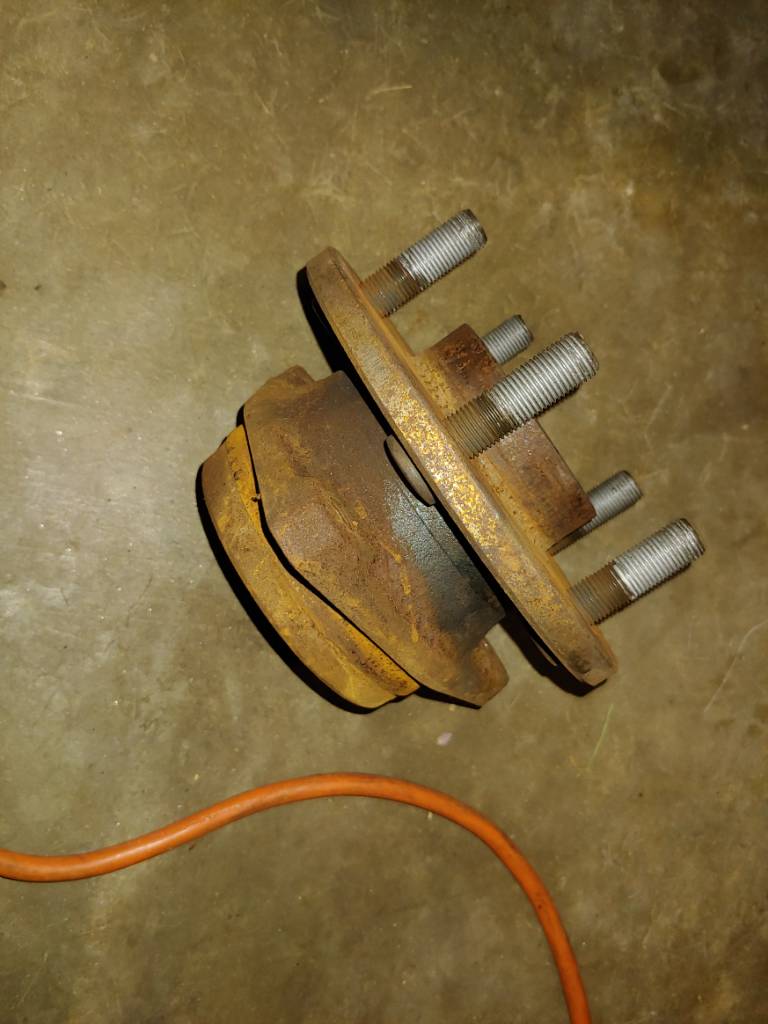
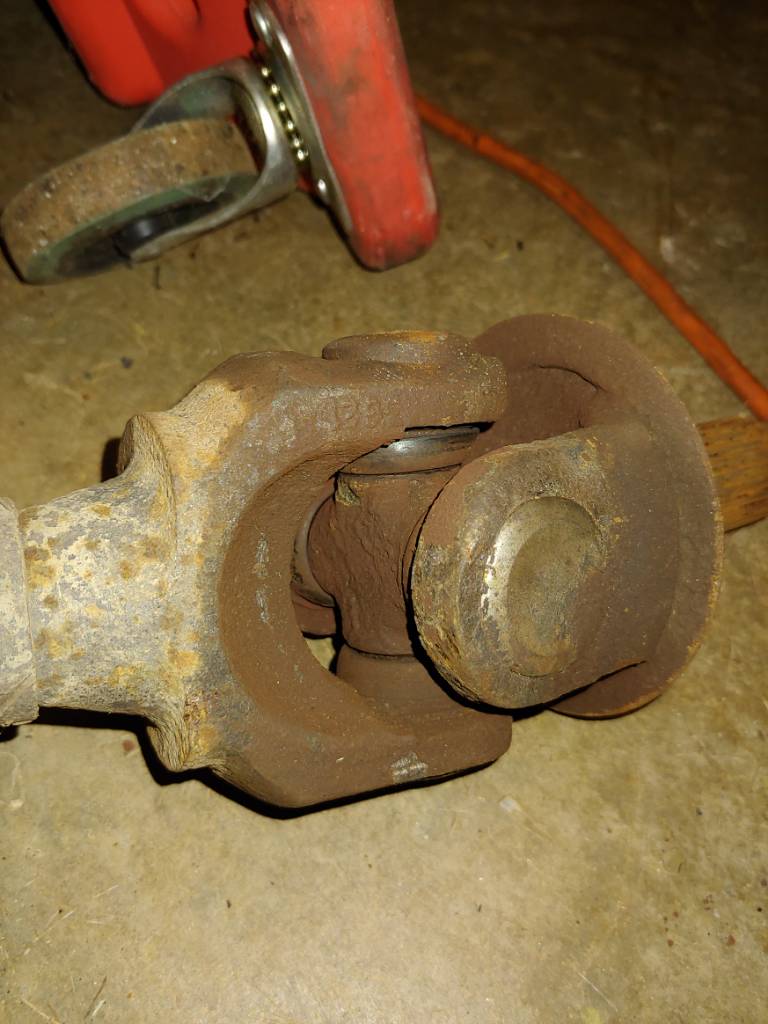
Replaced both of the hubs. In doing so I found the u-joint on the driver side in this condition. The passenger side is old (probably original, like this one, 158K miles), but is still functioning. Was going to change it, but while assembling the driver side I screwed up the new u-joint meant for that side, smh. I'll take care of it soon, but had to get it on the road today.
Also, being the dummy I am, I accidentally ordered the wrong hubs (they changed mid-99, mine was built 01/99). I ordered the older style instead of the newer style. Luckily I was able to rob the brake rotors off the ZJ to make them work. I don't feel like spending the $80 to get new rotors for the ZJ, so does anyone by chance have a decent set of rotors from a 90-98 Dana 30 in WNC? Not asking for free, I'll pay, just need cheaper.
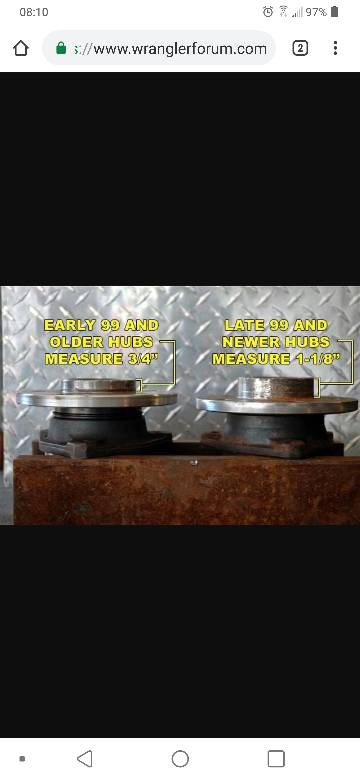
Also, being the dummy I am, I accidentally ordered the wrong hubs (they changed mid-99, mine was built 01/99). I ordered the older style instead of the newer style. Luckily I was able to rob the brake rotors off the ZJ to make them work. I don't feel like spending the $80 to get new rotors for the ZJ, so does anyone by chance have a decent set of rotors from a 90-98 Dana 30 in WNC? Not asking for free, I'll pay, just need cheaper.
awheelterd
Well-Known Member
- Joined
- Oct 18, 2007
- Location
- Kenly, NC
2 questions.O No! He's at it again. First you take your 1/2 plate, that's laying around, mark & drill 5 9/16" holes. Started with a small hole & worked my way up. Took a lot of damn Batteries! Now I need a bracket, which necessitated a spacer between 2 1&1/2"sq. tubes. Hey, use what you got! Broke out the Hobart 175, this time. Don't worry, this will be lightly loaded, when used, & it's Not for the Edger!
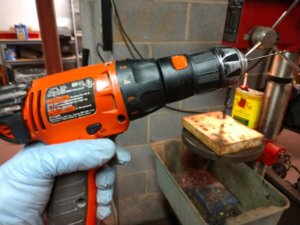
1. Why use a battery drill when you have a drill press in one of the photos?
2. What is it exactly?
UTfball68
Well-Known Member
- Joined
- Jul 18, 2008
- Location
- Granite Quarry
My first vehicle and first restoration. Hasn’t been tagged in 8 years...hasn’t really been streetable in about 4 years...and it has moss growing on it. Got it in the home garage and time to get it DD’able again.

rodney eppes
Well-Known Member
- Joined
- Feb 3, 2010
- Location
- Mt.Holly NC 28120
Fooled you, huh? That's the reason, I took the pic, with the drill press, in the background. Figured it would come off as a joke! I made up a new mount bracket, for a pick-up swing hoist. Once I get it completed & mounted, I'll snap a picture.2 questions.
1. Why use a battery drill when you have a drill press in one of the photos?
2. What is it exactly?

XJsavage
CounterCulture
- Joined
- Aug 15, 2009
- Location
- Lyle's Ford SC
Went back to my old routine of 5:00am waking up to work on the Jeep while it's cool enough to.
- Joined
- Feb 10, 2008
- Location
- Kings Mountain
I just put Crane knuckles with keyed high steer arms on my trap. Fuck cast iron anything.
AND, i fixed the interior mood lights.
Fo realz...
AND, i fixed the interior mood lights.
Fo realz...
Swapped out my Wrangler's battery that's been dead since Nov. Still under warranty. ")
Flushed the coolant.
Looked at all the other odds an ends I need to do. But first, cross my fingers and get it inspected. Second, looking into my steering linkage. I'd forgotten how scary it'd become until I swerved back and forth across the road on a test run. Squirrely is putting it mildly.
Flushed the coolant.
Looked at all the other odds an ends I need to do. But first, cross my fingers and get it inspected. Second, looking into my steering linkage. I'd forgotten how scary it'd become until I swerved back and forth across the road on a test run. Squirrely is putting it mildly.
XJsavage
CounterCulture
- Joined
- Aug 15, 2009
- Location
- Lyle's Ford SC
Moved it the hell out the way so I can start on my canopy/carport build. I've been collecting parts for a while. Today, I scooped the structural poles for all four corners, concrete, welding rods and new pair of post hole diggers. Time to bust it out.
3" rectangle 3/8" wall verticals
2x3" 3/16" angle overhead runners
Galvanized commercial tin.
I'm tired of sitting in wet Corbeaus!

3" rectangle 3/8" wall verticals
2x3" 3/16" angle overhead runners
Galvanized commercial tin.
I'm tired of sitting in wet Corbeaus!
Keith1138
Well-Known Member
- Joined
- Nov 18, 2015
- Location
- Harrisburg NC
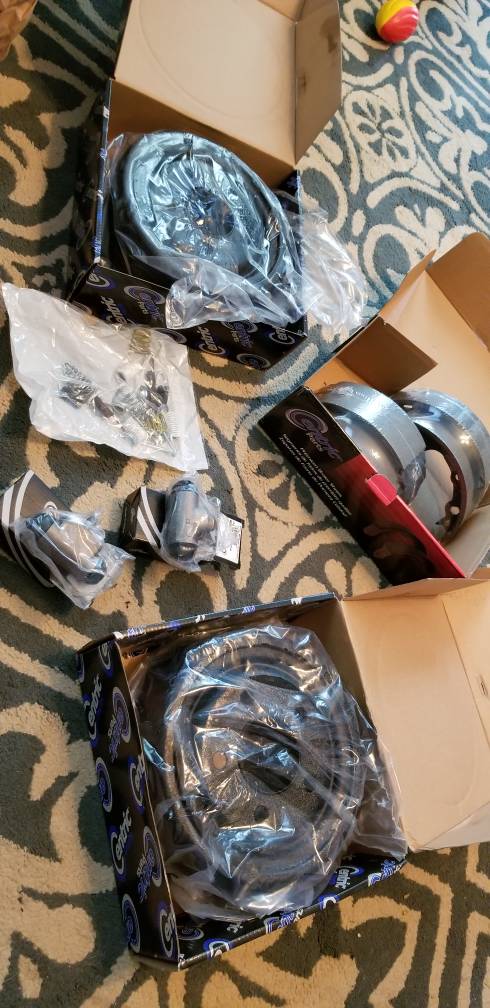
Got a full rear brake rebuild kit for me Chrysler 8.25 but I was hoping the kit came with new hardware like the e brake cables and new tiny metal pieces.
Any advice before I start this next weekend?
Sent from my SM-G892A using Tapatalk
Any advice before I start this next weekend?
Sent from my SM-G892A using Tapatalk
iwaxmyjimmy
College Web Wheeler
- Joined
- Mar 10, 2007
- Location
- Greenville NC
Got a full rear brake rebuild kit for me Chrysler 8.25 but I was hoping the kit came with new hardware like the e brake cables and new tiny metal pieces.
Any advice before I start this next weekend?
Sent from my SM-G892A using Tapatalk
Keep one side together so you can reference it when assembling.