

You are using an out of date browser. It may not display this or other websites correctly.
You should upgrade or use an alternative browser.
You should upgrade or use an alternative browser.
Mini Bike Thread
- Thread starter 77GreenMachine
- Start date
DirkaDirka875
Ima need 'bout tree fitty...
- Joined
- May 16, 2010
- Location
- Bear Creek, NC
But if i use too much it just slips outta my hands!LUBE lotsa LUBE...
JSJJ388
GREEN GREMLIN
- Joined
- Aug 31, 2016
- Location
- HAMPTONVILLE, NORTH CAROLINA
3 screwdrivers and just walk around the wheel is the best way I know of.
superman27344
Well-Known Member
- Joined
- Mar 10, 2015
- Location
- Lexington
Can't believe I missed that. Good catch.
McCracken
Logan Can't See This
- Joined
- Jul 9, 2005
So, I got busy yesterday and forgot to post the pics. The method worked, which is nice but there are a few precautions. Give me a few and I'll post them up. I've got a honey-do I'm working on currently.
McCracken
Logan Can't See This
- Joined
- Jul 9, 2005
So here's the method I use...
First, take the tire off your bike and remove the the sprocket and disc brake if you're working on the rear tire.


Those are 5mm Allen head bolts if anybody needs to know. To disassemble the tire I deflated it and used the two screw driver method to pop it off.

Here's another tip in case you forget things easily. The disc brake goes on the side where the valve stem is. Next, assemble your tools.

I forgot to take a picture of the tools first so as you can tell, I already popped one side on. Same deal, two screwdrivers. Without going back and looking someone said lube, lube, lube. They are correct. A simple splash of Dawn and water won't cut it. I used a mixture of Dawn and car wash soap. Lube the shit out of it and pop the first side on.
If you have a tube and like to live dangerously then go ahead and put it in. At this point you'll have more room to work. However, this is precaution #1, make sure that thing is out of the way when you start prying on the final bead. Common sense will tell you why.
Continued on next post...
First, take the tire off your bike and remove the the sprocket and disc brake if you're working on the rear tire.
Those are 5mm Allen head bolts if anybody needs to know. To disassemble the tire I deflated it and used the two screw driver method to pop it off.
Here's another tip in case you forget things easily. The disc brake goes on the side where the valve stem is. Next, assemble your tools.
I forgot to take a picture of the tools first so as you can tell, I already popped one side on. Same deal, two screwdrivers. Without going back and looking someone said lube, lube, lube. They are correct. A simple splash of Dawn and water won't cut it. I used a mixture of Dawn and car wash soap. Lube the shit out of it and pop the first side on.
If you have a tube and like to live dangerously then go ahead and put it in. At this point you'll have more room to work. However, this is precaution #1, make sure that thing is out of the way when you start prying on the final bead. Common sense will tell you why.
Continued on next post...
McCracken
Logan Can't See This
- Joined
- Jul 9, 2005
So, this is the issue in my opinion. When you start popping the last bead on it's almost impossible to maintain progress. As soon as you slide one section over you lose that much ground on the other. This is where the trusty vice grips come into play. Get your lip start and place you vice grips like so.

Next, stick your screwdriver under a section and pry. Two precautions here that are also common sense. The old question of, "How do you eat an elephant?" comes to mind. Don't take huge bites. A little at a time is better. Also, sink your screwdriver far enough where you're not leveraging all the force against the lip of the wheel. It will bend...


This is the crucial part. Once you've pried the lip back, hold the screwdriver in place with one hand. With the other hand, release the vice grips and move them towards the screwdriver and reclamp. This way when you let off the tire won't slip back.
Remember to relube as necessary and continue to work the vice grips around towards each other. You'll finally get to this point...

So close!!! Finally, pop that last section and tell it to kiss your ass. Air it up and mount it back on the bike.


This is how I do it and it's worked really well, at least on these two it did. Your results may vary.
Next, stick your screwdriver under a section and pry. Two precautions here that are also common sense. The old question of, "How do you eat an elephant?" comes to mind. Don't take huge bites. A little at a time is better. Also, sink your screwdriver far enough where you're not leveraging all the force against the lip of the wheel. It will bend...
This is the crucial part. Once you've pried the lip back, hold the screwdriver in place with one hand. With the other hand, release the vice grips and move them towards the screwdriver and reclamp. This way when you let off the tire won't slip back.
Remember to relube as necessary and continue to work the vice grips around towards each other. You'll finally get to this point...
So close!!! Finally, pop that last section and tell it to kiss your ass. Air it up and mount it back on the bike.
This is how I do it and it's worked really well, at least on these two it did. Your results may vary.
Buddy Holly
Professional Amateur
- Joined
- Apr 6, 2014
- Location
- North Raleigh
I use the same method as @McCracken but with an extra person. The trick is to have your helper stand on the sidewall so the bead will push inside towards the center of the wheel. The center is a smaller diameter and allows the bead to slip around the lip of the rim easier. Get it right and you can push the bead on without a screwdriver. It’s really tough to push it down by yourself unless you’re a fatass and well coordinated. I’m not either of those so I usually enlist my father to lend a hand.
Buddy Holly
Professional Amateur
- Joined
- Apr 6, 2014
- Location
- North Raleigh
I picked up my box of shit ‘n git today. This alone will almost triple the hp over the stock engine 

McCracken
Logan Can't See This
- Joined
- Jul 9, 2005
Good to see some commitment out of the group. Nice!
Buddy Holly
Professional Amateur
- Joined
- Apr 6, 2014
- Location
- North Raleigh
Made a governor bypass rod out of a landscaping fabric stake and got the motor mocked up. Waiting on clutch and chain to show up so I can finalize the mounting position. It’s quite a bit wider than the old motor
Pictured: “Oh stepbrother it’s so big!”

Pictured: “Oh stepbrother it’s so big!”
Last edited:
McCracken
Logan Can't See This
- Joined
- Jul 9, 2005
I had to make a custom mounting plate by doing some fancy machine work with a drill and a reamer. I think you've got more resources at your disposal. In the end my adapter/mounting plate was a 1/2" thick.Made a governor bypass rod out of a landscaping fabric stake and got the motor mocked up. Waiting on clutch and chain to show up so I can finalize the mounting position. It’s quite a bit wider than the old motor
Pictured: “Oh stepbrother it’s so big!”
View attachment 328115
Loganwayne
#BTL
- Joined
- Feb 15, 2013
- Location
- Clyde, North Carolina
Just fyi there is a weld on mounting plate on amazon for 25 dollars
Sent from my iPhone using Tapatalk
Sent from my iPhone using Tapatalk
McCracken
Logan Can't See This
- Joined
- Jul 9, 2005
Well, at the time (2+ yrs ago) the OGs had to make their own.Just fyi there is a weld on mounting plate on amazon for 25 dollars
Sent from my iPhone using Tapatalk
Buddy Holly
Professional Amateur
- Joined
- Apr 6, 2014
- Location
- North Raleigh
I think I have space to just redrill the stock plate to fit this. In order to fit at all I’ll have to run the clutch backwards (sprocket pointing towards the engine case) to make everything jive. No big deal, the clutch I ordered will work in either direction.
I got my Fuller on today and modified the exhaust to sit lower and point down a little. I didn’t have the right size DOM in stock so I ground the galvanizing off some conduit and used that


Also made a racing seat pan, or what I like to call a taint slammer to replace the broken stock seat.

I got my Fuller on today and modified the exhaust to sit lower and point down a little. I didn’t have the right size DOM in stock so I ground the galvanizing off some conduit and used that
Also made a racing seat pan, or what I like to call a taint slammer to replace the broken stock seat.
89wrangler
Not a new member
- Joined
- Oct 22, 2005
- Location
- Bostic,NC
that did not last long.Buy and Sell in Atlanta, Georgia | Facebook Marketplace
Saw this on the Facebook.....
View attachment 328525
Buddy Holly
Professional Amateur
- Joined
- Apr 6, 2014
- Location
- North Raleigh
For those that have bikes, what kind of top speed are y’all getting?
McCracken
Logan Can't See This
- Joined
- Jul 9, 2005
I haven't tested mine since the upgrades but I was hitting 35-40 mph with just the engine swap.
135For those that have bikes, what kind of top speed are y’all getting?
So @McCracken helped me this am!! I was fighting a dang lawnmower tire and remembered his vice grip tip!! Thanks man, that helped out bunches. These new tires are 4 ply and the sidewalls are ridiculous. I been dumping fix a flat in the old tires for years but finally had one the broke a belt so I was mounting tires as the sun came up this morning. I use a vaccum chamber to break the beads an two screwdrivers to remove and reinstall typically but the vice grips really helped from having to grapple with the tire.


McCracken
Logan Can't See This
- Joined
- Jul 9, 2005
Nice!!!!! Glad it worked for youSo @McCracken helped me this am!! I was fighting a dang lawnmower tire and remembered his vice grip tip!! Thanks man, that helped out bunches. These new tires are 4 ply and the sidewalls are ridiculous. I been dumping fix a flat in the old tires for years but finally had one the broke a belt so I was mounting tires as the sun came up this morning. I use a vaccum chamber to break the beads an two screwdrivers to remove and reinstall typically but the vice grips really helped from having to grapple with the tire.View attachment 328622 View attachment 328623 View attachment 328624 View attachment 328625 View attachment 328626
 I can't help but remember what an old wheeling buddy of mine used to say...."there's the right way and there's the way that works".
DirkaDirka875
Ima need 'bout tree fitty...
- Joined
- May 16, 2010
- Location
- Bear Creek, NC
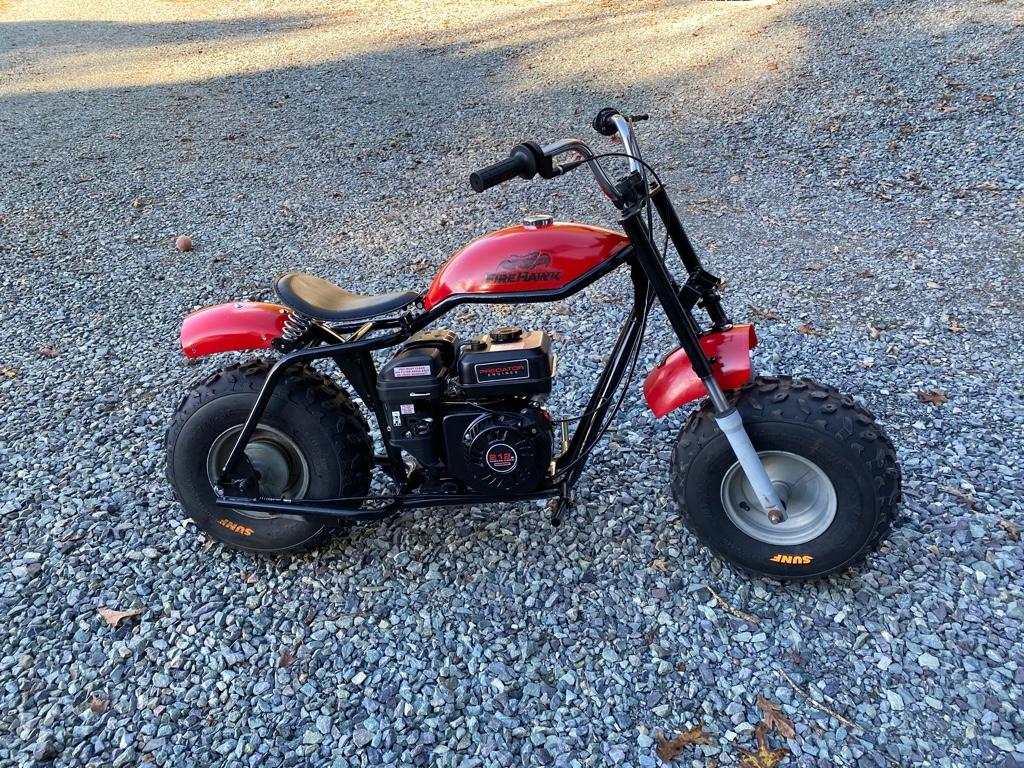
Piglets about ready for its first ride
Sent from my iPhone using Tapatalk
Sent from my iPhone using Tapatalk
untchabl
I like rocks
- Joined
- Mar 30, 2009
- Location
- Bear Creek, NC 27207
Piglets about ready for its first ride
Sent from my iPhone using Tapatalk
That's a full on race bike. Front suspension, springer seat and new tires.