3D PRINTING

Airplanes fly much better when they aren't heavy. A big problem printing single wall planes with PLA is weight, or so I hear, I haven't printed one yet.

I just want to figure out how to get the inner structure to not show through....
Note that a lot of the weight isn't the walls but the infill and top/bottom. Mathematically the perimeter is a small %. Depending on the design, sometimes you can get more rigidity with thicker walls and less infill anf floor/roof. It of course really depends on teh sape.
Also you might try changing your nozzle thickness. Move up to 0.6mm, then you'll get 50% more thickness per line. I've read a lof of things that say that overall 0.6 leads to the strongest overall.

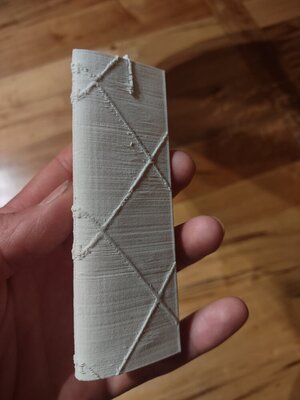
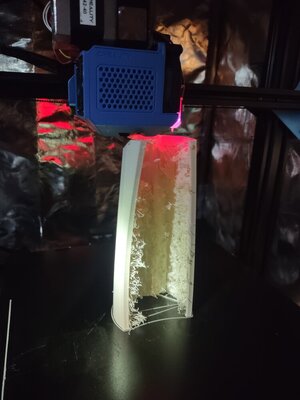
I am printing a piece now and selected 'print outer walls first' and so far it seems to look better (only about 1/2" tall so far). These are printed with 0% infill and 0 top/bottom layers. They have an inner structure that is considered a wall. The pictured piece is lighter than the designers weight, I think their weight is based off regular PLA. In cura it did say it would weigh 9-10g but it is only 7.6g.

Current printing piece actually looks excellent so far. WAY better than this one. And before you mention stringing, from what I have read and tried, it is impossible to not have stringing with the LWPLA. Some of the plane designs now are designed so each layer there are no retractions at all to eliminate stringing.
 

Attachments

  • IMG_20230721_221439685_HDR.jpg
    IMG_20230721_221439685_HDR.jpg
    79.9 KB · Views: 96
  • IMG_20230721_220907546.jpg
    IMG_20230721_220907546.jpg
    51.2 KB · Views: 94
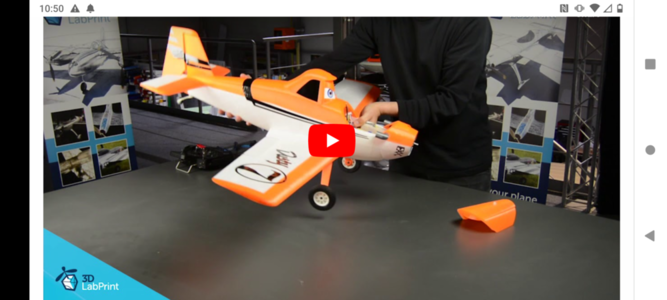
This is the one I am trying first. I wish some of the pieces were larger, they designed it so you could print the orange and white separately. I plan to print it all in white and paint it. I may try printing something with regular PLA as I know it is possible to get a flyable plane, but stall speed is higher and overall handling suffers as well. Plus, with a plane printed in PLA that adds a considerable bit of tail weight which you have to counter by adding additional nose weight.
 

Attachments

  • Screenshot_20230721-225020.png
    Screenshot_20230721-225020.png
    438.8 KB · Views: 90
So I ordered some 'pre-foamed' PLA to print the Dusty plane. It just seems the files are not well suited to the 'foaming' PLA. I am currently printing a part of a different plane (found on thingiverse) that seems to be going well with the LWPLA.

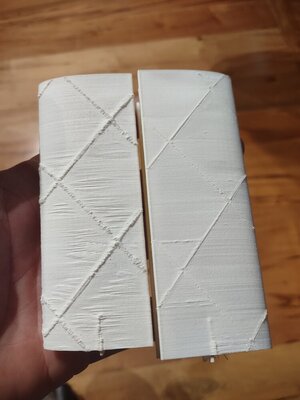
The picture with the two pieces, the worse looking one was at 100% flow, the better looking one was at I think 50% flow, it would probably be sufficient, but I am just scrapping the plan and going to use pre-foamed PLA for it instead. The pre-foamed is a little heavier that foaming, but supposedly prints very similar to regular PLA. I will save the foaming PLA for files that are optimized specifically for it.
 

Attachments

  • IMG_20230722_122403014.jpg
    IMG_20230722_122403014.jpg
    68.9 KB · Views: 78
  • IMG_20230722_122322483.jpg
    IMG_20230722_122322483.jpg
    92.5 KB · Views: 79
  • IMG_20230722_122300380.jpg
    IMG_20230722_122300380.jpg
    145.4 KB · Views: 81
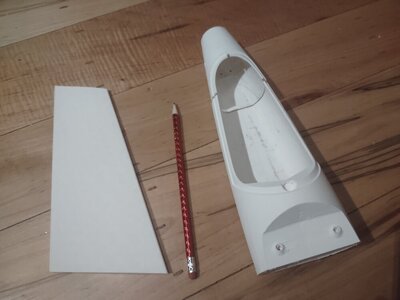
The successful pieces so far (not for Dusty). The piece on the left is the horizontal stabilizer (well, kind of the rudder too, it's a v-tail plane). At about 75% I looked at it and could see minor movement in the top as it was printing, can't believe it finished successfully honestly, when it finished I could flex the top back and forth 1-2cm. The top isn't as pretty as the bottom but it is sufficient. There is a carbon fiber rod that goes inside it to stiffen it up.

One thing I found odd, Cura said the print time was 2 hrs 8 minutes, but it actually took 3:02. Only reason I am still up at 1am tonight....
 

Attachments

  • IMG_20230723_011226149.jpg
    IMG_20230723_011226149.jpg
    64.7 KB · Views: 86
One thing I found odd, Cura said the print time was 2 hrs 8 minutes, but it actually took 3:02. Only reason I am still up at 1am tonight....
Cura isn't very good at estimating time. I have this problem w/ my bibo2, its chronically 10-20% underestimated. I think it doesn't apprpriately account for acceleration& deceleration time.
If you use OctoPrint there is a plugin that gives much more accurate time estimates and time remaining, It will feed back and show the "real" remaining time in cura while printing. Unfortunately you don't know this value until the job has been sent to Octoprint.

Ultimaker machines lie to you i na different way. The print time is spot on, but what it does tell you about is the ungodly forever time it takes to level the bed and purge the lines on every... single... print... and that it won't declare the job "finished" until the nozzle AND PLATE are completely cooled.... so add like 15 mins to everything.

I will say this this is an area where the Bumbu and Bambu Studio really shines. It tells exactly how much the time is, broken down between prep/leveling and such and actual print time. It even accounts for bed/nozzle heat up. This is the advantage to bein ga closed system where the slicer knows the hardware perfectly.
 
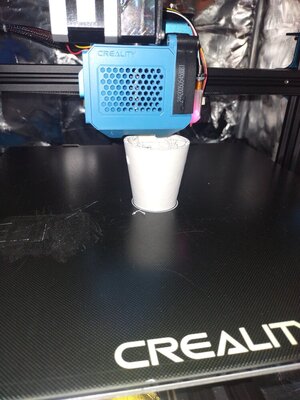
This is officially the largest thing I have printed. The center of the wing, it took 16.5 hours. This plane is going to take like a week to print 🤣. I have had the nozzle clog twice, luckily both times it was early in the print at just a few mm's high so it didn't waste any material.
 

Attachments

  • IMG_20230725_115931247_HDR.jpg
    IMG_20230725_115931247_HDR.jpg
    65.1 KB · Views: 95
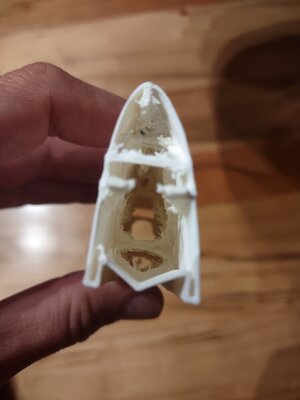
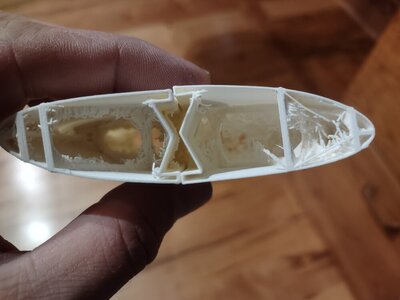
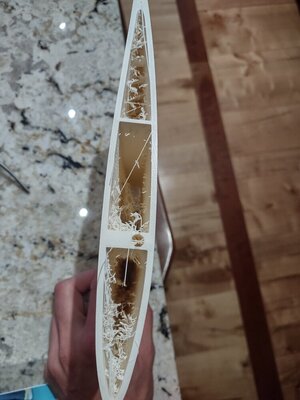
So these are files optimized for LWPLA. The outside surface looks perfect, but the inside as you can see is horrible. Luckily cleanup is easy, I use a metal file and it knocks all the stringing off fairly quickly. All the big stuff is printed for the plane now, just wingtips and control surfaces, etc are left.
 

Attachments

  • IMG_20230724_175620113_HDR.jpg
    IMG_20230724_175620113_HDR.jpg
    78.8 KB · Views: 82
  • IMG_20230727_112043388_HDR.jpg
    IMG_20230727_112043388_HDR.jpg
    93.1 KB · Views: 87
So these are files optimized for LWPLA. The outside surface looks perfect, but the inside as you can see is horrible. Luckily cleanup is easy, I use a metal file and it knocks all the stringing off fairly quickly. All the big stuff is printed for the plane now, just wingtips and control surfaces, etc are left.
Is that all just stringing / oozing?
 
Is that all just stringing / oozing?

Yes just stringing. I tried retraction distance as high as 5mm and it didn't make a difference, then I was watching a video and a guy mentioned it is impossible to get the stringing to go away. When the printer is done printing a piece, probably 10cm will ooze out... It's not as hard to print with this as I imagined, you just have to accept the fact that the file HAS to be optimized for LWPLA. A solid model where there is a constant outer perimeter would likely not be affected, it's the retractions that are the issue.

Some of the planes now are designed where there are no retractions needed, I haven't researched those yet.
If you could print in Vase Mode, where it never stops extruding and only slowly raises the bed, you'd be golden. That really depends on the model though. Its great for single-walled hollow things.
 
If you could print in Vase Mode, where it never stops extruding and only slowly raises the bed, you'd be golden. That really depends on the model though. Its great for single-walled hollow things.

Yea I think some of the newer designed models print in vase mode but I am not sure. This one is designed for about 5% infill so it can't print in vase mode.
 
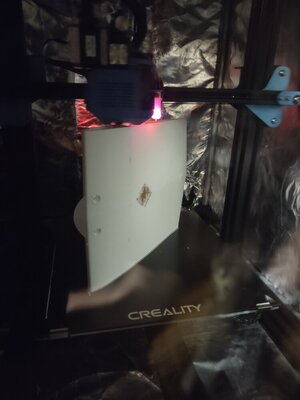
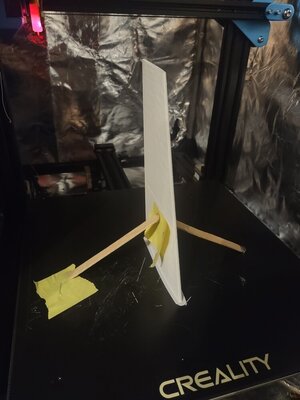
When I printed the first vertical stabilizer I noticed as it for closer to the top it was actually flexing it back and forth. This LWPLA adheres SOOOOO good I wasn't afraid of it coming loose, but it made the top 1/3 of the other one print a little rough (still useable). I figured I would try some quick 'supports to take a little of the flex out, tape, hot glue and popsicle sticks worked perfectly. I let the hot glue cool a little on the stick before sticking it to the tape, as I tried on a test piece and it will melt the plastic if it's full temp.
 

Attachments

  • IMG_20230727_142744648_HDR.jpg
    IMG_20230727_142744648_HDR.jpg
    86.2 KB · Views: 76
When I printed the first vertical stabilizer I noticed as it for closer to the top it was actually flexing it back and forth. This LWPLA adheres SOOOOO good I wasn't afraid of it coming loose, but it made the top 1/3 of the other one print a little rough (still useable). I figured I would try some quick 'supports to take a little of the flex out, tape, hot glue and popsicle sticks worked perfectly. I let the hot glue cool a little on the stick before sticking it to the tape, as I tried on a test piece and it will melt the plastic if it's full temp.
This is one of the downsides to "bed-flingers" like Creality printers. I'd have a few cases with similar really sensitive prints where all that Y-sliding motion caused wobble in the print. The only fix (aside from your creative booty-fab bracing) is to slow it down.

Imagine how bad it would be if you had oriented the part the other way!
 
Printing the last wingtip now, all the other pieces will be printed out of regular PLA.
Thats cool man. Cant wait to see the finished product flying
 

I just bought a bunch of the pre-foamed from 3dlabprints as they had it on sale for $18/1kg. I figure that's basically the same price as PLA+ so I'll use it for whatever, even if it isn't planes. Not quite as light as foaming PLA but half the price.
 
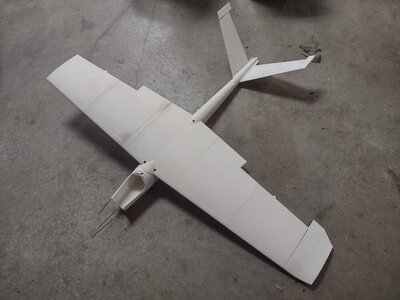
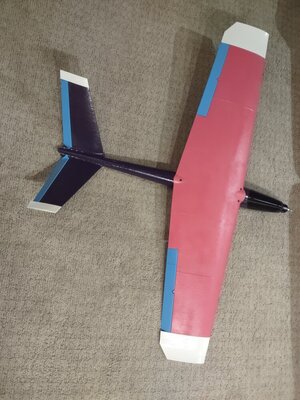
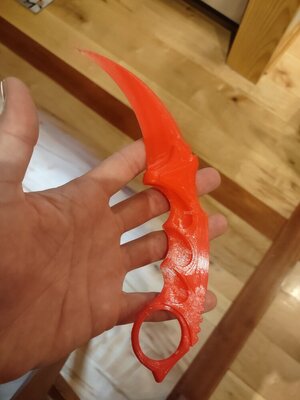
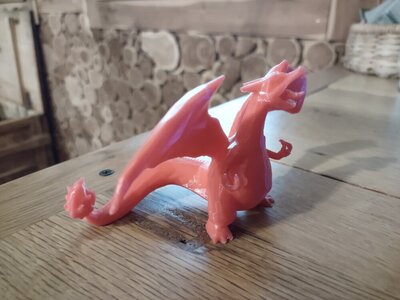
Plane is done aside from finishing the linkages and putting an ESC/receiver/prop on it. Also have some family in town from Canada so been printing things for them. The Karambit turned out great, printed two halves and glued them together. The dragon (Pokemon) also turned out great. Printing a little mermaid pendant now for the girl.
 

Attachments

  • IMG_20230807_234401802.jpg
    IMG_20230807_234401802.jpg
    171.5 KB · Views: 71
  • IMG_20230808_102431338.jpg
    IMG_20230808_102431338.jpg
    73.9 KB · Views: 79
  • IMG_20230808_184159084.jpg
    IMG_20230808_184159084.jpg
    93.6 KB · Views: 73
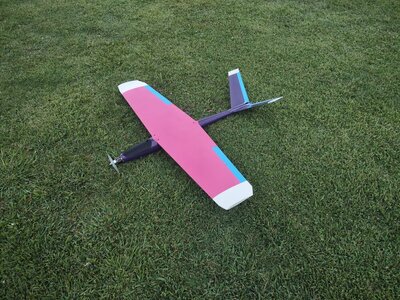
It flies great! About 10oz heavier than the recommended motor/ESC setup, but it's probably WAY faster too. With battery it weighs in at 45oz, it was easy to hand launch, overall a pretty easy plane to fly. Pink is a great color for a plane so I found out, very easy to see. If I had to guess, it's in the neighborhood of 100mph on a 3s battery, I am pleased with that.
 

Attachments

  • IMG_20230809_175848499.jpg
    IMG_20230809_175848499.jpg
    314.9 KB · Views: 71
I've been playing with carbon+fiber reinforced PET (not PETG) with the X1C. Project pics coming soon.
Holy Hell it's amazing.
Hydroscopic after printing so it's an extremely dimensionally stable even in wet or humid applications, and extremely tough and durable. Way stronger then ABS or conventional PETG, and flexible when thin.

I printed a 2.5mm bar and gave it to my daughter and said, Here try to break this. She folded it over on itself, it will not snap (along the xy plane). After a whole lot of trying everything and flipping it back and forth like a hinge best she could do is tear it.... You can see how it wouldn't fracture.
IMG_20230903_190944656.jpg


This is a 1.5mm bar, see how it will bend but not warp, stretch or break.
IMG_20230903_191127984.jpg


It will still snap along the z print lines, like if you made an L bracket it could break at the base wo a gusset.

Too bad it's $85/ kilo lol.
 
The back gate has warped and settled just enough that the latch no longer latches. Pretty common problem. Commonly fixed by loosening the screws and jiggering it a bit, but it's way off and I know that after some more weather changes it'll probably shift again anyway.
IMG_20230904_133829718_HDR.jpg

So a 3D printed a little knob extension for the tip using CF-PET so it'll be really durable and won't crack with exposure and use.
IMG_20230904_133837926_HDR.jpg

IMG_20230904_133923326_HDR.jpg
Design time: 90 seconds
Print time: 15 mins.
Time spent outdoors on a hot as balls day fixing a gate: about 2 mins.
 
The back gate has warped and settled just enough that the latch no longer latches. Pretty common problem. Commonly fixed by loosening the screws and jiggering it a bit, but it's way off and I know that after some more weather changes it'll probably shift again anyway.View attachment 403243
So a 3D printed a little knob extension for the tip using CF-PET so it'll be really durable and won't crack with exposure and use.
View attachment 403244
View attachment 403245Design time: 90 seconds
Print time: 15 mins.
Time spent outdoors on a hot as balls day fixing a gate: about 2 mins.
IMG_3900.jpeg
 
Selling our Ender 3 v2 for a good price if anybody wants it. We don’t use it much and it’s taking up space. Got a bunch of upgrades on it also. If anybody is interested I’ll send you the details if you message me
 
Back
Top