Ordered James Duff Extended Radius arms a spartan locker for the front and a spool for the rear. Now the wait for packages to arrive begins. Hoping I can knock all this out in the next few months. Alot of overtime at work coming up which is good for $$$ but eats into my shop times so we will see how it all plays out. Helped my buddy with gearing a 70HD for his K5 this weekend. Hoping to finish it up this coming weekend and then we will be working on our friends bronco to get it ready for gulches with an efi swap/rewire.


You are using an out of date browser. It may not display this or other websites correctly.
You should upgrade or use an alternative browser.
You should upgrade or use an alternative browser.
Bronco #2 The wheeler
- Thread starter YJKrawlin
- Start date
iwaxmyjimmy
College Web Wheeler
- Joined
- Mar 10, 2007
- Location
- Greenville NC
I’ve had decent luck with the spiral step bits, but gotta watch the RPMs so it doesn’t work harden. But really any HSS bit can do it.Any tips for drilling knuckles/pitman arm out for tapered inserts for the TRO swap?
skyhighZJ
Gov retirement < needs to live
- Joined
- May 31, 2012
- Location
- Aberdeen, NC.
They make taper bits (not the Christmas tree step bits) specifically for doing taper bores for TRE’s. Just have to know you’re degree of angle of dangle.
I’ve seen some get it done with the cheap large drill bits from HF, so hoping between that and a step bit, taking my time and using plenty of cutting fluid, it will go by easily.I’ve had decent luck with the spiral step bits, but gotta watch the RPMs so it doesn’t work harden. But really any HSS bit can do it.
I’m swapping to TRO at the same time so I want to drill them out for the inserts vs having an hourglass cut into the knuckles.They make taper bits (not the Christmas tree step bits) specifically for doing taper bores for TRE’s. Just have to know your degree of angle of dangle.
iwaxmyjimmy
College Web Wheeler
- Joined
- Mar 10, 2007
- Location
- Greenville NC
This is the style step bit I’m referring too, but be picky on the inserts. Some require an odd ball hole size, but when using a tapered reamer take some finesse and slow RPM. They have a tendency to chatter when you get them spinning too fast and will mess up the taper, which I believe is 1.5 in 1 foot. Barnes4wd is where I got my last one. Ideally reaming them on a Bridgeport is the best way, but for DIY at home, drilling through and using those tapered inserts works just as well. I’ve used them a good bit to convert stuff and fix wallowed out holes.
ghost
Well-Known Member
- Joined
- May 25, 2006
- Location
- Hartsville/Camden,SC
IMHO you need a reamer bit.
iwaxmyjimmy
College Web Wheeler
- Joined
- Mar 10, 2007
- Location
- Greenville NC
I do believe snap on quit making them but like I said Barnes4wd I think Carrie’s rhem and the inserts if you went that route
I got the ruffstuff inserts and the high angle insert for the pitman arm. The knuckles have to be drilled to 7/8” and I have a step bit for that. The pitman arm one is weld in and hole needs to be 1”. I may end up taking that one to be drilled out at a machine shop if I don’t have the right sized bit.View attachment 420180
This is the style step bit I’m referring too, but be picky on the inserts. Some require an odd ball hole size, but when using a tapered reamer take some finesse and slow RPM. They have a tendency to chatter when you get them spinning too fast and will mess up the taper, which I believe is 1.5 in 1 foot. Barnes4wd is where I got my last one. Ideally reaming them on a Bridgeport is the best way, but for DIY at home, drilling through and using those tapered inserts works just as well. I’ve used them a good bit to convert stuff and fix wallowed out holes.
iwaxmyjimmy
College Web Wheeler
- Joined
- Mar 10, 2007
- Location
- Greenville NC
FWIW, you may be hard pressed to get a machine shop to touch it telling them what it’s for. Just specify you need that hole drilled out to 1” and that insert welded. They don’t like making/modifying things for vehicles because of liability reasons.
Took my time and got the knuckles drilled out ok. Much easier than when I was drilling the pitman arm for the big bronco that's for sure. Waiting on another drill bit to arrive for the 1" hole for the pitman arm and should get that drilled out next week.FWIW, you may be hard pressed to get a machine shop to touch it telling them what it’s for. Just specify you need that hole drilled out to 1” and that insert welded. They don’t like making/modifying things for vehicles because of liability reasons.
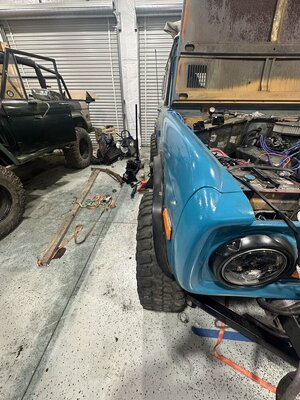
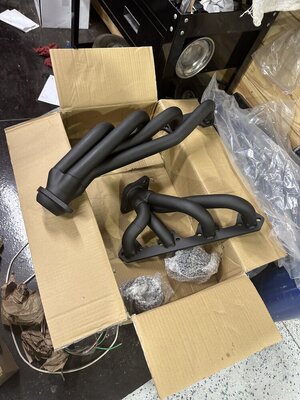
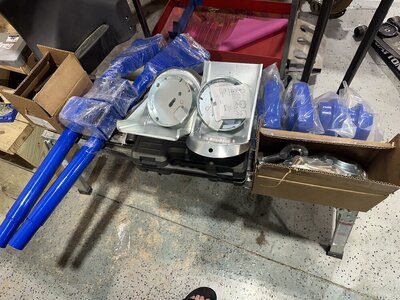
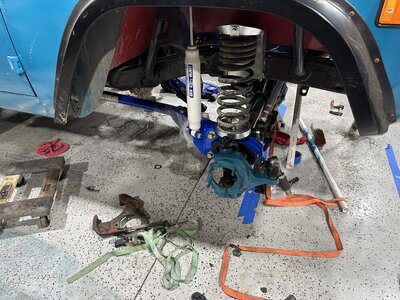
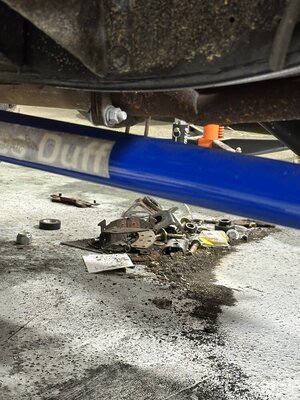
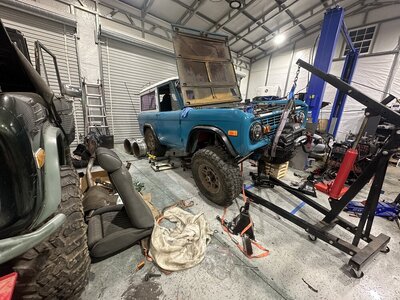
Parts have started arriving and I’ve started cutting. I’ll have to reroute the drivers side exhaust around to the passenger side during all of this to give the driveshaft clearance. Got the head units for the radius arms installed loosely on the axle. Will probably start tomorrow, working on getting them torqued down properly to avoid the “bronco lean”. Planning to stretch the wheelbase 1” in the front roughly while I’m at it. I may also need to thin out the front crossmember to clear the steering/track bar. I’ll know for sure once it’s all complete. Goal is to finish it all by November for a gulches run. Also got a mini spool thrown in the 9” for now and a spartan locker for the 44, still on 3.50 gears for the time being though.
Attachments
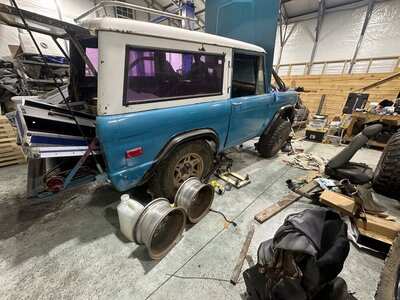
Got one of the coil buckets cut out. Knuckles drilled out really well. Pitman arm fought me the entire time. Ended up having to finish it out with a Dremel to fit the insert in. Because of that it's not 100% perfect. Definitely something that will need to be readdressed at some point. But should get me through the wheeling trip in November. Picked up a couple Saw blades to get to work on cutting more of the brackets off and a fresh tank of gas for the welder. Got the mini spool installed in the 9 and the spartan locker installed in the 44. Now just have to get to removing the brackets and get into mock up for the 1-1.5" front stretch.
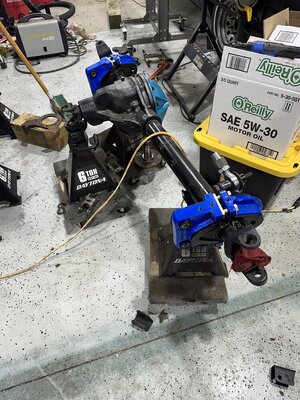
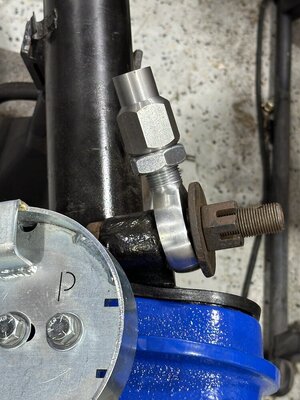
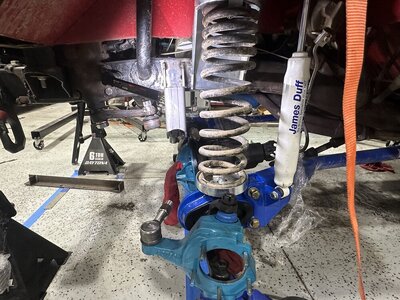
Considering setting up the track bar on my full width axle like this using the factory mounting point. I have a bracket that I can weld on but it will move it slightly inboard and closer to axle centerline so I’m not 100% sure how well it will work that way as far as clearing the diff. Any issues with running a heim in single shear for a track bar? I know it’s not ideal just trying to work with what I have before cutting off viable brackets. Planning to make some spacers for misalignment before it’s all done but just mocked it up for now.
Attachments
ghost
Well-Known Member
- Joined
- May 25, 2006
- Location
- Hartsville/Camden,SC
Could you do an L shaped bracket from under? That way it’s double shear and where you want it.
I may look at that as an option, I have the ruff stuff double shear offset bracket but it would put the track bar about 1-2” closer to axle centerline and I’m uncertain how that will interfere with the housing. Especially with the low amount of lift.Could you do an L shaped bracket from under? That way it’s double shear and where you want it.
iwaxmyjimmy
College Web Wheeler
- Joined
- Mar 10, 2007
- Location
- Greenville NC
Or just bend the track bar to clearI may look at that as an option, I have the ruff stuff double shear offset bracket but it would put the track bar about 1-2” closer to axle centerline and I’m uncertain how that will interfere with the housing. Especially with the low amount of lift.
That’s how the factory one was on the early bronco axle. Trying to avoid having to buy another dye if it’s not necessary.Or just bend the track bar to clear
iwaxmyjimmy
College Web Wheeler
- Joined
- Mar 10, 2007
- Location
- Greenville NC
What size tubing is it? 1 1/2”
Yeah, I have a 1.75 die for the model 32. The tubing that came for the y link and tie rod kit is 1.5x.25. Was hoping to get it to work straight but I can order a die if needed. Both factory bushings are in single shear on the axle end so I don’t know that it’s necessary, but figured I’d ask better minds than mine.What size tubing is it? 1 1/2”
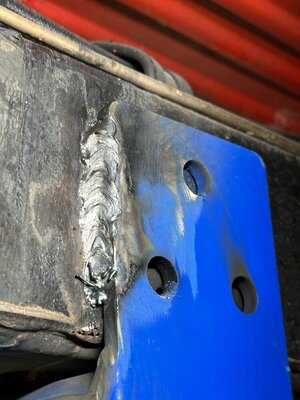
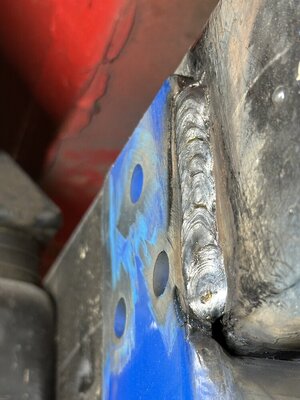
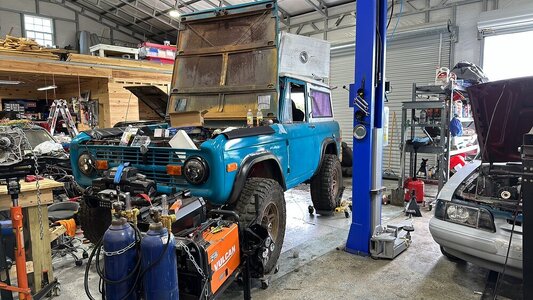
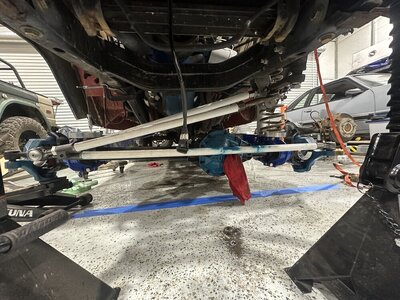
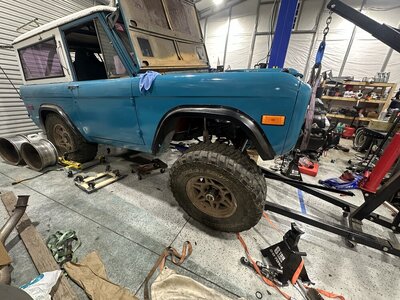
Well I got the axle set in. Have the rear brackets tacked in place for now. On the fence between welding completely or bolting in. I’m no welder but I’m confident everything should be burned in well albeit not pretty in some spots. Got some pvc to mock up the steering and track bar. I dropped the track bar down a hole and everything is perfectly parallel. Found out when we put the carrier back in after putting the spartan locker in apparently one side didn’t set in all the way and the passenger axle shaft won’t go in so going to have to get that sorted before getting too much further. Still a long way to go but it’s nice to have suspension under it again.
Attachments
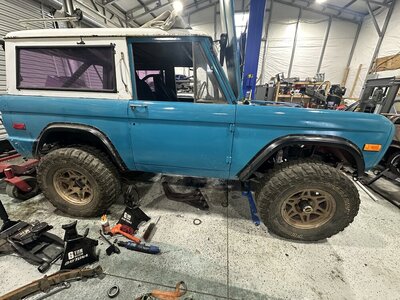
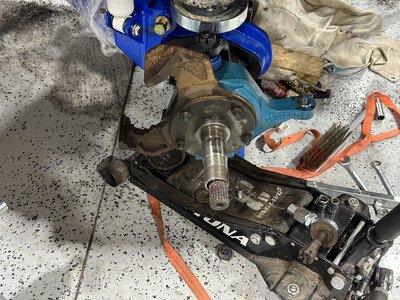
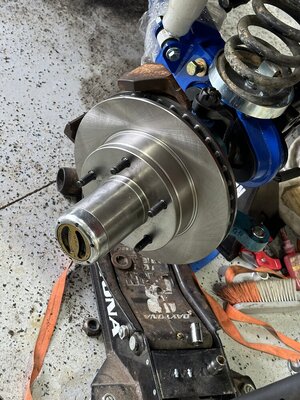
Got the ball joint preload spacer figured out. Had to reuse a spacer from the old ball joints to get it set properly. Ended up tapering the nose of the axle shaft to help it slide in properly after I reset the carrier and it was still fighting me to line up. Got it all in now though. Put a new internal spindle bearing and seal in and greased it all up. Now things should hopefully start rolling along. Still need to grease the ball joints. (I know it would have been easier to do it before now but wasn’t sure how many more times the knuckle would come off.) not much up travel on this setup but have a few more inches of droop for sure. Still need to remove the springs after I get everything setup and articulate the suspension and look for steering/track bar clearance as well as tires.
Attachments
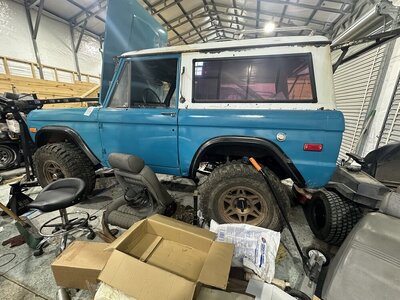
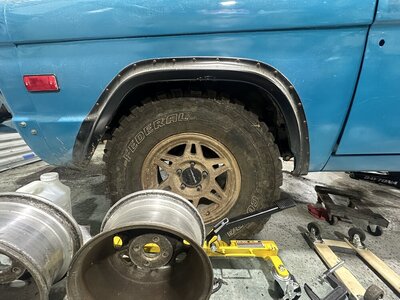
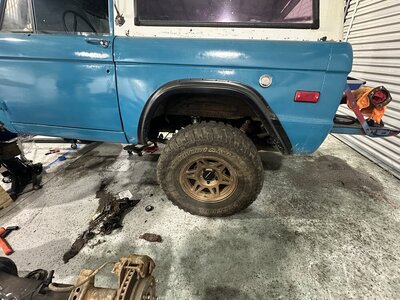
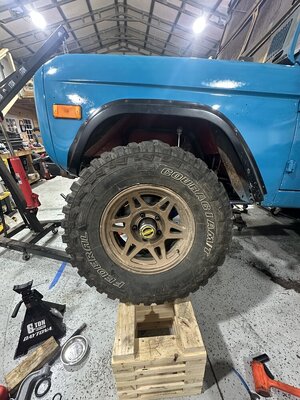
Got a hub put together and threw a wheel on to test fitment. I’ll probably have to trim the front a little more but it’s looking good so far. New fenders may need to be an item to look at eventually to correct the wheel opening but I think it will look better as it settles and with larger tires.
Attachments
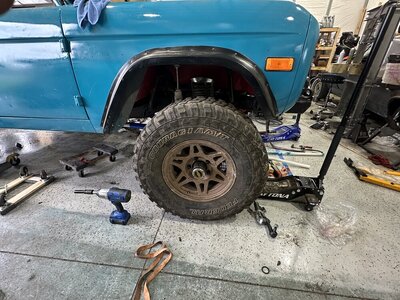
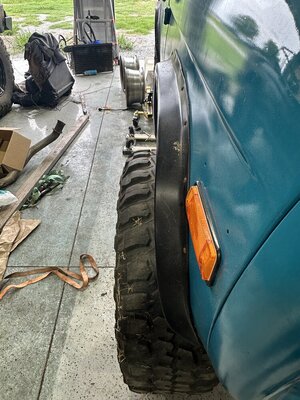
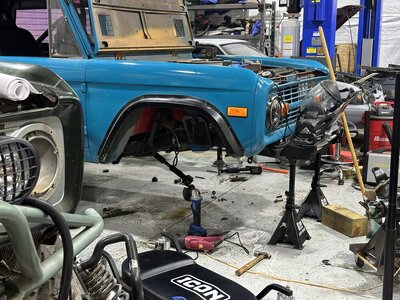
When I went to put the spindle on the drivers side I notice the ball joint wasn’t seated all the way, so I took it off and reseated it. When I went to put it back on I noticed that as I torqued the ball joint down it was actually pulling itself from the knuckle. It’s in there right and no amount of me hammering can get it to go one way or another. So I put a couple tack welds to hold it in. I figure it’s a 50 year old knuckle. There’s probably some wear there. So I’ll be on the lookout for some stock ford Dana 44 knuckles and bje sometime soon. Got the other hub thrown together and tire on to check clearances a little and see if the track bar was looking like it would clear. It appears so but I’m not 100% certain yet. I’ll probably wait to finalize it until I have the rear suspension done and can truly hit full bump. This was enough to put it on a 16” stand I built for my Mustang. Nothing crazy but I’m not sure it would even have gotten this high on the stock arms. Still a long way to go though.
Attachments

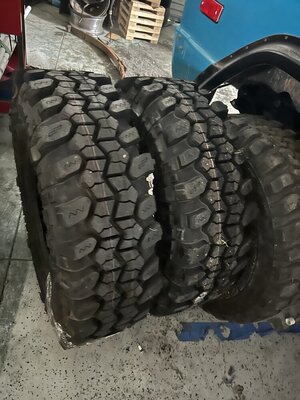
Got a good chunk done. Still a ways to go before November. Local community college is holding an off-road fabrication and welding class, so I joined that just to get better instruction on my welding, Got the rear axle swapped in. Still need to weld shock mounts and go through the brakes though. Started working on welding in the radius arm brackets. Coming out pretty well I think. Ordered some 37x12x17 sx-2 to try out. Just waiting on the rest to arrive to get them mounted. Got all of my steering welded up just need to get it installed and torqued and dialed in now. Coming along.