Granny 2: The Resurrection

Bout time Don! I have already started mowing the grass becuase it has been so "warm" in the evenings :flipoff2: Looking forward to the completion.
 
Granny2 is moving along again... I just finished up the front bumper and winch mount, and it is now waiting for paint. I will be finishing up the rear bumper and tire carrier next. M.O.B.S. Fab in Concord (made my cage) is making my sliders for me. Once this stuff is done and painting weather sets in steady the project should move on again. No projected completion date yet.
DON ! IT'S A JEEP, NOT A TANK !!!!!!!!!
 
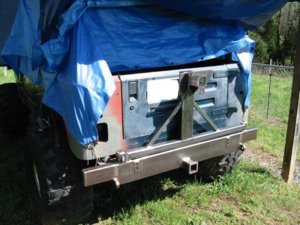
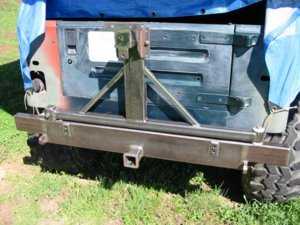
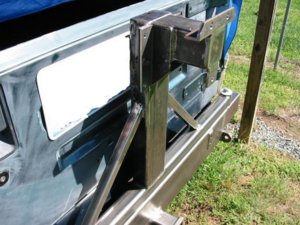
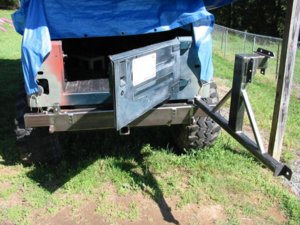
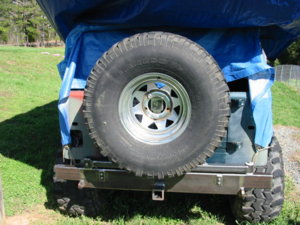
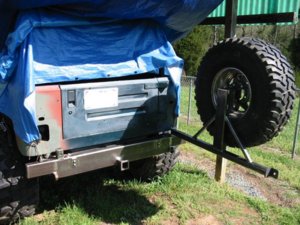
I finished up the rear bumper/tire carrier yesterday, and I'm pretty well pleased with the way it turned out... if I do say so myself. I think all of the fab work is complete now except the sliders. Once I get them, and get all the holes drilled etc., things should start moving along again. I'm now trying to figure out a neat way to mount my Hi-Lift so it will tuck in below the crossbar on the cage just behind the rear seat. They seem to work much better if kept in out of the elements. :)
 

Attachments

  • Bumper-rear-1.jpg
    Bumper-rear-1.jpg
    164.9 KB · Views: 364
  • Bumper-rear-2.jpg
    Bumper-rear-2.jpg
    179.2 KB · Views: 358
  • Bumper-rear-3.jpg
    Bumper-rear-3.jpg
    175.9 KB · Views: 414
  • Bumper-rear-4.jpg
    Bumper-rear-4.jpg
    197 KB · Views: 378
  • Bumper-rear-5.jpg
    Bumper-rear-5.jpg
    177 KB · Views: 397
  • Bumper-rear-6.jpg
    Bumper-rear-6.jpg
    176.5 KB · Views: 363
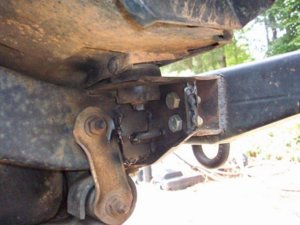
How'd you attach the bumper to the Jeep? Some way to tie into the frame? Ken fixed me up, but the original brackets from Big Daddy didn't do well - literally ripped and left the bumper hanging...
 
How'd you attach the bumper to the Jeep? Some way to tie into the frame? Ken fixed me up, but the original brackets from Big Daddy didn't do well - literally ripped and left the bumper hanging...

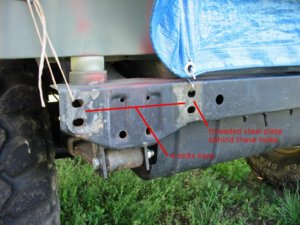
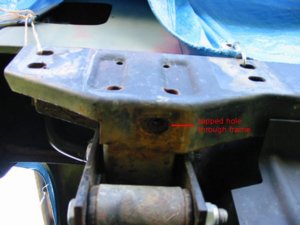
IMO: the stock rear member, while not as beefy as I would like it to be, should take a pretty good pull as long as the force is distrubuted equally over all fastening points. With 4 bolts on each side pulling straight, plus 1 bolt on each side through the frame (these should take most of the the load if pulling something) I think it will work fine. The bumper is rigid enouh to distribute the force evenly. Hope I explained that right! :eek:
 

Attachments

  • 1.jpg
    1.jpg
    155 KB · Views: 350
  • 2.jpg
    2.jpg
    90.4 KB · Views: 396
More progress today... got my manifolds for the fuel injection, and "hopefully" my ignition system. I got the manifolds (in & exh) off an '86 postal Jeep with a 4.2. The intake is an aluminum 2bbl unit. The ignition is an HEI unit off a 250 Chevy which I understand will fit an AMC 258 (4.2) simply by swapping out the cam gear... which I have. Will post more on this when I know for sure.
 
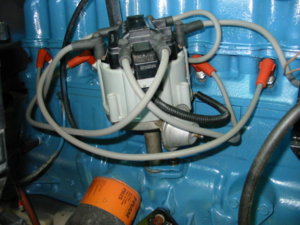
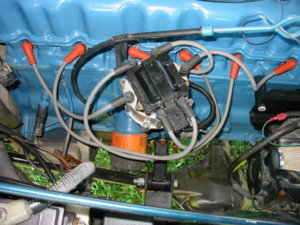
Another update... and what may have been the easiest performance upgrade I have ever done. I just finished installing my HEI Ignition system. It's a Delco-Remy off a '79 Chevy 250 I6. I swapped the distributor/cam gear from my old points-type distributor onto it and dropped it in. It started the 2nd try (moved distributor a bit) and timed in perfectly. I can actually notice a difference just idling.

Getting ready for URE Jamboree... that's all 'till next week! :)
 

Attachments

  • GM_HEI_Ignition-1.jpg
    GM_HEI_Ignition-1.jpg
    141 KB · Views: 338
  • GM_HEI_Ignition-2.jpg
    GM_HEI_Ignition-2.jpg
    177 KB · Views: 295
Get Er' Done Don!! Hoping to see you @ the Jambo!!
 
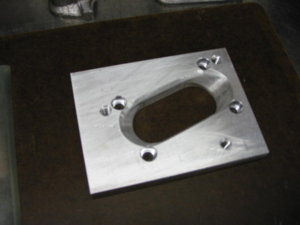
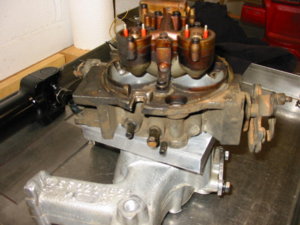
I have decided to give the GM TBI a shot. If it fails, I don't have much invested, and I can easily fall back on the Howell. If it works, I can say I did it (with a little help), I will definitely learn something from doing it, and it will certainly save me a few dollars. Today, I finished machining the adapter plate, and have started cleaning up the wiring harness some (not cutting, just cleaning). I have a good friend whom I am sure has rebuilt some throttle bodies. I think tomorrow I will go have a talk with him and find out what is involved in doing that. More as I get it done.
 

Attachments

  • GM_TBI-1.jpg
    GM_TBI-1.jpg
    64.9 KB · Views: 333
  • GM_TBI-2.jpg
    GM_TBI-2.jpg
    127.6 KB · Views: 375
You should be just fine with that.!!

The threaded plates will be great. And I think for what you'll be towing and where, you'll be fine. I went a little further, given that I haul the trailer off-road and have had one bad experience. Just an idea for you.

100_0193.jpg

There's not a lot of room behind the spring hanger on a YJ, so it's a little limiting (not to mention ugly) but makes me a lot less nervous!
 
I have decided to give the GM TBI a shot. If it fails, I don't have much invested, and I can easily fall back on the Howell. If it works, I can say I did it (with a little help), I will definitely learn something from doing it, and it will certainly save me a few dollars. Today, I finished machining the adapter plate, and have started cleaning up the wiring harness some (not cutting, just cleaning). I have a good friend whom I am sure has rebuilt some throttle bodies. I think tomorrow I will go have a talk with him and find out what is involved in doing that.

Kudos brother Don! :beer:
That adapter is the bomb and just plain makes mine look like :poop:

If you've ever rebuilt a carb (or even just taken one apart), the TB's are just as easy... mainly gaskets, o-rings, & secondary micron filters for the injectors. The only thing I'd recommend over simply adding the "rebuild kit", would be to grind off the solder joint holding the pressure regulator from being adjusted (adds some tune-ability should the OE pressure setting be too low/high).

Keep us in the loop!
 
I got the wiring harness pretty well cleaned up today; no cutting yet just getting rid of 20 years worth of grease grime and crap... what a mess. I also disassembled the throttle body. I wasn't going to do that at first, but it is a good thing I did. I doubt it would have run as gummed up as it was. I went to see my good friend who offered a little advice, and fixed me up with some choice wiring diagrams of the whole system. He is also going to clean the throttle body for me. All I will have to do is get the parts and put it back together. I'm still totally lost, but I admit it doesn't seem as complicated as it did a few months ago.

Caver Dave... is that the little bowl with the spring that pushes up on the diaphram? If so, mine is brazed or silver soldered up in the bottom hole, and I don't believe I can get at it without screwing something up.
 
Don
Novacayne75, Chris Ellis of Buckeye Performance here on this board just did the TBI on his 360. Once it's all in place you do need to do a tune on it, which consists of logging some data with a lap top and emailing him the data (him being the guy that also did Carver Daves) he will send you a Chip, you try it out, log some more, then send to him again. He adjusts what needs to be adjusted . It might take a time or two, but in the long run, you will have one more sweet running machine!
You really do not want to trust it out of the box especially since you have a relatively new rebuild. Too lean and you will burn a piston, not enough timing you burn valves and so on.
Chris took his to Windrock and I will say it was night and day difference wheeling with him using a carb vs using his TBI. Sooooo much more smoother!
Something else that really helped Chris, and he is also running a T-18 tranny, is he had the high idle set up just a little, I think he said 1400 RPM's, it's a blue wire in the harness and when set up, you just add 12 volts and wahlah, it's like having that 3rd foot when needing one on a technical section, or to idle up to run the Compressor or for what other reason. With just the simple flick of a toggle. Something I want to do mine when I get my compressor on.
 
Thanks guys... as this is a whole new ballgame to me this is the kind of info I need.

BTW, I just realized that I do NOT have the ECM number that most folks recommend... is that going to pose a future problem for me?
 
is he had the high idle set up just a little, I think he said 1400 RPM's, it's a blue wire in the harness and when set up, you just add 12 volts and wahlah

That's the AirConditioner input wire... in OEM form, it bumps the idle (only 100-ish RPMS) when the AC clutch is engaged, but can be programmed for a 500-ish RPM bump. Mines still zipped to the battery tray awaiting completion of OBA


BTW, I just realized that I do NOT have the ECM number that most folks recommend... is that going to pose a future problem for me?

What ECM do you have? IIRC, a couple variants of the 1227747 are pretty dang close (plus/minus a couple features)
 
What ECM do you have? IIRC, a couple variants of the 1227747 are pretty dang close (plus/minus a couple features)

Something has rubbed against the tag and wiped out one number... here's what I can make out: 122?062

Got the throttle body back from cleaning... looks like a new one! :) The Jeep is at Damien's (M.O.B.S. Fab) getting the sliders made. Once they are done, and I get it back, I believe last year's pace may pick up again. Squirting some paint should be happening in the near future... from there it will be (hopefully) a simple matter of bolting things back together. More as I get it.

Almost forgot... I will probably be needing (begging) some serious assistance from you guys that know how to do the TBI programming stuff... (hint, hint). :)
 
Thanks... I'm sure I will have many questions when I get to that point. BTW: using info from this page (http://tbichips.com/ecminfo.htm) it looks very likely that my missing ECM number might be an "8" (1228062)

1228062 is the same as 1227747, just fewer parameters as it was 100% a V6 ECM, were the 7747 was designed for V6 & V8...

What? No pictures of the TB? :D
 
Back
Top