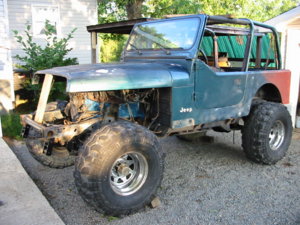
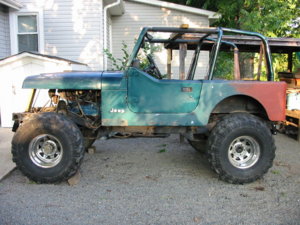
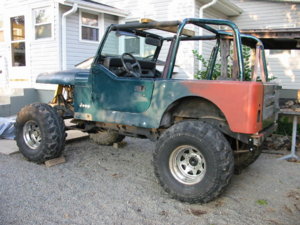
Granny 2: The Resurrection

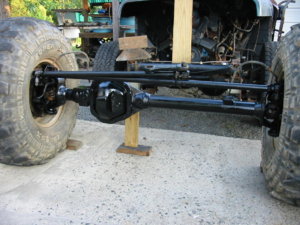
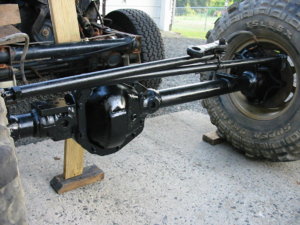
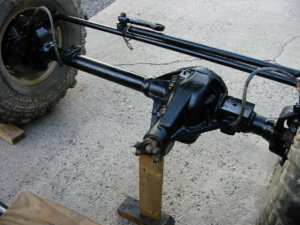
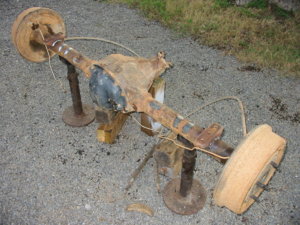
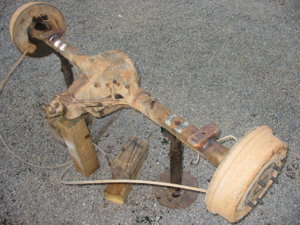
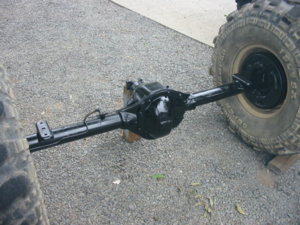
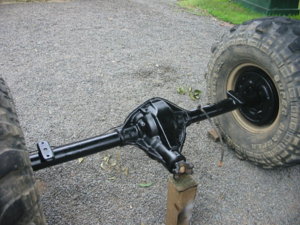
I've spent most of the past couple days working on the Dana 44s. I pulled the covers off and checked over the internals. Other than changing the oil in the front I couldn't see a thing that appeared to need attention. I did drill and tap a 1/4" NPT on the bottom of both and put a hardened flush-fitting plug (Allen head) into both. The plugs are located in an area which appears to get very little punishment. Now I can simply remove a plug when I want to check for water, etc. The front is completely finished and ready to go in. The rear spring perches have been relocated so that part is done. Thursday I will check over the axle seals on the rear and, if all goes well, I will then clean it up, add a coat of paint, and it will also be ready to bolt in. I am really looking forward to having all the heavy stuff done.
 

Attachments

  • Scout-44_Front-2.jpg
    Scout-44_Front-2.jpg
    186.5 KB · Views: 808
  • Scout-44_Front-3.jpg
    Scout-44_Front-3.jpg
    201.9 KB · Views: 826
  • Scout-44_Front-4.jpg
    Scout-44_Front-4.jpg
    203.5 KB · Views: 908
  • Scout-44_Rear-2.jpg
    Scout-44_Rear-2.jpg
    252.7 KB · Views: 784
  • Scout-44_Rear-3.jpg
    Scout-44_Rear-3.jpg
    270.7 KB · Views: 781
Finally, Old Granny's tub and cab hanging on the swing set waiting for the new owner to back his trailer under it, and haul it away.
I'm actually feeling a sense of accomplishment now! :driver:
I can't believe you didn't turn the old tub and cab into a little pull behind camper, like one of those Tabs or whatever they are called. :driver:
Can't wait to see the YJ at the Fun Caravan.
 
Snappy told me about granny 2 and had to check it out...great job so far
 
Thanks guys... Doug I can't remember if we have met before or not, but I will be sure to remedy that situation this coming Saturday.

Matthew, the Fun Caravan isn't very far away, and I still have a heck of a lot to do.... I dunno if I'll make it or not. :shaking:
 
Got the rear axle done yesterday. I will start swapping them out on Monday. For now, I am getting ready to head to Mountain City for the Toy Run... hope to see y'all there! :beer:
 

Attachments

  • Scout-44_Rear-5.jpg
    Scout-44_Rear-5.jpg
    175.2 KB · Views: 706
  • Scout-44_Rear-4.jpg
    Scout-44_Rear-4.jpg
    195.9 KB · Views: 755
OK Don, vacation is over, back to work!

Curious, how did you come up with spring perch placement without putting it under the jeep with weight on it?
 
Chip, that question had to burn on my small brain for a couple minutes... I started to write a long elaborate answer regarding angles and all that other stuff that you obviously already know.

Hopefully, this is the simple answer you were looking for... I have a set of tall parallel blocks with center pins in them that I use on the milling machine when cutting on a housing. I simply set them on a straight piece of channel, put the housing on them and moved the perches (one at a time) out the required distance. Hope that was what you were looking for. :)

And... you are right... vacation is over! :lol:
 
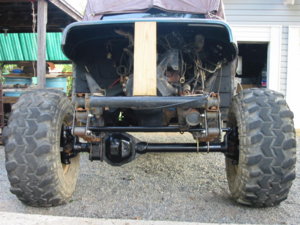
I spent all day Monday, and part of today, getting material and making new spring plates and shackles. I made new shackles as I did not like the extended aftermarket shackles that came on the vehicle. I also had to add 3-1/4" to my drag link, and I had to get the stock pitman arm reamed to fit my rod ends. Darrell at Galloways did a fine job for me on that. So after finally getting my ducks lined up I got the front axle bolted in this afternoon. Thursday, after getting some yard work done, I hope to start on the rear.
 

Attachments

  • Scout-44_Front-5.jpg
    Scout-44_Front-5.jpg
    146.2 KB · Views: 660
Chip, that question had to burn on my small brain for a couple minutes... I started to write a long elaborate answer regarding angles and all that other stuff that you obviously already know.

I reckon he was asking about how you set your pinion angle without the axle in the jeep with weight on the springs? if he wasn't asking that, I guess I am now :lol:
 
OK... hope this makes sense... using protractor, checked/recorded relationship of spring perch to face of yoke on stock axle. Stock axle yoke face is almost perfectly parallel to yoke face on transfer case thus no change needed. Then checked relationship of spring perch to face of yoke on Dana 44 axle. It was almost the same as the stock one. I am certain it will be fine, but I will double check it when I actually put it in. I have done this before and it all worked fine. :)
 
Yard work is not an excuse ! I've let mine go all to shit this year so I could spend extra time in the garage !! Better find another excuse to you!
 
Darn... you guys are rough on a fellow! :lol:

I hit a slight snag on the rear area. A trailer hitch was attached and all the bolts were rust-welded in place. Finally got them all loose and removed except one... it broke and I had to drill and re-tap the hole (laying on back under the vehicle). I don't need the holes right now, but who knows what tomorrow brings. The same rust-weld was on the fuel tank bolts... broke all but two. Got the tank off, dumped about 20 lbs of dried mud, cleaned and painted the skid plate, cleaned the tank, and had to order two check valve sealing rings from Jeep dealer at $11 each... they will be in Tuesday. I plan to call Howell tomorrow with reference to the fuel pump location. If they approve, I want to put the new electric (external) fuel pump where the stock filter goes, and move the filter under the hood where filters have been located for as long as I can remember. I got all new Bestop seats and hope to paint the frames tomorrow if the humidity drops as the weatherman has promised. However, on the good side of things, all is still progressing along nicely. I simply haven't posted as I didn't have anything really worthwhile to post. Hopefully, this week will produce some worthwhile results.

And, thanks for caring... ya bunch of hard asses. :shaking: :lol:
 
Thanks Steve! :)

At last, the axle swap is complete. I still have to figure out how/where to bolt the shocks to the front axles, and I have to make bump-stop plates for the front. The rear is basically done. I have to relocate the emergency brake cable bracket so I can gain 2-3 inches of cable, but it looks like that should be easy enough to do.

My old tire size is staying. I was going to go up to 36s, but have since decided I like the 35x15.50 SXs just fine.

I hope by week's end to be out from underneath the thing for a while! :bounce2:
 

Attachments

  • 95_YJ-5.jpg
    95_YJ-5.jpg
    192.2 KB · Views: 696
  • 95_YJ-6.jpg
    95_YJ-6.jpg
    174.7 KB · Views: 722
  • 95_YJ-7.jpg
    95_YJ-7.jpg
    166.2 KB · Views: 687
Dang Don! Just caught up with this thread! Looking great, and can't believe all the progress on your own and so quickly! You're very close to taking this for a test drive my friend!
 
I plan to call Howell tomorrow with reference to the fuel pump location. If they approve, I want to put the new electric (external) fuel pump where the stock filter goes, and move the filter under the hood where filters have been located for as long as I can remember.

Where was it at on the CJ? While you can put a filter anywhere, most recommend putting the filter PRE-pump to aid in longevity.

FWIW, My filter (& E2000 pump) are mounted to the starboard frame, above the axle, with no issues in 2.5 years. We mounted my brothers under the CJ skidplate... not really for "protection", but because it fit nicely :lol:
 
Thanks Ralph... I don't think I will be ready for the CTB Fun Caravan in Sept, but may very well be ready to go by the Fall Bash... at least I hope so. :)

The CJ had a mechanical pump on the motor, and the filter was at the carb. Howell told me this morning that the filter should be between the fuel tank and the pump, and as close to the tank as possible. It's really not a big deal... I was just trying to use what was already there. I called Howell to get my ducks lined up so I don't have to change a bunch of stuff again when I finally get ready for the injection.
 
Dang Don! Just caught up with this thread! Looking great, and can't believe all the progress on your own and so quickly! You're very close to taking this for a test drive my friend!

I've seen this man work faster with a bottle jack and rock from the side of the trail than a team of mechanics at a full service shop with lifts!

Looking great Don!
 
Chris, you shouldn't be telling stories about me working... especially with the rock. There's very few of us old guys left that have experience with stone tools. :lol:

Appreciate the compliment though! :beer:
 
love the work u are doing to your yj just woundering are you going to change the front upper shock mounts these things are bad about ripping out , keep up the good work and i hope to see you on the trail.
 
^^ I was not aware that there was a problem with the upper shock mounts... anyone else care to comment on this??? :confused:
 
Back
Top