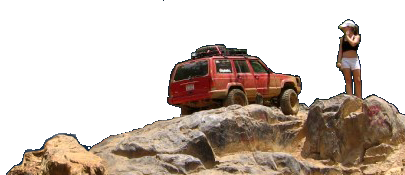
Granny 2: The Resurrection

What Chip was speaking to, is the cogged style belt. Never saw a cogged belt on a mower deck. Maybe! And as said " if it works". Probably put more hours on the mower than Granny!
 
Nice set up there Don! Resurrection coming along!!
 
^^^ Just for the record... I have run cogged belts on mower decks... maybe not the right belt, but I got the grass cut regardless. :driver:

Thank you Scott!!! I'm looking forward to the day I can take her on a ride with you guys!!! :beer:

Tom, that ignition will be on order before too many more moons pass... and shortly after that a Howell Injection will compliment it. :huggy:
 
I am trying to find a chevy TBI system to cannibalize for mine. Yes... I am trying to upgrade the old 5 as I build a newer rig. I am having to modify the cage a little since I found a fiberglass hard top and doors for it :huggy:
 
I have to say its an awesome build but I was surprised you stuck with the cj-5 transmission and transfer. Im a fan of the YJs and think you have made an awesome build up choice.
 
You'd have to know a little about "Granny" to know why he decided to stick with what he had.
The engine was a total rebuild, not too many years ago, and few miles on it. The tranny is a T-18, and as far as a manual goes, for the most part bullet proof. Don use to operate a business that dealt primarily with Dana 20's. His is a custom job and a True twin stick. So, his choice of drive train really only has one down fall, it's carbed. But I do think he has plans in the very near future for a Howell injection system, then he will be good to go about anywhere he wants to.
 
This is starting to look like a pretty decent week as far as accomplishing something. I'll go in the order of the pics...

I got the fenders & grill cleaned up ,sanded, and primed where needed. I haven't decided in what order I am going to do the painting, but my first instinct is to completely paint the grill while it's off the body. Then I can install the radiator, lights, and other stuff, and not have to bother any more with it. On the fenders, I think I might spray the inside areas just to clean things up, but leave the outer until I am sure there is no tire rubbing, etc.

There were some pretty bad cracks in the passenger side door panel. I welded them up using a small soldering iron and some matching plastic as filler. It came out real good. The drivers side had no damage. As for finish, they were gray, but badly faded and looked horrible. I used the Krylon Fusion to paint them. I wanted gray, but settled for green as it appears Krylon doesn't make any gray Fusion paint... at least I couldn't find any.

The fuel tank situation, as some of you know, has really give me a hard time. I've gone through two tanks, both with junk senders. One was sugared, the other rusted beyond belief. Chrysler has apparently designed this stuff so nothing is interchangeable, and the replacement parts are obviously made of pure gold as reflected by the prices. Anyway, I finally settled on an Auto Meter gauge with a matching sender. I had to make a new tank cover to adapt the sender, and it will also have both the supply and return lines built into it. From all indications this is going to work out fine. The total cost was $75 versus $289 for the sender/pump as advertised by 4Wheel Drive Hardware. Again, this was a major obstacle, and I am deeply relieved that I am about past it.
 

Attachments

  • Body_Work-1.jpg
    Body_Work-1.jpg
    82.5 KB · Views: 459
  • Body_Work-2.jpg
    Body_Work-2.jpg
    95.3 KB · Views: 446
  • Door_Panels.jpg
    Door_Panels.jpg
    112.3 KB · Views: 430
  • Fuel_Gauge.jpg
    Fuel_Gauge.jpg
    147.6 KB · Views: 489
The last pics are of my new seats... really nothing to explain here. These are Bestop solid-back replacement seats.
 

Attachments

  • Seats-2.jpg
    Seats-2.jpg
    166.5 KB · Views: 762
  • Seats-1.jpg
    Seats-1.jpg
    104 KB · Views: 792
  • Fuel_Sender-3.jpg
    Fuel_Sender-3.jpg
    91.5 KB · Views: 776
  • Fuel_Sender-2.jpg
    Fuel_Sender-2.jpg
    109.4 KB · Views: 808
  • Fuel_Sender-1.jpg
    Fuel_Sender-1.jpg
    118.3 KB · Views: 763
Don this thing is coming alone nice!
I am thinking it wil be ready for Harlan in November!
Looks like a lot of small stuff is all that is left, and for those of us that are keeping tabs, some update PLEASE!
 
OK... a very simple update for today... the fuel tank and brakes have literally kicked my ass! I have been running back and forth between Concord, Rockwell and Salisbury all morning. I think I finally have all the little pieces rounded up to finish up the fuel tank installation. As for the brakes... the banjo bolts on my front calipers are bastards (7/16"-24). The only place I can find that even acknowledges stocking them is Jegs, and they're on back order. Thus, I ordered a 7/16"-24 tap so I can make a nut. When it comes, I will then turn the bolts on my lathe using that nut for a thread gauge. Hopefully, the tap will be here by the end of the week. In a nutshell, this has been one of those spells where I could just walk away from the whole thing.

As for Harlan in November... I can't make it. I have another obligation of which I must attend.
 
Evening update... or amendment to above...

I believe I have finally conquered the fuel tank beast, and since my "artwork" is going into a dark place where it will never be seen again by anyone (unless it breaks) I thought I would post a couple photos just so someone knows that I actually did do this. :lol:

This is my homemade fuel tank cover assembly consisting of sender, and supply and return tubes. It is finished and now going into the tank! Now I can finally move on to something else! :bounce2:
 

Attachments

  • Fuel_Sender-4.jpg
    Fuel_Sender-4.jpg
    158 KB · Views: 663
  • Fuel_Sender-5.jpg
    Fuel_Sender-5.jpg
    203.4 KB · Views: 666
Looking great Don!!!
Nice artwork!!!
 
if ya had shown it to me and said_________(insert big company name here) made it, I would have believed ya!
Great work!
 
Don, wouldn't Wholesale Tool in Charlotte, carry that? Even if they mailed it tomorrow, you should have it Friday.

I ordered it from Wholesale Tool along with some blades for my band saw. It will be here Thursday. It's far less hassle for me to just order online than it is to drive to Charlotte.
 
Don, Sorry for the shitty fuel tank, I should have opened it up before sending it off...

Hopefully you will still talk to me ;)

Not sure if I understand your brake caliper situation.. I show the thread pitch on GMs as being 7/16-20 I've seem those bolts in most parts stores in the 'help' section (all the little red packages) But if not its very common to drill and tap the smaller size holes out to the larger 3/8" size. (Or drill/tap it to NPT and use a AN-3 nipple on it to run standard AN (37deg) stuff )

http://www.speedwaymotors.com/Banjo-Bolts,6469.html
 
Dang it Don, I have a 7/16 -24 thread die and some stainless banjo bolts I made up extra in my tool box.

Oh well... I'll know if there's a next time... I guess you now know who has a tap! :lol:

Don, Sorry for the shitty fuel tank, I should have opened it up before sending it off...

Hopefully you will still talk to me ;)

Not sure if I understand your brake caliper situation.. I show the thread pitch on GMs as being 7/16-20 I've seem those bolts in most parts stores in the 'help' section (all the little red packages) But if not its very common to drill and tap the smaller size holes out to the larger 3/8" size. (Or drill/tap it to NPT and use a AN-3 nipple on it to run standard AN (37deg) stuff )

http://www.speedwaymotors.com/Banjo-Bolts,6469.html

Tell you what Mike... we will call it even for me going brain dead on that nudge-the-jug game we partnered up on a few years back... we will still converse! :lol:

On the calipers, nothing really to understand... 7/16"-20 NF is standard, but my caliper thread size is 7/16"-14 (non-standard). Going bigger would go to 1/2" which I believe would cause me more grief due to an already close fit behind the steering arms.
 
It's been a little over two weeks since I last posted any progress. One week was lost due to foul weather. However, since the rain stopped I have been back at it pretty steady again.

The first really nice day we had after the monsoon I decided to get the paint gun out and see what my green marine paint would look like on the grill and inner fenders. Much to my delight they came out very well, and I am pleased with the color. Next, I am going to shoot the underside of the hood and the surfaces where the front fenders bolt to the tub.

I just put the finishing touches on the fuel system and check my gauge accuracy by dumping five gallons of gas at a time with the gauge hooked up. When it says full, it's full... when it says empty, be ready to walk. Auto Meter makes a very nice setup. The other nightmare was the "bastard" banjo bolts in my brake calipers. I got washers from McMaster-Carr and machined them to fit my fittings, and then made the bolts from 1144 cold rolled steel. As of this moment, I feel pretty safe in saying that I have put my two worst nightmares (so far) behind me.

I've got most of the wiring harness figured out and I'll probably spend the rest of today double checking a few connections, and wiring in the gauges, etc.

I expect to start putting the front end back together in the very near future, but I am going to have to take a short break to cut my 12" Bermuda grass, and my local machine shop buddy, who keeps me in spending money, needs me for a couple days.

More as I get it done. :)
 

Attachments

  • Fuel_Sender-6.jpg
    Fuel_Sender-6.jpg
    83.7 KB · Views: 499
  • Fenders-Grill-4.jpg
    Fenders-Grill-4.jpg
    156.3 KB · Views: 534
  • Fenders-Grill-3.jpg
    Fenders-Grill-3.jpg
    190 KB · Views: 478
  • Fenders-Grill-2.jpg
    Fenders-Grill-2.jpg
    133.9 KB · Views: 479
  • Fenders-Grill-1.jpg
    Fenders-Grill-1.jpg
    171 KB · Views: 469
  • Filter-Pump.jpg
    Filter-Pump.jpg
    115.1 KB · Views: 476
Looking good Don.:beer:
 
Back
Top