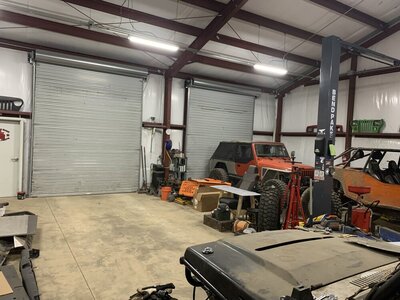
Red YJ Build

No updates that are picture worthy. Just ordering parts to start on the 4L80 and 241. So far the 4L80 looks pretty good. Fluid in the pan was certainly old but not burnt and the fluid poured from the converter was also nice and red with no burnt smells. A new filter, pan gasket, and drip stick tube seal should be here tomorrow and I can wrap that up. For the 241, a super short SYE was ordered along with a rebuild kit and 32 spline input.

The radiator and fan shroud came in. Nothing special to these, but simple items from Speedway Motors. The plan is to mount a Volvo fan to them so I'll need to hit the junkyard soon.

As I started to mock up the accessories on the motor, it became very apparent that the PSC pump currently being used on my rig (TC style) was not going to bolt up. I started looking at a variety of manufactures for aftermarket brackets but could not justify the $180+ price tags I was seeing for just the alternator and PS pump. Did some more digging and found out the Chevy SSR used a TC style pump and has accessory truck spacing. From that I was able to find a part number and ordered one. It should be here Tuesday and then I can wrap up the front of the motor.
 
Finished up cleaning the transmission this weekend. It got a couple new seals (dip stick tube, rear VSS plug, etc), new filter, and pan gasket. No metal was found in the pan but there was obvious signs of clutch wear. We’ll see how long it’ll last and go from there.

Also got around to pressure washing the transfer case but it’ll need some deep cleaning of the case once I tear into it. Hopefully all parts will show up this week for it.

66B68E0E-9F20-400C-BF23-DBED5B706CA9.jpeg
1BEF7147-5BD7-4C82-A946-F2FA06C0B729.jpeg
30B8E2E6-8E8B-426B-89A7-428CCA2DE944.jpeg
 
Slowly making more progress. 241 is stripped down and SYE and 32 spline input is ready for install. Waiting on a couple seals to show up (should be here Monday) and then it’ll all go back together.

Since I’m waiting on parts for the TC, it was time to start on the harness. It’s too cold for my heater in the garage to knock off the chill so I started on this task inside. Spent tonight stripping all of the loom and tape as well as removing unnecessary wiring from the PCM connectors.

Watched a video a couple weeks ago about an engine tuner having issues and the cause was a leaking oil pressure sensor. It actually pushed oil through the connector, down the loom and then into the pcm connectors. Upon taking mine apart, I found signs of a similar phenomenon occurring.

Tomorrow I’ll continue removing unnecessary wires and will hopefully have it to a point where all I’ll need to do is add appropriate connections once its routed through the Jeep.

B01C8F82-DF7C-42EF-B14C-AF39EBF79238.jpeg
1CBBA655-7327-4595-922D-932BC0C527AD.jpeg
DDA476E9-EE16-4DBC-8222-995F6BD2C0E1.jpeg
 
Before and after of the TC. It’s still ugly but about 8” shorter now.

@Chris_Keziah knocked out the changes to the ECM for me yesterday so that’s now complete.

Everything is now ready for the swap to take place. I’ve got a trade show to attend next week so the swap will begin on Feb 13th! @tobaccoroad4wd has been gracious enough to give me shop space and that will help tremendously with getting the stock drivetrain out and the new drivetrain in.

66426D02-250C-417E-9D04-1E624288B876.jpeg
BCE24BCA-1D54-4004-AE5D-918E1E58F74C.jpeg
 
Try spray can oven cleaner it does good on aluminum
 
Initial plan to pull the driveline tomorrow has been pushed back a week. My nephew will be in town this week and loves his power wheels Jeep. So, I’ll be keeping the YJ at the house for him to crawl around in.

Tomorrow I’ll start moving parts to Justin’s shop. Majority of the parts are already here and the remainder of them (minus exhaust tubing, radiator hoses, and tc shifter) should be here by Friday. This means the physical swap should go quickly.

Photos of the parts movement will come tomorrow.
 
Please stop wasting time out of town winning best of show awards and cater to our need for this thread to progress

BTW... Too damn much orange in that shop
 
Last edited:
With a ton of help from @tobaccoroad4wd and @Chris_Keziah, it’s out with the old and in with the new. Motor mounts are tacked in and trans crossmember is under construction. I’ll have to do some massaging of the floor of the tub to better clear the 241. I never realized how large it was until it was hanging 3” below the frame rail.

5DB4CE45-F0C7-4F0E-9F80-F8DBC641F7CA.jpeg
A8B0D311-A6C8-492D-812A-F4ED823AEC9C.jpeg
FEC00F8A-B221-4A2C-BAFE-A470617CD890.jpeg
BEED1582-55EF-45CA-83DC-DD0087CAA570.jpeg
 
No pictures as today was very much focused on knocking stuff out. The trans crossmember is done minus welding on two bushing mounts. Motor mounts are fully welded and painted. The rear floor of the tub has been patched and the new fuel cell mount is here. Factory YJ wiring harness has been thinned and all unnecessary wires in the engine bay have been removed.

Today the exhaust tubing showed up along with some O2 sensor bungs. The entire exhaust will be run through stainless so I’ll get to brush up on some tig welding.

Tomorrow the plan is to finalize the fuel cell mounting, merge the LS and YJ harnesses and start figuring out the tach/speedo signal converter. Once the wiring is run, the motor and trans will go back in (hopefully for the final time). It was high hopes to be able to start the motor tomorrow but, it’s looking like it’ll have to wait as I need to get the tools needed for priming the oiling system.
 
Today I struggled with motivation and my ADD was going hard so it was tough to stay focused and really knock stuff out. But, I was still able to accomplish a few things.

Motor, trans, and tcase are all back in. Trans mount is complete. Trans shift cable has started to be run and I may need a longer cable. Started on the placement of the radiator. Fan shroud has been modified to better fit the radiator. Fuel cell mount has been test fit and painted. Power steering pump has been mocked up and spacers will be needed to align the pulleys.

Next steps are to mount the ECU, make the spacers for the PS pump, and purchase the actual fan to be used for the radiator. There’s a lot more beyond these items but I’m trying to knock things out one at a time as best I can.

Huge thanks to @tobaccoroad4wd for all the help this weekend.

CF374A80-77C8-4BE8-887F-F1FB279AD30A.jpeg
D0014E68-E484-41B6-9786-7AC6005A9F6A.jpeg
B6647C28-621F-4038-8F79-A89740B6733E.jpeg
1584B585-92AD-41C4-832D-2D722A474BD4.jpeg
9D5ED8D6-F294-4E2F-A440-E46899788E9A.jpeg
0FD208C4-B5FF-4ADF-9861-D4E73F166585.jpeg
 
Made a little progress last night. Started laying out the LS harness in the engine bay. Initial plan was to simply loom it and run it as it was in the truck but I hated how it looked with wires running in every direction. So, I’m now tackling the process of shortening, lengthening, and splicing wires to best fit the YJ engine bay. All wires needed to tie into the factory YJ harness are identified and I’ve also laid out how to reuse the factory YJ power distribution center for the LS.

Most if the work was thinking and routing wires so not much to show except the mess it currently looks like.

9E83213E-2F8A-4B06-AAE4-987DEA2F5F93.jpeg
 
No pictures because it's all boring but, wiring continued last night. Both injector and coil pack harnesses are run and loomed. These also include the throttle body, ECU coolant, and oil pressure gauge wiring. Also found the home for the ECU and TCU. Tomorrow night the focus will be items on the back of the motor/intake (cam, ECU oil pressure, MAP, knock) and then the trans tunnel wiring. After that's all run, the stock YJ harness will be mated with the LS harness.
 
Final touches to patching the rear floor are done. Fuel cell mount is done and fuel cell in. Fuel filter/regulator is mounted and lines need to be run. Intake is back on and all wiring around it run and loomed. Power steering pump is installed with appropriate spacers for pulley alignment. Grill has been shelled to fit radiator. Factory turn signal housings were too large so I made them fit a set of LED pods which gained me the clearance needed. Throttle pedal has been modified and mounted. Clocking ring for the tcase is installed and I’ve got a little more clearancing to do.

AB7DA197-D426-40DD-91B9-0D016EE7B8BF.jpeg
CED76CC7-8899-4359-B27E-77EB3E871F90.jpeg
8EB38575-2676-45A3-8AA5-4497D411AA6B.jpeg
0CBEB8A6-87E1-47FF-85B1-AF04654BDE51.jpeg
9F343174-F506-452B-BC3A-05B27FACD2EA.jpeg

9921DB6A-BDAA-4CC0-8F97-C9549C944B15.jpeg
 
Last edited:
I ain’t no enginerd, but is the weight of that pod gonna crack right out of that orange lens?
 
I ain’t no enginerd, but is the weight of that pod gonna crack right out of that orange lens?

It very well could since the lenses are from 94 and are already cracking. New ones are on order just in case. To gain the maximum clearance with the radiator, I’m actually going to be machining down the cooling fins on the back. These LEDs are too bright for what I’m using them for so I’ll use resistors and drop the voltage which will then mean less heat so less cooling needed. After the cooling fins are removed/trimmed, the pods will be much lighter.

All this sounds great in my head and on paper but we’ll find out if/how long they last.
 
Back
Top