Just some junk on Rockwells build thread..

Rich I saw at Wally World in Camping Section, Sealed, water Tight Boxes...

May see if Computer will fit in it... For safety sake...
 
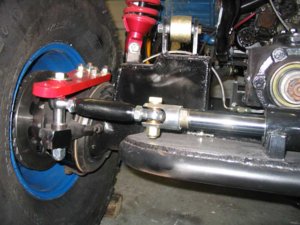
Not alot to update, made the mini tie-rod ends for the front and welded up the slugs in front the steering arms, did some painting on the rear axle pieces and the rear tubework, and started installing the engine wiring harness. Once i figured out why Jim's laid out the connectors where he did, it all made sense.. All the wiring is pretty well hidden, it's a nice harness he made.

Now to figure out where / how in the hell to mount the computer.. I think I have a location, but the PCM has no provisions for mounting.. :rolleyes:

Nice guard....

I made up a bracket and mounted my puter up under the pass side dash. Should be high and dry. If I get water up that high, I've got other problems......but water tight would be sweet if you can swing it. The only potential prob I see is Puter + water tight= no cooling, not that it gets very warm.
 
I'm not worried about water, the PCM is under the hood on the OEM app.. it's watertight big time.

Plus, this harness is a *wee* bit thicker than the older stuff, and that main harness will only let it go off the left valve cover.. Jim extended it as far as possible without going more custom and having to charge me more, but an area just under the master cylinder is about "it" for mounting...
 
I don't think it's gonna happen, but I'll know for sure by next weekend. I have been at the beach all last week so nothing got done, and all I got done today was to make a parts store run, paint the rear axle hi-steer arms, make the rear tie-rods, do (very) little on the engine harness, and mostly scratch my head, resigning myself to having to run a Camaro water pump because of the water pump's outlet, if I want to be able to run an air filter... :(

Oh, and I also disassembled the front coilovers to add a 90° fitting to the reservoir hose.. My first time tearing into a set.. Kinda nerve-racking! Not to mention, a little messy. But, all went smoothly, and once I got over my own timidness, it was actually pretty simple. Also added the Jeep TJ bump stops on the shafts while it was apart. Just getting the rig high enough to disconnect the coilovers was quite a freaking adventure. :rolleyes:
 
lookin good rich. be carefull mounting that pcm under the master, Anf fluid leak will get into the pcm and eat it. It was allway's a problem on older xj's with the fuse block.
 
lookin good rich. be carefull mounting that pcm under the master, Anf fluid leak will get into the pcm and eat it. It was allway's a problem on older xj's with the fuse block.

Hmmm, interesting, thanks.

Looks like it'll be mounted right on the inner fender where the louvers are which isn't right under the MC, but not terribly far from it either. Just another reason to keep everything clean over there I suppose.. :D
 
Just a quick shot of the steering assembly all put together... short of hitting a tree at 30mph, I shouldn't have any problems out of it.. :D

steering.jpg
 
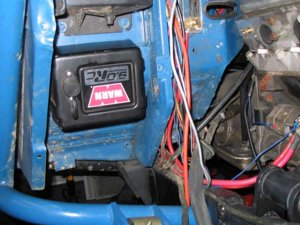
The last few days have been wiring, nothing really to show, but today I tied down and tightened up most of the hydro lines, made the intake system, and decided the solenoid box for the front winch looked shitty mounted on the winch, so I began relocating it.. ugh, what a PITA.

The solenoid pack in its new home... (nowhere else to put it)
winchbox.jpg

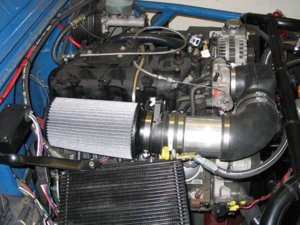
The intake setup - a "Cobrahead" 90 to a standard 90, some 4" tube, then a reducer to 3.5" for the MAF, and an AEM "dryflow" filter - none of that damn oiled gauze... I still need to make a little bracket to stand it off the engine slightly.
intake.jpg

AND, WE HAVE STEERING!!!! Well, kinda. We have rear-steer at least. I didn't bleed the front yet. Once the pump started moving fluid (I guess the valve was stuck), it was CAKE, thanks to this brilliant idea from Blkvoodoo.. (I'll do a tech writeup on it later, it's a GREAT timesaver though..)
pspumpdriver.jpg
 
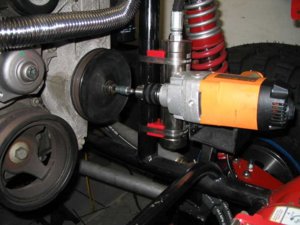
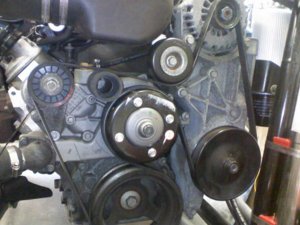
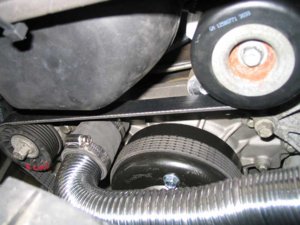
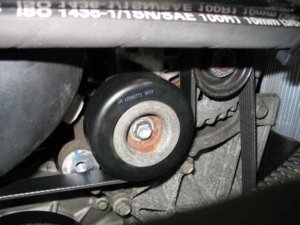
Getting closer, but not without some stress.. When I initially installed the serpentine belt, it was rubbing BADLY on the radiator hose outlet.. I'm running 5.3 truck accessories on a 'vette water pump. Fortunately, it looked as though one of the alternator mount bolts would be a good spot, but that's already a LONG M10 bolt. Aprilia to the rescue! I had a spare bolt of the right size, perfect length, threaded right in in my spare bolt bag from my motorcycle... Even the belt for the Tahoe fit, and I've got great pulley wrap so things won't slip.

Here's the before shot.. note the location of the idler pulley on the right.
beltclearancebefore.jpg

And, after!
beltclearanceafter.jpg
idlerpulleyrelocated.jpg
 
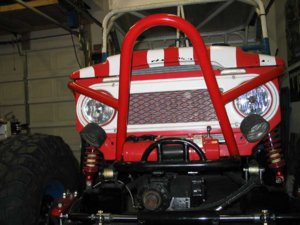
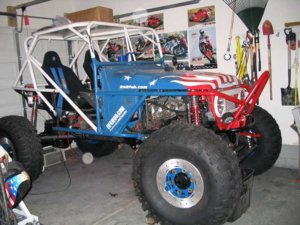
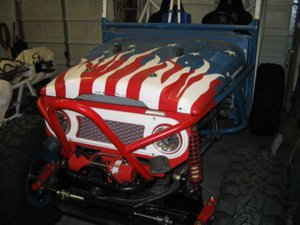
Ladies and gentlemen, this is not a test (fitting)- the front end is together! cooling fan, radiator, bib, front rock lights, winch, everything!! I love how it looks.

headon.jpg

side.jpg

topdown.jpg
 
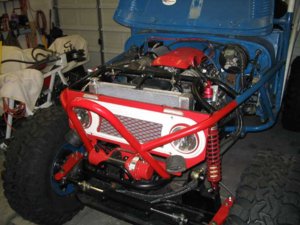
Oh, and in a moment of "Duh, Rich", I figured out that the brace in the center of the hood was preventing me from running the engine cover we painted up and wanted to run.. buh-bye to the brace!

hoodopen.jpg
 
Thanks guys..

Ken - Probably the Aug open invite at DPG. There's still plenty of little things left, not to mention exhaust, driveshafts, and brakes. I also started the fuel plumbing last night.
 
Rich, looks awesome! Except, you need to run a carb dude. EFI is for guys that can drive a clutch.... wait a minute, never mind. Just messing with ya!
 
Looking good Rich! You owe me a roll. :flipoff2:
 
Thanks guys..
Ken - Probably the Aug open invite at DPG. There's still plenty of little things left, not to mention exhaust, driveshafts, and brakes. I also started the fuel plumbing last night.

Rich,
Nice work...those "little things" sure are a time killer...oh how I know.
 
Back
Top