We Bought a RV Clark!! Oh no! Rebuild thread

Sunny days!
Perfect day to get the nose cone panel up.
Once that is up, I can finish up the trim inside this part.

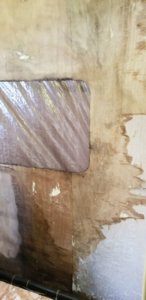
We started by digging through the building and finding our panel that we'd cut months ago.
Got it set in place for final measurements.
20190328_201842.jpg

Just as I thought...it needed a little trimming here and there.
20190323_123203.jpg


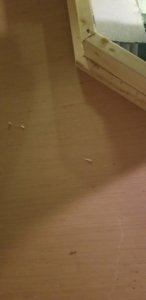
Got it back in place and added a few temporary screws.
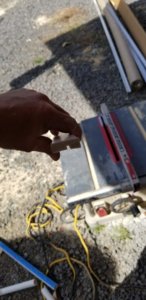
It's still a lil bit chilly outside and this frp panel is cold. I think it will bend better if it were warmer.
20190323_114441.jpg


No problem...
20190323_120317.jpg


The heat was just what the doctor ordered.
We were able to bend it around no problem.
20190323_114447.jpg


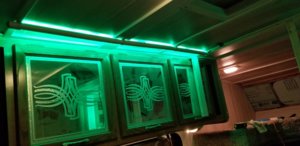
Now it's time to add the almighty Stay put glue!!
20190323_133132.jpg


Then, we added the butyl tape...
20190323_135321.jpg


Next I'll just add a couple more temporary screws. Once the roof goes on, these edges will be screwed down via trim pieces.
20190323_141030.jpg
 
Next we decided to work on the outside corners. There were lots of extra holes in the siding from earlier repairs. I needed to seal up the holes, and hide them. Before I could add the outside edge trim pc.

In this picture, you can see the ugly edges, but I've already covered the holes with a thin strip of waterproof tape.
20190323_150717.jpg


I have put alot of thought into how I could hide the ugly. I didnt want to use big aluminum pcs. like what was on it...so, I come up with a plan.

We dug out the original nose panel and hacked it up a bit. I'm glad I didnt throw it away!
20190323_144810.jpg


It's the same color as the siding!
We need to sand the old luan off the backside, add plenty of silicon and stick it up!
20190323_152321.jpg

20190323_150607.jpg


Then we added the corner trim.
Looks good enough to me.
20190323_162932.jpg
20190328_212329.jpg
 
Next we started back on the inside. Here's Keith adding the rounded wooded blocks in the nose cone. Also filling in the voids with expanding foam. Not sure, but I think this is exactly how the factory did it.....except they had a factory..lol
20190323_164506.jpg

I bought some el-cheapo car speakers. They attach to the backside of this dark panel. Then attach to the cabinets from the inside. They sound good enough!
20190323_234700.jpg
20190323_234747.jpg

Then we tinkered with the insides of the cabinets. Adding new bottoms and reworking some of the old dividers.
20190324_125057.jpg
20190324_125107.jpg


This side panel goes up and hides all of the wiring and the speakers.
20190324_125111.jpg
 
Adding more foam to the front...
20190324_125133.jpg

While Bobby works on stripping the bedroom walls in the back.
20190324_125145.jpg


Several hours later..the wall is mostly ready for new luan. Also got this window out.
20190324_125158.jpg


Looking like a mess up in here!
20190324_125200.jpg

Long way to go yet!
 

Attachments

  • 20190324_125158.jpg
    20190324_125158.jpg
    75.1 KB · Views: 353
Last edited:
Then I built up some wooden edges on the little side wing walls.
20190324_210050.jpg


20190324_210025.jpg
Then added some insulation
20190324_211619.jpg
and finally...

I wrapped it in new, free carpet!
20190324_213135.jpg
I didn't want to use carpet Initially, but after lots of thought, I decided this would be the ,cheapest and easiest way to cover these sections.

So I did the other side...
20190324_224018.jpg


Then I covered the new retaining walls too!
20190325_164612.jpg
I still need to come up with a way to cover the metal under here, but the carpet looks good.
20190325_164524.jpg
20190325_164657.jpg
 
We camped out all night!

Dude, there are many to choose from in this delicious thread, but this is by far my favorite part of the build so far!
 
They make another spray foam that is "max expanding" or something like that. It blows up big. Might save you some time and money if you have any more areas that need to be filled.
 
We've accomplished alot, Clark!
Here's alot more...


Operation Bling Palace


Cut a length of PVC
20190329_124709.jpg

Split that in half..
20190329_132512.jpg

Then add brackets and paint it all up.
20190329_175215.jpg

Next..use the table saw to cut a wire hiding trench in the ceiling trim.
20190329_180316.jpg

After that...line the inside with industrial strength double sided tape.
Place the fancy led lights inside and press hard. They're stuck!
And you can see how I hid the wires.

20190329_222729.jpg
 

Attachments

  • 20190329_153722.jpg
    20190329_153722.jpg
    80.6 KB · Views: 288
The led lights are bright, theres no way you want them shining directly into your eyes. So, I angled the PVC and lights up and away.
In the end, I have a decently clean looking install and a cool light show for just a few bucks. ( lights were Dixie run raffle prize)
20190329_230004.jpg
20190329_224951.jpg
20190329_224934.jpg
20190329_224959.jpg
 

Attachments

  • 20190329_205438.jpg
    20190329_205438.jpg
    82.1 KB · Views: 297
I think it's looking good in the rv. Too good to leave these cabinates like this. So...honey, grab a screw gun and get at it!
20190331_173853.jpg


Brooke removed all the cabinets doors and hardware, while I sanded everything down. This is an awesome multipurpose tool.
20190331_223429.jpg
20190331_194923.jpg
20190331_223446.jpg
 
Looks like it’s coming together in time for Chocco! :D
 
Back
Top